_GOTOBOTTOM
Constructive Feedback
For in-progress or completed build photos. Give and get contructive feedback!
DAK Pz IV Ausf E destroyed
scratchmod
Visit this Community
Massachusetts, United States
Joined: November 07, 2008
KitMaker: 796 posts
Armorama: 763 posts
Posted: Tuesday, December 23, 2008 - 03:07 AM UTC
I've started work on the Dragon Pz IV Ausf E Afrika version. This build will take a while because of the scratchbuilding that has to be done,and also other commitments that I have.
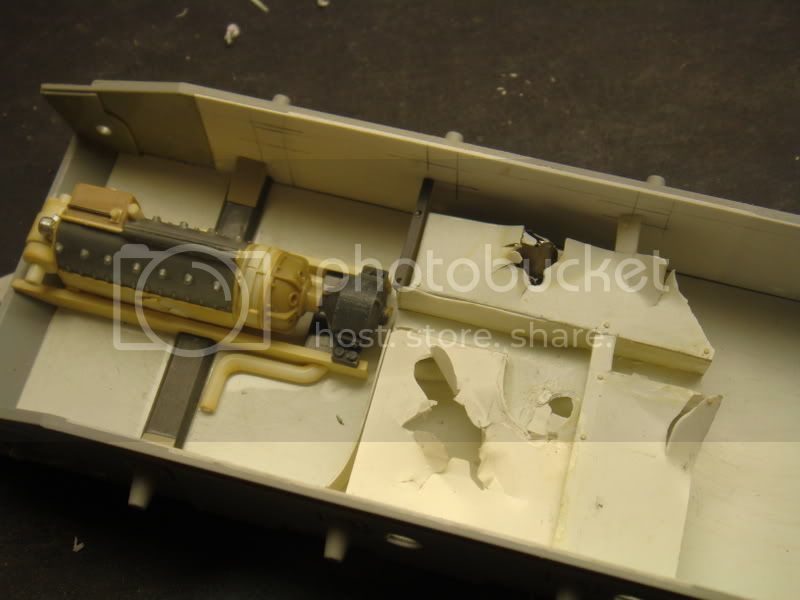
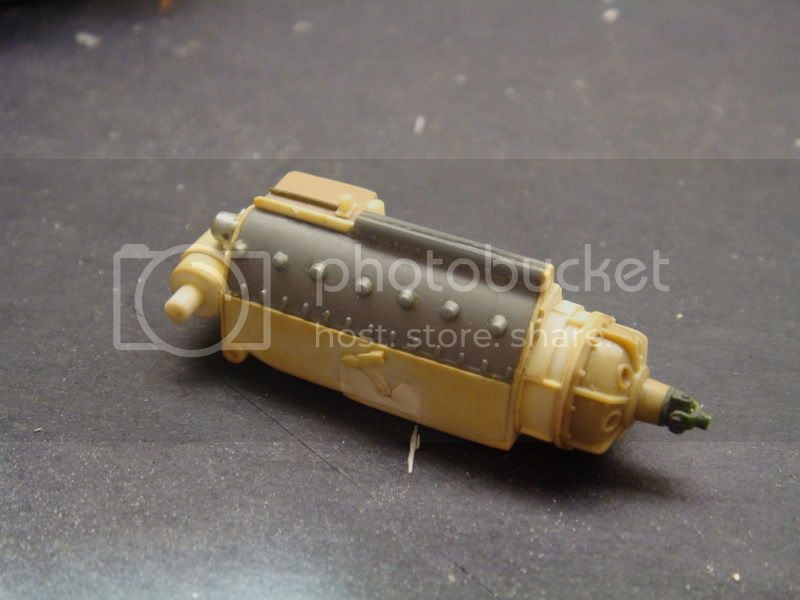
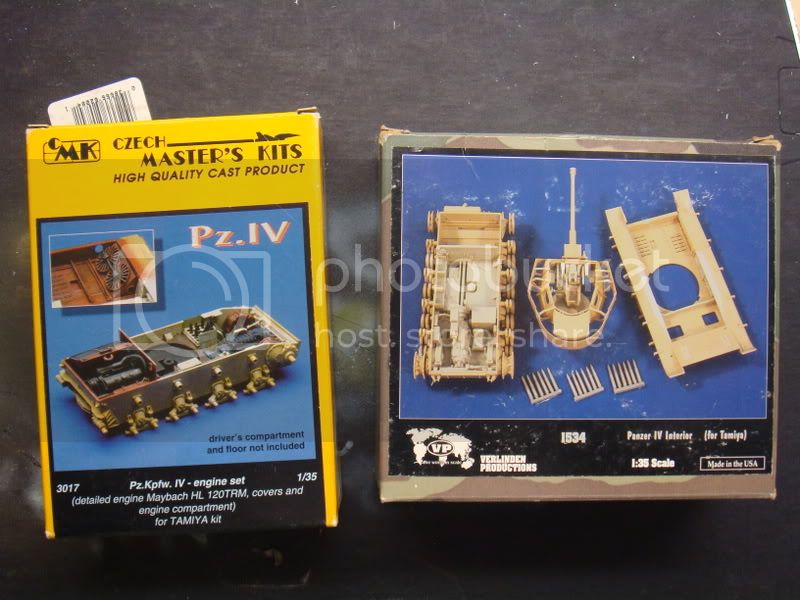
I started by cleaning out the hull inside by removing the vertical supports, then used pllastic card to make the sides flush and to hide the holes for the suspension.The transmision is something that I scratchbuilt about 12 years ago but never used until now. I will be using the Verlinden interior set as a ref. and may use a few of the parts. I will use either the CMK or Verlinden resin motor set.

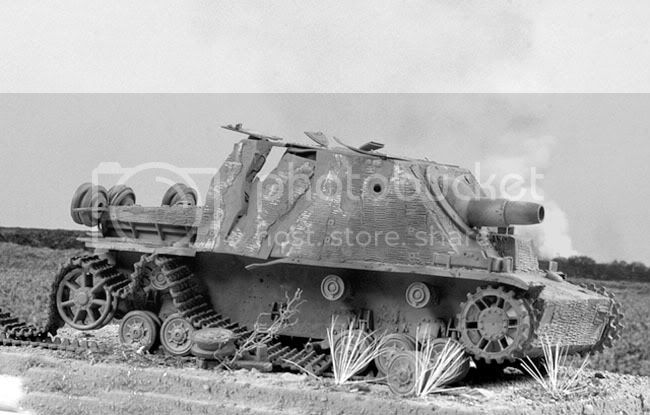
Here is a small sample of what I intend on doing with this model. I built these when I lived in Germany.

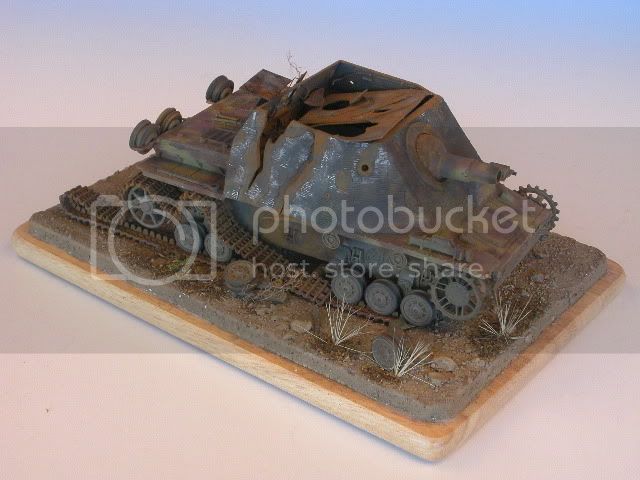
The old Tamiya Brummbar with scratch interior.


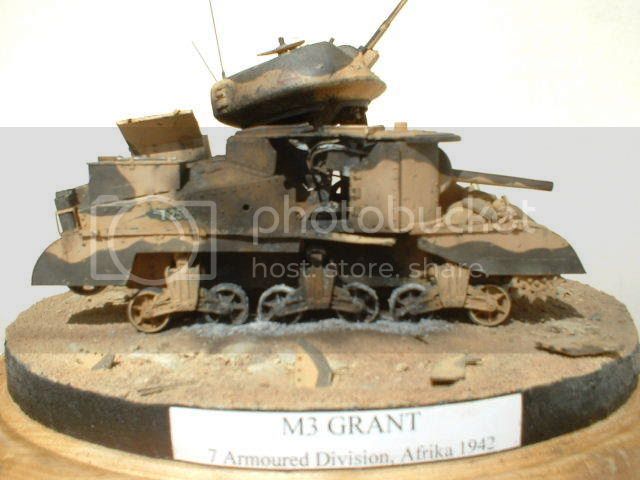
This is also an old Tamiya M3 Grant.This baby took me a good year to build.The entire interior is scratchbuilt (minus engine comp.) as is the entire upper hull.
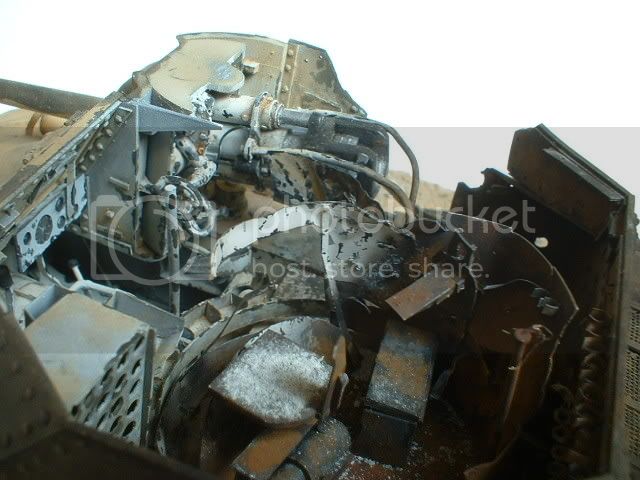
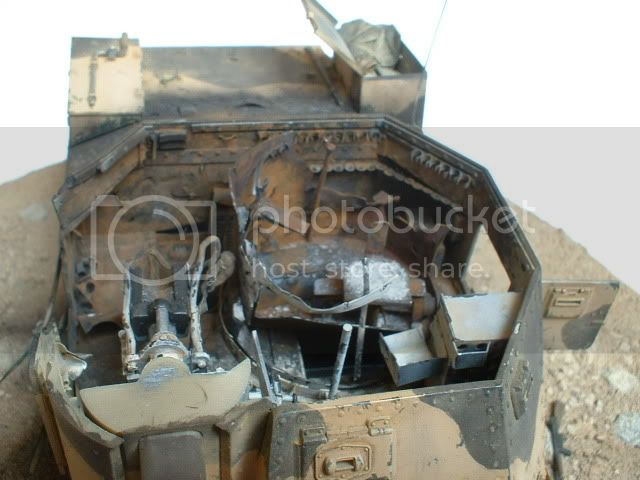

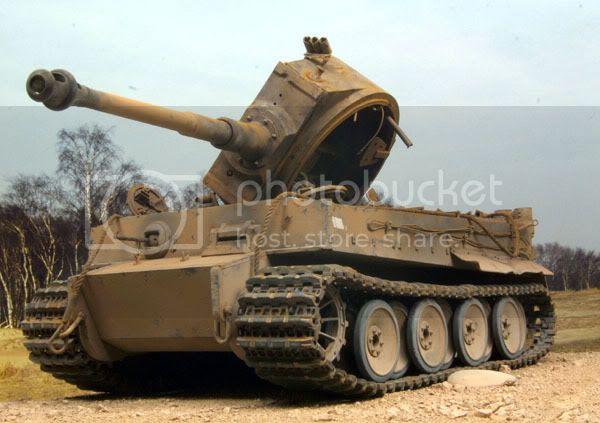
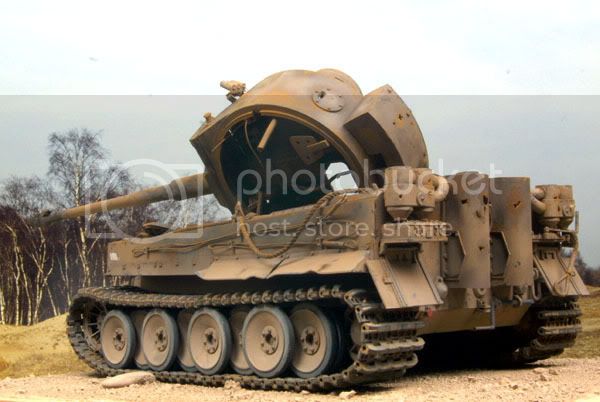
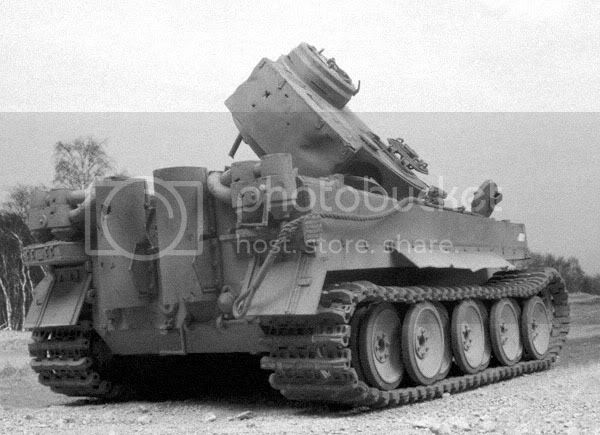
This Tiger is the 1/25 scale Tamiya kit with some interior work done to it as well.


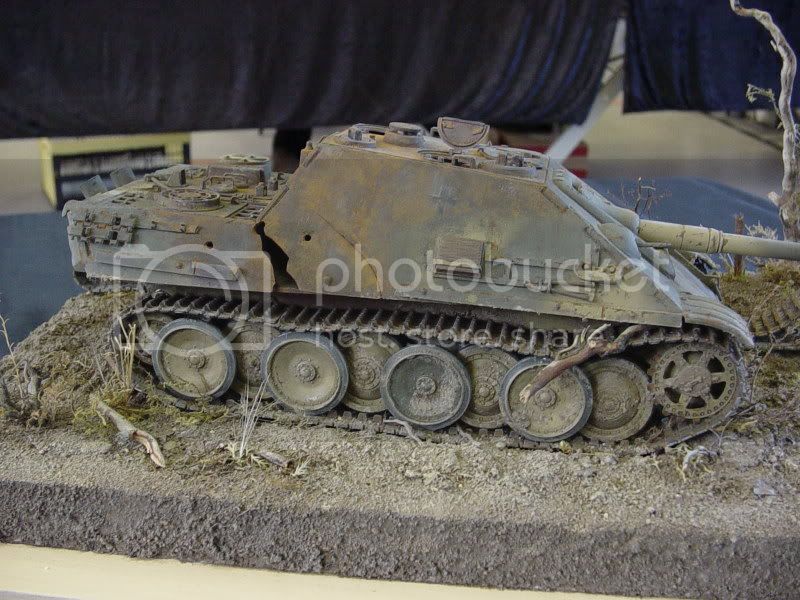
This is one of the first tank wrecks that I built,I experimented with an Italeri JagdPanther.

I will keep posting as the model progresses, and if you have comments or suggestions feel free to post it.

Semper Fi
Rob


hellvetier
Visit this Community
Bern, Switzerland
Joined: April 17, 2008
KitMaker: 264 posts
Armorama: 156 posts
Posted: Tuesday, December 23, 2008 - 03:25 AM UTC
Hei Rob!

This build log is going to be very interesting! The other models you showed are just great and I'm looking forward to see one of these constructed 'live'

How did you do the rust effect on the other wrecks?

regards...

A. W.
scratchmod
Visit this Community
Massachusetts, United States
Joined: November 07, 2008
KitMaker: 796 posts
Armorama: 763 posts
Posted: Tuesday, December 23, 2008 - 03:36 AM UTC
Hey A.W. I used the same method as I did with the PjIV L48. I use real rust powder that I collected in differant shades. The shades are light/dark rust,bright/dark orange and a reddish rust. These shades represent the differant stages of rusting metal. An example would be bare metal after it rains would start turning a bright orange, and old rusted metal is a reddish brown color. I spent a couple of years studying rusting metal,old junk cars,construction equipment and burnt out vehicles before I started doing the wrecked tanks. Hope I could answer your question.

Rob
muchachos
Visit this Community
Ontario, Canada
Joined: May 21, 2008
KitMaker: 537 posts
Armorama: 439 posts
Posted: Tuesday, December 23, 2008 - 05:09 AM UTC
Amazing! I thought the first Brummbar pic was for reference!

Scott
jimz66
Visit this Community
Connecticut, United States
Joined: December 15, 2006
KitMaker: 1,165 posts
Armorama: 1,105 posts
Posted: Tuesday, December 23, 2008 - 06:33 AM UTC
He had me fooled on that pic too. Whoa, very cool stuff their Rob. Well done. Can't wait to see this one.
jimz66
Visit this Community
Connecticut, United States
Joined: December 15, 2006
KitMaker: 1,165 posts
Armorama: 1,105 posts
Posted: Tuesday, December 23, 2008 - 06:33 AM UTC
He had me fooled on that pic too. Whoa, very cool stuff their Rob. Well done. Can't wait to see this one.
TuomasH
Visit this Community
Turku ja Pori, Finland
Joined: September 10, 2008
KitMaker: 470 posts
Armorama: 175 posts
Posted: Tuesday, December 23, 2008 - 06:41 AM UTC
Screw you, you already made me to save that brummbar image to my hard drive as reference already Luckily I readed what others were posting to this thread.

Sure gonna follow this one if its as good as your earlier wrecks!

TuomasH
Plasticbattle
#003
Visit this Community
Donegal, Ireland
Joined: May 14, 2002
KitMaker: 9,763 posts
Armorama: 7,444 posts
Posted: Tuesday, December 23, 2008 - 07:13 AM UTC
Hi Rob. If your work that you´ve done poreviously is anything to go by, this should be another stunner. Looking forward to more updates.
scratchmod
Visit this Community
Massachusetts, United States
Joined: November 07, 2008
KitMaker: 796 posts
Armorama: 763 posts
Posted: Tuesday, December 23, 2008 - 07:55 AM UTC
Thanks gents, glad to hear you like my wrecks. Ya the Brummbaer is kinda my favorite,it was the 3rd wreck that I built and the first to be published in a model mag,it also won a first place at a show.
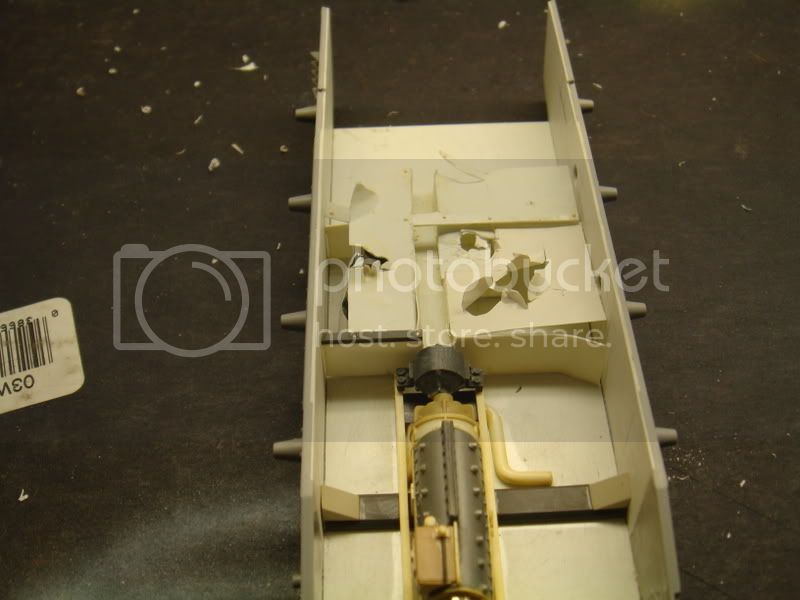
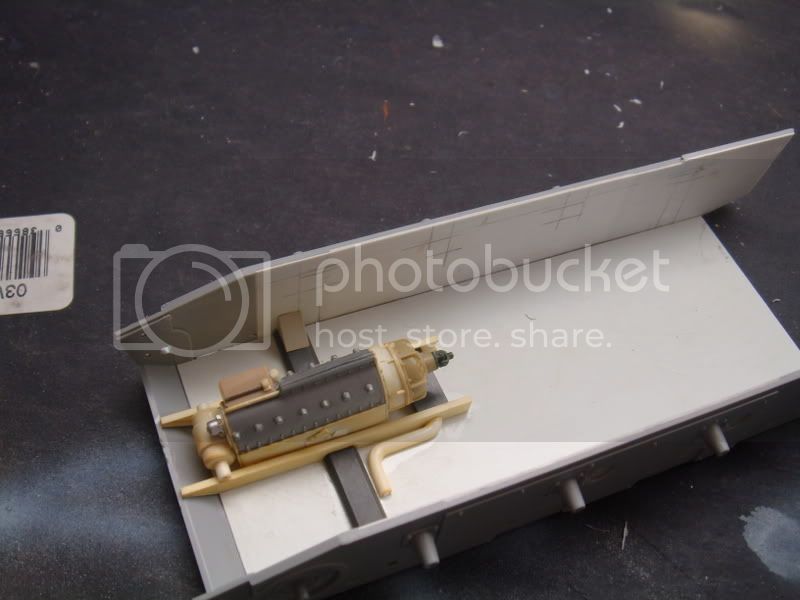
ok I spent about an hour on the interior inbetween other things and this is what I have so far. I built,then destroyed the middle section where the tanks are located, next will be the fire wall between the motor/fighting compartments when I have some free time.


Here is a pic of how my model will look when done. I'm using this pic and others as ref. on how i'll build mine.


If I don't post soon,it's because i'm at an xmas party at work, I wish you all a merry xmas.

Rob


integraguy95
Visit this Community
Tennessee, United States
Joined: October 02, 2008
KitMaker: 308 posts
Armorama: 304 posts
Posted: Tuesday, December 23, 2008 - 11:05 PM UTC
Rob,
I think you are a wrecked panzer king. Those above models look outstanding and this one promises to be just as good probably better! Thats going to be one heck of a wreck judging by the picture your going by, can't wait to see the final result! Good luck.
ppawlak1
Visit this Community
Victoria, Australia
Joined: March 14, 2006
KitMaker: 1,973 posts
Armorama: 1,843 posts
Posted: Tuesday, December 23, 2008 - 11:17 PM UTC
This is going to be a great thread Rob !
I'm interested how you choose your coloring , how you decide how you modulate these colors, and also how you determine what is smashed up and what you leave relatively undamaged in your piece.

There is a real art to doing these destroyed vehicles. Have you seen real ones ? Do you look at real burnt out vehicles of other types to learn about the colors ?

Cheers

Paul
jimz66
Visit this Community
Connecticut, United States
Joined: December 15, 2006
KitMaker: 1,165 posts
Armorama: 1,105 posts
Posted: Thursday, December 25, 2008 - 02:56 AM UTC
Go for it Rob. Don't let anything slow you down now.
CMOT
Staff MemberEditor-in-Chief
ARMORAMA
Visit this Community
England - South West, United Kingdom
Joined: May 14, 2006
KitMaker: 10,954 posts
Armorama: 8,571 posts
Posted: Thursday, December 25, 2008 - 07:07 AM UTC
Judging by your past efforts Rob this should be another stunner, perhaps you could send in a build feature for this one to Armorama.
scratchmod
Visit this Community
Massachusetts, United States
Joined: November 07, 2008
KitMaker: 796 posts
Armorama: 763 posts
Posted: Thursday, December 25, 2008 - 07:34 AM UTC
Hi guys and merry xmas
Thanks Darren,i'll start writing down some notes for the write up.
Paul, I did alot of research and studying photos and still do. Yes I have seen the real thing, I was with combat Eng.3rd AD during the gulf war and have seen plenty of wrecked tanks and other vehicles. As far as what gets destroyed and what stays somewhat intact depends on what happened to the vehicle, no two are the same, internal fires and exploding ammo has a differant effect from vehicle to the other. I guess that's why they call it the art of destruction,basically it's all down to looking at lots of photos.
I'll post some pics soon.

Rob
scratchmod
Visit this Community
Massachusetts, United States
Joined: November 07, 2008
KitMaker: 796 posts
Armorama: 763 posts
Posted: Friday, December 26, 2008 - 11:05 AM UTC
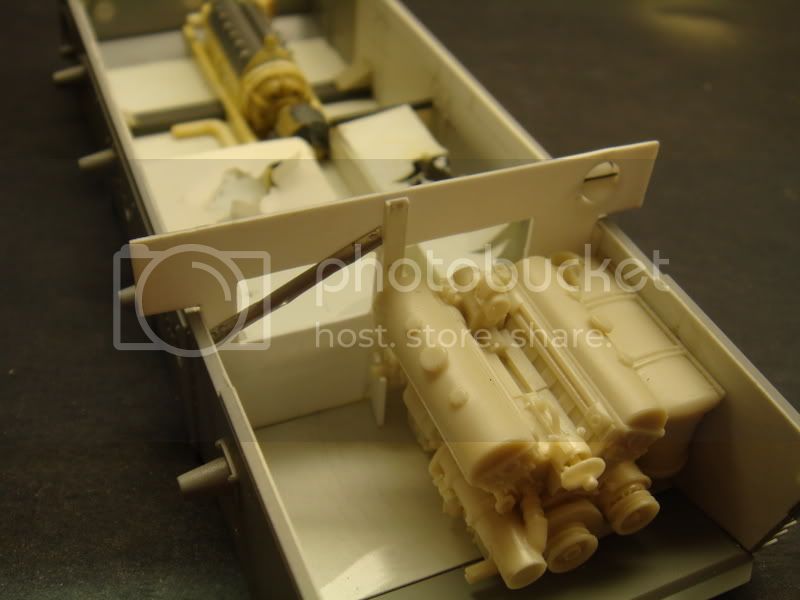
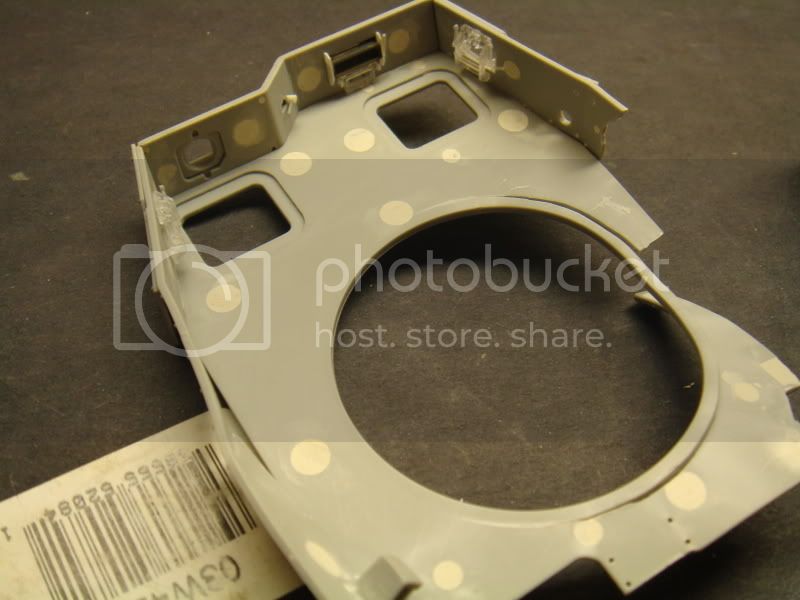
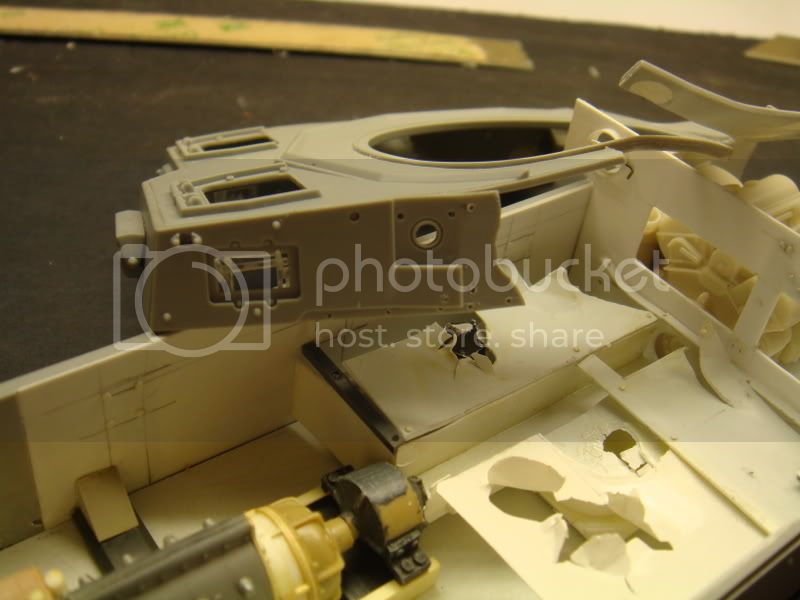
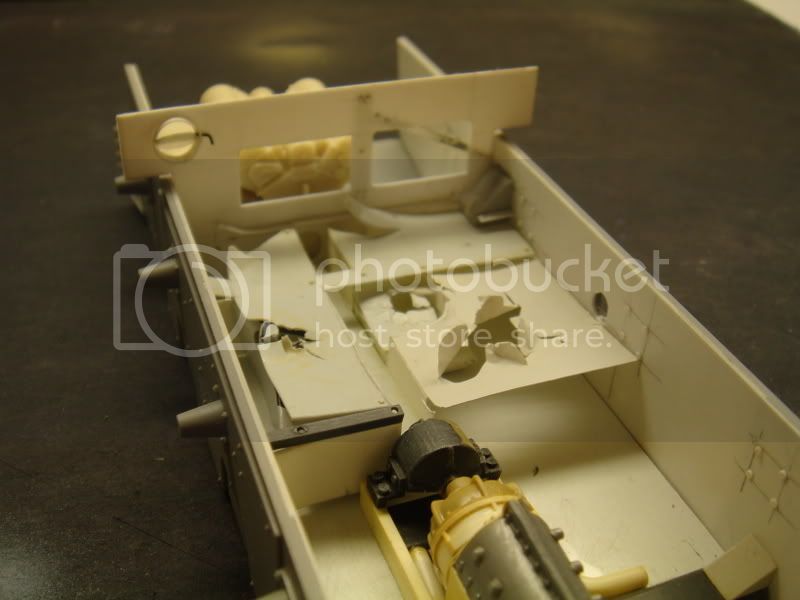
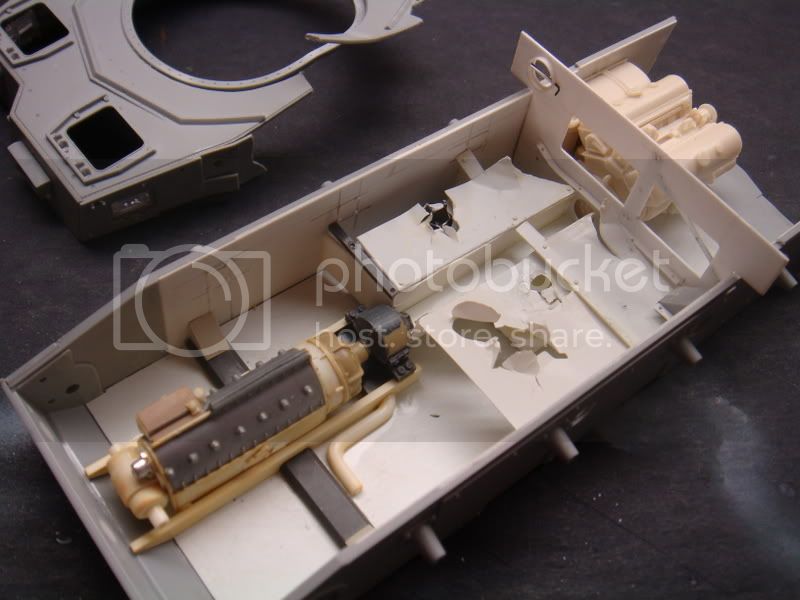
Just a little up date of where i'm at right now. All the ejector pin holes on the inside of the upper hull have been filled with squadron white putty and sanded when dry. I couldn't help but start the upper hull damage as you can see in the pics.


I did some work on the fire wall, still needs a few things.


Once the fire wall is done i'll start on trans,brake drums and much of the front end before working on the engine comp.

Rob
terry35
Visit this Community
Dublin, Ireland
Joined: May 13, 2006
KitMaker: 26 posts
Armorama: 22 posts
Posted: Friday, December 26, 2008 - 12:35 PM UTC
Ouch . Truely amazing work. So many years have gone past since a burnt out panzer 4 was a tamiya kit with lighter fuel thrown over it. Having done one or two wrecks I fully understand the amount of work needed to do it right, and you have DONE IT RIGHT.

Terry.
newfish
Visit this Community
England - West Midlands, United Kingdom
Joined: June 23, 2008
KitMaker: 2,329 posts
Armorama: 2,110 posts
Posted: Friday, December 26, 2008 - 03:10 PM UTC
great start rob that transmission you did all those years ago still looks great

youve certainly been working hard on the interior

theres been some really intereasting wrecked tanks of late this is one of my favourite ones ive seen its looking great

panzerboy1944
Visit this Community
Illinois, United States
Joined: January 08, 2007
KitMaker: 236 posts
Armorama: 110 posts
Posted: Friday, December 26, 2008 - 04:19 PM UTC
Hi
you are doing an excellent job Kudos to you
Thanks Lee
wbill76
Visit this Community
Texas, United States
Joined: May 02, 2006
KitMaker: 5,425 posts
Armorama: 4,659 posts
Posted: Friday, December 26, 2008 - 04:39 PM UTC
Weathering a "live" vehicle is tough enough...getting one that's "dead" and wrecked right is even tougher...and you've done an outstanding job with the examples you've posted. Definitely a clear progression there from the first to the latest. Look forward to seeing the latest iteration and echo Darren's request to see a Feature of your techniques in achieving this kind of look.
marsiascout
Visit this Community
Noord-Brabant, Netherlands
Joined: March 24, 2008
KitMaker: 1,247 posts
Armorama: 913 posts
Posted: Saturday, December 27, 2008 - 12:42 AM UTC
Super work! I must say your 1:25th scale Tamiya Tiger looks like the real thing! I thought you picked a museum photo.

Lars
SIRNEIL
Visit this Community
England - South East, United Kingdom
Joined: July 30, 2007
KitMaker: 658 posts
Armorama: 599 posts
Posted: Saturday, December 27, 2008 - 04:18 AM UTC
i honestly thought that the B&W pictures were of real vehicles then i decided to read the text . i'm really looking forward to this one rob keep the updates coming....
neil.........
scratchmod
Visit this Community
Massachusetts, United States
Joined: November 07, 2008
KitMaker: 796 posts
Armorama: 763 posts
Posted: Sunday, December 28, 2008 - 06:41 AM UTC
Hi guys,thank you for the great comments and motivation to continue with this build. I will try to do a write up on this build. I realy enjoyed scratchbuilding in the past and am now getting back into it again.
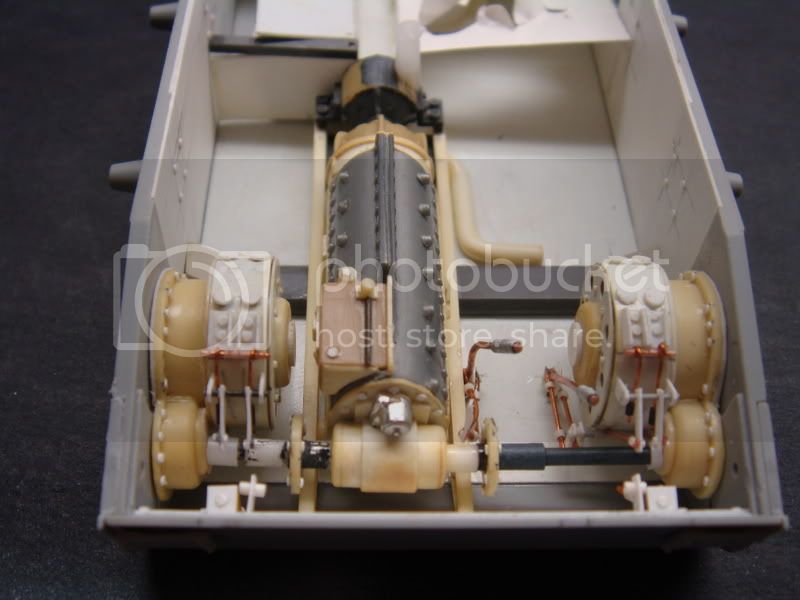
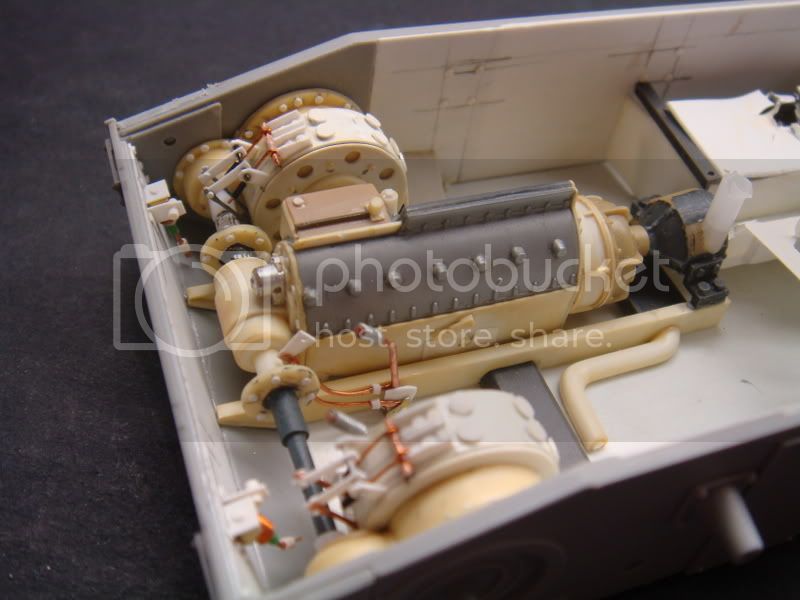
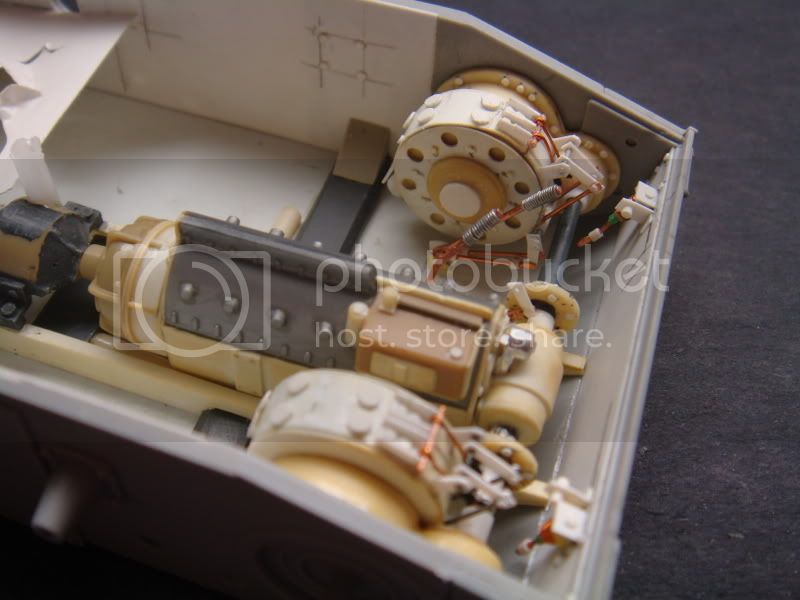
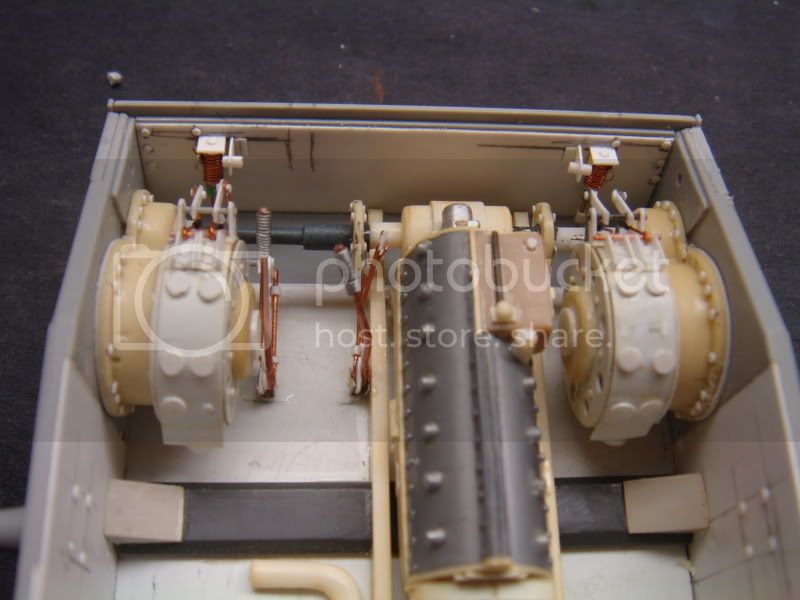
Here is what i've gotten done so far. The brake drums and linkage are about 90% done, still have to do the clutch,gas and brake pedals then I start destroying the interior some more. I used copper wire and wire insulation for the linkage and plastic card for most of the brake system. Here is what it looks like so far.


The rest of the build will be quicker than the trans. and brakes. I will post as it progresses so stay tuned.

Rob
newfish
Visit this Community
England - West Midlands, United Kingdom
Joined: June 23, 2008
KitMaker: 2,329 posts
Armorama: 2,110 posts
Posted: Sunday, December 28, 2008 - 07:22 AM UTC
the brakes , wiring and leavers look great they are really detailed!

i hope the build goes faster so i really can see the finished result!

jointhepit
Visit this Community
Oost-Vlaanderen, Belgium
Joined: May 14, 2006
KitMaker: 3,829 posts
Armorama: 881 posts
Posted: Sunday, December 28, 2008 - 10:35 AM UTC
brilliant work, you took my wishlist for 2009, and boy am I gonna use this as a reference when building my own, looking at the level of your skills, damn have I got a lot to learn, still...


Greetz, following this one

 _GOTOTOP