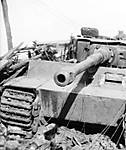
Armor/AFV: Axis - WWII
Armor and ground forces of the Axis forces during World War II.
Hosted by Darren Baker
DML#6383 Tiger 1 Turret Zimmerit Mod
panamadan
Visit this Community
Minnesota, United States
Joined: July 20, 2004
KitMaker: 1,513 posts
Armorama: 1,449 posts
Posted: Sunday, March 21, 2010 - 01:26 PM UTC
Phil,
I'm guessing due to impact's size plain-old AP. The others besides APDS are simply "windscreens" to smooth out the bluntness of a AP round-think a nicely sharpened pencil. APDS would have a smaller hole. I recommend reading Zaloga's book on the T62 as he describes how modern AP rounds work and the fight to get high volouctees out of them.
Smaller (APDS) =very fast! Very fast=more penetration!
Dan
barkmann424
Visit this Community
England - North West, United Kingdom
Joined: November 23, 2008
KitMaker: 357 posts
Armorama: 353 posts
Posted: Friday, March 26, 2010 - 07:22 PM UTC
Hello again my friends, It's raining yaay! Stuck indoors, now where is that workbench... Last time I put wheels on a workstation!!!

Hi Dan! Had a good old mooch around the web, and found some articles images and a few videos of the impact and carnage that tank killing rounds such as APDS can deliver... I really would not like to be a watermelon in an AFV! Good to hear from you, as always. I will PM you later about your Abrams, I also managed to find my stock of Bristol board, whilst hunting for my work area.

Okay let's get down to it boppers!
On the KO'd '211' Doppelganger, I have be adding some weld seams and field 'tagged' points to the turret, and started getting the petalled and shed Zimmerit surfaces ready.
The weld beads,seams and 'slag' were done by using coloured stretched sprue (taken from some Gundam Kit's of Oliver's... Okay Grant, I have been nicking bits of the children's toys again!) applied and softened with tamiya Extra Thin Liquid cement, then a ground down dressmaking pin was used to imprint and tease the 'gloop' into resemblance of the very hasty and brittle looking repair to the turret roof. On the visible weld seams on the turret track clamps lower supports, that are not to be covered by Zimmerit on the fire damaged side... These were detailed with some stretched sprue, but given a more uniform pattern of welding detail using a syringe tip, as these were factory applied and obviously a bit neater.
An area of Zimmerit that always causes debate is the sketchy area in front of the Drivers Glacis Plate, above the transmission, adjoining the Bow Plate. I call this the Bow Glacis Apron! BGA for short... Some believe that a lot of Tigers did not have any Zimmerit applied to this area, perhaps because the order for the application of Anti-Magnetic Mine Paste, stated that it was only to be applied to vertical, or near vertical plates. Others think that because it was an angled plate and sat over a very important piece of the Tigers drive-train it would have been a priority point for the application of Zimmerit.
Now the difficulty with this area and the viewing of any application of the paste is hampered by the saturation of light from The Sun, and the angle that wartime images were often taken at. But on the majority of images that can be found with a good view of the BGA, there can be observed a difference in the texture in relation to the smooth sheet surface of the front mudguards/fenders. Here are a few images of the plate.

A rather varied bunch eh? Some look like a rather sloppy rough application, whilst on a few you can see that a 'ridge pattern' has been applied. My belief is that because of the near horizontal angle of the plate, the pattern does not 'stand' as well as the vertically applied ridges, also the accumulation of dust,dirt and mud can sometimes soften the peaks of the pattern in places, not to mention the passage of the crew's heavy hob nailed boots!
In order to try and replicate this area of Zimmerit, I have had a go at using something other than epoxy putty. Mr Surfacer sprang to mind, as other than being hallucinogenic, it has a lot of good properties for applying a pattern of Zimmerit to styrene. It sticks, it is malleable and pliable when drying and can be re-softened with Mr Color Thinners or MIBK. It was spread onto the surface using a wide flat brush, left to 'crust over' for around 15 minutes, before being imprinted with the Lion Roar Zimmerit Applicator tool. At no point did the Mr Surfacer stick to the rollers die gear!


Now here are a few more images of the construction fully under way.


I think the Friuls may have found a permanent home eh?
Right I am off to get a little more done before The Sun starts shining again...

Cheers for dropping by. Phil.
panamadan
Visit this Community
Minnesota, United States
Joined: July 20, 2004
KitMaker: 1,513 posts
Armorama: 1,449 posts
Posted: Saturday, March 27, 2010 - 12:54 AM UTC
Enjoying, enjoying...
Dan
exer
Visit this Community
Dublin, Ireland
Joined: November 27, 2004
KitMaker: 6,048 posts
Armorama: 4,619 posts
Posted: Saturday, March 27, 2010 - 01:53 AM UTC
What a great thread. I'm not building a Tiger- yet:) but I love reading about all the techniques and the comparisons between different manufacturers. Keep up the good work.
barkmann424
Visit this Community
England - North West, United Kingdom
Joined: November 23, 2008
KitMaker: 357 posts
Armorama: 353 posts
Posted: Saturday, April 03, 2010 - 07:47 PM UTC
Happy Easter folks!
Sitting comfortably, eaten all those sickly chocolate eggs yet?

Hello Pat! Thanks for calling in, good to hear that something can be gleaned from these pages of 'Terminal Tiger Mania'! I think that I have also learned a lot as the blog has grown and 'mutated' out of the original plan. (don't worry the other Tigers with the differing turret Zimmerit will be back very soon) The comparisons come about quite naturally, as I often cannot decide between which AM to add, and what manufacturer offers the best quality/value package.
Thank you again for your kind comments Pat.


Right then time to have a look at what I have been up to... It's a bit distressing, holes in a Tiger!

I have finally bit the AP round, and took a dremel to this poor Tiger! Using a mixture of cone and ball ended dental burrs, the impacts were then treated to a few applications of Tamiya Extra-Thin Cement to soften the indentations and remove any residual swarf on the craters edge. On the impact on the mantlet, I heated the ball burr and pressed it further into the wound, in order to create a little lip where the deformed plate formed a kind of solid corona. If that makes sense?
The impacts on the Glacis were 'drilled' completely through... The hit on the drivers armour vision port, was finished with the cone burr, slightly penetrating through the styrene, then closed up with some Tamiya Extra-Thin. The crack in the cast port pillar was simply scratched in with a scalpel and pin.
Now for the penetration that has deformed the Kugelblende... This being drilled completely through, and then a piece of styrene tube with a smaller brass tube within the core, trying to replicate what I believe to be the AP round that caused the bow mg ball mount and housing to deform so alarmingly. As stated in Panzerwrecks 8 Normandy, the bow mg/radio operator must have taken a serious blow when the Tiger was hit... If the Tiger was still crewed and operational at that point!


Also a few more additions to the missing/damaged stowage fixings and clamps have been added. Along with the start of the residual attachment points, where the Tigers mudguard/fenders would have been. I have decided to also model this vehicle with a destroyed exhaust muffler on the right hand side, in order to make a start, a 4mm hole was drilled through the aperture slot on the kits rear hull. Another thing I have been thinking about including upon this build is a variation on the cast armoured exhaust covers... More about this another time.


Some more Mr Surfacer has also been applied, in order to try and depict the sub layer of Zimmerit that has been exposed by the frontal impacts and the areas not totally destroyed by the fire. this once again being flowed onto the the surface (not as heavily applied this time), then after part drying the faint impression of the Zimmerit's pattern was applied with the Lion Roar Zimmerit Applicator.


Hey Paul (Weirdy)
I found another wooden 'travel lock' block in the images!

This is definitely starting to look like a standard piece of Late Tiger 'shipping packaging' eh? Once again it looks as though this Tiger does not have many miles on the clock. I did find another one, but have misplaced it! Ah well it will turn up again.

Well I'm off to see if I can get some more done on the Tigers, before the chocolate crazed masses wreak havoc around the workbench!

Thank you all for coming by this way... Cheers Phil.
jet
Visit this Community
Alberta, Canada
Joined: December 30, 2002
KitMaker: 306 posts
Armorama: 295 posts
Posted: Saturday, April 03, 2010 - 09:14 PM UTC
Outstanding thread-tremendous!
vanhall
Visit this Community
Groningen, Netherlands
Joined: January 23, 2007
KitMaker: 406 posts
Armorama: 391 posts
Posted: Sunday, April 04, 2010 - 08:34 PM UTC
Super detail work Phil, it all looks spot on with the reference pics.

Here's another one for the 'BGA' zim collection: (a 2/.sPzAbt503 late)


Looks to comfirm what you said. The zim 'rakes' are there, just less prominent and much smoother.

That missing exhaust tube is a bit of a puzzle. I can't imagine how that would come about???.. Anyways, maybe someone will have a explanation.

Looking forward to the next installment,
Grant.

barkmann424
Visit this Community
England - North West, United Kingdom
Joined: November 23, 2008
KitMaker: 357 posts
Armorama: 353 posts
Posted: Monday, April 05, 2010 - 07:50 PM UTC
Hi James! Why thank you indeed for the kind words, hopefully I get can this back up to speed.

Hello Grant! Thanks for the image, always appreciate some BGAZ! I am starting to think that maybe this Tiger was hit from the rear, burnt and was pushed of the road, the missing track slightly off to the left up the incline is a bit of a clue, along with the not burnt foliage, and that perhaps the hits on the Mantlet and Glacis were later practice additions. How are you doing my friend? Keeping busy? Oh I got some of the Artisan Mori Bosch lights... Mighty tasty, it should look a treat all bent and beaten up.

Cheers... Phil.

barkmann424
Visit this Community
England - North West, United Kingdom
Joined: November 23, 2008
KitMaker: 357 posts
Armorama: 353 posts
Posted: Thursday, April 08, 2010 - 09:41 PM UTC
Good Morning! I hope that I find you all full of the joys of Spring?

Well first things first... This arrived through the postal aperture the other day. Along with a set of Artisan Mori's Bosch headlights


This was purchased, as I think that all the open hatches on '211' D will leave the interior a bit naked sparse looking to the beholder. The set is actually quite comprehensive, and yet could do with a bit more!

It does omit a few areas that would be visible through the open hatches, especially on the Radio/Bow Mg Operations compartment.


The Drivers compartment also could do with a little more in the way of controls.

You do get the steering wheel and linkage but no pedals or levers. But on the whole it does represent enough for my purpose within this build.
On the downside some of the larger flatter parts do have a substantial 'overflow' of resin from the pouring. Though an orbital sander (I kid you not! ) ...On low, soon removed the extensive excess resin, and some of my fingerprints!
And here are the basics dry fitted into the forward fighting compartment of the Tiger, some very nice detail (Are they totally accurate? I need to look a bit more between actual images, Tiger 1 info and the parts... )


Now about this battered Bosch Light...
Here are the DML and Artisan Mori lights together.

The Artisan Mori, are a lot finer in detail, with separate lenses and optional cover less lamp housing. Giving the ability to beat it up a little. Though for this I used the DML cover, thinned out with a selection of dental burrs, until it was thin enough to 'chew up' a bit.

A bit of attention with a scalpel, and hopefully it looks something like the abused light on the actual Trashed Tiger.


I have made the fastening clip and locking pin... I just have to find it again! Or perhaps make another. I think that the next logical step is to get the lower hull finished, and all the empty clamps and hangers in place. on the left hand sponson and the rear hull plate.

...Armoured exhaust covers, do we have any options on variants?... You betcha!

Cheers for looking, thanks again. Phil.
Byrden
Visit this Community
Wien, Austria
Joined: July 12, 2005
KitMaker: 2,233 posts
Armorama: 2,221 posts
Posted: Thursday, April 08, 2010 - 10:20 PM UTC
I know nothing about this set, except what I can see in your photos... but I can see a few problems.

The ventilation ducts on the inside front wall; the right one is too long, it should be a mirror of the left.

David
panamadan
Visit this Community
Minnesota, United States
Joined: July 20, 2004
KitMaker: 1,513 posts
Armorama: 1,449 posts
Posted: Friday, April 09, 2010 - 05:07 AM UTC
It may be a bit late-but doesn't CMK make a drivers compartment set?
Dan
Wierdy
Visit this Community
Ukraine / Україна
Joined: January 26, 2010
KitMaker: 570 posts
Armorama: 553 posts
Posted: Friday, April 09, 2010 - 05:59 AM UTC
Hey Phil! Again (like in the case of dress making pins) you're reading my mind with the interior set TMD one seems to be more complete than Verlinden, though more expensive as well. Artisan Mori headlight is finer but aren't styrene variants of all manufacturers dimensionally close to each other?
I never used Fukuya accessories, all I know is the amount of pins is smaller in their set.
One more image with travel lock...Hmmm...nice to see it
Don't you know the unit?
You put so much time, thought and effort into making damage effect on your 'Bocage victim'!!! That would truly be a joy to see it with burnt paint effect around those spectacular projectile holes. Thinking about the background?
pokdub
Visit this Community
Dublin, Ireland
Joined: February 04, 2009
KitMaker: 13 posts
Armorama: 11 posts
Posted: Thursday, April 15, 2010 - 05:43 AM UTC
Just finished Mid Production Tiger with added interior (Academy).
Nice overall package, and an interesting build.
Press-ganged a 'Self Propelled Gun' crew into kitty service.

Followed and finished in the Appleyard-Approach. Tks for confidence and inspiration.

As mentioned above, there is little visible, and lit, through the open hatches.
If the hull top is glued down, then your meticulous work, and investment, will be hidden forever. Maybe better to spend the extra on exteriors ???
barkmann424
Visit this Community
England - North West, United Kingdom
Joined: November 23, 2008
KitMaker: 357 posts
Armorama: 353 posts
Posted: Monday, April 19, 2010 - 11:10 AM UTC
Apologies and salutations good Tiger friends!

Hello David. Any other insights on the interior would be greatly appreciated, even though this is going to be a through the hatch view, I have always wanted to attempt a good representation of a full interior, now that LED's are available for some illumination. There does seem to be a fair bit missing, even though it is not supposed to be a complete set. The area on the forward portion of the sponson 'shelf' next to the Radio/Bow Mg operator station is missing the retaining frames for the ammo boxes, the rail/rack for the Mg pouches etc, and some of the visible wiring will have to placed also. I will try and get it in by the end of the week, so you can have a good shufti and give us your thoughts. Would it be best primed to highlight the details?
Thanks again for the 'loan' of your knowledge David!

Hi Dan! I am after a CMK Driver/Radio Bow Mg insert, just not found one a the right price yet! Been busy listening to the Radio!

Hello Paul! Good to hear from you again. The unit of that Tiger being transported? It's not the s.SS.Pz.Abt101 is it??? The camo looks familiar.
The scorching and impact marks should be very interesting to paint, I will be calling on a few 'Masters of Destruction' for help in this area.
I have a question Paul on the Zvezda Tiger kits I see from time to time for sale... Would it be worth buying one?

Greetings Paul! Good to hear from you again. And great to hear that this madness has helped you in some way. I have been rooting through my Academy Tigers this week looking at the interiors, you are right about the amount of detail included, there must be more sprues for the internal organs than the hide of a Tiger!

With a week of Chaos behind me I have been able to unsheathe the scalpel and get busy again. (Still cleaning up the resin interior!!!)
But one thing I have got onto is the depiction of the varying production variants of the Armoured Exhaust Cover. I have mithered David over this in the past, and a lot of the features and differences come from 'mould' drop out during casting, and the moulds being 'patched' rather than reset. Often the apex of the cover suffers the most due to mould flaws, with the central ridge being flattened and smoothed. Another version has what looks like bridging plates inserted to strengthen the deteriorating mould, causing a 'roofed' effect, and yet another example has access channel machined into the side walls for the attachment nuts/bolts to be fitted or removed.


And here are the corresponding images to the variants covers.

Flattened and smoothed


Ridge plates 'roof effect'


Access Channels (I have only seen these on late production Tigers in Normandy there is another from the s.Pz.Abt.503 Tiger 213... but i cannot find an image on my HD...Anybody?)


And the 'bog standard' with casting serial marks.
Thanks to Dennis Trowbridge for the excellent image.


Well I think it's interesting!

Another thing I have been Toying with is the right hand side fuel tank/radiator/fan area, this is in my mind due to the damage done to the turret by the fire that would have raged here, perhaps caused by a penetration on the rear hull plate that wiped out the right exhaust muffler. So I am thinking of representing this as destroyed. Exploded collapsed fuel tank, heavily damaged radiator, and mashed 'sirocco' fans. For this I am going to scratch build the fuel tank and radiator, and use the DML fans. Here is the theorising.

I will use the vent screen plate from the earlier DML Tigers, as it has no moulded wooden screen on it, enabling me to add some pitiful burnt embers of the remaining toasted screen.

I have also started making a start on the damaged skirts and exhaust shrouds.
During a rather fortunate accident with a blow torch, I found that a lightly solder 'tinned' area on the brass PE with a soupcon of liquid flux, heated at a focal point burns the brass in a rather fetching manner... One for Rob methinks!


Well folks that's all for tonight, back real soon... Cheers Phil.
Wierdy
Visit this Community
Ukraine / Україна
Joined: January 26, 2010
KitMaker: 570 posts
Armorama: 553 posts
Posted: Tuesday, April 20, 2010 - 05:15 AM UTC
[quote]
Hello Paul! Good to hear from you again. The unit of that Tiger being transported? It's not the s.SS.Pz.Abt101 is it??? The camo looks familiar.

I have a question Paul on the Zvezda Tiger kits I see from time to time for sale... Would it be worth buying one?
Hi Phil! The camo may look familiar but isn't there a Wehrmacht crewman standing nearby?
As for Zvezda Tigers (both early and late) they are former Italeri kits which I would never recommend you to deal with, despite the low price. These ones are for beginners. As for the running gear of their late Tiger see Sturmtiger comparison review on PMMS and here is one more link http://www.dishmodels.ru/gshow.htm?p=3671 No English text but lots of images here.
Your attention to details is examplary as always
barkmann424
Visit this Community
England - North West, United Kingdom
Joined: November 23, 2008
KitMaker: 357 posts
Armorama: 353 posts
Posted: Saturday, April 24, 2010 - 08:59 PM UTC
G'day everybody, I hope that I find every one of you well? Normal service appears to be getting closer. and I don't just mean the rain in Manchester!

Hi Paul! Thanks for the insight on the Zvezda Tigers, I'll think that after all that information on that was put forth on the Dishmodels site, I'll give them a wide berth!
I don't know if it is attention to detail that I seek. or just some product of a dark deep rooted psychosis! Thank you very much for your kind words of appreciation Paul.

Well you ask? What has been all that gnashing and wailing, coming from my dark corner?

I finally got the nerve up to 'trash' the side skirts! I had to really make sure that they were 'well' soldered, before attacking them with various implements, in order to replicate the extreme damage seen on this wrecked and forlorn Tiger.
So my friends what do you think...


And I also managed to find the mangled Bosh light! It still needs a few small details, along with some more weld seams on the empty stowage clamps and retaining frames.

Another thing I have been pondering over is the, Tetra fire extinguishers retaining straps... Would they be obliterated when the extinguisher possibly exploded during the fire? Anybody out there with relevant experience of this?

You will notice that this Tiger has no turret stowage bin yet! Well here it is ready to go under the 'iron', though from the images I have of the 'Rommelkiste' it looks in a worse state than the side skirts! Only one lid, numerous small arms penetrations, and a whacking great 'plunging hole in the top!


Right then I'm off to burn the kitchen worktop and spill liquid flux all over the show... Expensive hobby this eh?

Back in a tick! Cheers Phil!
vanhall
Visit this Community
Groningen, Netherlands
Joined: January 23, 2007
KitMaker: 406 posts
Armorama: 391 posts
Posted: Sunday, April 25, 2010 - 02:00 AM UTC
Hi Phil,
Excellent work with the battered side skirts. I know from (bad) experience it's very difficult to 'maul' these and still keep the bolting edge straight. Did you use any sort of clamp to hold/keep them straight?.. In the past, I had thought about trying to make something just for this purpose.
Difficult to know with FE straps? On the only pic where I can make it out, the only thing I can see is that the round base plate looks intact... I imagine (guessing), if it had been in place during a fire. Any extreme heat/pressure would blow the nozzle fitting out before the cylinder would explode. It's more likely (and easier ) it was pilfered or even removed by someone coming out the escape hatch..????

Good luck with the 'Junk-trunk'.... and watch out for the kitchen surfaces.
Grant.
panamadan
Visit this Community
Minnesota, United States
Joined: July 20, 2004
KitMaker: 1,513 posts
Armorama: 1,449 posts
Posted: Sunday, April 25, 2010 - 02:54 AM UTC
The beat up side skirts match up well with the beat up look of the Tiger.
This might be practice tor a Tiger that has hit by a 500lb bomb!
Dan
Major-Hazard
Visit this Community
United Kingdom
Joined: July 14, 2008
KitMaker: 217 posts
Armorama: 215 posts
Posted: Sunday, April 25, 2010 - 07:34 AM UTC
Super progress, Phil; thanks for the update.

I love those Voyager Tiger 1 turret bins. That damaged turret Zimmerit work is excellent BTW.


Bill

http://panzersinscale.blogspot.com/
barkmann424
Visit this Community
England - North West, United Kingdom
Joined: November 23, 2008
KitMaker: 357 posts
Armorama: 353 posts
Posted: Friday, May 07, 2010 - 11:49 AM UTC
Hello all! How are you doing?

Hi Grant! Thanks for the translation service, 'junk trunk' I like it! The skirts were a lot more difficult than I would have thought... It's the turn of the one remaining front fender next.

Hello there Dan! What's on the 'jukebox' today? It is funny you mention 500lb bombs,I was looking at the aftermath of Operation 'Goodwood's' preliminary 'softening up' just the other day... 500lb aerial delivered ordnance and Tigers... Just do not mix! Just ask the s.Pz.Abt.503!

'Wotcha Bill' what are you up to in Tigerworld this week? Thanks for the 'nod' on the beat up skirts... Ironic really that so much care and gentle persuasion is needed to replicate damage done in seconds!

You are all probably wondering what I have been doing for such an extended period of time... Not much in particular, I have been playing with some other putties for Zimmerit trials, sourcing some more AM (Don't worry Grant, you will have me to keep you company in AM 'Rehab' at the OOB Clinic! ) I have even been tinkering with some small green things, more on those another time.
But back to the Tigers, '211D' has had a little more work put into it, mainly to the Turret spare track clamps (only five on this Tiger!) and some rather scruffy soldering and denting, warping, and piercing on the 'Junk Trunk'.


The clamp tops are from Tiger Model Designs, they are two part and are easily articulated to simulate a 'drooping' clamps where the spare link is missing. The also have cast 'casting' numbers on both parts... Though on this set I am going to replace them with Archers raised casting number decals, as was done on '121'.
Further work has been done on the Verlinden interior, Davids recommendations have been removed from the inner surface of the Glacis plate. And some PE diamond pattern anti-slip tread has been used for the base plates on the Drivers and Bow MG/Radio Operator seating assemblies, as the resin parts are not that 'square'. I have also been thinking about the right hand side fan/radiator/fuel cell compartment, and the damage from the 'hypothetical' killing shot in the rear that entered the rear hull plate, and the fire that possibly ensued. The armoured vent plate has been swapped for an earlier version, that has not got the wooden screen, in order to represent a burnt and buckled one with ash and remnants of the wood remaining. I have also toyed with the idea of incorporating some of the Academy Tiger 1 innards for the cooling portion of the powerplant... See what you think? I do actually prefer the look of the sirocco fans with their housing.


I will have to get the litter together for a group shot shortly eh?

See you all real soon!

Cheers for calling back, thanks Phil!

http://barkmannscorner.blogspot.com/
panamadan
Visit this Community
Minnesota, United States
Joined: July 20, 2004
KitMaker: 1,513 posts
Armorama: 1,449 posts
Posted: Friday, May 07, 2010 - 03:48 PM UTC
That driver's seat looks pretty comfeterable!
New Order and Jot Division!
Dan
Byrden
Visit this Community
Wien, Austria
Joined: July 12, 2005
KitMaker: 2,233 posts
Armorama: 2,221 posts
Posted: Saturday, May 08, 2010 - 03:19 AM UTC
May I ask where you got the idea for tread plate around the driver's seat? I thought there wasn't any there.

David
barkmann424
Visit this Community
England - North West, United Kingdom
Joined: November 23, 2008
KitMaker: 357 posts
Armorama: 353 posts
Posted: Saturday, May 08, 2010 - 05:10 AM UTC
Hi Dan! It certainly does look as though the driver got the 'soft option' in the seating stakes! Ahh! Joy Division and New Order, never saw Joy Division but was lucky enough to see New order twice once in the Hacienda and another time in Bradford... Rather good if I remember!

Hello David. The notion on the diamond tread-plate beneath the Drivers and Radio/Bow Mg operators seats is down to the kits resin parts and from Christian Ankerstjernes images of the Saumur Late Tiger 1 when at Munster, on this site...
http://www.panzerworld.net/tigerimunster
I must say when I saw these rather revealing images it did add to my thoughts how rudimentary this 'through the hatch' set is.
I have a question, if you would be so kind? Is the toothed item in the cut out for the turret lifting lug in the 'Rommelkiste'of '211'D a torsion bar end?

Thanks in advance David...

Cheers...Phil.


Byrden
Visit this Community
Wien, Austria
Joined: July 12, 2005
KitMaker: 2,233 posts
Armorama: 2,221 posts
Posted: Saturday, May 08, 2010 - 06:45 AM UTC
There was no tread plate in that area, just the seat I'm afraid.

I don't have Panzerwrecks so I'd need a better scan of the item you mention.

David
barkmann424
Visit this Community
England - North West, United Kingdom
Joined: November 23, 2008
KitMaker: 357 posts
Armorama: 353 posts
Posted: Saturday, May 08, 2010 - 07:28 AM UTC
Dashing to my rescue again David! Unfortunately I have had a hair cut, so no escape from the Tower on this one eh?
Looks like I will have a bit more scratch-building to do on the seat support frame then. Thanks for the drawings.
Here is the scan from Panzerwrecks for your consideration.


Cheers Phil.