Hosted by Darren Baker
Stryker M1127 RV & M1126 ICV w/ SLAT - WIP
Removed by original poster on 01/06/10 - 02:56:18 (GMT).
AngryDog

Joined: March 27, 2004
KitMaker: 1,114 posts
Armorama: 900 posts

Posted: Tuesday, January 05, 2010 - 05:54 AM UTC
An update on the build...But first..
Quoting myself here....
Any advise...?
Michael, Robert and Burik,
Thanks Very Very much for the help with the wiring for the lights, did my best, for trying to depict them as in the photos, not as great as I hoped, but next Stryker, I'll tackle the cables prepared with more items that will simulate the connectors and such... much better..and will do the separate "side red lights" and wiring too on the slat.
Guys, I think I have just a few more main questions... before I can go all out with the painting ..
1) Where does the DUKE antenna wiring go to...?
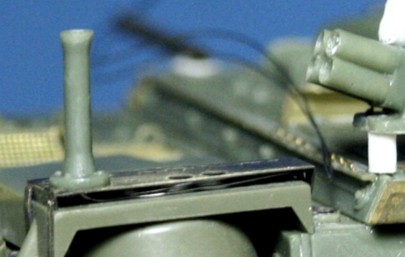
Where does the Rhino's device wiring/tubing go to..? I know it goes under the winch structure and then.....? Is it 2 or more cables that are in a thicker tubing which is usually wrapped around the square beam..?
Some scratch built stuff.. I used plastic sheet for the 2 support sheets for easier positioning later, making sure the slat section will line up with the others.
This is the fire-proof blanket, thermal..whachamacallit?
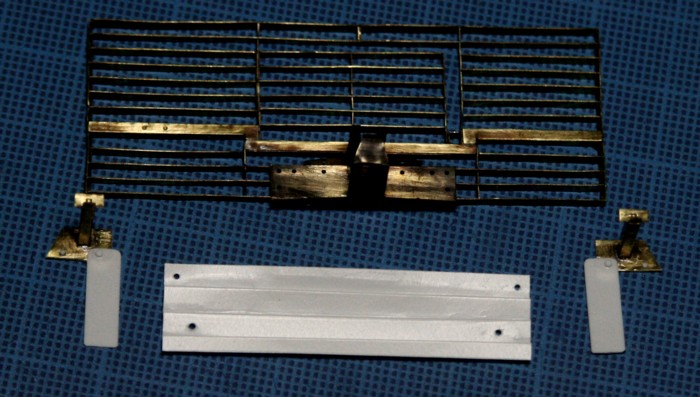
Hard time getting the 2 weapon mounts on the rear blast panels--shaped up.
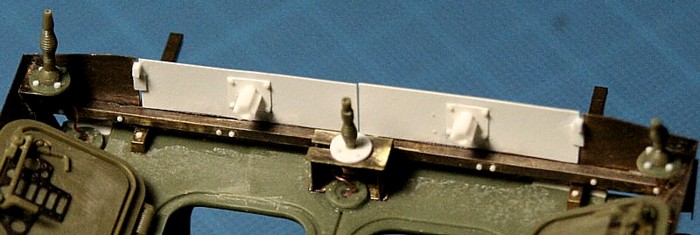
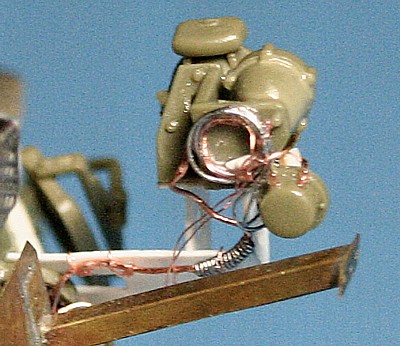
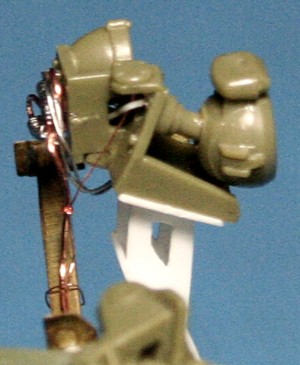
Note that I coiled up silver wire for some the wiring of the lights and smoke dischargers.. the coil is to simulate the ribbed tubing....I touched superglue over it-hoping that once painted it will give the similiar impression..
Anyone has a better idea please let me know..I can't think of snything else!
Right Side
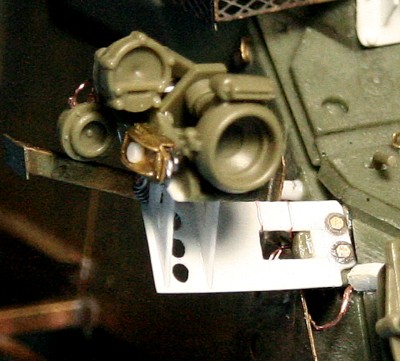
Left Side
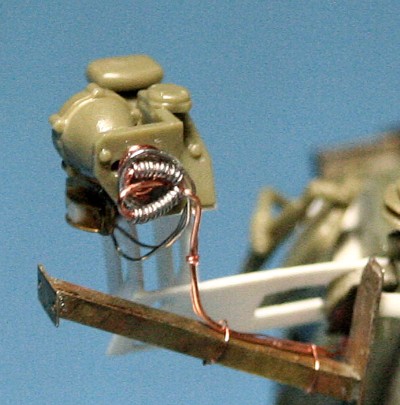
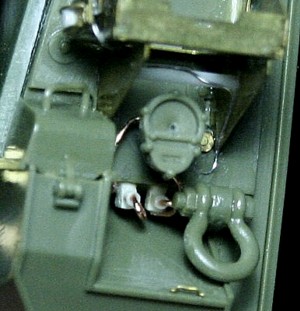
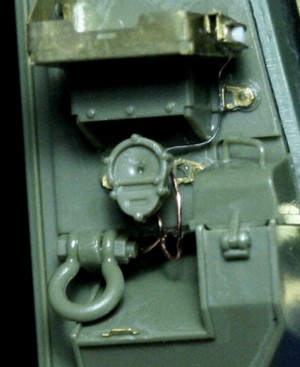
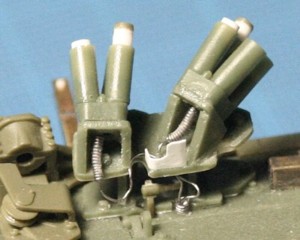
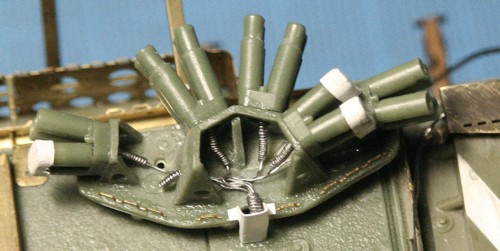
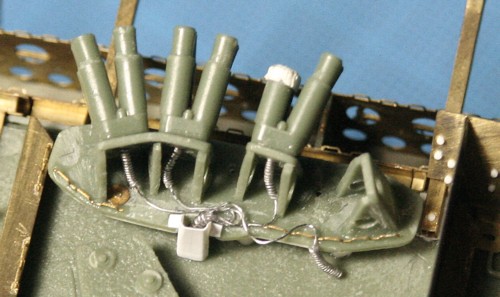
Wire cutters...UPPPPP!

and DOWNNN

What's the color of the round clear part???


Quoting myself here....
Quoted Text
There's a lot of photoetch straps to be used for securing the Gear,MRE boxes etc.. for the side stowage baskets and throughout the hull...
Would you think it's best to glued the straps down partially at one point ( leaving the gear off) and then Prime and Paint... Or add the straps after the main painting of the Stryker is done, and then paint the straps?
Any advise...?
Michael, Robert and Burik,
Thanks Very Very much for the help with the wiring for the lights, did my best, for trying to depict them as in the photos, not as great as I hoped, but next Stryker, I'll tackle the cables prepared with more items that will simulate the connectors and such... much better..and will do the separate "side red lights" and wiring too on the slat.
Guys, I think I have just a few more main questions... before I can go all out with the painting ..
1) Where does the DUKE antenna wiring go to...?

Where does the Rhino's device wiring/tubing go to..? I know it goes under the winch structure and then.....? Is it 2 or more cables that are in a thicker tubing which is usually wrapped around the square beam..?
Some scratch built stuff.. I used plastic sheet for the 2 support sheets for easier positioning later, making sure the slat section will line up with the others.
This is the fire-proof blanket, thermal..whachamacallit?

Hard time getting the 2 weapon mounts on the rear blast panels--shaped up.

Note that I coiled up silver wire for some the wiring of the lights and smoke dischargers.. the coil is to simulate the ribbed tubing....I touched superglue over it-hoping that once painted it will give the similiar impression..
Anyone has a better idea please let me know..I can't think of snything else!
Right Side


Left Side


Wire cutters...UPPPPP!
and DOWNNN
What's the color of the round clear part???

GulfWarrior

Joined: January 05, 2010
KitMaker: 1,051 posts
Armorama: 1,029 posts

Posted: Tuesday, January 05, 2010 - 07:31 AM UTC
Wow! That's a kick ass job!
I'm planning on ultimately building all of the Stryker variants! I'm only planning on doing the slat armor on the recon or ICV variant. It looks like a real B****!!
I'm planning on ultimately building all of the Stryker variants! I'm only planning on doing the slat armor on the recon or ICV variant. It looks like a real B****!!


18Bravo

Joined: January 20, 2005
KitMaker: 7,219 posts
Armorama: 6,097 posts

Posted: Tuesday, January 05, 2010 - 04:16 PM UTC
Nicely done! I am glad you were able to decipher the photos.
The Rhino only has one thick cable. Where it enters the hull I do not know...

The Rhino only has one thick cable. Where it enters the hull I do not know...

AngryDog

Joined: March 27, 2004
KitMaker: 1,114 posts
Armorama: 900 posts

Posted: Thursday, January 07, 2010 - 05:38 AM UTC
Richard, the Slat is indeed a real B#@$*...Monotonous---BORING!  I've a load of Strykers on the line up..and I can't see them done without the Slat.. So I'm going complete my many other projects first!
Robert, thanks for the pic... Guess I'll just go ahead with the Rhino..hopefully someone will chime in about the cable soon...
Speaking of which..you guys got any answers to my previous questions...?

 I've a load of Strykers on the line up..and I can't see them done without the Slat.. So I'm going complete my many other projects first!
Robert, thanks for the pic... Guess I'll just go ahead with the Rhino..hopefully someone will chime in about the cable soon...
Speaking of which..you guys got any answers to my previous questions...?


mikey

Joined: March 14, 2006
KitMaker: 229 posts
Armorama: 227 posts

Posted: Thursday, January 07, 2010 - 05:56 AM UTC
The detail on that is incredible!! And it's not the real thing!! Keep up the good work because I can't wait to see the finished piece. 

AngryDog

Joined: March 27, 2004
KitMaker: 1,114 posts
Armorama: 900 posts

Posted: Sunday, February 28, 2010 - 05:25 AM UTC
Just realised I never posted these....So for those who asked ....hopefully the pics and info will help.. and they're not too late.
Here's my tools and method of tackling those nasty slat bits..
In the start, it takes a bit of time and practice, but once you get the hang of it.. I assure you that Anything with Slat armor will No longer Intimidate you!!!!
I had intended to solder but found to be better at "blow-torchin" .. Even bought the 0.3mm solder wire, but since the going had been great by simply using 1mm wire, cut up to tiny bits... I stuck to it and did almost the whole Slat via Blow-Torch !
I used 1mm solder (the cheapo type found at anywhere) cut them up into as tiny bits as possible. Also bought the cheap flux at the hardwhare store.
For those of you who aren't used to working with real tiny bits, I recommend you use 0.3mm wire and a better flux...
In the photo..the soldering tip is the standard type that came with my Pro70 set. I found the blow torch method to be easier, to work with and particularly safer (for me) as I have a habit of being careless... So I just have to "put myself in harms way" for a few seconds when I turn on the torch, rather than have a soldering tip sitting on my table waiting for me to drop on my lap!
But be warn... Respect the Torch! It is VERY VERY HOT!

1mm solder bits cut up to small lenghts.

My "very complex" soldering station..
-- $2 large magnet in U-shape metal frame (came with a hook as well for hanging stuff) from a $2 Japanese budget shop over here. Used to be a nice flat square..but cracked under heat...DUUUUHHH! You can see what's left of the magnet under the Slat.
-- I really should use a larger metal base to prevent my cutting mat and table catching fire... but this had done me good for now.. (Next Stryker Slat ..I'll have a better set up)
-- Your standard and mini files..come in a pack of 12 or more I think..from any hardwhare shop. Since they're magnetic..I use them to hold and position the Slat to the magnet (whatever works for you). Oh ya, so is your tweesers, blades and everything else so Be warned -- while positioning --- your tools will work against you. So just hold the magnet down! Practice first.. and take note of a little physics here.. magnets and metals repel and attract!..Especially the cheap ones where the magnetic properties are not contant. So find the "G" spot for your tools to be positioned, add the Slat, solder/blow-torch, remove Slat, leave the tools there and add next Slat..and so on..

Using a toothpick add some flux to the underside of the Slat pieces, then position it on the magnet and secure snugly.....then add a little more flux to the other areas. (You'll have to find during which part of this process you're most comfotable to position the individual Slat pieces, I do so once the Slat's Frame is positioned and secured on the magnet.)
Use a sharp blade to pick and place the solder bits to the corresponding areas on the Slat.
Take Note : Flux & Especially Solder : Less is Best!

Takes anywhere from 10 to 15 minutes to add flux and solder and position and secure your part. Take your time with this until you are 'seasoned". This is the most important process!
The actual "torch work" will only last around 3 to 5 seconds! If you're going to scratch your nose, answer that phone call, do this before you turn on that Torch! I always do a dry run to make sure I don't burn anything that isn't supposed to, especially the fingers on my left hand which have a mind of their own.
Pointing up and away from you....Light the flame on your lighter with one hand and use your thumb on the other hand to turn on the gas for your Pro70's torch.... Put down your lighter than adjust the torch instensity .. .the flame should be just slightly more than after its "turn-on" adjustment button.
You can see this in the photo.
The solder will begin to melt almost immediately once the flame reaches it.. So ideally the motion will be like this:
At an angle, point the tip of flame to the bottom area.....solder begins to melt....move the flame up to the rest..... and then back down again to the bottom. Done!
Lastly..at this point Everything is Really Hot, so give a couple minutes before handling.
Hope my tips help.... Have Fun and be Safe.


Here's my tools and method of tackling those nasty slat bits..
In the start, it takes a bit of time and practice, but once you get the hang of it.. I assure you that Anything with Slat armor will No longer Intimidate you!!!!
I had intended to solder but found to be better at "blow-torchin" .. Even bought the 0.3mm solder wire, but since the going had been great by simply using 1mm wire, cut up to tiny bits... I stuck to it and did almost the whole Slat via Blow-Torch !
I used 1mm solder (the cheapo type found at anywhere) cut them up into as tiny bits as possible. Also bought the cheap flux at the hardwhare store.
For those of you who aren't used to working with real tiny bits, I recommend you use 0.3mm wire and a better flux...
In the photo..the soldering tip is the standard type that came with my Pro70 set. I found the blow torch method to be easier, to work with and particularly safer (for me) as I have a habit of being careless... So I just have to "put myself in harms way" for a few seconds when I turn on the torch, rather than have a soldering tip sitting on my table waiting for me to drop on my lap!
But be warn... Respect the Torch! It is VERY VERY HOT!
1mm solder bits cut up to small lenghts.
My "very complex" soldering station..
-- $2 large magnet in U-shape metal frame (came with a hook as well for hanging stuff) from a $2 Japanese budget shop over here. Used to be a nice flat square..but cracked under heat...DUUUUHHH! You can see what's left of the magnet under the Slat.
-- I really should use a larger metal base to prevent my cutting mat and table catching fire... but this had done me good for now.. (Next Stryker Slat ..I'll have a better set up)
-- Your standard and mini files..come in a pack of 12 or more I think..from any hardwhare shop. Since they're magnetic..I use them to hold and position the Slat to the magnet (whatever works for you). Oh ya, so is your tweesers, blades and everything else so Be warned -- while positioning --- your tools will work against you. So just hold the magnet down! Practice first.. and take note of a little physics here.. magnets and metals repel and attract!..Especially the cheap ones where the magnetic properties are not contant. So find the "G" spot for your tools to be positioned, add the Slat, solder/blow-torch, remove Slat, leave the tools there and add next Slat..and so on..
Using a toothpick add some flux to the underside of the Slat pieces, then position it on the magnet and secure snugly.....then add a little more flux to the other areas. (You'll have to find during which part of this process you're most comfotable to position the individual Slat pieces, I do so once the Slat's Frame is positioned and secured on the magnet.)
Use a sharp blade to pick and place the solder bits to the corresponding areas on the Slat.
Take Note : Flux & Especially Solder : Less is Best!

Takes anywhere from 10 to 15 minutes to add flux and solder and position and secure your part. Take your time with this until you are 'seasoned". This is the most important process!
The actual "torch work" will only last around 3 to 5 seconds! If you're going to scratch your nose, answer that phone call, do this before you turn on that Torch! I always do a dry run to make sure I don't burn anything that isn't supposed to, especially the fingers on my left hand which have a mind of their own.
Pointing up and away from you....Light the flame on your lighter with one hand and use your thumb on the other hand to turn on the gas for your Pro70's torch.... Put down your lighter than adjust the torch instensity .. .the flame should be just slightly more than after its "turn-on" adjustment button.
You can see this in the photo.
The solder will begin to melt almost immediately once the flame reaches it.. So ideally the motion will be like this:
At an angle, point the tip of flame to the bottom area.....solder begins to melt....move the flame up to the rest..... and then back down again to the bottom. Done!
Lastly..at this point Everything is Really Hot, so give a couple minutes before handling.
Hope my tips help.... Have Fun and be Safe.


18Bravo

Joined: January 20, 2005
KitMaker: 7,219 posts
Armorama: 6,097 posts

Posted: Sunday, February 28, 2010 - 05:47 AM UTC
Great technique Nick. Whether you realize it or not, all that metal you're putting on the slat is acting as heat sinks. With the torch it probably doesn't matter as much as you're doing all of the joints so quickly, but with soldering it can be good or bad. Good (for anyone contemplating the solder method) is that if you judiciously apply the heat sinks (I use alligator clips) you can prevent neighboring joints from overheating and coming undone.
however, using too many heat sinks at once makes it take a much longer time to heat the joint. Most beginners make the mistake os heating the solder and not the joint, resulting in a blobby mess.
BTW Nick, PM for you.
Nicely done.
however, using too many heat sinks at once makes it take a much longer time to heat the joint. Most beginners make the mistake os heating the solder and not the joint, resulting in a blobby mess.
BTW Nick, PM for you.
Nicely done.
AngryDog

Joined: March 27, 2004
KitMaker: 1,114 posts
Armorama: 900 posts

Posted: Sunday, February 28, 2010 - 06:25 AM UTC
Hi Robert,
Thanks for your comments
Heat sinks and alligator clips.. I never thought of that! That's a GREAT tip THANKS! Will apply that to my next Strykers. I had other parts particularly the mutli-joints like the Slat's support arms coming undone... for this one...duh!
And yup, pm sent too!
Thanks for your comments
Heat sinks and alligator clips.. I never thought of that! That's a GREAT tip THANKS! Will apply that to my next Strykers. I had other parts particularly the mutli-joints like the Slat's support arms coming undone... for this one...duh!
And yup, pm sent too!

shopkin4

Joined: March 29, 2009
KitMaker: 1,135 posts
Armorama: 1,030 posts

Posted: Sunday, February 28, 2010 - 07:02 AM UTC
I was actually just looking at this before you PM'd me. I haven't been doing any building because I'm away at school, but I have a Leopard 2A6M on deck because I think I am going to leave the MGS until slat comes out.
Plus I'm working on my own personal campaign:
Clear the STASH
So this will include the following
Leopard 2A6M
Chally 2
M1117 Guardian
M977 HEMTT
Trump T-62
M1128 MGS
Polish Leopard 2A4


Call me crazy


Plus I'm working on my own personal campaign:
Clear the STASH
So this will include the following
Leopard 2A6M
Chally 2
M1117 Guardian
M977 HEMTT
Trump T-62
M1128 MGS
Polish Leopard 2A4


Call me crazy


AngryDog

Joined: March 27, 2004
KitMaker: 1,114 posts
Armorama: 900 posts

Posted: Monday, March 01, 2010 - 03:11 AM UTC
Hey Sean, well you're certainly in the NUT club.. I've got Strykers, Humvees, M1s, M1117s, Buffalos and a couple others on the bench too!
A new client gave me a Leopard Slat set (amongst a bunch of stuff!) and I've a good excuse to build that Leo too..jus need to get all those other sets to make the proper version.
I'm glad you're away at school so it mean I'm not too late for you..

A new client gave me a Leopard Slat set (amongst a bunch of stuff!) and I've a good excuse to build that Leo too..jus need to get all those other sets to make the proper version.
I'm glad you're away at school so it mean I'm not too late for you..


AngryDog

Joined: March 27, 2004
KitMaker: 1,114 posts
Armorama: 900 posts

Posted: Tuesday, March 02, 2010 - 06:55 AM UTC
Most of the Slat are not fixed to the Styker, but the lower side sections are..
SO.... what's the best way to clean all the residue from soldering/torching all that PE? There's a combination of flux residue as well as discoloration-looks like rust or oxidation. I've also done sanding to smooth out the joints..
I was wondering about spraying WD40, or Mr Muscle for degreasing cooker tops...

18Bravo

Joined: January 20, 2005
KitMaker: 7,219 posts
Armorama: 6,097 posts

Posted: Tuesday, March 02, 2010 - 01:15 PM UTC
If there's any solder build up in the corner I use a square hobby file. For the residue weak acid usually does the trick.
AngryDog

Joined: March 27, 2004
KitMaker: 1,114 posts
Armorama: 900 posts

Posted: Tuesday, March 02, 2010 - 02:43 PM UTC
Any particular brands for the weak acid you can recommend?

18Bravo

Joined: January 20, 2005
KitMaker: 7,219 posts
Armorama: 6,097 posts

Posted: Tuesday, March 02, 2010 - 04:08 PM UTC
Heinz 

AngryDog

Joined: March 27, 2004
KitMaker: 1,114 posts
Armorama: 900 posts

Posted: Tuesday, March 02, 2010 - 04:36 PM UTC
tomato sauce 

Posted: Tuesday, March 02, 2010 - 05:22 PM UTC
Coke Cola will also clean PE, just watch what it does to a penny. IF you try this make sure you keep an eye on it, by that I mean dont put it in and forget about it.
AngryDog

Joined: March 27, 2004
KitMaker: 1,114 posts
Armorama: 900 posts

Posted: Wednesday, March 03, 2010 - 05:47 AM UTC
I used coke to clean my sink... Ok I'll try it on my PE..
AngryDog

Joined: March 27, 2004
KitMaker: 1,114 posts
Armorama: 900 posts

Posted: Thursday, March 04, 2010 - 03:34 AM UTC
I didn't solder the Slat in the usual way advised..altogether. I drilled the individual holes at each side of the sections, and joined to eachother by plastic rod-simulating the bolts. I'll post those pics later..
Although I had initially found intimidating the numerous individual Slat pieces... after I got the hang on torching... I really have to say that I found it easier to put the Slat together as compared to some other photoetch details sets I've worked on.
I have a BATCH of Strykers in my next WIP, and I'm actually looking forward to it!
The photo is 1100 x 646...right click and "view image" if you wanna see it larger.

bulivyf
Vendor

Joined: April 03, 2006
KitMaker: 2,450 posts
Armorama: 2,409 posts

Posted: Thursday, March 04, 2010 - 03:43 AM UTC
Nick, Excellent job. 


Miloslav


Miloslav
AngryDog

Joined: March 27, 2004
KitMaker: 1,114 posts
Armorama: 900 posts

Posted: Friday, March 12, 2010 - 06:26 AM UTC
Thanks Milo! 
One-Piece-Slat....

Test fit

Example of how to make your life Miserable...


One-Piece-Slat....

Test fit

Example of how to make your life Miserable...

seb43

Joined: August 30, 2005
KitMaker: 2,315 posts
Armorama: 2,158 posts

Posted: Friday, March 12, 2010 - 08:24 AM UTC
Good Luck
I love the tool
Cheers
Seb
I love the tool
Cheers
Seb

shopkin4

Joined: March 29, 2009
KitMaker: 1,135 posts
Armorama: 1,030 posts

Posted: Friday, March 12, 2010 - 11:58 AM UTC
Great as usual.
really looking forward to the conclusion of this build
really looking forward to the conclusion of this build
AngryDog

Joined: March 27, 2004
KitMaker: 1,114 posts
Armorama: 900 posts

Posted: Friday, March 19, 2010 - 05:07 AM UTC
I did a quickie before bedtime..  Last minute thing, as I forgot my Stryker had no towbar. Reference from the WWP book & the net, measured, looked through my materials and found the appropriate size tube from evergreen's rod & tube assortment. Rest was made with .020 sheet and the handle with 5mm rod. Process took about an hour.
I'll clean it up a wee bit another day.
Going to secure on the right side with the disc & wingnut from AFV's kit. secure the end with a strap.. as in pics I found..

 Last minute thing, as I forgot my Stryker had no towbar. Reference from the WWP book & the net, measured, looked through my materials and found the appropriate size tube from evergreen's rod & tube assortment. Rest was made with .020 sheet and the handle with 5mm rod. Process took about an hour.
I'll clean it up a wee bit another day.
Going to secure on the right side with the disc & wingnut from AFV's kit. secure the end with a strap.. as in pics I found..

AngryDog

Joined: March 27, 2004
KitMaker: 1,114 posts
Armorama: 900 posts

Posted: Tuesday, March 23, 2010 - 05:22 AM UTC
Did some remainder scratch building.. reference from the WWP book..
Definately needed the stretcher

I noticed some planks of wood for whatever purpose....as well as..those metal v-bars attached.. (can't remember what they're called) Believe it's for fencing barb wire..


Could never remember what this is called..I know it's for hammering poles,ect into the ground.


1st attempt at the stowage belt/nets.. in real thin plastic sheet..sucked!

I tried again with tamiya masking tape,that didn't work either..
So it was back to lead sheet...come out ok.....will partially secure it over the gear ontop ..
Definately needed the stretcher

I noticed some planks of wood for whatever purpose....as well as..those metal v-bars attached.. (can't remember what they're called) Believe it's for fencing barb wire..


Could never remember what this is called..I know it's for hammering poles,ect into the ground.


1st attempt at the stowage belt/nets.. in real thin plastic sheet..sucked!

I tried again with tamiya masking tape,that didn't work either..
So it was back to lead sheet...come out ok.....will partially secure it over the gear ontop ..

 |


