Campaigns
Where Armorama group builds can be discussed, organized, and updates posted.
Campaign in the Pacific
GVoakes
Visit this Community
Manitoba, Canada
Joined: September 04, 2007
KitMaker: 193 posts
Armorama: 132 posts
Posted: Thursday, July 22, 2010 - 11:06 AM UTC

Quoted Text


So far the completion status

Close to completion;
Grant Voakes, CALLSIGN: GVoakes, to finish just pick one of the models submitted in the gallery and select the reference for it.


Thought I had done that...

OH well - my reference - 4th Division Type 3 Chi Nu waiting for the invasion of the Home Islands. One of my sources of inspiration on this build.

BobCard
Visit this Community
Florida, United States
Joined: August 09, 2006
KitMaker: 1,008 posts
Armorama: 847 posts
Posted: Thursday, July 22, 2010 - 04:38 PM UTC
Hi Grant,
You probably did but I just missed it. Perfect and nice to hear from you again.

So far the completion status
David Carlson CALLSIGN: TheDiggs, USS SAMUEL B. ROBERTS (DE 413)
Thomas F. Sweeney, CALLSIGN: tsweeney, Diorama Tarawa Marines at the wall
Sal CALLSIGN: ltb073, LVT 4 Saipan
Russ Callsign: russamotto, Margaret, Diorama Saipan and Hellcat, Pacific Operations
Michael Armbrister: Callsign; mopnglo, Colorado Diorama, Tarawa
Thomo Thomson, Callsign: thomokiwi, Type 97
Leo, Callsign: Rebilda, Bushmaster Diorama “Stuck”
Brian Bullock Callsign: bpunchy, LVT 4
Bob Card, Callsign: same, Guam Diorama
Grant Voakes, CALLSIGN: GVoakes, 4th Division Type 3 Chi Nu

44 enlisted

Thanks, hopeing to still see more completed,
Bob
mopnglo
Visit this Community
United States
Joined: January 07, 2006
KitMaker: 452 posts
Armorama: 271 posts
Posted: Thursday, July 22, 2010 - 05:51 PM UTC
Hey guys! This may seem a bit off topic, but I've been thinking about Marines lately and the Pacific Campaign seems like a good place for this. My father lives in Virginia Beach and works with a lot of active and retired Marines. I build my Colorado vignette for a friend who is a retire Marine. Even though the model was mediocre in my eyes, he really appreciated it. It meant a lot to me that he like it so much and has incorporated it into his "Marine shrine". Today, my dad told me a story about a Marine he's become close to who was paralyzed during a tour in Afghanistan. And, I started thinking about building a kit for him. I also wondered if anyone else builds models as a "thank you" for veterans. I know it really isn't much compared to the sacrifice our veterans have made, but it is a meaningful thank you. What do you all think? Is it something you do?
SGTJKJ
#041
Visit this Community
Kobenhavn, Denmark
Joined: July 20, 2006
KitMaker: 10,069 posts
Armorama: 4,677 posts
Posted: Thursday, July 22, 2010 - 11:56 PM UTC
Thanks for the info, Bob. Nice to see the pictures and know it was at Guam. Maybe that is why I have been unable to find any pictures on the net.

I have made a little more progress. The main assembly is done and the base coat on. Details painting and decals are next and then I have to figure out what kind of weathering will be needed for Guam. Maybe sand, or mud, or black sand.....
(Edit: looked up some pictures on the net and seems like Guam had a normal sandy soil. I will go for washes and pigments in sand colour and light earth tones.)

I will update with more pictures soon.


ppawlak1
Visit this Community
Victoria, Australia
Joined: March 14, 2006
KitMaker: 1,973 posts
Armorama: 1,843 posts
Posted: Friday, July 23, 2010 - 08:09 PM UTC
Hi Guys !

The Camo is on the LVT-4

The next step is a clear coat (Vallejo Satin Finish) before decals and weathering - that's when the fun starts

I'll use a couple of the Bison decals I have (US symbol for the sides), but I can't make "A13" with what I have, so I've ordered generic Archer transfers.

BTW: I bought those two weeks ago from a local hobby store but haven't got them yet

Any way here's a progress picture - lots of sand, dirt, muck, and a tiny bit of rust to come..


Cheers

Paul
ppawlak1
Visit this Community
Victoria, Australia
Joined: March 14, 2006
KitMaker: 1,973 posts
Armorama: 1,843 posts
Posted: Friday, July 23, 2010 - 10:45 PM UTC
Bob,

I'm not sure when those transfers will get here.

So I was thinking that perhaps I could make this LVT either "A12", or "A14" using the Bison Decals and trimming them ....

Would that be acceptable ?

Cheers

Paul
errains
#045
Visit this Community
South Carolina, United States
Joined: September 23, 2005
KitMaker: 362 posts
Armorama: 350 posts
Posted: Saturday, July 24, 2010 - 01:27 AM UTC
Hey Paul,

Nice looking LVT, love that camo job, the figures are outstanding.
I the one stand would work well for a future build I have planed, where did you get them?
SGTJKJ
#041
Visit this Community
Kobenhavn, Denmark
Joined: July 20, 2006
KitMaker: 10,069 posts
Armorama: 4,677 posts
Posted: Saturday, July 24, 2010 - 05:32 AM UTC
Nice progress on the LVT, Paul. That camouflage really sets it aside from other LVTs I have seen.

I have made a little more progress on my Sherman with the decals and an initial wash on.
More to follow soon.


ppawlak1
Visit this Community
Victoria, Australia
Joined: March 14, 2006
KitMaker: 1,973 posts
Armorama: 1,843 posts
Posted: Saturday, July 24, 2010 - 10:07 AM UTC

Quoted Text

Hey Paul,

Nice looking LVT, love that camo job, the figures are outstanding.
I the one stand would work well for a future build I have planed, where did you get them?


Thanks Eric, Jesper,

the figs are the "Warriors" LVT Crew with Hornet heads.

This project should be finished soon and then I can do some work on that Shermie

Cheers

Paul
ppawlak1
Visit this Community
Victoria, Australia
Joined: March 14, 2006
KitMaker: 1,973 posts
Armorama: 1,843 posts
Posted: Saturday, July 24, 2010 - 02:30 PM UTC
The Vallejo Clear Coat is on, and the "Bars and Stars" are on the sides of the LVT

I just need to sort out the Vehicle number before I do the first wash ...

Cheers

Paul
BobCard
Visit this Community
Florida, United States
Joined: August 09, 2006
KitMaker: 1,008 posts
Armorama: 847 posts
Posted: Monday, July 26, 2010 - 08:23 AM UTC
Michael,
An excellent idea for showing your appreciation to the Vets. I have done it a couple of times, one Vet even donated it to a museum. Highly recommend it and there is a lot of details they can shed on your project.

Jesper,
Excellent work, looking forward to seeing the weathering

Paul,
Looks a lot better the way you have the camo, more believable. Very possible on the numbering, I believe we found numbers on both sides so 12 should work nicely.

Thanks guys for posting,
Just 21 days remain,
Just seems to be getting busier each day.
Bob
ppawlak1
Visit this Community
Victoria, Australia
Joined: March 14, 2006
KitMaker: 1,973 posts
Armorama: 1,843 posts
Posted: Monday, July 26, 2010 - 08:35 AM UTC

Quoted Text


Looks a lot better the way you have the camo, more believable. Very possible on the numbering, I believe we found numbers on both sides so 12 should work nicely.

Thanks guys for posting,
Just 21 days remain,
Just seems to be getting busier each day.
Bob


Thanks very much Bob, "12" it is !!

I'll make up those decals tonight and seal them with clear coat. The machine is just waiting on those (it's sealed with Vellejo Satin clear), so it can be weathered

Not long now - the fun part is next !!

Cheers

Paul
tread_geek
Visit this Community
Ontario, Canada
Joined: March 23, 2008
KitMaker: 2,847 posts
Armorama: 2,667 posts
Posted: Monday, July 26, 2010 - 09:25 AM UTC
Paul P, nice looking LVT.

Jesper, so you ever sleep or eat? You sure built that Destroyer at Warp speed.

I finally had some time and am doing three things at once. The turret is pretty much done but still needs some more weathering.


I have one question though. I can't find any pictures of an M4A2 with the´searchlight on the turret. Should I leave it as is (looking like the glass was shot out) or paint the inside silver and add some Testors Window Maker to make it look like glass?

As I weather the turret I am applying decals using Bob's method. It's slow going as the decals are so small and I can't handle the chassis until the setting solution dries.


The tracks are base coated and I believe that I have the right number of links to look good. Also doing some detail painting when the situation allows. BTW Bob, I used your picture of the side of the Destroyer to position the stars and the name. The instructions has the name too far away from the star.

Cheers,
Jan
BobCard
Visit this Community
Florida, United States
Joined: August 09, 2006
KitMaker: 1,008 posts
Armorama: 847 posts
Posted: Monday, July 26, 2010 - 09:33 AM UTC
Jan,
Your work never fails to amaze me. That small with such great detail. I've learned to never beleive those instructions or art work, photos always work the best. Glad I could help, Great work,
Bob
tread_geek
Visit this Community
Ontario, Canada
Joined: March 23, 2008
KitMaker: 2,847 posts
Armorama: 2,667 posts
Posted: Monday, July 26, 2010 - 11:11 AM UTC
Thanks for the compliments, Bob. All it rally takes is patience and very fine tweezers. Speaking of patience, I think that I am seeing the light at the end of the tunnel. I got all the decals on and properly positioned according to the original photos. I have started on the weathering processes on the hull.


Hopefully with this picture you can see the fine detailing that Dragon did with this kit. Weld beads, cast texture on the turret and casting numbers on the bogies.


Cheers,
Jan
ppawlak1
Visit this Community
Victoria, Australia
Joined: March 14, 2006
KitMaker: 1,973 posts
Armorama: 1,843 posts
Posted: Monday, July 26, 2010 - 10:05 PM UTC
Thanks Jan !

Great work on the Shermie

Ok I've put the Vallejo Satin Clear coat on the Beast and added the decals (just need to put some clear on the Id numbers now).

The next step will be a wash tomorrow night, followed by weathering through "Oils" as the first step of a few different techniques on top of one another.

I'll also add some "chipping" and some "light" rust to the heavily used areas.

BTW: I was in a hurry to take a pic and knocked over one of my photographic light stands .... SMASH !!

One $35 globe later and a lot of broken glass the picture is a little dull (I've ordered a new globe now ) but you can at least see what the LVT looks like at the moment.

The colors are also a little darker (and better I think) after the clear coat

Here's an update.


Cheers

Paul
BobCard
Visit this Community
Florida, United States
Joined: August 09, 2006
KitMaker: 1,008 posts
Armorama: 847 posts
Posted: Thursday, July 29, 2010 - 03:31 AM UTC
Jan,
Thanks, I’ll have to open up the box of the one 1/48th scale M4 I do have in the stash and take a look. Those details are great for that small. What’s funny about that kit is that I also have the dozer attachment kit for it and a couple of additional extra parts and decals; I’d better go take that look. I don’t think you’ll convert me since I need plenty of magnification for 1/35 as it is.

Paul,
Looking forward to your final weathering, sorry to hear about the light stand, all you needed was some additional costs.

Thanks guys, 18 days left to the end of the Campaign,
Bob
ltb073
Visit this Community
New York, United States
Joined: March 08, 2010
KitMaker: 3,662 posts
Armorama: 3,078 posts
Posted: Thursday, July 29, 2010 - 05:27 AM UTC
Paul,
Great looking LVT, the colors look excellent. And as previously stated the figures are outstanding as well. looking forward to seeing the finished job.
BobCard
Visit this Community
Florida, United States
Joined: August 09, 2006
KitMaker: 1,008 posts
Armorama: 847 posts
Posted: Thursday, July 29, 2010 - 06:01 AM UTC
Bill C,
You sneaky little booger, saw your photos. Before I can count you in I need a post with a little explanation on your M4, when constructed and a reference. I saw the title just need you to identify.
Thanks,
Bob
ppawlak1
Visit this Community
Victoria, Australia
Joined: March 14, 2006
KitMaker: 1,973 posts
Armorama: 1,843 posts
Posted: Thursday, July 29, 2010 - 08:08 PM UTC

Quoted Text


Paul,
Looking forward to your final weathering, sorry to hear about the light stand, all you needed was some additional costs.

Thanks guys, 18 days left to the end of the Campaign,
Bob


Thanks Bob,

the seond wash will go on tonight before I start on streaking etc this weekend. I'll also need to add a few sandy deposits beneath the upper track runs...

I need to think about that

Cheers

Paul
SGTJKJ
#041
Visit this Community
Kobenhavn, Denmark
Joined: July 20, 2006
KitMaker: 10,069 posts
Armorama: 4,677 posts
Posted: Friday, July 30, 2010 - 05:03 AM UTC
Great work, Jan. Coming along very nicely. It will be interesting to compare the two builds in the end - especially the weathering. I am a little bit of a novice when it comes to PTO weathering.

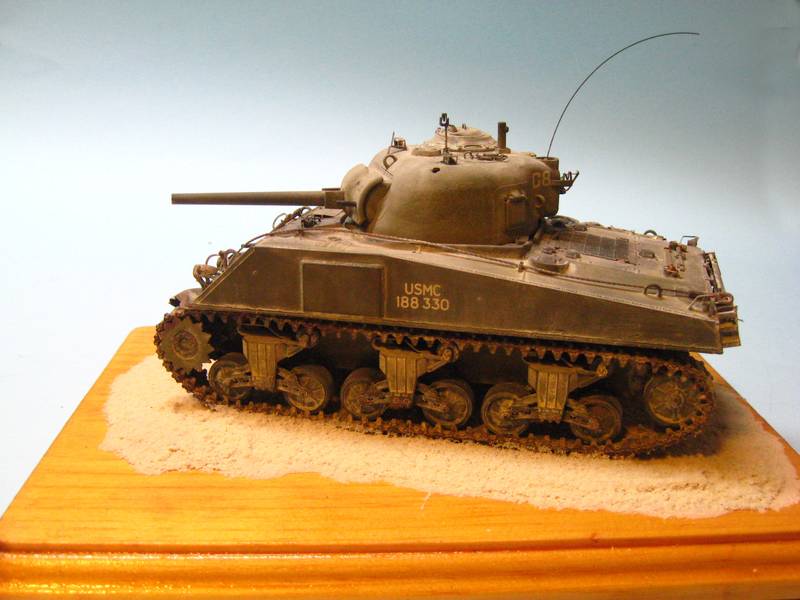
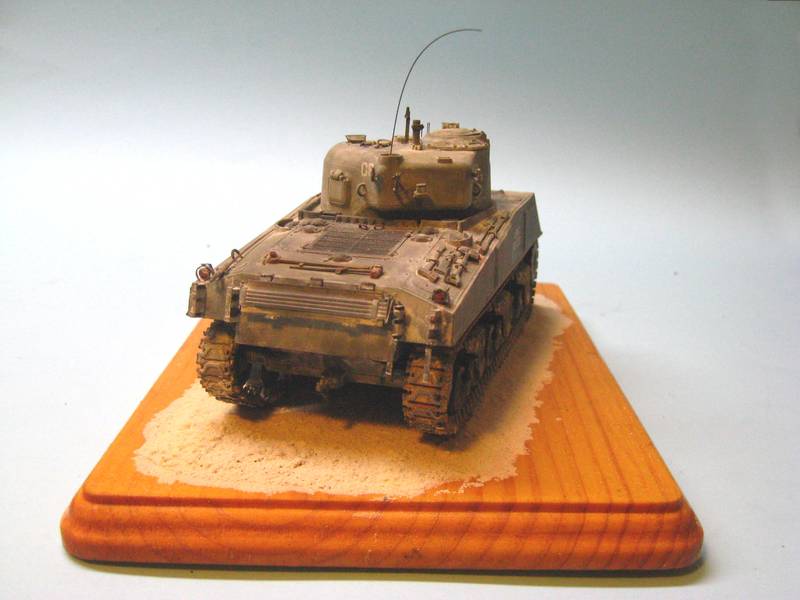
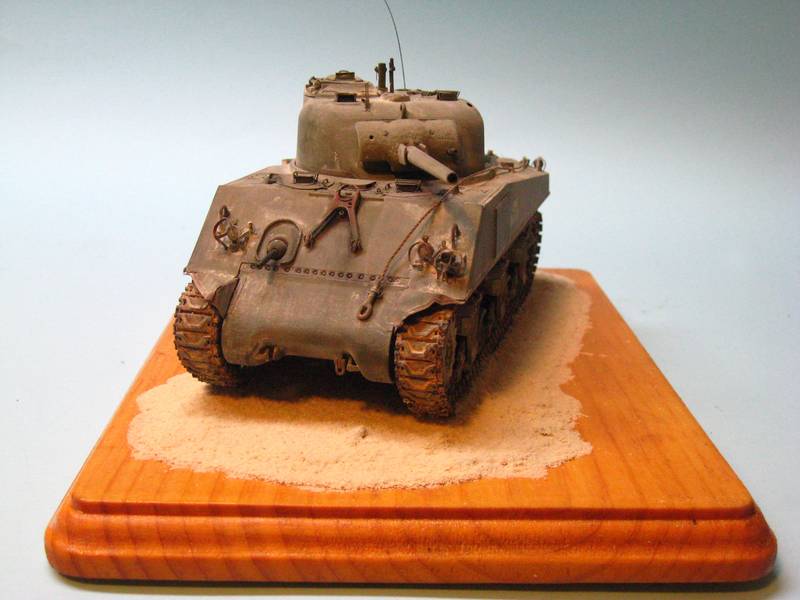
Here is my finished result for this campaign. It was an interesting build for me as I mostly do German WWII armour. I learned more about the history of this vehicle from the experts in this tread. Thanks for all the info - illustrates all the good things in campaigns.

I choose to do a sandy/light earth weathering of this vehicle, but also kept it to "light" weathering. No scratches, battle damage etc.

It is great to partipate in this well run campaign. Thanks for your leadership and organisation of theis campaign, Bob

Comments welcome


BobCard
Visit this Community
Florida, United States
Joined: August 09, 2006
KitMaker: 1,008 posts
Armorama: 847 posts
Posted: Friday, July 30, 2010 - 05:22 AM UTC
Jesper,
Outstanding, really like the weathering, nice and dusty. Congrats on completion of the Campaign and thank you for your comments.

It will be interesting to see both matched up. I actually signed up to the 1/48th Campaign just so I can give it a shot, don't think I'll do as good as Jan but it will be different.

Congrats on completing the Campaign,
Bob
bill_c
Staff MemberCampaigns Administrator
MODEL SHIPWRIGHTS
Visit this Community
New Jersey, United States
Joined: January 09, 2008
KitMaker: 10,553 posts
Armorama: 8,109 posts
Posted: Friday, July 30, 2010 - 05:24 AM UTC
Hi, everyone, I just joined the campaign and offer my Sherman on Saipan for consideration. It's 4th MAR DIV, my father's unit (though he was a grunt on the ground), and I based it on photos from the division's WW II book: no particular markings, ordinary paint job, plus the usual dust and sand. The photos didn't show any tanks with clutter, so this one is the same.


BobCard
Visit this Community
Florida, United States
Joined: August 09, 2006
KitMaker: 1,008 posts
Armorama: 847 posts
Posted: Friday, July 30, 2010 - 06:55 AM UTC
Thanks Bill,
Really like to see the dusty weathering, excellent job and congrats on finishing the Campaign,
Bob
Wolfsangel
Visit this Community
Texas, United States
Joined: January 15, 2010
KitMaker: 221 posts
Armorama: 91 posts
Posted: Friday, July 30, 2010 - 06:26 PM UTC
Hey guys, I'm chiming in a little late but I have been doing some homework. Wow, Jan, Jesper Amazing! Bob, Nice dio. I especially like the detail of the back tattoo and the "I'm happy to be alive" smile on the posing guy.

I decided to finally build a Tamiya Type 97 Late since I finally had the crew to go with it.

Off and on for about a month and here's where I'm at:

Still need to weather some more and finish up the tracks,

The figs are almost there although the faces are looking girlie instead of leathery.
Just have to mess with 'em a little more.
I built it to represent one of the 9th Tank Regiment on Saipan at dusk on the 16th of June '44 right before they moved into position for their disastrous night attack. Of course, I found a good picture of one with an improvised rack on the rear hull for carrying Infantry... right after I finished the camo. Still have to build that too. Par for the course!