Putrajaya, Malaysia
Joined: March 04, 2004
KitMaker: 2,511 posts
Armorama: 913 posts
Posted: Wednesday, April 06, 2011 - 08:30 PM UTC
Quoted Text
Zaidi, I did it on my OddBall Sherman where I took two links out of the each loop - the end with the holes.
I Shaped the end to fit correctly into the section with the pins (I shaved off the pins). Then a glued with a good quality CA (Super glue), let it sit for a day and then fit the tracks (after paint touch up).
You must be careful not to take too many segments out though.
The result looks good but .................. dry fit, dry fit, dry fit !!
Hope that helps mate 
Cheers
Paul
Paul,
thanks for the tips.. unfortunately, i already glued the tracks with cement... i will try figure something... probably will tie them with black thread plus CA and some mud and dust to cover it.... thanks once again... i didnt know sherman tracks were tight...
will update soon
The more i know, the less I understand!!!!
Victoria, Australia
Joined: March 14, 2006
KitMaker: 1,973 posts
Armorama: 1,843 posts
Posted: Wednesday, April 06, 2011 - 08:47 PM UTC
Quoted Text
Quoted Text
Zaidi, I did it on my OddBall Sherman where I took two links out of the each loop - the end with the holes.
I Shaped the end to fit correctly into the section with the pins (I shaved off the pins). Then a glued with a good quality CA (Super glue), let it sit for a day and then fit the tracks (after paint touch up).
You must be careful not to take too many segments out though.
The result looks good but .................. dry fit, dry fit, dry fit !!
Hope that helps mate 
Cheers
Paul
Paul,
thanks for the tips.. unfortunately, i already glued the tracks with cement... i will try figure something... probably will tie them with black thread plus CA and some mud and dust to cover it.... thanks once again... i didnt know sherman tracks were tight...
will update soon
You might be able to get them apart or cut them to suit - but it's up to you

Paul
OddBall: "It's a wasted trip baby. Nobody said nothing about locking horns with no Tigers"
KIlgore: " I love the smell of napalm in the morning. ...The smell, you know that gasoline smell, the whole hill. Smelled like... victory."
Ontario, Canada
Joined: March 23, 2008
KitMaker: 2,847 posts
Armorama: 2,667 posts
Posted: Monday, April 11, 2011 - 09:19 AM UTC
Greetings fellow Sherman-o-holics!

Finally managed to make some progress on my M4(105). Of course not before I had to reattach a few tiny pieces on the turret that were damaged during an unanticipated fall to the floor.

Thankfully a few left over parts from previous Sherman kits came in handy.
The upper and lower hull are not attached and neither is the row of bolts at the top of the transmission housing or the commanders hatch but all other kit parts are in place and secured. My first coat of paint ended up too dark and wiped out the pre-shading. The second attempt worked out but the pictures don't really show the shade variations as well. Anyway, here's where it stands .


Now on to the detail painting.

Cheers,
Jan


Pennsylvania, United States
Joined: May 17, 2006
KitMaker: 370 posts
Armorama: 368 posts
Posted: Monday, April 11, 2011 - 03:43 PM UTC
New Jersey, United States
Joined: November 02, 2009
KitMaker: 609 posts
Armorama: 433 posts
Posted: Monday, April 11, 2011 - 10:41 PM UTC
Tim - Your firefly looks great. The netting and foliage are well done and the tools have a great wood tone. I can understand the judges' concern about the track tension, but what else didn't they like?
Pennsylvania, United States
Joined: May 17, 2006
KitMaker: 370 posts
Armorama: 368 posts
Posted: Monday, April 11, 2011 - 11:29 PM UTC
Not quite sure, they closed the doors to the exhibition room as if they were electing a new Pope and no one was allowed in. They gave absolutely no feedback at all, good or bad. Thats why I will only attend AMPS from now on.
Victoria, Australia
Joined: March 14, 2006
KitMaker: 1,973 posts
Armorama: 1,843 posts
Posted: Wednesday, April 13, 2011 - 09:42 PM UTC
@ Jan - keep those pics coming - looking forward tot he next steps !!
@ Timothy - REALLY nice work on the Firefly ! Congrats on a lovely build. Please post pics in the Gallery for this Campaign also please

Cheers
Paul
OddBall: "It's a wasted trip baby. Nobody said nothing about locking horns with no Tigers"
KIlgore: " I love the smell of napalm in the morning. ...The smell, you know that gasoline smell, the whole hill. Smelled like... victory."
Pennsylvania, United States
Joined: May 17, 2006
KitMaker: 370 posts
Armorama: 368 posts
Posted: Thursday, April 14, 2011 - 12:32 AM UTC
Paul, thanks. Is the gallery accessed on the campaign page?
California, United States
Joined: December 06, 2004
KitMaker: 3,694 posts
Armorama: 2,693 posts
Posted: Thursday, April 14, 2011 - 06:19 AM UTC
Quoted Text
Paul, thanks. Is the gallery accessed on the campaign page?
It would be nice if there were entries on the campaign page for links to the thread and gallery but maybe in the future.
Here is a link to the Sherman gallery:
http://gallery.kitmaker.net/showgallery.php/cat/25735Utrecht, Netherlands
Joined: December 14, 2006
KitMaker: 2,679 posts
Armorama: 313 posts
Posted: Thursday, April 14, 2011 - 07:15 AM UTC
So I've added my entries.
the M4 Sherman 75 (wet

) and the M4A3E2
Martin
Pennsylvania, United States
Joined: May 17, 2006
KitMaker: 370 posts
Armorama: 368 posts
Posted: Thursday, April 14, 2011 - 11:01 AM UTC
OK, I have tried but I am not too bright. Do I have to upload pics to my kitmaker account then to the campaign, or can I upload from say Flickr? How do I delete pics from kitmaker? Lastly how do you load pics to the campaign. I said I wasnt to bright

California, United States
Joined: December 06, 2004
KitMaker: 3,694 posts
Armorama: 2,693 posts
Posted: Thursday, April 14, 2011 - 02:01 PM UTC
A lot of your questions will be answered by this thread:
For Those New to Armorama CampaignsPennsylvania, United States
Joined: May 17, 2006
KitMaker: 370 posts
Armorama: 368 posts
Posted: Friday, April 15, 2011 - 09:11 AM UTC
Gary, thanks for your help. Everything went just as you showed. My upload to the campaign gallery was a success.

Spain / España
Joined: November 18, 2004
KitMaker: 456 posts
Armorama: 333 posts
Posted: Monday, April 18, 2011 - 10:48 AM UTC
Hi guys,
I am building Tasca's British Sherman II for this campaign.
It has been a long time since I built any kit (at university and I ended in the year 2003).
I have built very little of it and will post photos shortly. I hope to get enough free time to finish it.
I was thinking of painting it with the pink camouflage included with the kit instructions. Does anyone has any photo of it or any interesting photos of camouflaged Sherman II's or M4A1 DV with early VVSS suspension?
I want photos in order to have a visual reference for the painting stage and also for the building (does that sherman, or any other with an interesting camouflage, had holes in the suspension arms or nuts or was without the hole, etc).
This is going to be a first timer for many things (photoetch and for painting because the fardest I've got with any kit was giving the base colour and the highlights with the AB (no washes, no filters, etc)).
I am pretty sure it's going to be a nice experience and I will learn quite a lot from this build.
Thanks in advance for your help,
Angel
Missouri, United States
Joined: July 01, 2006
KitMaker: 614 posts
Armorama: 601 posts
Posted: Wednesday, April 20, 2011 - 02:58 AM UTC
Angel,I answered your question about the wood and if there are any questions you know where to find me.
Tony lee the Mutt
Putrajaya, Malaysia
Joined: March 04, 2004
KitMaker: 2,511 posts
Armorama: 913 posts
Posted: Sunday, April 24, 2011 - 04:56 AM UTC
some small update.... sorry too busy with life and job
i cut 2 link of the tracks on each side...and attached the tracks.... i think it looks ok now....


consider the tracks business is done!
i repaint or retouch the excessive chipping...and dusting the body will tamiya buff..
tow cable and tools are glued in placed...need to touch up some more...
add a few jerry cans from an old stocks i had in hands...
tarp are resin stuff left over


will add rain streak and some more effects soon.... too busy with life and work..
TQ
Zaidi
The more i know, the less I understand!!!!
Victoria, Australia
Joined: March 14, 2006
KitMaker: 1,973 posts
Armorama: 1,843 posts
Posted: Monday, April 25, 2011 - 10:52 AM UTC
@ Angel - welcome to the Campaign

The Tasca kit you mention is very good

@ Zaidi - I like how you've improved the paint - well done. Your project is coming along nicely !! The tools should by dusty, but NOT rusty

Paul
OddBall: "It's a wasted trip baby. Nobody said nothing about locking horns with no Tigers"
KIlgore: " I love the smell of napalm in the morning. ...The smell, you know that gasoline smell, the whole hill. Smelled like... victory."
Ontario, Canada
Joined: March 23, 2008
KitMaker: 2,847 posts
Armorama: 2,667 posts
Posted: Wednesday, April 27, 2011 - 07:58 AM UTC
Some nice work and progress going on here.

I've been a little slow but the base coat(s) are pretty much on but a few areas need a bit up touching up. Hull top and bottom are now attached. I started on some of the detail painting but have stopped while I "experiment" a bit. I have a PE set of Wading Trunks for the Dragon M4(105) that I got with a previous kit. They scared the dickens out of me so I never considered ever making them. Madness took control and I made a start with all the bending and shaping.
The Sherman


Start of the rear wading trunk.


Honestly, I don't know if I have the skills to complete these but I'll see what happens.
Cheers,
Jan


Victoria, Australia
Joined: March 14, 2006
KitMaker: 1,973 posts
Armorama: 1,843 posts
Posted: Thursday, April 28, 2011 - 01:02 AM UTC
Jan it's great to see you tackle that PE ! Thank for posting !!

Paul
OddBall: "It's a wasted trip baby. Nobody said nothing about locking horns with no Tigers"
KIlgore: " I love the smell of napalm in the morning. ...The smell, you know that gasoline smell, the whole hill. Smelled like... victory."
Alberta, Canada
Joined: February 18, 2003
KitMaker: 1,728 posts
Armorama: 1,629 posts
Posted: Thursday, April 28, 2011 - 03:25 PM UTC
Builds are coming along nicely...just over 2 months left...I'm not sure if I'll get a second one done...maybe OOB? Ha!
Jan, who made that p.e. wading trunk set? Looks interesting.
Jim
"Fire all weapons and open a hailing frequency for my victory yodel" - Zapp Brannigan
New Jersey, United States
Joined: November 02, 2009
KitMaker: 609 posts
Armorama: 433 posts
Posted: Friday, April 29, 2011 - 11:28 AM UTC
Removed by original poster on 04/29/11 - 23:06:50 (GMT).
Christchurch, New Zealand
Joined: January 11, 2006
KitMaker: 438 posts
Armorama: 359 posts
Posted: Friday, April 29, 2011 - 12:03 PM UTC
Quoted Text
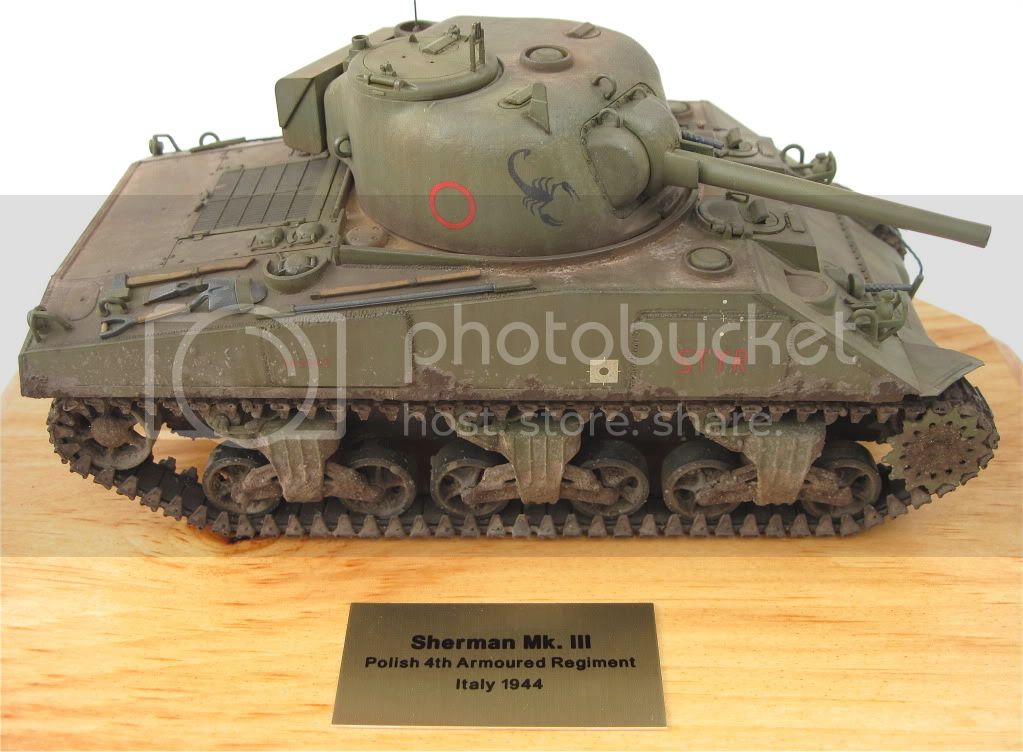
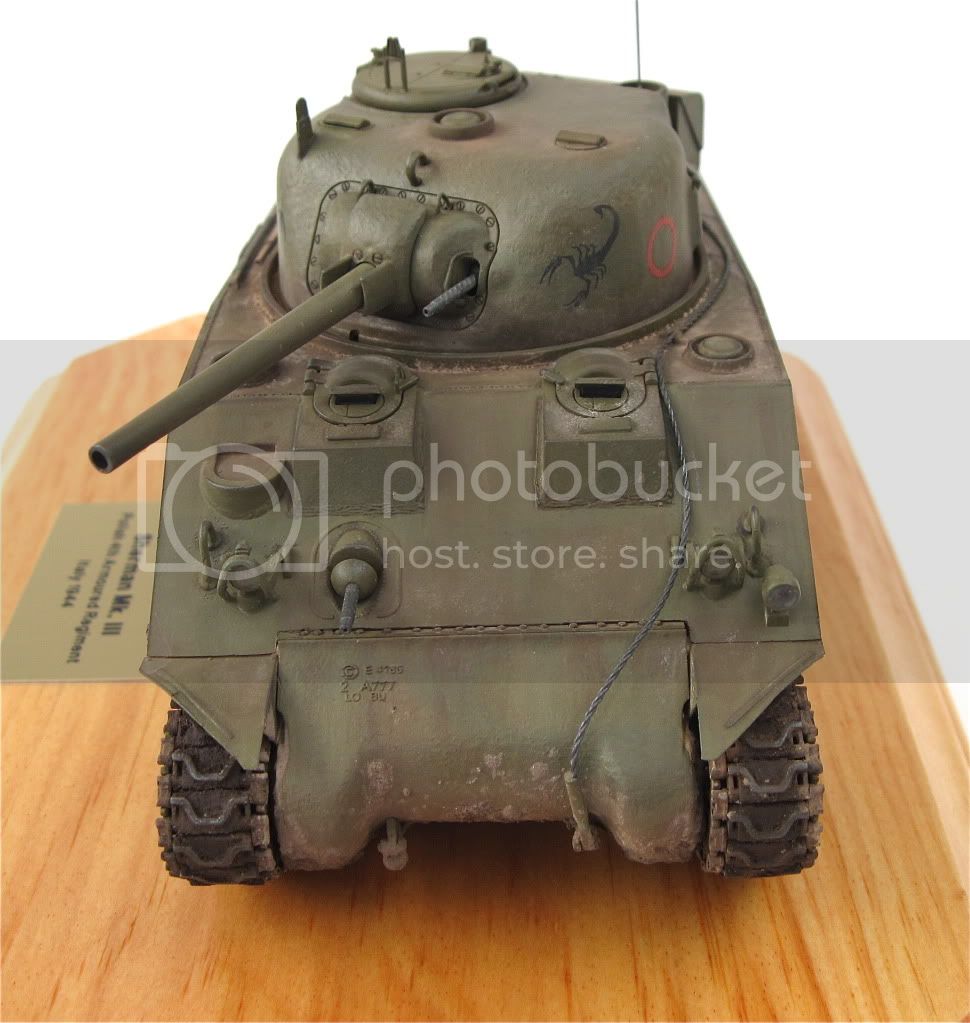
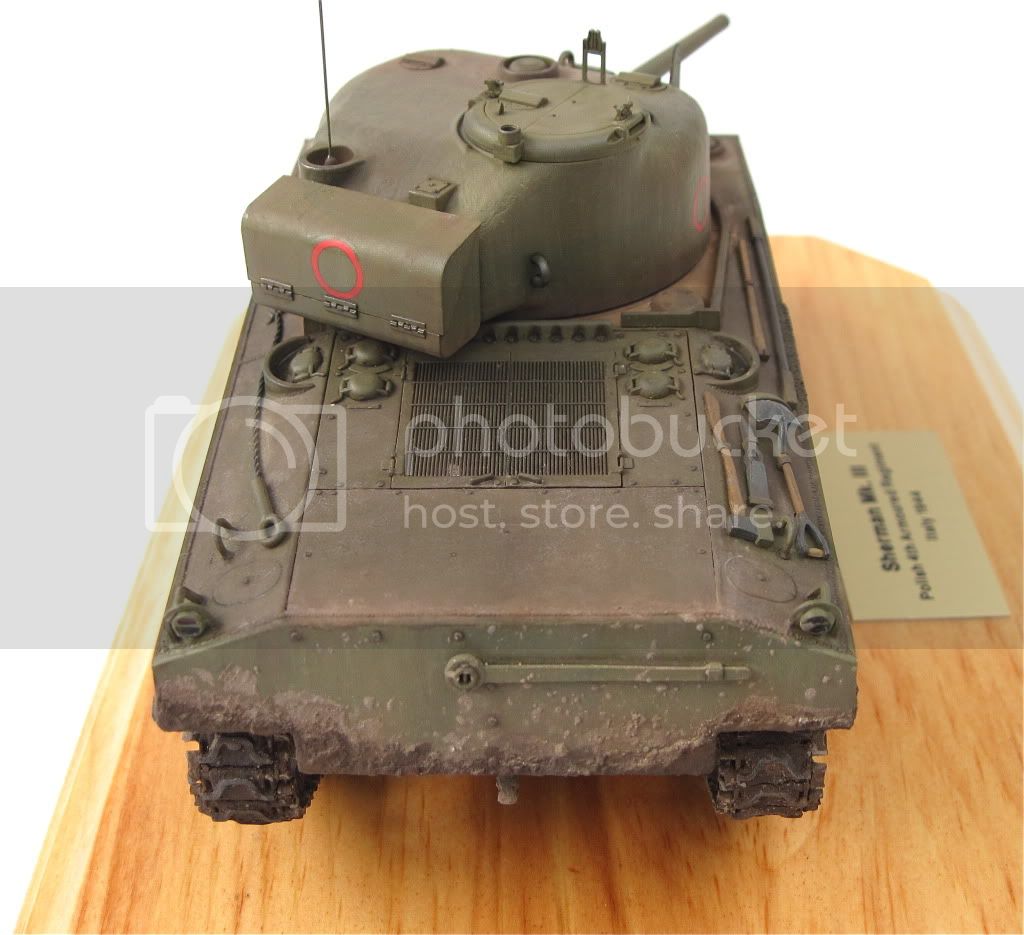
I'm calling this one 99% done. I'm going to let it sit for a few days and then come back and see whether I want to add or touch anything up.
To sum up, this is a Sherman Mk. III that served with the Polish 4th armoured regiment in Italy. I used Dragon's mid-production Sicily kit and added Bison Decals and Panda Plastics tracks. I have no idea whether it's faithful to the real vehicle, but this was more about the weathering for me. I wanted to push myself weathering-wise and I think I accomplished that.
This was my first Sherman and I made a number of mistakes - some due to my lack of knowledge of the Sherman, others due to Dragon's poor instructions - but I had a lot of fun anyway. I haven't been a fan of the Sherman in the past, but this build changed my mind. If nothing else, I have a lot more respect to Allied armor modelers who need to get tracks perfectly taut.
With all of that said, here are some final photos. Feedback would be appreciated - both on the weathering and the Sherman-specific mistakes I can correct for next time.

[/IMG]
Weathering looks excellent as does the kit overall. Awesome
Cheers
Thomo
On the Workbench
Verlinden 120mm Red Devil, Arnhem
Academy 1/35 "Honey"
Dragon 1/35 Tank Riders
NZ M5 Recce

#045
South Carolina, United States
Joined: September 23, 2005
KitMaker: 362 posts
Armorama: 350 posts
Posted: Sunday, May 01, 2011 - 12:02 AM UTC
Awesome Mk III Bill! Nice build and of course your finish and weathering is top notch. I especially like the wet mud with the dry edges. I was wondering if you could give us an overview or step-by-step on the weathering process you used.
Excellent Job!!


Eric Rains
Greenwood, SC, USA
barkingdigger
 Associate Editor
#013
England - East Anglia, United Kingdom
Joined: June 20, 2008
KitMaker: 3,981 posts
Armorama: 3,403 posts
Posted: Sunday, May 01, 2011 - 09:48 AM UTC
Bill, I second Eric's vote on your weathering! What did you use to texture the stuck-on mud?
My own Mk III has sat in a box long enough - I dug it out today and finished the soft stowage. If I can prime it tomorrow the painting can commence!
Tom
"Glue, or Glue Not - there is no Dry-Fit" - Yoda (original script from Return of the Jedi...)


