Thanks, John. Appreciate it.
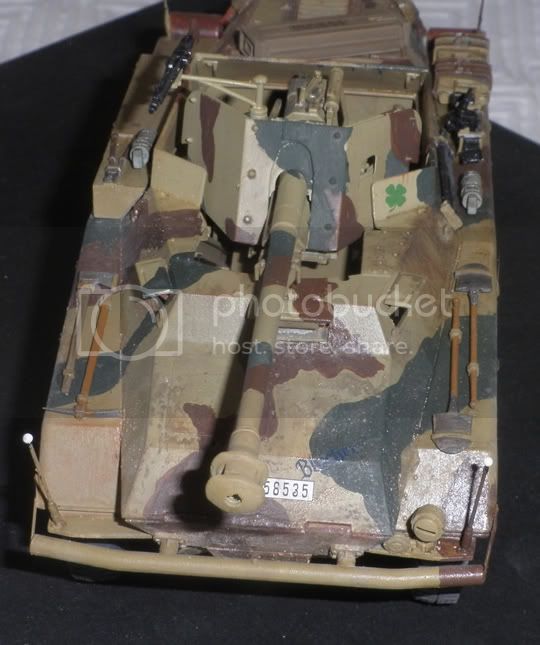
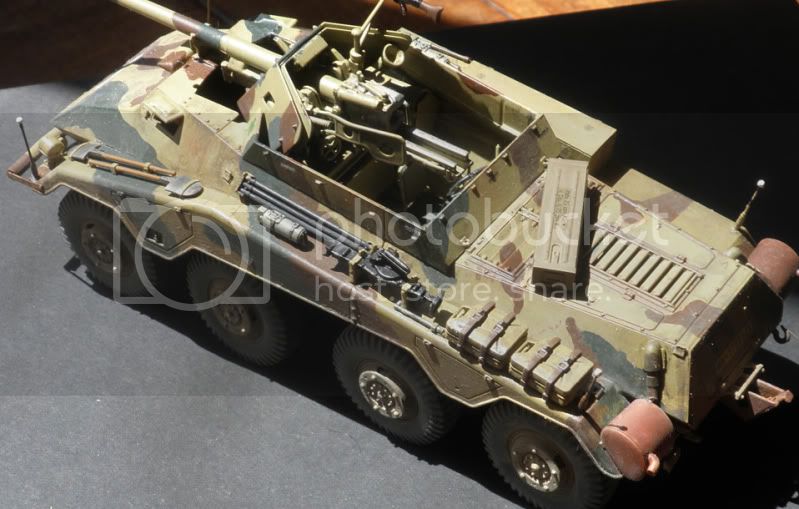
Unfortnently I have had to throw out or sell some models over the years. Especially since I have been moving around the world with my work. However, luckily some of the best have still survived the relocations.
Looking forward to see your 234 finished.
Campaigns
Where Armorama group builds can be discussed, organized, and updates posted.
Hosted by Darren Baker, Richard S.
Armored Wheeled Vehicles
Posted: Saturday, July 16, 2011 - 02:16 PM UTC
Posted: Saturday, July 16, 2011 - 06:18 PM UTC
My BTR-80 is now finished. It is in the markings and camouflage of a Ukranian BTR-80.
I built it with the snorkels raised and the rear propulsion port open as I was wanting to show just about to enter the water or just leaving the water. Fx. the sea shore or a river. Therefore I kept weathering pretty light as water would have washed away most grime although a river in itself can be dirty.
Overall I am very satisfied with the end result although the wheels never ended up being perfect. I am a little anoyed about that, but it still got a front place in the display cabinet
Comments and suggestions welcome
Nito74
Lisboa, Portugal
Joined: March 04, 2008
KitMaker: 5,386 posts
Armorama: 4,727 posts
Joined: March 04, 2008
KitMaker: 5,386 posts
Armorama: 4,727 posts
Posted: Sunday, July 17, 2011 - 04:05 AM UTC
Ok it's done !!
Some of the pics were taken with too much light , but here goes...
It's the Dragon kit, no other extras.
Painted with Tamyia acrylics, humbrol and Vallejo.
Some Mig filters & pigments and Mig wash too.
I tried for the first time the oil dot technique for creating some shadows and highlights.
Some of the pics were taken with too much light , but here goes...
It's the Dragon kit, no other extras.
Painted with Tamyia acrylics, humbrol and Vallejo.
Some Mig filters & pigments and Mig wash too.
I tried for the first time the oil dot technique for creating some shadows and highlights.
Sudzonic
Scotland, United Kingdom
Joined: December 07, 2007
KitMaker: 2,096 posts
Armorama: 1,983 posts
Joined: December 07, 2007
KitMaker: 2,096 posts
Armorama: 1,983 posts
Posted: Sunday, July 17, 2011 - 04:20 AM UTC
Nice work gent's,
Got some more work done on mine, gess I will need to steep it up a gear and get it finished?
zontar
Hawaii, United States
Joined: August 27, 2006
KitMaker: 1,646 posts
Armorama: 1,557 posts
Joined: August 27, 2006
KitMaker: 1,646 posts
Armorama: 1,557 posts
Posted: Sunday, July 17, 2011 - 12:31 PM UTC
Jesper: I really think you hit the mark with the camo and the weathering looks great. Congrats on finishing.
John: very nice all around. Congrats to you too.
Scott: being that it's Japanese, I'd almost keep it that clean. Will look good in the rest of your dio.
Happy Modelling, -zon
John: very nice all around. Congrats to you too.
Scott: being that it's Japanese, I'd almost keep it that clean. Will look good in the rest of your dio.
Happy Modelling, -zon
Nito74
Lisboa, Portugal
Joined: March 04, 2008
KitMaker: 5,386 posts
Armorama: 4,727 posts
Joined: March 04, 2008
KitMaker: 5,386 posts
Armorama: 4,727 posts
Posted: Sunday, July 17, 2011 - 02:31 PM UTC
It's looking good Scott !
Thanks Zon, it was a terrific kit , despite the instructions it was very fun it turned out ok.
zontar
Hawaii, United States
Joined: August 27, 2006
KitMaker: 1,646 posts
Armorama: 1,557 posts
Joined: August 27, 2006
KitMaker: 1,646 posts
Armorama: 1,557 posts
Posted: Monday, July 18, 2011 - 09:52 AM UTC
Aloha All:
I'm calling this one done even though it needs some more weathering and to blend the mud in better. As my vacation starts this week, I won't be able to complete the weathering before I go.
Tamiya's 1/48th Greyhound, out of the box:
Happy Modelling, -zon
I'm calling this one done even though it needs some more weathering and to blend the mud in better. As my vacation starts this week, I won't be able to complete the weathering before I go.
Tamiya's 1/48th Greyhound, out of the box:
Happy Modelling, -zon
17741907
Istanbul, Turkey / Türkçe
Joined: December 05, 2007
KitMaker: 953 posts
Armorama: 705 posts
Joined: December 05, 2007
KitMaker: 953 posts
Armorama: 705 posts
Posted: Monday, July 18, 2011 - 11:18 AM UTC
Looking good Zon...Well done mate....
Posted: Tuesday, July 19, 2011 - 02:01 AM UTC
Thanks for the comments on my BTR-80, guys. Appreciate it very much
Zon, very nice Greyhound. The shading of the armour panels came out very well. Did you preshade it or did you post shade with Tamiya smoke or similar?
Looking good so far, Scott. I agree with Zon. Keep the weathering light although I have seen some very dirty Japanese AFVs during exercises. Maybe just a few washes to pick out the details and some light dusting on the wheels?
zontar
Hawaii, United States
Joined: August 27, 2006
KitMaker: 1,646 posts
Armorama: 1,557 posts
Joined: August 27, 2006
KitMaker: 1,646 posts
Armorama: 1,557 posts
Posted: Tuesday, July 19, 2011 - 06:50 AM UTC
Hakan: Thanks for the comment! It was a fun build.
Jesper: Thanks! It was mostly pre-shading with flat black, although I also hit the inside corners of the panels with a post-wash of raw umber and lamp black, about 50:50 mix.
Happy Modelling, -zon
Jesper: Thanks! It was mostly pre-shading with flat black, although I also hit the inside corners of the panels with a post-wash of raw umber and lamp black, about 50:50 mix.
Happy Modelling, -zon
Sudzonic
Scotland, United Kingdom
Joined: December 07, 2007
KitMaker: 2,096 posts
Armorama: 1,983 posts
Joined: December 07, 2007
KitMaker: 2,096 posts
Armorama: 1,983 posts
Posted: Tuesday, July 19, 2011 - 07:20 AM UTC
Thanks for the feed back guys, all the JGSDF vehicles in Iraq I have seen are very clean looking. I will give it a lite wash with Mig gulf sand I am going to replace with AM items so I am not to worried how they look.
Anyway here is some pics for you all to enjoy.
By sudzonic at 2011-07-19
Anyway here is some pics for you all to enjoy.
By sudzonic at 2011-07-19
Posted: Thursday, July 21, 2011 - 02:53 AM UTC
Progress pics of my entry, ZSL-92 IFV.
Posted: Thursday, July 21, 2011 - 05:20 AM UTC
Nice job on the camouflage, Lap man.
Thanks for the tips, Zon. I think I will try that next time for my next overall green build. Very convincing effect.
Sudzonic
Scotland, United Kingdom
Joined: December 07, 2007
KitMaker: 2,096 posts
Armorama: 1,983 posts
Joined: December 07, 2007
KitMaker: 2,096 posts
Armorama: 1,983 posts
Posted: Thursday, July 21, 2011 - 07:58 AM UTC
dutchboyinohio
Ohio, United States
Joined: August 05, 2007
KitMaker: 258 posts
Armorama: 116 posts
Joined: August 05, 2007
KitMaker: 258 posts
Armorama: 116 posts
Posted: Thursday, July 21, 2011 - 07:40 PM UTC
Late to the party as always, here's my entry for the campaign: RPM's 1/72 Staghound. This will be mostly an out-of-the-box build:
Kit before I started earlier tonight (or better, early morning ):
Some initial progress. Two nicely detailed engines to which I may still add some detail like wiring once I check my references. I'm also considering modeling the vehicle with hatches open; it'd be a shame to hide such nice detail (and two hours worth of work...):
And the beginnings of the interior:
By the way, just perusing the thread, there are some really awesome builds posted already, definitely good motivation to get this Staghound done!
Mark
Tonyfr
Ohio, United States
Joined: June 12, 2009
KitMaker: 516 posts
Armorama: 391 posts
Joined: June 12, 2009
KitMaker: 516 posts
Armorama: 391 posts
Posted: Friday, July 22, 2011 - 07:24 AM UTC
Welcome aboard Mike. You have 9 days to get it complete!
Tony
Tony
tread_geek
Ontario, Canada
Joined: March 23, 2008
KitMaker: 2,847 posts
Armorama: 2,667 posts
Joined: March 23, 2008
KitMaker: 2,847 posts
Armorama: 2,667 posts
Posted: Sunday, July 24, 2011 - 07:10 AM UTC
I have been following this campaign for some time now and it was always my intention to enlist. Unfortunately domestic concerns have hampered my free time and I have procrastinated until today. Nothing like cutting myself short!
Unlike Mark, I actually started my build on the 5th of this month so that I am fairly well along. It is my intention to submit this build as a build review so it is well documented with images.
My subject is the Revell 1/72 TPz-1 A4 Fuchs. Here's the requisite starting pictures from the 5th.
While the kit lists 102 part numbers, some parts have as many as six similar pieces on the sprue. I estimate the total parts at around 170 or so. The first part of the instructions was to build the two sets of the water propulsion system. The penny in the picture should give an idea of the size we are dealing with.
I completed these pieces the first day and attached them to the lower hull.
After having built the Revell Luchs I mistakenly anticipated that this suspension would be a breeze as it had only six axles as opposed to the eight on the Luchs. I was about to experience a shock but first I felt that a minor embellishment to the build would be worth while. As there is a clear windshield one can see into the interior. After looking into it with the hull pieces dry fitted together this proved correct. Therefore, I decided to scratch together at least a rudimentary interior from plastic sheet and odds and ends.
While parts of the interior were drying I started to assemble the rear most axle. It was at this point that I saw that this suspension would be even worse than the Luchs with all the separate tiny pieces. Most of it must be assembled off the vehicle and then and then you have to get a half dozen pieces to line up in different locations at almost the same time.
I was in for a greater shock when I started to assemble the front axles. Revell gives you the option of assembling them with the wheels in a turned position so the ends of the axles must remain moveable until final assembly onto their mounting arms.
As an example of the complexity of this middle axle, the axle itself is made up of 12 parts, the steering linkage is another 7 and there are four support arms (springs and shock absorbers).
The entire process to this point has taken the free time over almost two weeks. With barely a week left, I hope that the rest will go smoother. Questions and comments welcome.
Cheers,
Jan
Herchealer
Indiana, United States
Joined: July 31, 2003
KitMaker: 1,523 posts
Armorama: 710 posts
Joined: July 31, 2003
KitMaker: 1,523 posts
Armorama: 710 posts
Posted: Sunday, July 24, 2011 - 08:00 AM UTC
Here is my WIP hopefully I can make it by the deadline. I think i will be OK since I have Leave scheduled all of next week!.
Well let me know what you think so far
Herky
Well let me know what you think so far
Herky
Posted: Sunday, July 24, 2011 - 08:12 AM UTC
Nice progress, guys.
herky, how did you make the red anit slip surfaces?
Herchealer
Indiana, United States
Joined: July 31, 2003
KitMaker: 1,523 posts
Armorama: 710 posts
Joined: July 31, 2003
KitMaker: 1,523 posts
Armorama: 710 posts
Posted: Sunday, July 24, 2011 - 10:53 AM UTC
The Non-slip surface is just simply Rustoleum TERRA COTTA straight from the can. I used Elmer's white glue to cover up what i didnt want painted. Peels off easy and is alot cheaper than the Liquid mask stuff.
HTH,
Herky
HTH,
Herky
corsair924
New Hampshire, United States
Joined: August 11, 2008
KitMaker: 403 posts
Armorama: 322 posts
Joined: August 11, 2008
KitMaker: 403 posts
Armorama: 322 posts
Posted: Sunday, July 24, 2011 - 01:50 PM UTC
Yeah I saw that posting too. Too bad Home Depot doesn't stock Terracotta anymore, course on can should be a lifetime supply.
Herchealer
Indiana, United States
Joined: July 31, 2003
KitMaker: 1,523 posts
Armorama: 710 posts
Joined: July 31, 2003
KitMaker: 1,523 posts
Armorama: 710 posts
Posted: Sunday, July 24, 2011 - 02:10 PM UTC
Walmart should have it though. I get mine at Lowe's. And yes I have been using the same can for quite some time now.
corsair924
New Hampshire, United States
Joined: August 11, 2008
KitMaker: 403 posts
Armorama: 322 posts
Joined: August 11, 2008
KitMaker: 403 posts
Armorama: 322 posts
Posted: Sunday, July 24, 2011 - 02:13 PM UTC
stryker in terracotta
corsair924
New Hampshire, United States
Joined: August 11, 2008
KitMaker: 403 posts
Armorama: 322 posts
Joined: August 11, 2008
KitMaker: 403 posts
Armorama: 322 posts
Posted: Sunday, July 24, 2011 - 02:22 PM UTC
corsair924
New Hampshire, United States
Joined: August 11, 2008
KitMaker: 403 posts
Armorama: 322 posts
Joined: August 11, 2008
KitMaker: 403 posts
Armorama: 322 posts
Posted: Sunday, July 24, 2011 - 02:54 PM UTC
stryker in the tape
and after
and in my homemade painting box