Slovakia
Joined: October 15, 2010
KitMaker: 825 posts
Armorama: 246 posts
Posted: Saturday, April 09, 2011 - 11:50 PM UTC
Istanbul, Turkey / Türkçe
Joined: December 05, 2007
KitMaker: 953 posts
Armorama: 705 posts
Posted: Sunday, April 10, 2011 - 11:39 AM UTC
Great work Naseby...Well done.....

Missouri, United States
Joined: November 24, 2008
KitMaker: 93 posts
Armorama: 81 posts
Posted: Thursday, April 14, 2011 - 07:42 AM UTC
Texas, United States
Joined: February 22, 2008
KitMaker: 5,026 posts
Armorama: 1,604 posts
Posted: Thursday, April 14, 2011 - 08:34 AM UTC
@ Warren: what color did you use on the Dingo?
@ Tim: are your tow cables large heavy duty thread, and so how did you get them to look so stiff. I am trying to find some for my KVII.
@ Naseby: what color did uou paint the Churchill with?
Bob
If it aint broke dont fix it.
South Australia, Australia
Joined: August 14, 2007
KitMaker: 5,926 posts
Armorama: 712 posts
Posted: Thursday, April 14, 2011 - 08:35 AM UTC
Very nice work Tim and Naseby..

You may be right, I may be crazy.
South Australia, Australia
Joined: August 14, 2007
KitMaker: 5,926 posts
Armorama: 712 posts
Posted: Thursday, April 14, 2011 - 08:44 AM UTC
Hi Bob.
I used Gunze Aqueous H80. Is called Khaki Green I think. I use it one much of my Briddish Armour. I was going to use a darker green that was used on many later british AFVs, but this being an early war vehicle I used the lighter colour.
The weathering is all MIG Pigments. Straight on the matt finished AFV and looks great.. to my eyes anyway!

Cheers
You may be right, I may be crazy.
Missouri, United States
Joined: November 24, 2008
KitMaker: 93 posts
Armorama: 81 posts
Posted: Thursday, April 14, 2011 - 11:35 AM UTC
I tow cables are the thread that came with the kit. I painted them Model Master Jet Exhaust color and they got somewhat stiff from the paint.
Slovakia
Joined: October 15, 2010
KitMaker: 825 posts
Armorama: 246 posts
Posted: Saturday, April 16, 2011 - 04:28 AM UTC
Good work on the Cromwell Tim, nothing is overdone, nice colour and finish.
@ Bob: I used Tamiya XF-26 Deep Green for the whole tank. Shadows are amde with black and yellow.
Nordjylland, Denmark
Joined: January 30, 2006
KitMaker: 613 posts
Armorama: 508 posts
Posted: Saturday, April 16, 2011 - 10:36 PM UTC
When i noticed this campaign I decided to have a go at a project I’ve had stashed for some time now. I have a shameful history of unfulfilled entries to campaign however, so I’ve been waiting to see if I would actually complete one before making my entry.
I’ve now come well into the project and therefor fell confident that I’ll actually come through.
My entry is a Chieftain Mk10 from the Berlin Brigade in its famous urban camouflage scheme as depicted in “British Infantry Brigade Berlin” (Tankograd Publishing 2005) p24-25 . I've noticed that I'm not the only one to do so; AndyMcHun is doing on too. But I hope that doesn't matter? I use Tamiya’s 35068 Chieftain as a base and Accurate Amour’s C026 Chieftain Mk-10 kit for the conversion. I’ve always loved the Chieftain and feel that the urban scheme is a challenge I can’t resist (though I’ll probably hate by the end). So far the build is almost out of the boxes. I’ve painted the running gear and tracks before I assembled the rest of the tank as they’ll later be converted behind plates. I opted to use Tamiya’s baskets instead of AA’s as I like to add my own storage instead.


England - East Anglia, United Kingdom
Joined: August 12, 2005
KitMaker: 14,499 posts
Armorama: 11,675 posts
Posted: Saturday, April 16, 2011 - 11:20 PM UTC
Hi folks,
apologies for not being around.
Sal - Nice work on the on the Ding. Are you going to blacken,/burn the ground around the rear of the vehicle?
Nasby, The Churchill Crock looks great, nice presentation too.
Tim, great work on the Cromwell.
Kenneth off to a good start.
Darren, Looking good.
Excellent looking builds folks.
Al


'Action this Day'
Winston Spencer Churchill
Nordjylland, Denmark
Joined: January 30, 2006
KitMaker: 613 posts
Armorama: 508 posts
Posted: Sunday, April 17, 2011 - 12:54 AM UTC
I hope someone can help me with this? Please!

As I mentioned I intend to make the rear turret baskets open. I have realized that the left one is bigger for the Mk10 than the one supplied with Tamiya’s kit. I therefore have to make one from scratch. The one supplied with Accurate Amour seems to have a solid bottom, whereas the one from Tamiya has a “gittery” one. Which one is correct?

Scotland, United Kingdom
Joined: December 07, 2007
KitMaker: 2,096 posts
Armorama: 1,983 posts
Posted: Friday, April 22, 2011 - 03:46 AM UTC
Hay gang thought better update you all on my build, I am going for a used look so I have painted some of the armour panels in a sand color to look like they ave been replaced.

stay tuned for more..
CUIDICH 'N RIGH
life is a river, it always runs.
Scotland, United Kingdom
Joined: December 07, 2007
KitMaker: 2,096 posts
Armorama: 1,983 posts
Posted: Friday, April 22, 2011 - 09:13 AM UTC
A better pic.

CUIDICH 'N RIGH
life is a river, it always runs.
Washington, United States
Joined: September 02, 2009
KitMaker: 227 posts
Armorama: 141 posts
Posted: Tuesday, April 26, 2011 - 07:42 AM UTC
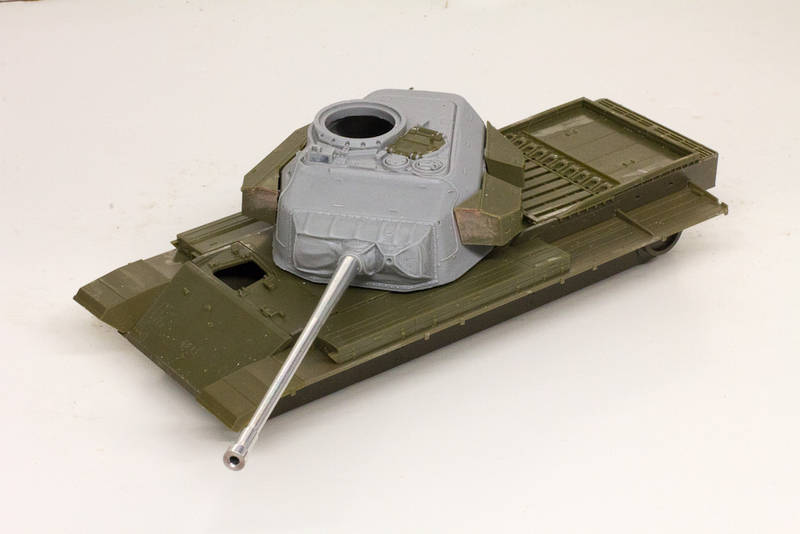
I decided to build a Korean War Centurion MK3 using the AFV Club MK5 and LionMarc's conversion turret.
LionMarc's turret is a real nice casting, the various parts from the AFV Club kit, such as the hatches and metal barrel fitted with the minimum of fuss.
I now have the pain of putting together the AFV club individual track links. These look great however my finger tips are hurting after putting together a mere 50 links and these do not want to stay together. Anyone got any good tips ?
Ian Clasper
Nordjylland, Denmark
Joined: January 30, 2006
KitMaker: 613 posts
Armorama: 508 posts
Posted: Tuesday, April 26, 2011 - 07:59 AM UTC
About the tracks; I cut the pins off mine and glued them on like they were none-workable tracks.
I would like to point out another thing though. As far as I know Korean war Centurion used the top opened stowage boxes on the hull, not the side opened as supplied in AFV club’s kit

California, United States
Joined: December 06, 2004
KitMaker: 3,694 posts
Armorama: 2,693 posts
Posted: Tuesday, April 26, 2011 - 11:55 AM UTC
Some people use diluted white glue or MicroLiquitape to keep track pins/connectors in place but keep them flexible. I have some Liquitape coming to try that on the AFV Club T16 tracks I've been trying to build.

#152
Texas, United States
Joined: December 07, 2002
KitMaker: 487 posts
Armorama: 441 posts
Posted: Tuesday, April 26, 2011 - 01:25 PM UTC
Here are some shots of my Cromwell.
I used fruil tracks and some eduard PE (not much)
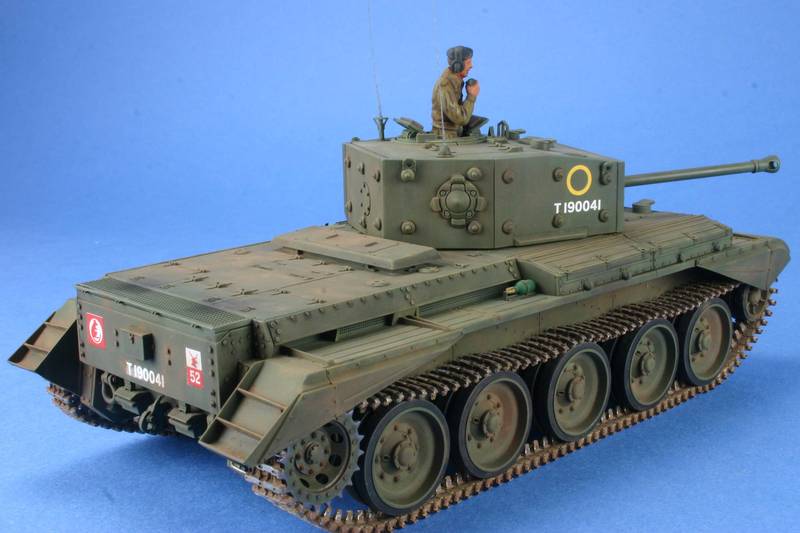
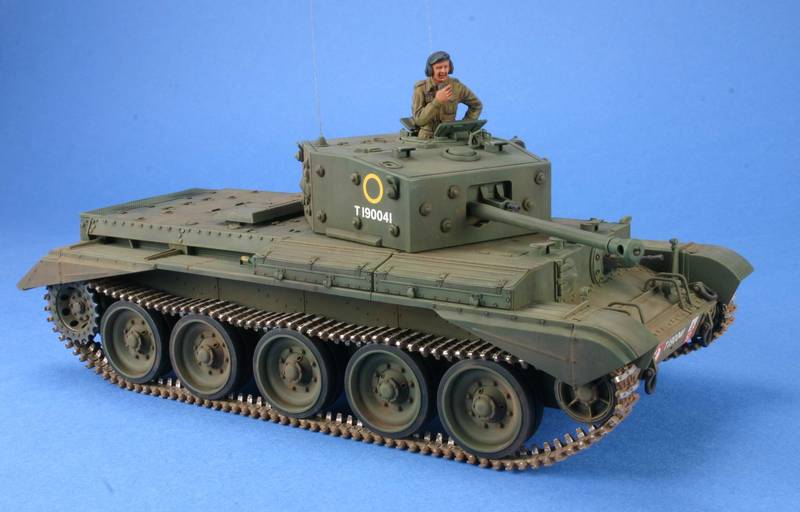
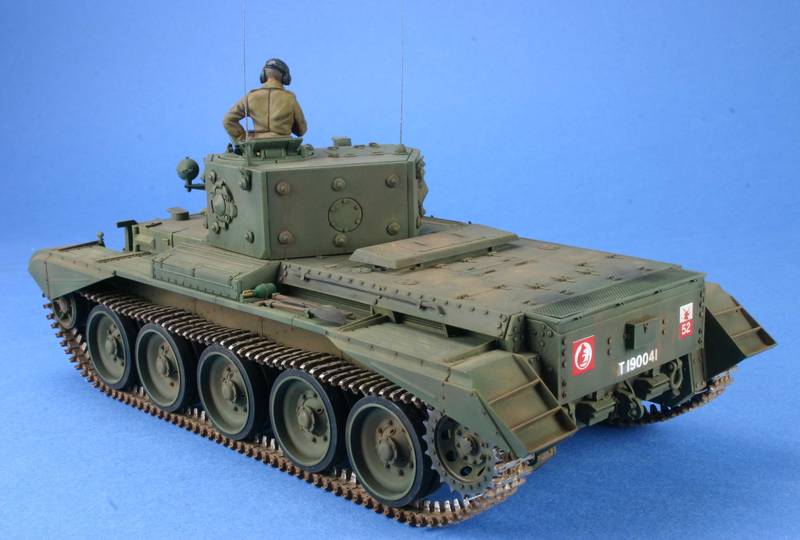
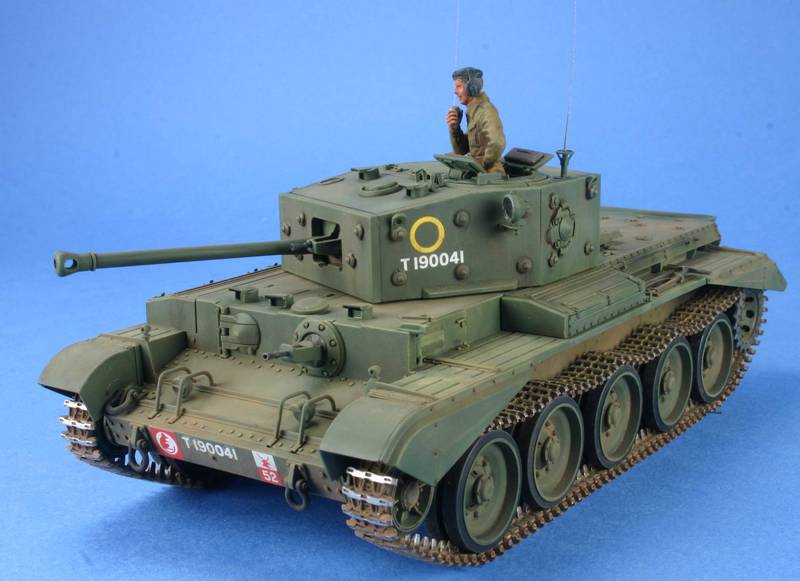
When I was taking these photos I noticed that I still had a long track pin installed instead of the short one. That would have hurt during the show on Saturday.
Tom
Long time modeller. Starting when I was a teenager, then I found out about girls and college and work and kids. But now that I have one girl, no school, no work and the kids are grown, I'm back to full time modelling. My prime area of interest is armor, b
Washington, United States
Joined: September 02, 2009
KitMaker: 227 posts
Armorama: 141 posts
Posted: Tuesday, April 26, 2011 - 05:08 PM UTC
Quoted Text
About the tracks; I cut the pins off mine and glued them on like they were none-workable tracks.
I would like to point out another thing though. As far as I know Korean war Centurion used the top opened stowage boxes on the hull, not the side opened as supplied in AFV club’s kit

I compared the side bins that I mounted from the kit with the photo of "Columbo" in Concord's Tank Warfare in Korea and they match, the kit parts look right, and feature piano hinges along the top and latches on the side., everything looks in the right place for top opening stowage !
New Jersey, United States
Joined: November 02, 2009
KitMaker: 609 posts
Armorama: 433 posts
Posted: Wednesday, April 27, 2011 - 01:57 AM UTC
Tom - Really nice job with your Cromwell ... the tracks look perfect, the weathering is restrained, and the markings give it a bit of color. I have to wonder, though, didn't the Brits understand the importance of sloped armor by the time the Cromwell entered service? There isn't a curve to be found on that turret.

#152
Texas, United States
Joined: December 07, 2002
KitMaker: 487 posts
Armorama: 441 posts
Posted: Wednesday, April 27, 2011 - 02:31 AM UTC
Quoted Text
Tom - Really nice job with your Cromwell ... the tracks look perfect, the weathering is restrained, and the markings give it a bit of color. I have to wonder, though, didn't the Brits understand the importance of sloped armor by the time the Cromwell entered service? There isn't a curve to be found on that turret.
Thanks for the complement. The British may not have gotten to sloped armor, but they knew how to add 2" of bolt on armor.
Speaking of bolts, I had purchased some brass after market bolts with the intention of replacing the kit bolts. However, upon closer inspection the kit bolts had weld marks to keep the bolts from coming loose. These marks were very subtle and I did not want to go to the extra effort removing the kit bolts, mounting the brass bolts and them recreate the weld beads. Sometimes the kit is better than the aftermarket stuff.
Regards,
Tom
Long time modeller. Starting when I was a teenager, then I found out about girls and college and work and kids. But now that I have one girl, no school, no work and the kids are grown, I'm back to full time modelling. My prime area of interest is armor, b
Missouri, United States
Joined: November 24, 2008
KitMaker: 93 posts
Armorama: 81 posts
Posted: Wednesday, April 27, 2011 - 03:27 AM UTC
Tom- Great looking Cromwell.
How did you get that dirty, dusty look? Look at mine a few pages back, it really needs some dust on it.

#152
Texas, United States
Joined: December 07, 2002
KitMaker: 487 posts
Armorama: 441 posts
Posted: Wednesday, April 27, 2011 - 03:51 AM UTC
Quoted Text
Tom- Great looking Cromwell.
How did you get that dirty, dusty look? Look at mine a few pages back, it really needs some dust on it.
Tim,
I hope you and your family are okay. The news reports from Missouri show great trouble.
The dirty/dusty look is a combination of the application of pigments (i use MIG) and an overall airbrush of a Tamiya Flat earth and flat black to make a grimy color. This mixture is airbrushed from the bottom up so there is more in track areas and less the higher up you go. The fruil tracks were painted a trackish color and then a random application of the pigments then set with a thinner.
The faces were then touched with a sanding stick and the metal shines through. I used an artist pencil to depict wear on the guide teeth and where the road wheels would touch the inside face of the tracks,
Hope this helps.
Tom
Long time modeller. Starting when I was a teenager, then I found out about girls and college and work and kids. But now that I have one girl, no school, no work and the kids are grown, I'm back to full time modelling. My prime area of interest is armor, b
England - North East, United Kingdom
Joined: October 22, 2007
KitMaker: 971 posts
Armorama: 280 posts
Posted: Thursday, April 28, 2011 - 04:06 AM UTC
Gent,s been following the thread from the start some fantastic stuff getting done, Have now got caught up with my builds so can start on my own for this.While enjoying the sun in the garden have started on the re-boxed Italieri now Tamiya with figures and Legends stowage set for the Staghound. Will be doing 7th armour in Normandy with small base

Washington, United States
Joined: September 02, 2009
KitMaker: 227 posts
Armorama: 141 posts
Posted: Thursday, April 28, 2011 - 07:26 AM UTC
Quoted Text
I would like to point out another thing though. As far as I know Korean war Centurion used the top opened stowage boxes on the hull, not the side opened as supplied in AFV club’s kit

Apologies, I read read Hull Stowage and my Brain ran away thinking Turret Storage !
Anyone got any details of the Hull Storage Boxes used on the MK3, I am not too late in the build to make corrections !
Ian
England - North West, United Kingdom
Joined: July 18, 2010
KitMaker: 611 posts
Armorama: 584 posts
Posted: Saturday, April 30, 2011 - 06:26 AM UTC
Tom that cromwell looks fantastic, that dust looks great.
Kieth welcome to the campaign. good luck with the build.
stan


