Campaigns
Where Armorama group builds can be discussed, organized, and updates posted.
Braille Battlefield
weathering_one
Visit this Community
Ontario, Canada
Joined: April 04, 2009
KitMaker: 458 posts
Armorama: 456 posts
Posted: Wednesday, November 03, 2010 - 06:55 AM UTC
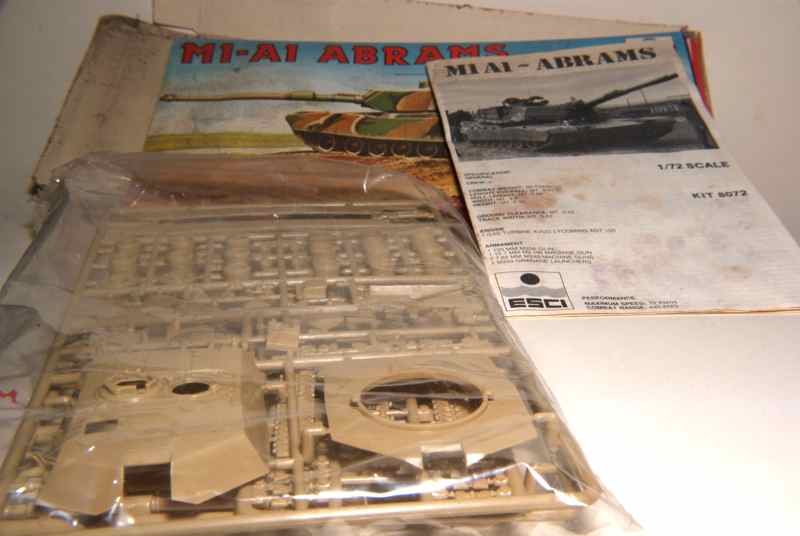
Greetings all. I finally broke down and joined this one. I didn't have too much lying around but due to a little accident in the basement, the choice was made for me. I picked up an old ESCI M1A1 Abrams a while back from the sale bin. Due to water damage the box was all but destroyed but the instructions are dirty but readable. Here's the required photo.


The kit doesn't look too bad and might be easier than the Matchbox Challenger. The only thing that I don't like is that the road wheels are one big wide wheel instead of two separate ones.BTW, I also have another partially built Challenger but I might do that later.

Regards,
AJ
madmax5510
Visit this Community
Hunedoara, Romania
Joined: May 06, 2008
KitMaker: 354 posts
Armorama: 343 posts
Posted: Wednesday, November 03, 2010 - 08:03 AM UTC
So,is beginn...
I'm glad to see so many participants,it seems that will be another great braille campaign.
AJB finally...i'm very glad to see you here!

Guys, d'ont wait for me ...i follow you soon.
SGTJKJ
#041
Visit this Community
Kobenhavn, Denmark
Joined: July 20, 2006
KitMaker: 10,069 posts
Armorama: 4,677 posts
Posted: Wednesday, November 03, 2010 - 08:40 PM UTC
Nice progress on the StuG, Jan. The ring and periscopes looks nice - especially considering the scale. Looking forward to see more.

AJB, I remember this kit from my childhood. as I recall it is actually a pretty nice kit, but I might be wrong as standards were a little lower at that time. It will be fun to follow your build.

I will upload sprue shots of my Jagdpanther soon.
PanzerAlexander
Visit this Community
Attica, Greece / Ελλάδα
Joined: February 17, 2010
KitMaker: 625 posts
Armorama: 608 posts
Posted: Wednesday, November 03, 2010 - 11:43 PM UTC
Here is my contribution to the campaign.


Cheers

Sudzonic
Visit this Community
Scotland, United Kingdom
Joined: December 07, 2007
KitMaker: 2,096 posts
Armorama: 1,983 posts
Posted: Thursday, November 04, 2010 - 04:09 AM UTC
Hay gang here is where I am at so far.


Next I need to figure out how to tackle the TUSK up grades on the turret
spacewolfdad
Visit this Community
England - West Midlands, United Kingdom
Joined: May 23, 2010
KitMaker: 642 posts
Armorama: 593 posts
Posted: Thursday, November 04, 2010 - 06:06 AM UTC
Hi Folks,

I have made a start on the Esci Wespe, it had the least to do to finish it! I cleaned it up a bit more and thinned down the edges of the superstructure armour to get a more scale appearance. I have added an exhaust and some tools, then just for interest a helmet hanging on the edge of the fighting compartment.

I then primed it this morning and will airbrush it tomorrow when the primer has cured.

The Wespe, Opel Blitz and Jagdpanzer IV are for my wargames army and are not over detailed. The 'from new' build will be a different matter. Here are some photos of the progress so far:


That's it for now, post again soon.

All the best,

Paul
weathering_one
Visit this Community
Ontario, Canada
Joined: April 04, 2009
KitMaker: 458 posts
Armorama: 456 posts
Posted: Thursday, November 04, 2010 - 07:56 AM UTC
@madmax5510 - thanks for the welcome Dani. I wasn't sure if I wanted to join just yet but...

@SGTJKJ - yes, the kit looks quite nice. The detail seems okay for it's age.

Anyway, I got started on the suspension. Those huge one piece main wheels really annoyed me. I know the skirt would hide some of them but after trying it, it just wasn't enough. On someone's suggestion I got a razor saw and tried to cut a groove down the centre. Due to the way the wheels are moulded I actually ended up cutting all the way through the thing. Glue in a shim and glue the two halves back together. But with fourteen wheels...

I figured that I'd just do or cut the groove in the first wheel front and back. That didn't look right with the wheel next to it so I did a couple of more taking care not to cut too deep.
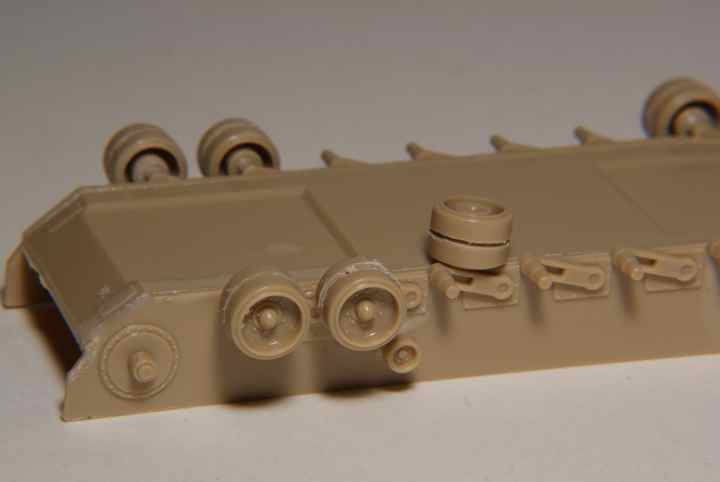


One thing led to another and...more wheels cut.
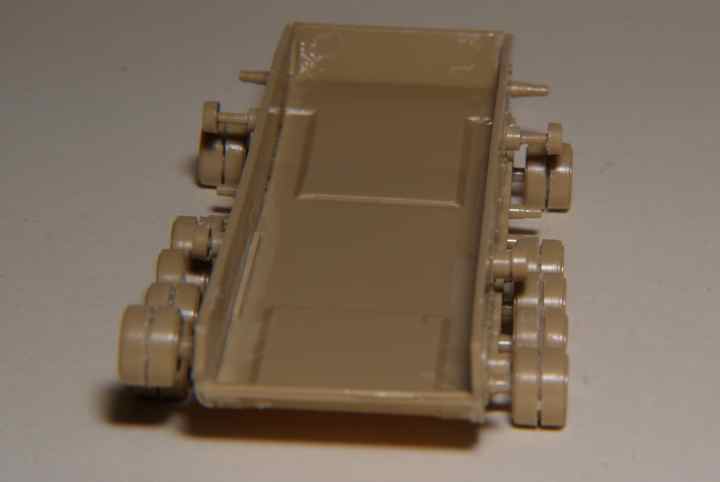


By this point I started to wonder if I'm not turning into one of those OCD types. Then the first problem hits. The rear most wheel (idler?) pin on both sides is barely a stub.
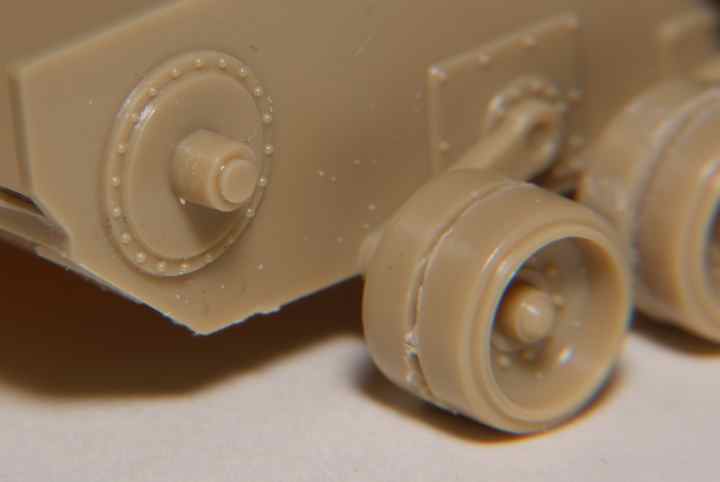


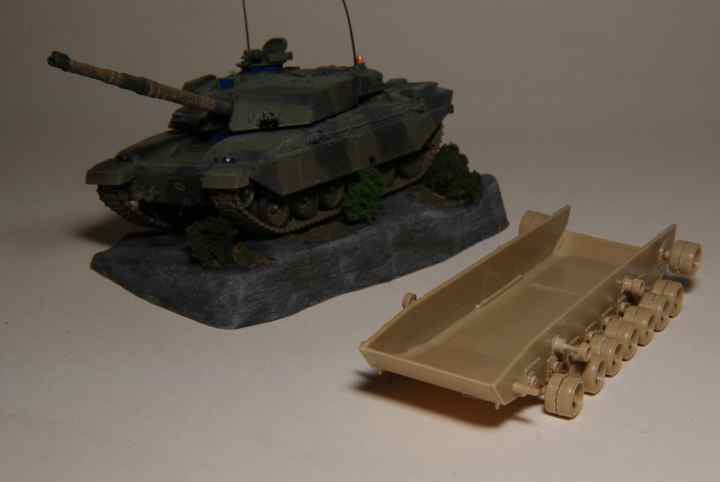
It's the same on both sides so it couldn't be an accident. I used Jan's method for the similar problem that he had in his Panzer Howitzer build. All said and done I ended up with all the wheels cut with grooves. Made a few mistakes but they will be hidden by the tracks. It wasn't all that bad if you just take your time. Here's a picture with a familiar British tank for scale.


Finally I noticed that the side pieces were warped and the body top didn't sit right when placed on. Cut some sprue pieces and glued them in to act as stretchers.
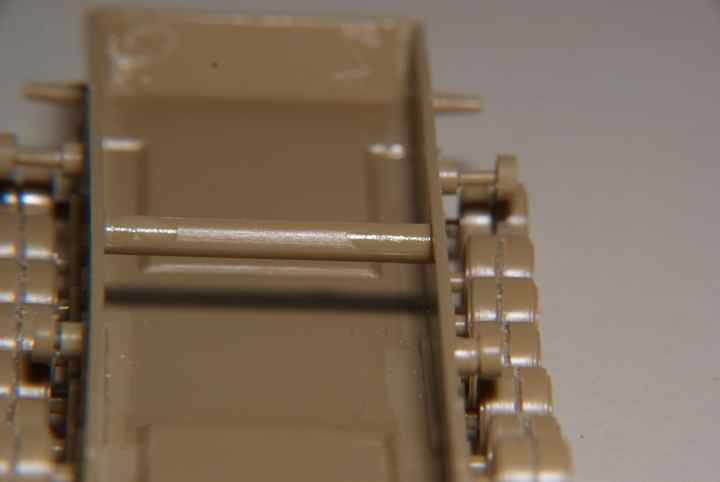


Despite the couple of problems this one came together faster than the Matchbox Challenger. Starting on the turret next.

Regards,
AJ
tread_geek
Visit this Community
Ontario, Canada
Joined: March 23, 2008
KitMaker: 2,847 posts
Armorama: 2,667 posts
Posted: Thursday, November 04, 2010 - 08:20 AM UTC
It's quite impressive to see some definite progress this early in the campaign. Hope everyone doesn't run out of steam. No pictorial updates on the StuG today as I am still experimenting with the tracks.

@Jesper Thanks for the vote of confidence on the commanders hatch. I will try to keep this build on the simpler side, I hope. I will however have to rework the side skirt supports as I can't easily duplicate the missing pieces.

@AJ Quite stunning progress and with all those road wheels that you cut, you might have a touch of OCD. Take two aspirins and message us in the morning.

spacewolfdad Nice work on the Wespe. I like the added touches of the rear hatch down and the helmets on the side. I may have to try to jazz up the StuG a bit in a similar fashion.

Cheers,
Jan
Firefly74
Visit this Community
Queensland, Australia
Joined: April 15, 2010
KitMaker: 224 posts
Armorama: 205 posts
Posted: Thursday, November 04, 2010 - 07:29 PM UTC
Hi all, lots of progress here already!
Jan: Hatch ring is looking good,nice work!
Alexander: That's a lot of sprues for 1:72! How many pieces does the it have?!
Scott: good luck with the tusk upgrades!
Paul: Wespe is looking good,I have had this one in the stash for years!
AJ: Nice work on the roadwheels,looks like a lot of work early in the piece on this one!

I made a small start on the Vickers MkVI yesterday,only to realise that Airfix have neglected to mould a singe rivet anywhere on the whole vehicle they have also made some colour mistakes on the decal sheet.... I suppose I shouldn't be surprised really!
Does anyone have any tips on making rivets?
They are unfortunately Very small on a Vickers and it would no doubt be quite painful to fix, so I may have to just 'grin and bear it' on this build.
Cheers,
Tim
SGTJKJ
#041
Visit this Community
Kobenhavn, Denmark
Joined: July 20, 2006
KitMaker: 10,069 posts
Armorama: 4,677 posts
Posted: Thursday, November 04, 2010 - 11:17 PM UTC
AJB, nice work on the wheels. I like that you did the whole run of wheels and not just a few. Hope the effort will show when finished.

I have changed my mind - again - on what to build for this campaign. I will build the UM models T-34/76. It looks like a very nice kit with good details and even a bit of PE included.
There are also decals included for no less that 6 different vehicles. Some of them quite attractive despite the overall green colour scheme. However, I will build a captured T-34 in overall sand and green.

More to follow when I get started...


randyd
Visit this Community
United States
Joined: July 04, 2009
KitMaker: 241 posts
Armorama: 199 posts
Posted: Friday, November 05, 2010 - 12:46 AM UTC

Looks like a good start to this GB folks!

Jan, Nice little piece of scratch building

Scott, Looking good! What is the TUSK upgrade ?

Paul, Sweet work so far , my friend love the helmet!

AJ, Like what you did on the wheels.

Tim, Possible help on the rivet issue?


Randy
firstcircle
Visit this Community
England - South East, United Kingdom
Joined: November 19, 2008
KitMaker: 2,249 posts
Armorama: 2,007 posts
Posted: Friday, November 05, 2010 - 05:36 AM UTC
Alternative rivetting method:

Quoted Text


I made tiny slices of [0.5mm] rod with a brand new blade, and glued them on with liquid cement, applying them with the point of the blade. Forget tweezers. You need enough glue to keep them on but not so much that they melt. Getting the slices of regular size isn't that important, as providing they are fixed on properly, they can be sanded down to a regular profile later - preferably several hours later.


Don't forget to wear protective gear when rivetting.
tread_geek
Visit this Community
Ontario, Canada
Joined: March 23, 2008
KitMaker: 2,847 posts
Armorama: 2,667 posts
Posted: Friday, November 05, 2010 - 06:40 AM UTC
@Jesper Chart has been updated with your current selection and status. Looks like it might be an interesting build. Having a camo T-34 will be a nice change from the usual green.

@Tim Help with rivets, among other things, is what campaigns are all about. Another rivet option is to get some Liquitex textured paint or something similar. My SWMBO uses these to make small raised dots on ornaments she makes. After looking at some they look remarkably like rivets. She uses a stylus or a darning needle (depending on size needed) to apply the "drop." After it dries it's a latex dome shaped mound.

As for moi! One step forward and two steps back. I tried the link and length ESCI tracks on the old chassis and found that they were too small or the sprocket was too big. I removed the old side panels from the chassis and was going to substitute the newer sprocket but as the newer optional ESCI parts from the resin kit had a full suspension and lower hull I decided to use them. The tracks fit well on that sprocket. So in reality, I'll be rebuilding the entire lower section of the StuG.


The only major issue is that the mounting pins for the suspension components aren't full pins but like AJB's kit, merely stubs.


And here I thought that just a couple of days and I'd be painting.

Cheers,
Jan
Braille
#135
Visit this Community
California, United States
Joined: August 05, 2007
KitMaker: 1,501 posts
Armorama: 1,485 posts
Posted: Friday, November 05, 2010 - 12:56 PM UTC
Here's what I have lined up for this campaign . . .


Tiger I that still needs paint on the tow cables, tools and also adding some stowage. Humber Mk II still needs to be weathered and base needs to be finished . . .


Putting together a Military Wheels SG-122A using the Trumpeter Stug III C/D as a donor kit for the chassis and drive train . . .


And if I can get enough time? A Vietnamese T34/85 model 1969 using the DML kit (Revell kit for a few parts to update the DML kit) CMK barrel and MR Models conversion set.

This campaign is really starting off with a number of braille builds that I have not seen built or posted here before.
Jan, Matthew and Randy thanks for posting the tip on the rivets. Jan hope your thinking about carefully sanding down the ring over the periscopes to a better scale thickness?

-Eddy
firstcircle
Visit this Community
England - South East, United Kingdom
Joined: November 19, 2008
KitMaker: 2,249 posts
Armorama: 2,007 posts
Posted: Friday, November 05, 2010 - 01:11 PM UTC
I see there's some major sugery going on, AJB with the razor saw and Jan has the big clamps out. I had to resort to the heavy duty clamp to get the sides of the cab to meet with the back:


I started this Science Treasury kit about 8 years ago, which is before I had started modelling regularly again, and had splashed the liquid cement around quite liberally, so I've been trying to polish it up a bit as well., but I do also now have wheels.

It's always nice to learn something when building a kit; I found that this vehicle is included in the Society of Automotive Engineers of Japan's 240 Landmakrs of Japanese Automotive Technology. Apparently it was just about the first motor vehicle to be made exclusively from parts manufactured in Japan. Today Isuzu is the world's largest manufacturer of commercial vehicles; at one time they had a partnership with Britain's Wolseley company. Now whatever happened to them . . . ?
Firefly74
Visit this Community
Queensland, Australia
Joined: April 15, 2010
KitMaker: 224 posts
Armorama: 205 posts
Posted: Friday, November 05, 2010 - 05:40 PM UTC
Hi all,thanks for the tips on rivets,much appreciated!
I will investigate the best option. Will be turning what was going to be quite a quick and simple build into something considerably more complicated.
Hopefully the end result will be worth all the extra effort!
Lots of unique builds being done for this campaign, looking forward to seeing everyones work.
Cheers,
Tim
SGTJKJ
#041
Visit this Community
Kobenhavn, Denmark
Joined: July 20, 2006
KitMaker: 10,069 posts
Armorama: 4,677 posts
Posted: Friday, November 05, 2010 - 10:20 PM UTC
Fantastic work going on in this campaign tread. A real eye opener to what can be done in this scale.

Eddy, you really have your plate full. Looking forward to follow all your projects.
Maurice
Visit this Community
Friesland, Netherlands
Joined: September 11, 2006
KitMaker: 254 posts
Armorama: 75 posts
Posted: Saturday, November 06, 2010 - 02:56 AM UTC
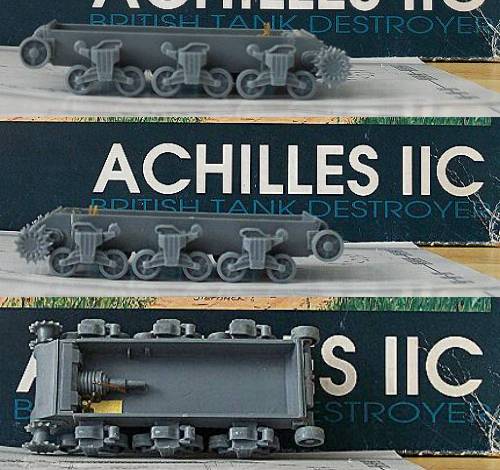
My progress so far:

The running gear/suspension has been put together, with a small beginning of the interior. while this may not seem like much, I actually already processed some 70 parts...

There's a reasonable amount of trimming to do, every part has some mouldlines that need to be removed. Haven't seen any excess plastic yet though.

The tracks are next, that's another 40 or so parts...

Sometimes I wonder why I had to buy this kit instead of a more simple one.
tread_geek
Visit this Community
Ontario, Canada
Joined: March 23, 2008
KitMaker: 2,847 posts
Armorama: 2,667 posts
Posted: Saturday, November 06, 2010 - 07:22 AM UTC
@firstcircle Aren't these old kits just grand, Matthew! With you that makes three of us hauling out the hardware to make these projects behave.

@Maurice Nice to see the progress and the Achilles. Is that a Dragon kit as the base? If that is the case then I totally believe the number of parts that you have had to deal with. I've built two of their Shermans and the one with the VVSS suspension proved to be quite a chore in getting the bogies done.

My build is not exactly going smoothly. I assembled the lower hull of the Stug and put on the rear idlers. After cleaning up some left over glue and plastic from the inner side of the upper hull I tried a test fit of the two pieces. The following pictures tell the outcome.


The front hull appears to fit the contours of the inside of the upper hull but alas, no where near properly. The rear has the idlers so high there is not enough room for the tracks and the rear plate with the exhausts is configured totally wrong for the upper hull.

I had roughly (visually compared the pieces of the old and newer suspension and they appeared extremely close. After all this work I actually measured things out and the newer hull sides are about 2 mm too long and the height of the sides varies from 1 mm to tall in the front to 1.5 mm too short at the rear. It appears that not all Panzer III lower hulls of the ESCI kits used identical parts. My original was meant for rubber band tracks while the newer one came with the link and length.

Here's a picture of the old side resting against the StuG with the new lower hull.


Back to the drawing board!

@Braille Eddy, the ring above the periscopes was made from .030" sheet as I found anything thinner distorted as I tried to cut the centre. Prior to attaching the hatch I had sanded it down by almost two-thirds to around .012". That's about as far as I dare go as parts of the ring were starting to distort from the thinning. Ideally some PE might have worked well but I had none appropriate or the proper tools to cut/manipulate it.

Cheers,
Jan
weathering_one
Visit this Community
Ontario, Canada
Joined: April 04, 2009
KitMaker: 458 posts
Armorama: 456 posts
Posted: Saturday, November 06, 2010 - 08:11 AM UTC
I must agree that there are some rather unique builds being presented here. Jan, maybe the kit you chose to complete is cursed and that's why it has sat around so long. I would have definitely given up by now.

@Braille- I thought that the Humber was finished! I remember seeing it in the gallery and the feature and it HAD wheels on it.

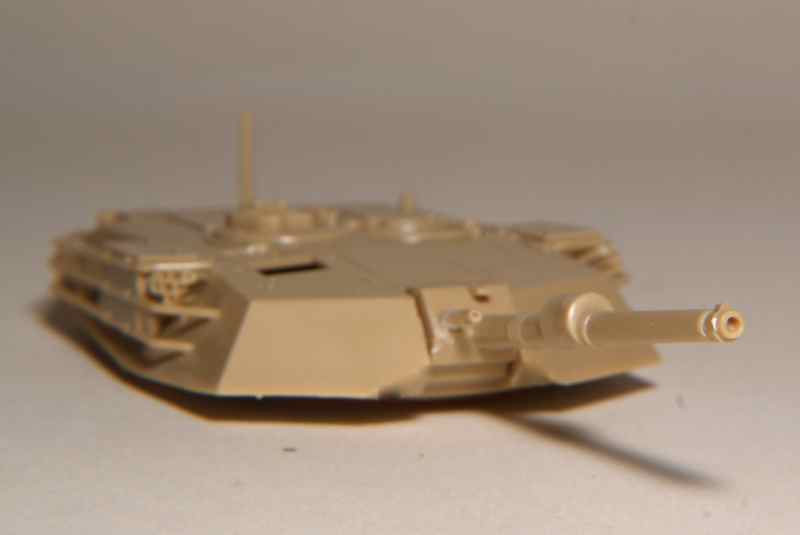
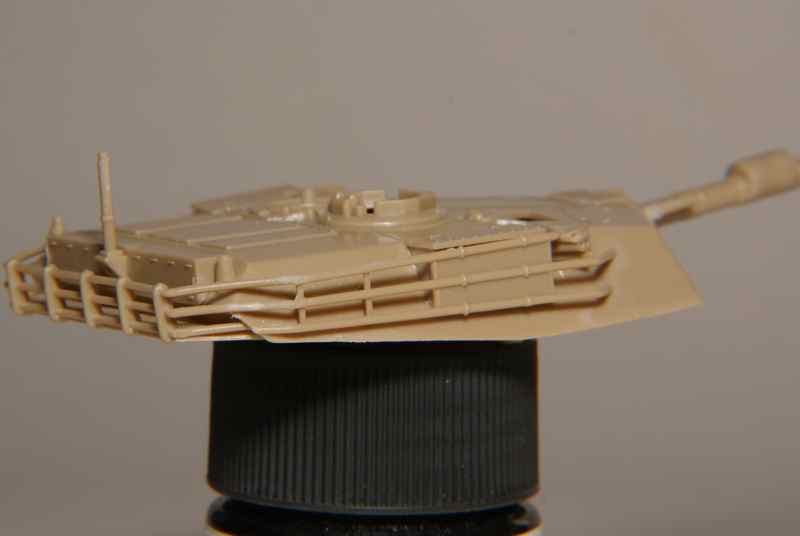
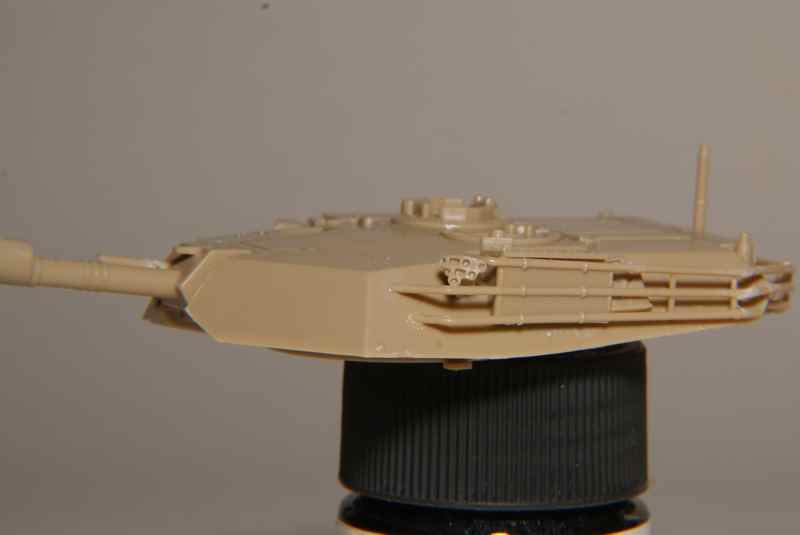
@Sudzonic - DID you have any problems with the side racks on you Abram(s). The side ones on my ESCI kit went on fine but I agonized for two days trying to figure out how I was going to attach the back turret part. It didn't seem to want to fit for anything. I almost was ready to leave it off.

I finally used force to bend some of the tubing of the rack to make it fit. Had to use fast setting super glue to attach it to the side parts. Still, this build seems to be faster than the Challenger. Oh, and I broke the machinegun three times while trying to get that back rack on. After the third break I decided to try something different (for me) and drill out the barrel. Used a #67 (.032", .8128 mm) drill for that.

Pictures so far.


I also managed to find some really fine synthetic mesh and am trying to make a camouflage net for the racks with it.

Regards,
AJ
casualmodeler
Visit this Community
Hame, Finland
Joined: February 04, 2009
KitMaker: 702 posts
Armorama: 665 posts
Posted: Saturday, November 06, 2010 - 08:17 AM UTC
Nice progress everyone. Not much progress here, because of fitting problems, mould failures and now latest issue is, that thin layer has started to peel of from certain parts, like a layer of dead skin... Not a easy kit to put together. One question for anyone, who knows Panzer III N turret like his own pockets:
should there be a seam around turret roof part or should the turret roof be solid one piece with walls??
tread_geek
Visit this Community
Ontario, Canada
Joined: March 23, 2008
KitMaker: 2,847 posts
Armorama: 2,667 posts
Posted: Saturday, November 06, 2010 - 10:36 AM UTC
AJB Nice going with a difficult situation. From what I can see and what I know from another M1 kit you joined the bars of the rack well. Drilling out the MG I fear is another sign that you *might* be getting the Modellers OCD!

Kimmo There doesn't appear to be a big seam on either my Matchbox or ESCI Pz III where the roof joins the sides. Just to be safe I checked out Prime Portals Panzer III. The only thing that I see is a small weld where the pieces join. BTW, they have two other Pz III walk arounds there.

Cheers,
Jan
Maurice
Visit this Community
Friesland, Netherlands
Joined: September 11, 2006
KitMaker: 254 posts
Armorama: 75 posts
Posted: Saturday, November 06, 2010 - 12:03 PM UTC

Quoted Text

@Maurice Nice to see the progress and the Achilles. Is that a Dragon kit as the base? If that is the case then I totally believe the number of parts that you have had to deal with. I've built two of their Shermans and the one with the VVSS suspension proved to be quite a chore in getting the bogies done.


No it's a complete kit by ExtraTech, though it's no longer in their item list. I don't think it's a copy of a DML kit.

Here's a kit review: ExtraTech Achilles IIC
Braille
#135
Visit this Community
California, United States
Joined: August 05, 2007
KitMaker: 1,501 posts
Armorama: 1,485 posts
Posted: Saturday, November 06, 2010 - 08:21 PM UTC
Jesper, yes I do have a plate full! I don't know how I will pull this one off but I will give it my best and enjoy every minute of it! BTW good model choice, looking forward to seeing that T34/76 in German markings.

Jan, your the one with a full plate! You have got your work cut out for you. I can't wait to tackle that SG-122A as I will be kit bashing chassis components and upper hull pieces to try an achieve as accurate a model as I can and I'm sure I will encounter some similar issues along the way. That periscope ring on your Stug looks better now!

AJ, the Humber was painted and the wheels were fitted for the photos but I had not yet added the decals or weathering. I went ahead and removed the wheels to age, weather and add a little chipping to the paint. Then add the decals and spare tire. As for the base I still wanted to do a little more in the way of painting and adding some dry foliage and finally place the whole enchilada on a wood base. Your processing along nicely on that ESCI Abrams.

Maurice, that kit looks so interesting to build. From the kit review you posted it seems to be the Cadillac of 72nd scale tank kits your putting together - keep it coming!

-Eddy
Removed by original poster on 11/07/10 - 11:58:00 (GMT).