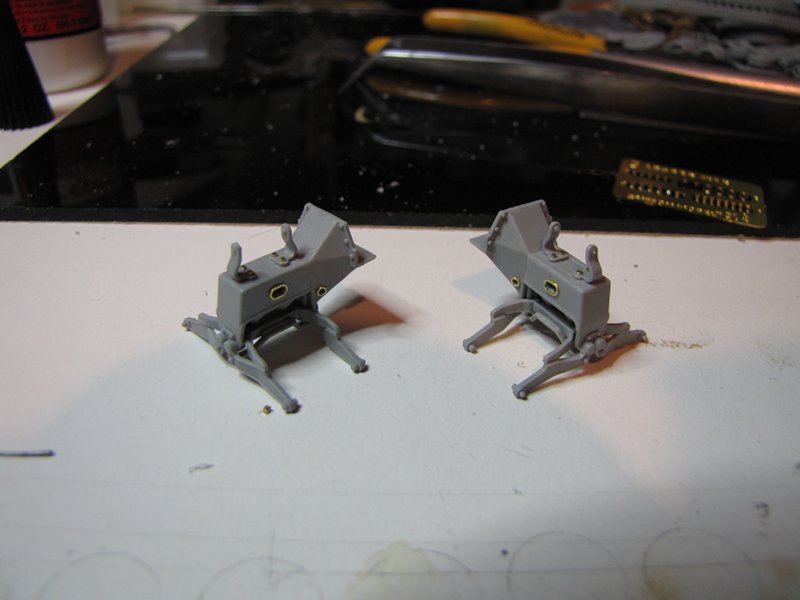
Well Guys,
I'm still speechless as to how much work everyone is putting into their builds..
here is my latest work up.
I Sprayed the first base coat of paint today, used my new Badger Krome that I got about 3 days ago, and it works great. Sprays as well as my Velocity, but has a smoother trigger action.
I used Model Master 2050, Olive Drab AnA 613 as a base, I'll go over it with a lightened version to bring out some details and to make it look not so monochrome. This worked well with my jeep and I will see if I can replicate the technique.
Some of the bits I sprayed with Model Master 1711, Olive drab FS 34087 as a base so I can darken those bits and not have everything the exact same color.
here are the photos.
Thanks for looking
Delbert
Campaigns
Where Armorama group builds can be discussed, organized, and updates posted.
Hosted by Darren Baker, Richard S.
US Halftracks Campaign
Posted: Monday, September 03, 2012 - 03:09 AM UTC
Posted: Monday, September 03, 2012 - 04:10 PM UTC
Phil,Joel and Delbert,
Your builds are all looking Great!
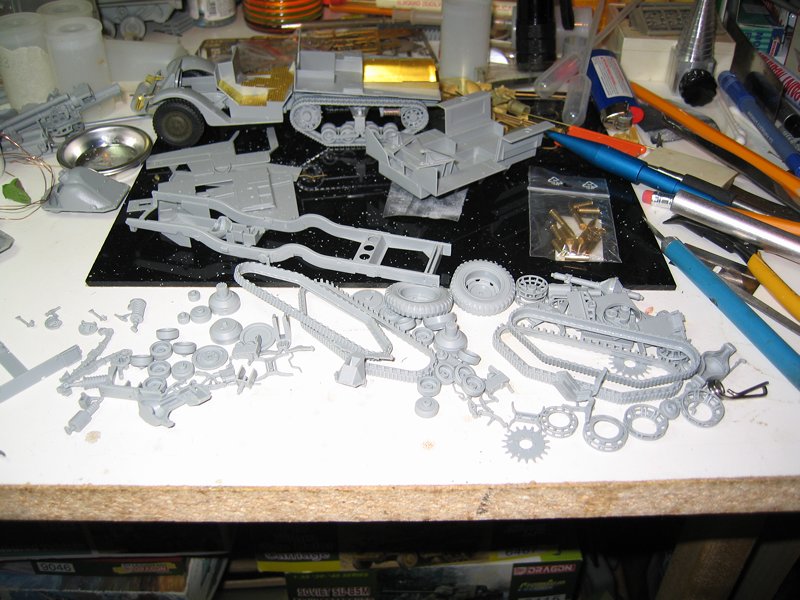
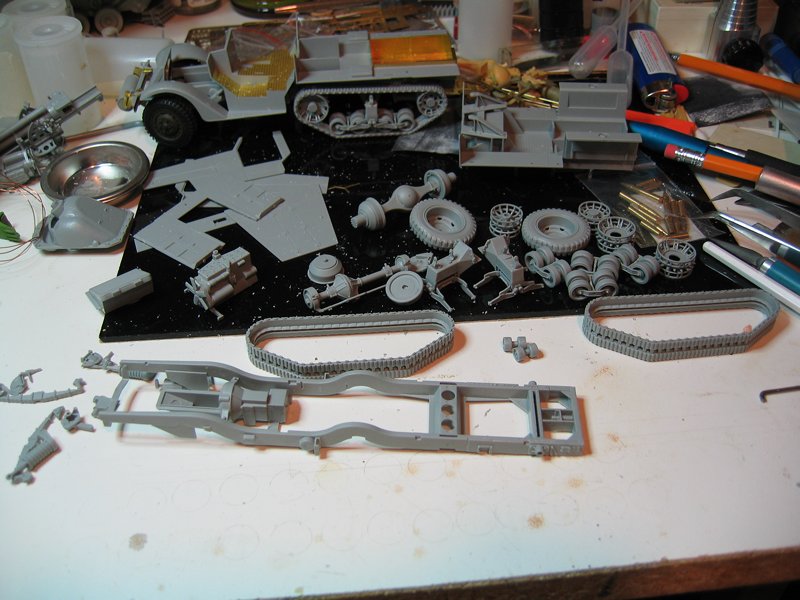
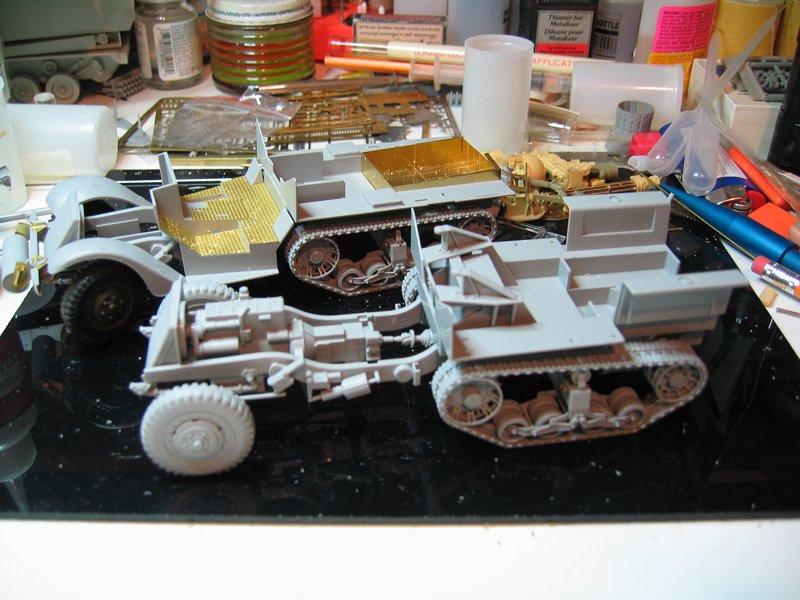
I managed to get the T19 completed almost up to where the 75GMC is.
First a pile of parts clean and ready to assemble
Some sub assemblies
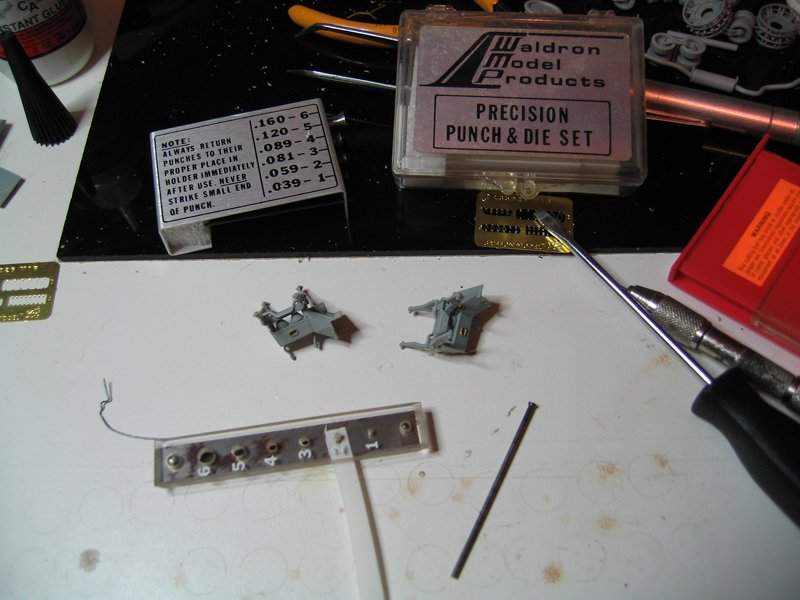
Fixing a lost PE flange for the bogie assembly
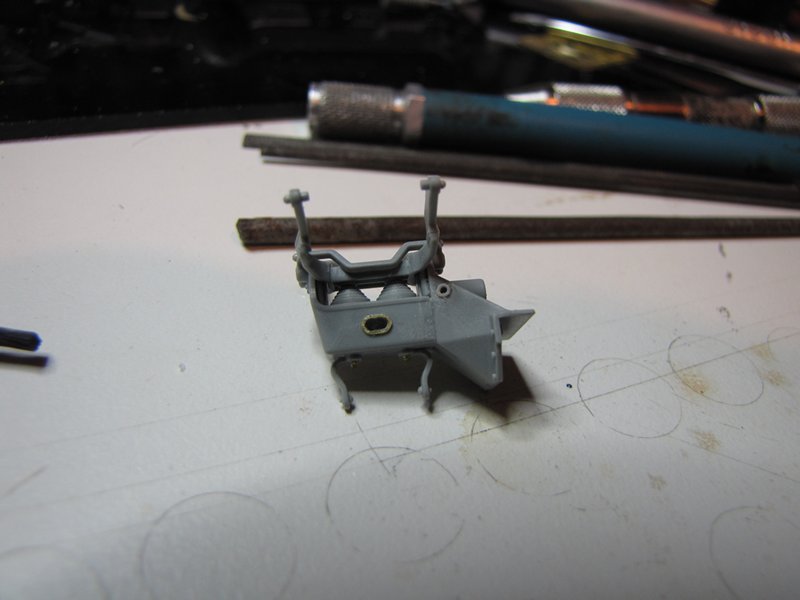
Some PE
And where it stands now.
Cheers Rob.
Your builds are all looking Great!
I managed to get the T19 completed almost up to where the 75GMC is.
First a pile of parts clean and ready to assemble
Some sub assemblies
Fixing a lost PE flange for the bogie assembly
Some PE
And where it stands now.
Cheers Rob.
IrishGreek
Michigan, United States
Joined: October 17, 2010
KitMaker: 627 posts
Armorama: 571 posts
Joined: October 17, 2010
KitMaker: 627 posts
Armorama: 571 posts
Posted: Tuesday, September 04, 2012 - 03:32 PM UTC
Made some more progress. A word of caution to those who have not yet done the front wheels. Be careful of the hub alignment, make sure the half moon nubs will line up with the drum brake components correctly... Or your weighted tires will face the wrong way. UP. Ask how I know... So fixed that... and she is sitting on her wheels, no tracks yet.
Don't know why it is not rotated, edited the photo in photobucket...
Here is the link to the folder too if you want.
http://s746.photobucket.com/albums/xx109/jkantirakis/35%20Dragon%20M2A1%20Half%20Track/
Don't know why it is not rotated, edited the photo in photobucket...
Here is the link to the folder too if you want.
http://s746.photobucket.com/albums/xx109/jkantirakis/35%20Dragon%20M2A1%20Half%20Track/
BigSmitty
Minnesota, United States
Joined: October 01, 2008
KitMaker: 597 posts
Armorama: 439 posts
Joined: October 01, 2008
KitMaker: 597 posts
Armorama: 439 posts
Posted: Wednesday, September 05, 2012 - 03:27 PM UTC
Not much time to work tonight, as some other items kept me pretty busy for most of the evening, but I managed to get a little work done on the M16. I'm still waiting for some metal barrels to come in for the quad .50s so until then it's a matter of picking out little details, ammo cans, etc.
Photos of tonight's progress:
Yeah, I used the PE for the open louvers. They just screamed USE US!!!
PE wiper blades, held in place by a small dab of Future, then coated the entire windshield (front and back) with a coat to thin out the windscreen and hold those little buggers in place.
That's all for tonight. Hopefully get this closer to major sub assemblies in a week or two...
steph2102
Isere, France
Joined: April 23, 2011
KitMaker: 735 posts
Armorama: 606 posts
Joined: April 23, 2011
KitMaker: 735 posts
Armorama: 606 posts
Posted: Friday, September 07, 2012 - 05:00 AM UTC
hello, here is my progress. you ,guys made really great job.
I is not been able to do the protections of the headlights. but, I do not déspere.
steph2102
Isere, France
Joined: April 23, 2011
KitMaker: 735 posts
Armorama: 606 posts
Joined: April 23, 2011
KitMaker: 735 posts
Armorama: 606 posts
Posted: Friday, September 07, 2012 - 05:01 AM UTC
IrishGreek
Michigan, United States
Joined: October 17, 2010
KitMaker: 627 posts
Armorama: 571 posts
Joined: October 17, 2010
KitMaker: 627 posts
Armorama: 571 posts
Posted: Sunday, September 09, 2012 - 02:27 AM UTC
She is now sitting on her tracks...
And her body work is starting to come together too.
Bigrip74
Texas, United States
Joined: February 22, 2008
KitMaker: 5,026 posts
Armorama: 1,604 posts
Joined: February 22, 2008
KitMaker: 5,026 posts
Armorama: 1,604 posts
Posted: Sunday, September 09, 2012 - 06:20 AM UTC
@ John: your build looks way!!!! too clean how do you do it my build look more like a salvage yard. Nice work so far I will be keeping an eye for your finished track.
@ Matt: the windscreen and PE look good, how do you apply your adhesive? I seem to have a heavy hand and only today made an applicator for CA which I need to spend time practicing with. Nice build Matt so far.
@ Steph: stunning paint job and finish.
Bob
@ Matt: the windscreen and PE look good, how do you apply your adhesive? I seem to have a heavy hand and only today made an applicator for CA which I need to spend time practicing with. Nice build Matt so far.
@ Steph: stunning paint job and finish.
Bob
steph2102
Isere, France
Joined: April 23, 2011
KitMaker: 735 posts
Armorama: 606 posts
Joined: April 23, 2011
KitMaker: 735 posts
Armorama: 606 posts
Posted: Sunday, September 09, 2012 - 10:50 AM UTC
Quoted Text
@ Steph: stunning paint job and finish.
thank you bob
IrishGreek
Michigan, United States
Joined: October 17, 2010
KitMaker: 627 posts
Armorama: 571 posts
Joined: October 17, 2010
KitMaker: 627 posts
Armorama: 571 posts
Posted: Sunday, September 09, 2012 - 12:47 PM UTC
Quoted Text
@ John: your build looks way!!!! too clean how do you do it my build look more like a salvage yard. Nice work so far I will be keeping an eye for your finished track.
Bob
Bob,
It did look more that way (salvage yard) until I got a few sub assemblies together. That, and my wife asked me to straighten up...
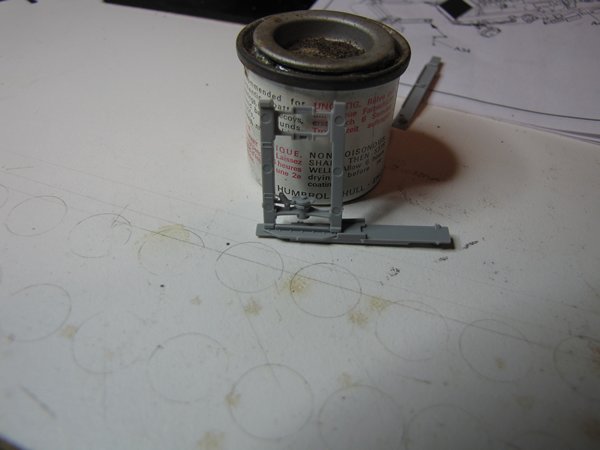
Another question for everyone. Does anyone have a good pic showing how these parts should be connected??? I have looked online, but not found anything clear yet.
Thanks.
John
Posted: Sunday, September 09, 2012 - 01:29 PM UTC
Hi John,
I hope this helps.
If not let me know and I'll take some more shots.
Cheers Rob.
I hope this helps.
If not let me know and I'll take some more shots.
Cheers Rob.
IrishGreek
Michigan, United States
Joined: October 17, 2010
KitMaker: 627 posts
Armorama: 571 posts
Joined: October 17, 2010
KitMaker: 627 posts
Armorama: 571 posts
Posted: Sunday, September 09, 2012 - 02:16 PM UTC
Rob, that's great. Thanks. I thought that might be it, but did not want to guess. You know?
John
John
BigSmitty
Minnesota, United States
Joined: October 01, 2008
KitMaker: 597 posts
Armorama: 439 posts
Joined: October 01, 2008
KitMaker: 597 posts
Armorama: 439 posts
Posted: Monday, September 10, 2012 - 03:23 PM UTC
Still waiting on the metal barrels for the .50cal M2's but decided I can go ahead and work on the support and rear half of the M16. Here are the progress photos; only an hour or so on the bench tonight... Monday's are a real bear at work...
So far so good, but for some reason the right side track is toed out a bit, and I can't figure out why. Odd...
Joel_W
Associate Editor
New York, United States
Joined: December 04, 2010
KitMaker: 11,666 posts
Armorama: 1,143 posts
Joined: December 04, 2010
KitMaker: 11,666 posts
Armorama: 1,143 posts
Posted: Tuesday, September 11, 2012 - 12:01 AM UTC
Steph, your build is looking super. Can't wait to see it with some weathering applied.
Joel
Joel
steph2102
Isere, France
Joined: April 23, 2011
KitMaker: 735 posts
Armorama: 606 posts
Joined: April 23, 2011
KitMaker: 735 posts
Armorama: 606 posts
Posted: Tuesday, September 11, 2012 - 04:08 AM UTC
JOEL thank you, very nice work on your kit. the weathering will have (if all okay) this weekend.
Delbert, I like your paint color. how did you put the radio up? I am looking for the method of attachment.
Phil, congratulations you are the world champion of PE.
I'll have to it gives me a half track DRAGON, they look great.
steph
Delbert, I like your paint color. how did you put the radio up? I am looking for the method of attachment.
Phil, congratulations you are the world champion of PE.
I'll have to it gives me a half track DRAGON, they look great.
steph
beefy66
England - North East, United Kingdom
Joined: October 22, 2007
KitMaker: 971 posts
Armorama: 280 posts
Joined: October 22, 2007
KitMaker: 971 posts
Armorama: 280 posts
Posted: Wednesday, September 12, 2012 - 07:23 AM UTC
well you can really tell the difference in quality from the Dragon halftraks to the old Tamiya your builds are looking great guys,Here is my progress slow to get back into it after my vacation but nearly there
Posted: Wednesday, September 12, 2012 - 12:07 PM UTC
Quoted Text
Delbert, I like your paint color. how did you put the radio up? I am looking for the method of attachment.
Hey Steph thanks its just the model master Ana 613 straight out of the bottle.. i'm using it for a base color and I'll be lightening it up a bit.
As for the Radio its just sitting in there agaist the back wall and fits perfectly between the side supply box and a bit of unknown detail behind the passenger seat. Its like the Verlinden radio was made exactly for this kit.. After painting I'll prob just glue it into place attaching it to the back wall.
btw your build looks great.. I've been following it with great interest.
Delbert
IrishGreek
Michigan, United States
Joined: October 17, 2010
KitMaker: 627 posts
Armorama: 571 posts
Joined: October 17, 2010
KitMaker: 627 posts
Armorama: 571 posts
Posted: Friday, September 14, 2012 - 12:08 AM UTC
Making progress still, but have a question.
Here is the grill with the open PE slats:
How would you recommend getting rid of the 'bend' in them?
Thanks,
John
Here is the grill with the open PE slats:
How would you recommend getting rid of the 'bend' in them?
Thanks,
John
Posted: Friday, September 14, 2012 - 12:38 AM UTC
John,
If you file the ends so they are not a tight fit that should take the bend out.
Cheers Rob.
If you file the ends so they are not a tight fit that should take the bend out.
Cheers Rob.
Joel_W
Associate Editor
New York, United States
Joined: December 04, 2010
KitMaker: 11,666 posts
Armorama: 1,143 posts
Joined: December 04, 2010
KitMaker: 11,666 posts
Armorama: 1,143 posts
Posted: Friday, September 14, 2012 - 12:47 AM UTC
Keith, your build is looking great. The stowage really makes a big difference.
Joel
Joel
geogeezer
Arizona, United States
Joined: February 17, 2011
KitMaker: 263 posts
Armorama: 258 posts
Joined: February 17, 2011
KitMaker: 263 posts
Armorama: 258 posts
Posted: Monday, September 17, 2012 - 10:14 AM UTC
Hi All
I signed up for the US Halftracks Campaign some time ago when I was building stuff for the Great War Campaign. I'm not a great fan of multitasking, which in my case means several jobs done badly, so I wanted to finish my Model T light patrol cars before starting on the halftrack.
Anyway, here goes. The kit is the Tamiya M21 mortar carrier, and will be pretty much built OOB, a refreshing change from the Model T kits which had a lot of warped parts and involved a lot of scratch building.
Cheers,| |)
Dick
Posted: Tuesday, September 18, 2012 - 07:19 PM UTC
Oh my, I’ve been neglecting my Campaign and Armorama for some time now… Real life sometimes is a PITA…
@ John, your second post sums up where I’m at about right now… I seem to have the same slight tilt you’re talking about. I was hoping it was just a dry fit issue. I agree with Rob on the bend issue.
@ Delbert, coming along nicely. I particularly like the radio.
@ Rob, two at the same time? I’d probably mix up the parts all the time… Although it doesn’t really matter, most of it’s interchangeable anyway…
@ Matt, the PE louvers look great, I think it’s quite hard to get them straight and regular. Any tips?
@ Steph: Coming along nicely! It really has that 30ies feel to it.
@ Keith, even though it’s Tamiya, I don’t think you can complain: Still looks great!
@ Richard, welcome to the club!
Cheers!
Stefan
corsair924
New Hampshire, United States
Joined: August 11, 2008
KitMaker: 403 posts
Armorama: 322 posts
Joined: August 11, 2008
KitMaker: 403 posts
Armorama: 322 posts
Posted: Wednesday, September 19, 2012 - 01:23 PM UTC
Well, bet to get my photos posted before something else distracts me
first my Dragon M16 kit
The kit went together very straightforward, about the only difficulty I had was with the wench on the front end.
I left the machine partially disassembled to facilitate painting then finished assembly with superglue.
Next, M16 in progress beside a very ancient (never painted) Tamyia M3
The turret was a bit tight to assemble and if I redid it, I'd paint the guns before mounting them
this is why you don't leave kits of the same breed together overnight, they breed. . .
Both m16 & M3 in paint booth primed
BigSmitty
Minnesota, United States
Joined: October 01, 2008
KitMaker: 597 posts
Armorama: 439 posts
Joined: October 01, 2008
KitMaker: 597 posts
Armorama: 439 posts
Posted: Wednesday, September 19, 2012 - 02:53 PM UTC
@Stefan The louvers have little tabs that fit in the notches in the back of the grill. I attached them with some Gator Glue and they've all held up except for the top one, which I managed to knock loose tonight. I'll take a picture tomorrow to show.
@John K You shouldn't have to file them. The notches in the back of the grill fit perfect (at least on my M16, but the grill is the same for all DML halftrack variants) and you want to angle them about 45 degrees downward. That should take a bit of the bend out as well.
I finally got my RB barrels in for the quad .50cal mount. They aren't bad (not the best) but at $4.99 a piece, I could replace the entire set of 4 for less than the price of some of the other replacement barrels.
I ended up not using any of the PE parts, as these aren't the normal M2, nor did I use the cocking lever or the rear handles, but I'll save them for future builds, especially if I use a Tamiya M2 for the base, as they aren't too bad for plastic. Cutting free the plastic barrel was more tedious than a normal M2 as the front mounting post extends below the cooling jacket and barrel. Careful cutting with the snips and some scraping and I got them cleaned up decently.
They are a marked improvement over the kit guns, and as they are pretty much the central part of this build, spending a little extra was worth it.
Some dry fit test photos (only got one side done tonight):
Mated to the chassis, dry fit for photo purposes with the front cab and grill (how I popped the top louver loose):
That's all for tonight. Tomorrow I should be getting my Atak Zimmerit for the Panther campaign, so I can continue on that for a bit.
@John K You shouldn't have to file them. The notches in the back of the grill fit perfect (at least on my M16, but the grill is the same for all DML halftrack variants) and you want to angle them about 45 degrees downward. That should take a bit of the bend out as well.
I finally got my RB barrels in for the quad .50cal mount. They aren't bad (not the best) but at $4.99 a piece, I could replace the entire set of 4 for less than the price of some of the other replacement barrels.
I ended up not using any of the PE parts, as these aren't the normal M2, nor did I use the cocking lever or the rear handles, but I'll save them for future builds, especially if I use a Tamiya M2 for the base, as they aren't too bad for plastic. Cutting free the plastic barrel was more tedious than a normal M2 as the front mounting post extends below the cooling jacket and barrel. Careful cutting with the snips and some scraping and I got them cleaned up decently.
They are a marked improvement over the kit guns, and as they are pretty much the central part of this build, spending a little extra was worth it.
Some dry fit test photos (only got one side done tonight):
Mated to the chassis, dry fit for photo purposes with the front cab and grill (how I popped the top louver loose):
That's all for tonight. Tomorrow I should be getting my Atak Zimmerit for the Panther campaign, so I can continue on that for a bit.
Joel_W
Associate Editor
New York, United States
Joined: December 04, 2010
KitMaker: 11,666 posts
Armorama: 1,143 posts
Joined: December 04, 2010
KitMaker: 11,666 posts
Armorama: 1,143 posts
Posted: Thursday, September 20, 2012 - 08:48 AM UTC
Those guns look tremendous. What a huge difference.
Joel
Joel