Campaigns
Where Armorama group builds can be discussed, organized, and updates posted.
Where Armorama group builds can be discussed, organized, and updates posted.
Hosted by Darren Baker, Richard S.
King Campaign
Posted: Saturday, January 26, 2013 - 12:36 PM UTC
Rob I just opened an identical kit to the one I am already building, the hull is exactly the same as the one in the kit you have. Looking at the adjustable suspension arm I think you will find a lug that fits into the rear of arm and DML have neglected to number or identify the kit part. Dragon kits are fun to build are they not?

wing_nut

Joined: June 02, 2006
KitMaker: 1,212 posts
Armorama: 674 posts

Posted: Saturday, January 26, 2013 - 12:42 PM UTC
I looked over the sprues 3 or 4 times and just don't see anything that looks like it needs to be added to the arm. If they're there... I am going to look again now... they sure as heck ain't on the sheet. Gee, why am I not surprised. 

Posted: Saturday, January 26, 2013 - 04:48 PM UTC
Darren,
Mine will work fine the way it is, Marc's is the one that does not seem to work. I was just trying to help.
Cheers Rob.
Mine will work fine the way it is, Marc's is the one that does not seem to work. I was just trying to help.
Cheers Rob.
panzerbob01

Joined: March 06, 2010
KitMaker: 3,128 posts
Armorama: 2,959 posts

Posted: Sunday, January 27, 2013 - 06:43 AM UTC
Darren;
Hi! I'm watching your zimm routine and how you are addressing the details pretty closely on this KT - I just picked up the DML 6302 kit (KT "Porsche turret" w/ zimm) at a show yesterday and am planning on putting that together for this campaign - it's either that one, or it'll be it's 1/72 baby-clone kit... you know the one, same box-art, 1/2 the size, and 1/4 the parts!
I would have gone your route, but just don't have enough time to do the add-on zimm; I think you'll benefit from easier battle-damage, etc. over the pre-zimmed kit. I'm already pre-sweating the issue of attaching some detail bits and creating the proper amount of "easement" in the zimm which often appears around these bits but which is apparently not well-addressed in the DML pre-zimmed kit (where some detail parts are added on without any exact locators or gaps waiting for parts...). What you are doing certainly has some educational value to me!
I do have one question: that access hatch and plate appears to be somewhat slanted in your posted turret-rear pic - I'm guessing that this is parts dry-fit, and not in final position...
Bob


wing_nut

Joined: June 02, 2006
KitMaker: 1,212 posts
Armorama: 674 posts

Posted: Sunday, January 27, 2013 - 10:21 AM UTC
Rob you are quite correct. No way mine was gonna work. I was hoping shopping someone else would confirm the that Dragon had screwed up on these pieces and wondering if anyone else had come across that same thing. I have to say they did. I've been over the sprues enough to know there just ain't nuttin' to glue on to that arm to make it work... or look like that parts you posted, which is what I would have though they should look like. The hole in the tub happens to be 3/16' so I glued some brass tube i had to he arm and problem solved. But really Dragon... What's up with those [parts?
Posted: Sunday, January 27, 2013 - 12:15 PM UTC
Marc; I have built this KT when it was released with 8 figures to sit and stand on the outside and I did not encounter any issues that I can remember, I am sure there must be a part hidden in the box to attach the swing arm from the rear.
Bob; firstly thank you for a heads uo on the rear turret door as I missed that it was out of alignment, this issue has now been corrected as it was only tacked with superglue anyway. I would a;so like to thank you for the positive feedback and I also owe a dept the Pawel (Spitfire) for all of his help.
Bob; firstly thank you for a heads uo on the rear turret door as I missed that it was out of alignment, this issue has now been corrected as it was only tacked with superglue anyway. I would a;so like to thank you for the positive feedback and I also owe a dept the Pawel (Spitfire) for all of his help.

woltersk

Joined: May 27, 2003
KitMaker: 1,026 posts
Armorama: 654 posts

Posted: Monday, January 28, 2013 - 03:18 PM UTC
Finally applied some paint. It was kinda sad to cover up all those precious metals!  But it had to happen sooner or later.

I'm still debating which method to use on the tracks.
Keith
 But it had to happen sooner or later.
I'm still debating which method to use on the tracks.
Keith
Nito74

Joined: March 04, 2008
KitMaker: 5,386 posts
Armorama: 4,727 posts

Posted: Tuesday, January 29, 2013 - 01:00 PM UTC
Some very nice builds !
Nice progress Keith !
Nice progress Keith !

wing_nut

Joined: June 02, 2006
KitMaker: 1,212 posts
Armorama: 674 posts

Posted: Wednesday, January 30, 2013 - 04:19 AM UTC
Keith I know what you mean. But as long as you have to do it, it may as well look as good as yours does.
Darren, I bought 2 of these kits at the same time. i have to look in the other box to see if there is something missing from this one.
The welding torch has not been put away completely. Still some to do around hinges and little noogies like that. But the main stuff is done and the rolled steel is finished. Finally able to add some of the goodies.


I found some straight pins that look like an appropriate size for the track pin and lifting lugs. Dritz long size 21. Grinding the head was easy enough. Don't have to do that for each link ??? but made a few for the track pins for the extra treads for the side of the turret.


Did you know the Third Reich predicted the show "Star Trek"? Why else would they may a hatch that looks like the star ship Enterprise?

Darren, I bought 2 of these kits at the same time. i have to look in the other box to see if there is something missing from this one.
The welding torch has not been put away completely. Still some to do around hinges and little noogies like that. But the main stuff is done and the rolled steel is finished. Finally able to add some of the goodies.


I found some straight pins that look like an appropriate size for the track pin and lifting lugs. Dritz long size 21. Grinding the head was easy enough. Don't have to do that for each link ??? but made a few for the track pins for the extra treads for the side of the turret.


Did you know the Third Reich predicted the show "Star Trek"? Why else would they may a hatch that looks like the star ship Enterprise?

Posted: Wednesday, January 30, 2013 - 05:20 AM UTC
Hi guys 
some stunning builds on here,due to some tec problems and lost /missplaced pics here we go
Airfix pre production turret

all tools and cables molded on and those crap tracks
Went together a treat ,no filler at all

then the tracks and the running gear
the pin for the drive sprockets and the idlers are far too flimsy and were replaced with brass tube,the tracks where made to sag with pin glued from the inside of the hull,teeth were also removed from the sprocket where the track sits

Tamiya paints uswed for the tri colour cammo


A coat of Klear,decals then some MIG filters and washes a tad of dry brushing with enamels and it dont look too bad


Hope you like
Andy

some stunning builds on here,due to some tec problems and lost /missplaced pics here we go

Airfix pre production turret
all tools and cables molded on and those crap tracks

Went together a treat ,no filler at all

then the tracks
 and the running gear
the pin for the drive sprockets and the idlers are far too flimsy and were replaced with brass tube,the tracks where made to sag with pin glued from the inside of the hull,teeth were also removed from the sprocket where the track sits
Tamiya paints uswed for the tri colour cammo
A coat of Klear,decals then some MIG filters and washes a tad of dry brushing with enamels and it dont look too bad

Hope you like
Andy
Posted: Wednesday, January 30, 2013 - 09:31 AM UTC
Andy; I really like the finish on your KT
Marc I am finding myself really looking forward to your updates as I want to see where you go with this.
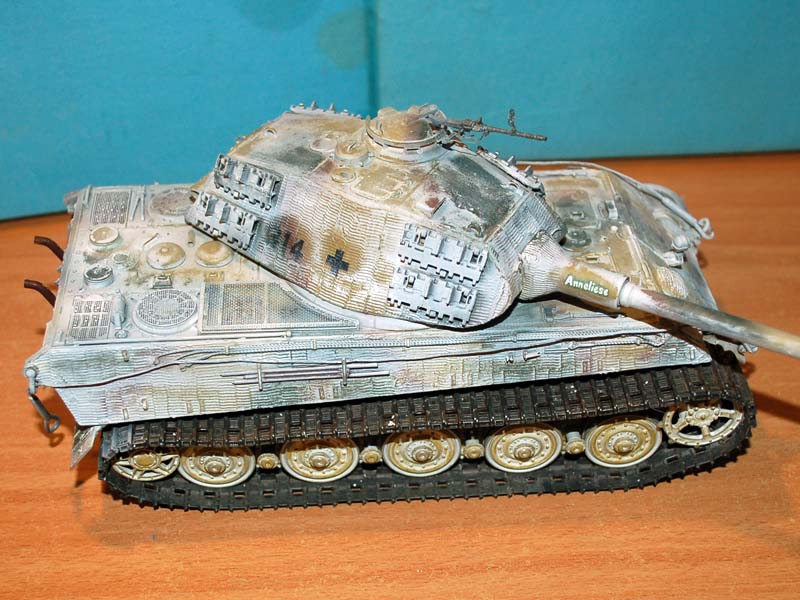
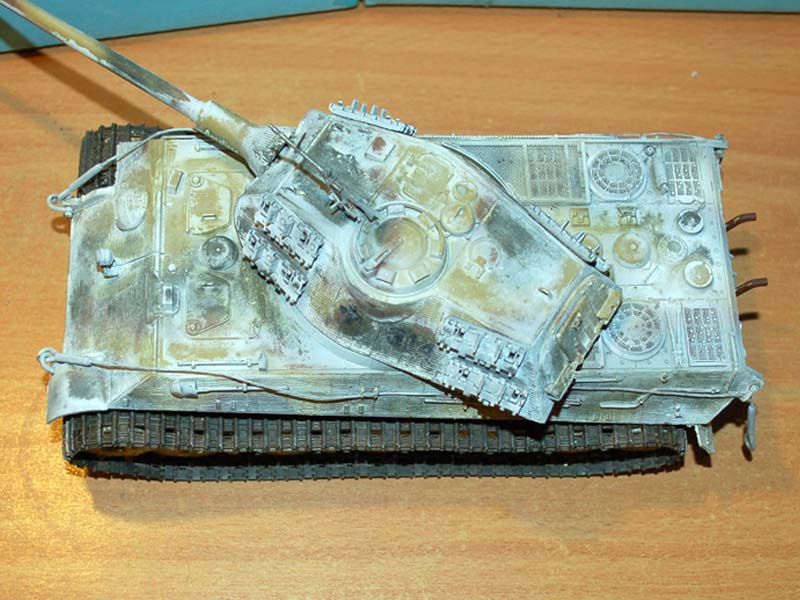
Well here it is with the heavily worn white wash in place and getting close to completion. I will do an SBS soon covering this as it was not practical to take pictures during the process. I hope you like what is there so far
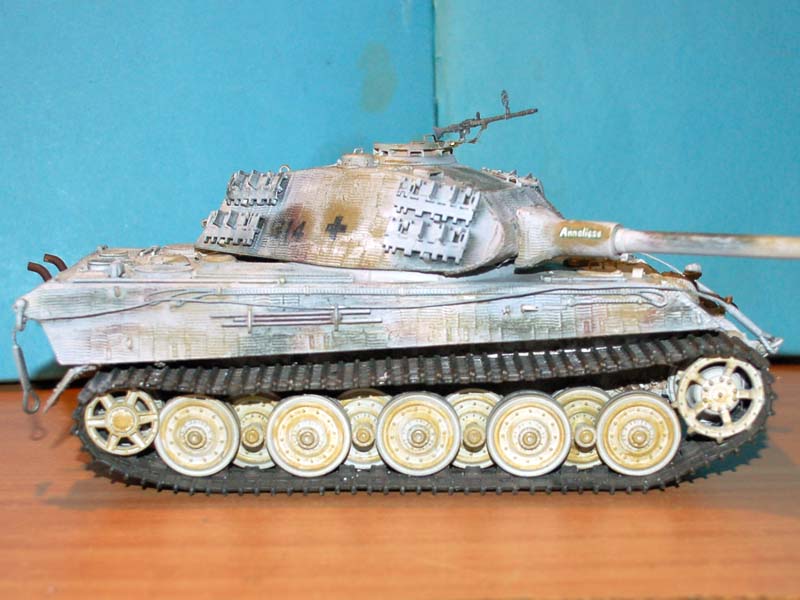
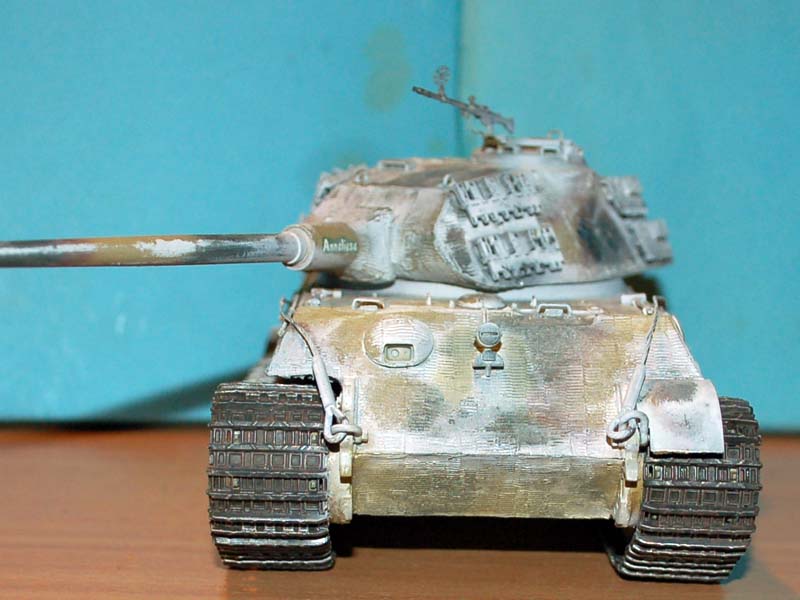
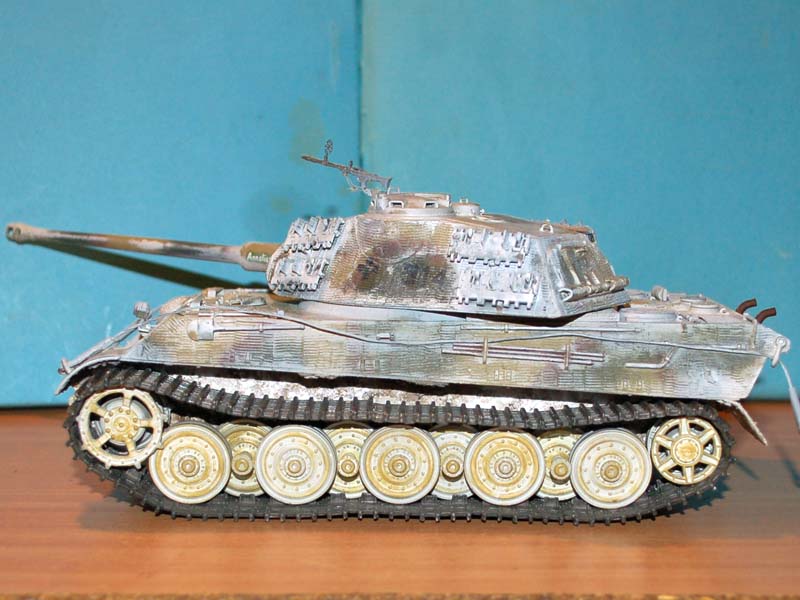
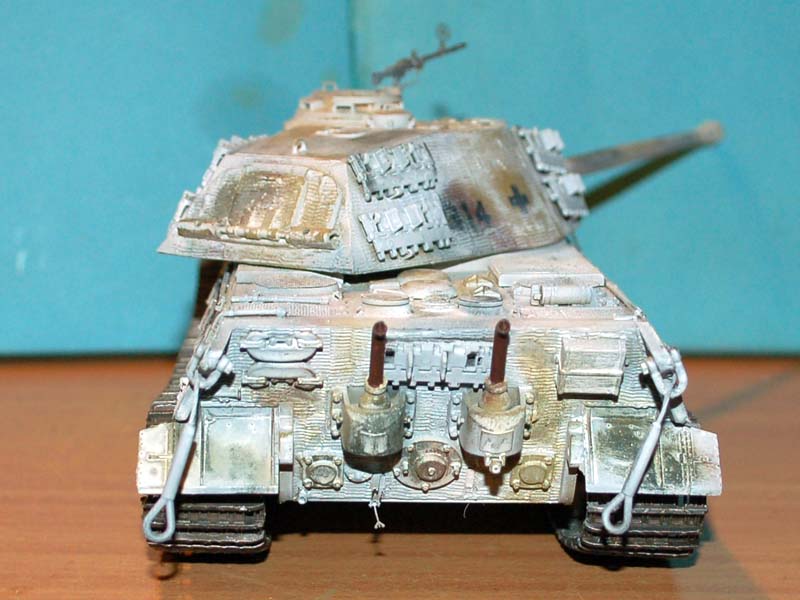


asmodeuss

Joined: November 19, 2011
KitMaker: 1,389 posts
Armorama: 1,388 posts

Posted: Wednesday, January 30, 2013 - 02:17 PM UTC
Marc, great job! nice texturing. I love the attention to detail you are putting in it. The star trek thing: AWESOME!! 
Darren, sweet white wash. Hope you`ll post your sbs in the feature format as the tree making you did.
Phil.

Darren, sweet white wash. Hope you`ll post your sbs in the feature format as the tree making you did.
Phil.


wing_nut

Joined: June 02, 2006
KitMaker: 1,212 posts
Armorama: 674 posts

Posted: Friday, February 01, 2013 - 05:41 AM UTC
Andy, Darren... a pair of hot little kitties there.
Thanks Phillipe.
OK, I'm calling this one. Dragon messed up. I pulled out the other kit and went over it with a fine tooth comb, saved from when I had hair, and part B1 is the same. Nothing the fits into he hole in the hull molder to the arm and no other part to be added to it. But to be fair... Thank you dragon for making the hole in the hull exactly 3/16" so a tube to fit is almost as easy as having the right part


woltersk

Joined: May 27, 2003
KitMaker: 1,026 posts
Armorama: 654 posts

Posted: Friday, February 01, 2013 - 11:08 AM UTC
@Marc--Wholly crap! It had never occurred to me to try simulating steel texture. You are an animal!! And now you got me thinking about the lifting posts on the exhaust armor. They just look so bare without them. Your Enterprise line had me wondering where you were going with that...and then I almost spit out my coffee when I noticed what you were referring to! 
@Andy--Nice work on a tiny rendition of a big tank. Another one of those that could be mistaken for a larger scale.
@Darren--Very nice whitewash effect. They don't always come out looking as realistic as yours. Looking forward to your SBS.
As for me, no Earth-shattering progress here. Just some more base coat paint on the lowers. I will get to the center hubs/bearings after I get the tracks together. Otherwise she is about ready for some camo airbrushing.

Okay, now I gotta complain--why didn't anyone tell me that Dragon's tolerances are so tight that a thin layer of paint would prevent parts from going on? I couldn't even get the top half of the chassis to slide into the bottom hull let alone get the road wheels back on! Sheesh. I should have realized that with the tight dry-fit. Live and learn, and laugh at oneself!
Keith

@Andy--Nice work on a tiny rendition of a big tank. Another one of those that could be mistaken for a larger scale.
@Darren--Very nice whitewash effect. They don't always come out looking as realistic as yours. Looking forward to your SBS.
As for me, no Earth-shattering progress here. Just some more base coat paint on the lowers. I will get to the center hubs/bearings after I get the tracks together. Otherwise she is about ready for some camo airbrushing.

Okay, now I gotta complain--why didn't anyone tell me that Dragon's tolerances are so tight that a thin layer of paint would prevent parts from going on?
 I couldn't even get the top half of the chassis to slide into the bottom hull let alone get the road wheels back on! Sheesh. I should have realized that with the tight dry-fit. Live and learn, and laugh at oneself!
 Keith

wing_nut

Joined: June 02, 2006
KitMaker: 1,212 posts
Armorama: 674 posts

Posted: Saturday, February 02, 2013 - 11:36 AM UTC
Thanks Keith. Sorry about the coffee 
We've all heard of the carpet monster. Well I have a desk douche or bench bastard. I keep loosing parts that don't make it to the carpet. Started with 8 track hooks... and then there were 7. I use silly putty to make a quickie mold to cast new "simple" parts when this happens. New hook and the extra links hung and secured with the pins.


I really hope I don’t break the sight off with my big sausage fingers. They must know thought since the parts are doubled.


We've all heard of the carpet monster. Well I have a desk douche or bench bastard. I keep loosing parts that don't make it to the carpet. Started with 8 track hooks... and then there were 7. I use silly putty to make a quickie mold to cast new "simple" parts when this happens. New hook and the extra links hung and secured with the pins.


I really hope I don’t break the sight off with my big sausage fingers. They must know thought since the parts are doubled.

Posted: Saturday, February 02, 2013 - 12:08 PM UTC
Nice piece of advice there Marc
imatanker

Joined: February 11, 2011
KitMaker: 1,654 posts
Armorama: 1,565 posts

Posted: Saturday, February 02, 2013 - 12:32 PM UTC
Marc... That's a great idea using silly putty for your molds.What do you use for a casting resin?
And by the way,your build looks awesome.
Andy...Nice work Man,the mini kitty is sweet.Jeff T.
And by the way,your build looks awesome.
Andy...Nice work Man,the mini kitty is sweet.Jeff T.

wing_nut

Joined: June 02, 2006
KitMaker: 1,212 posts
Armorama: 674 posts

Posted: Saturday, February 02, 2013 - 07:52 PM UTC
Thansk guys. Jeff it's Micro Mark Cr 300.
Posted: Sunday, February 03, 2013 - 03:05 PM UTC
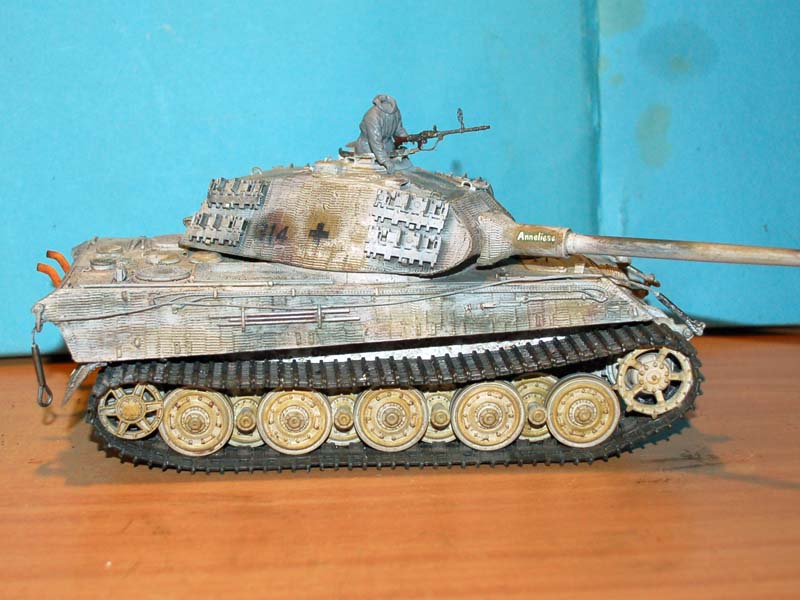
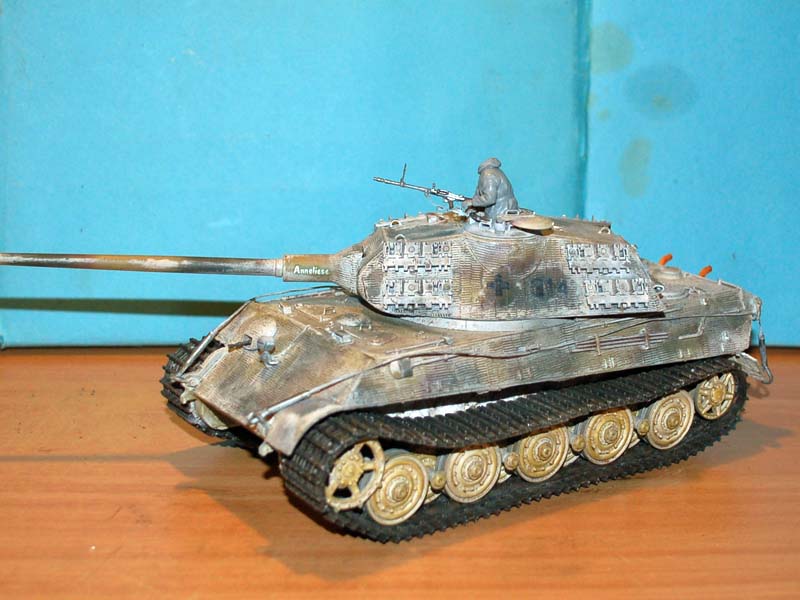
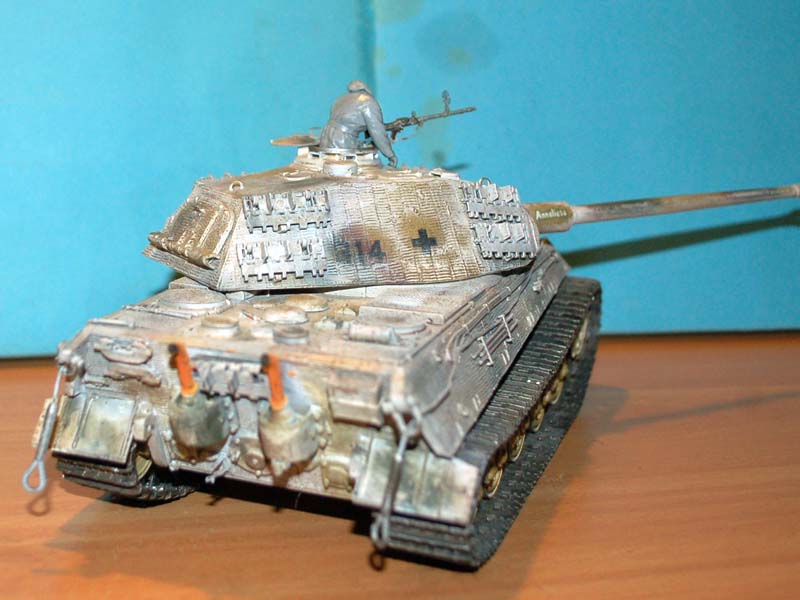
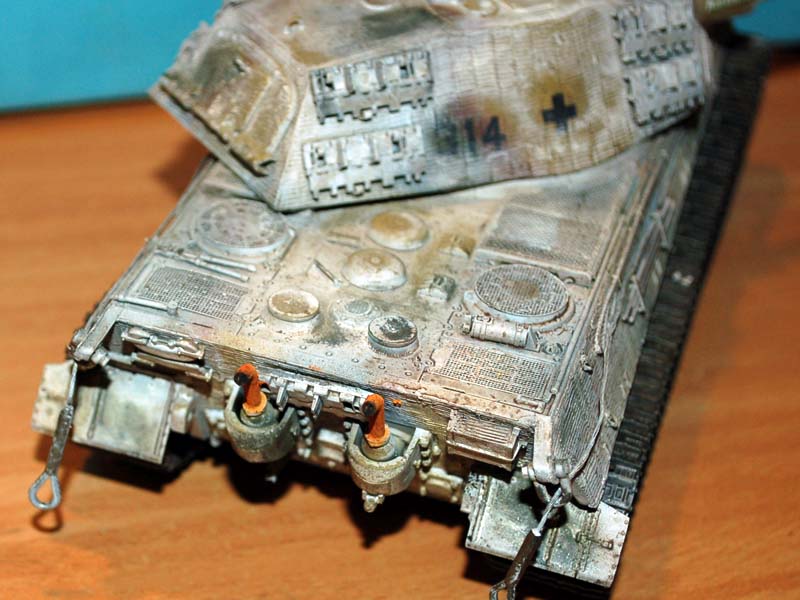
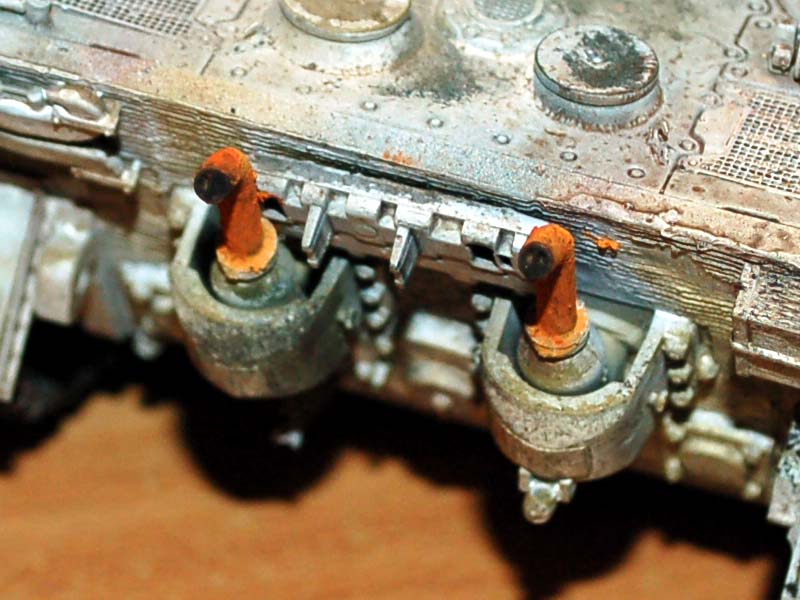
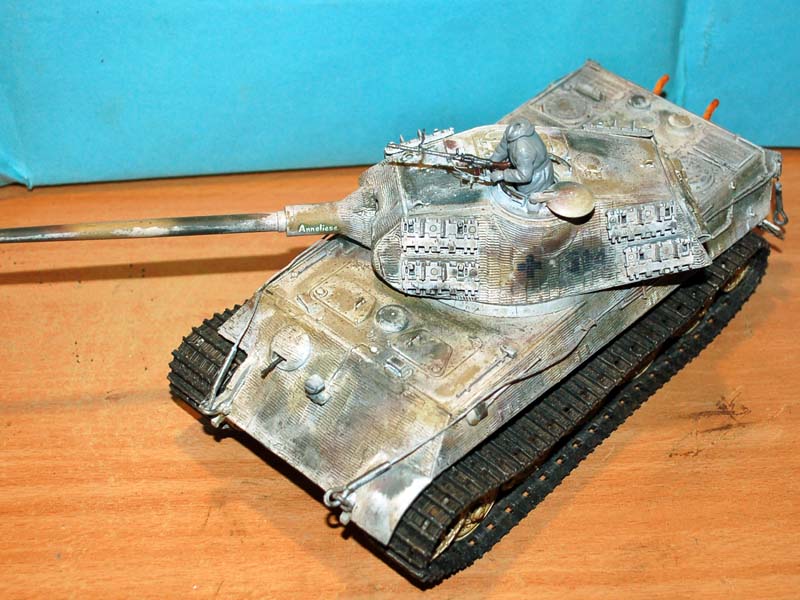
Well here is a quick update for you where I have given the whole model a wash and started adding some pigments to the exhaust oh and adding the radio ops MG.
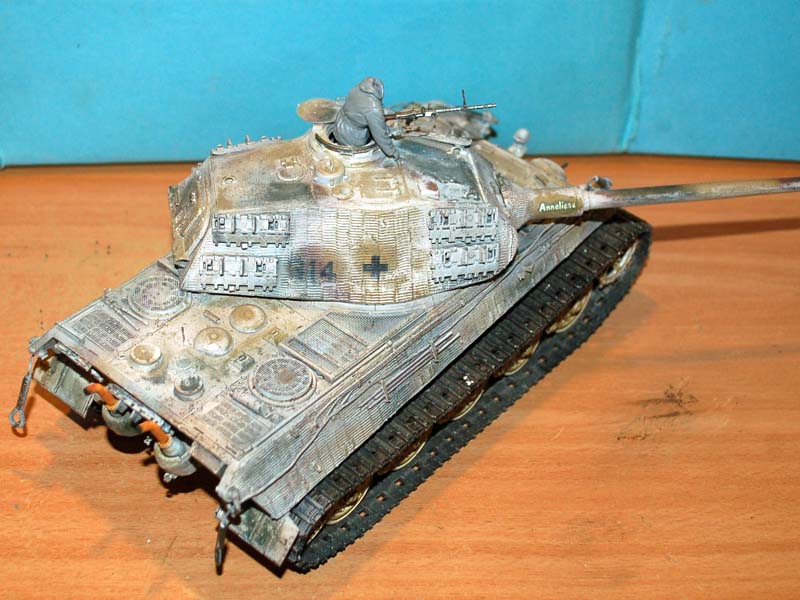


Hangelafette

Joined: April 22, 2012
KitMaker: 344 posts
Armorama: 315 posts

Posted: Monday, February 04, 2013 - 01:30 PM UTC
I'm in with Dragon's cartoon King Tiger, actually it is quite a good looking kit, lots of extras.

I've already made some progress on the hull:

I'm aiming towards a late production King Tiger, I'll need to research my options and possibly 'borrow' decals from another kit.
 Nate
Nate

I've already made some progress on the hull:

I'm aiming towards a late production King Tiger, I'll need to research my options and possibly 'borrow' decals from another kit.
 Nate
Nate
wing_nut

Joined: June 02, 2006
KitMaker: 1,212 posts
Armorama: 674 posts

Posted: Tuesday, February 05, 2013 - 09:57 AM UTC
Darren looks like you're in the home stretch. Looks good too. Too bad the commander went and got his head shot off. 
Nice start Nate.
Added fuel cell vents.

Got the exhausts ready for mounting.

The tedious chore of the tracks is completed.


For whatever reason I absolutely could not get a good looking solder joint on PE. Tried Tix flux as suggested by friend and WOW. I’ve heard about solder getting sucked into the joists before just never saw it. Got the fenders done with only minor clean up. Instead of trying to get the fenders to stay on only attached at the mounting plates I filled the back with strips of plastic flush with the top folded edge and secured with CA. Scraped away the Bondo and I was able to get a really strong bond.


Nice start Nate.
Added fuel cell vents.

Got the exhausts ready for mounting.

The tedious chore of the tracks is completed.


For whatever reason I absolutely could not get a good looking solder joint on PE. Tried Tix flux as suggested by friend and WOW. I’ve heard about solder getting sucked into the joists before just never saw it. Got the fenders done with only minor clean up. Instead of trying to get the fenders to stay on only attached at the mounting plates I filled the back with strips of plastic flush with the top folded edge and secured with CA. Scraped away the Bondo and I was able to get a really strong bond.


Posted: Tuesday, February 05, 2013 - 10:08 AM UTC
Just as well I have decided to use an alternate crew member as tank commander then 

Nathan; welcome to the mix.
Marc this may be a stupid comment/question but you do know that the fenders overlap don't you. Take a look at the kingtiger walkaround i did on the site as it may be of help.


Nathan; welcome to the mix.
Marc this may be a stupid comment/question but you do know that the fenders overlap don't you. Take a look at the kingtiger walkaround i did on the site as it may be of help.

wing_nut

Joined: June 02, 2006
KitMaker: 1,212 posts
Armorama: 674 posts

Posted: Tuesday, February 05, 2013 - 02:02 PM UTC
I think I know what you mean by overlap Not sure how they come together on the underside but the strip that covers the seam between 2 sections must have something to do with interlocking them. I'm guessing that strip is at one end of the section and the next one clips or slides into it somehow. The strips is hard to see in the long shot of the tank but here's a close up. It's there.


wing_nut

Joined: June 02, 2006
KitMaker: 1,212 posts
Armorama: 674 posts

Posted: Friday, February 08, 2013 - 02:26 AM UTC
Final mock up of the vehicle with only the tools to be added.


The tools are done and ready to mount. I made the "threaded" rods ends by rolling some solder under a file.


The tools are done and ready to mount. I made the "threaded" rods ends by rolling some solder under a file.


Posted: Friday, February 08, 2013 - 03:45 AM UTC
Very nice work on the wood for the tools Marc
 |


