barkingdigger
 Associate Editor
#013
England - East Anglia, United Kingdom
Joined: June 20, 2008
KitMaker: 3,981 posts
Armorama: 3,403 posts
Posted: Friday, January 18, 2013 - 02:56 AM UTC
Hi guys!
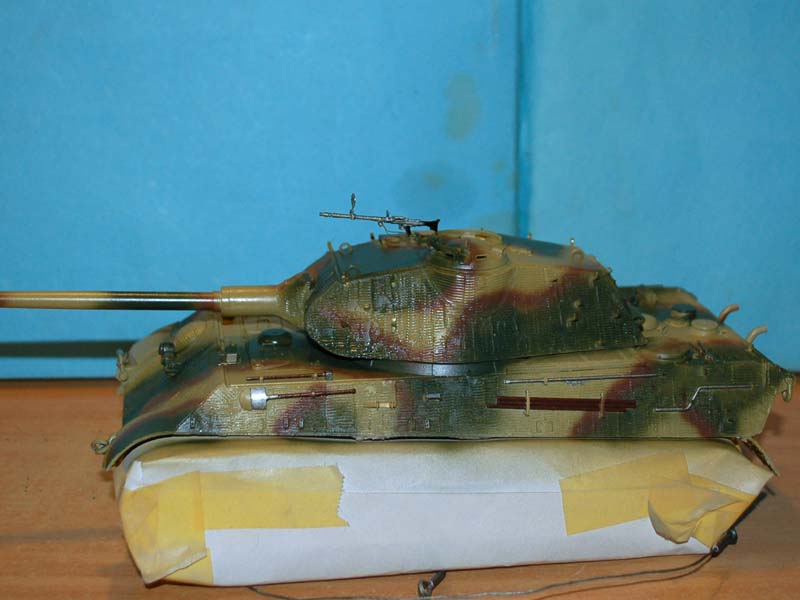
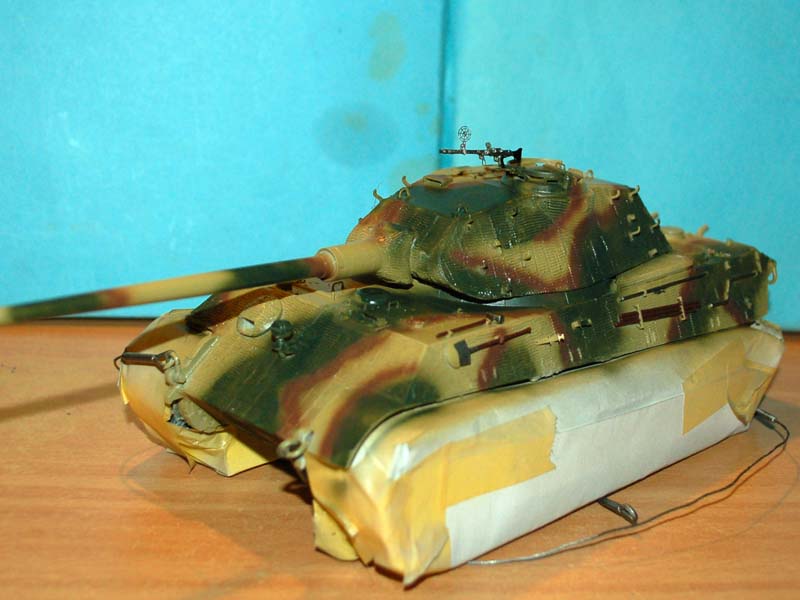
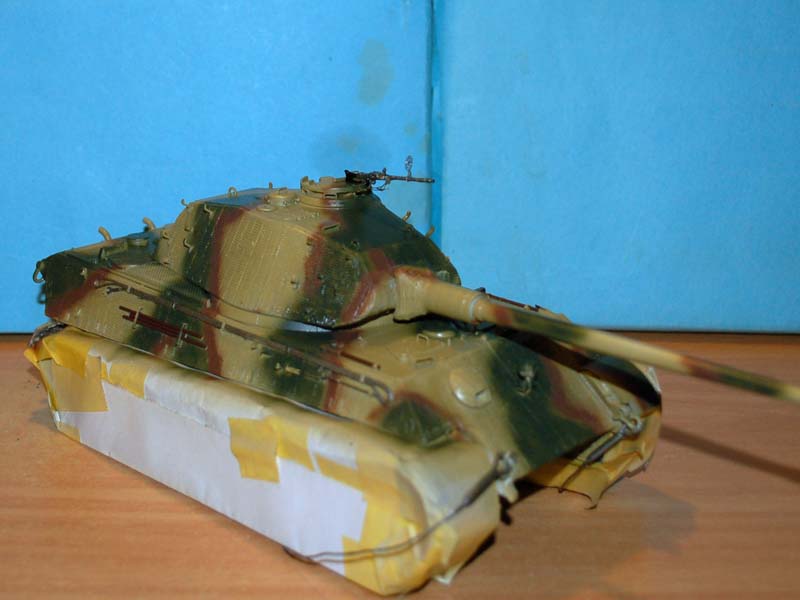
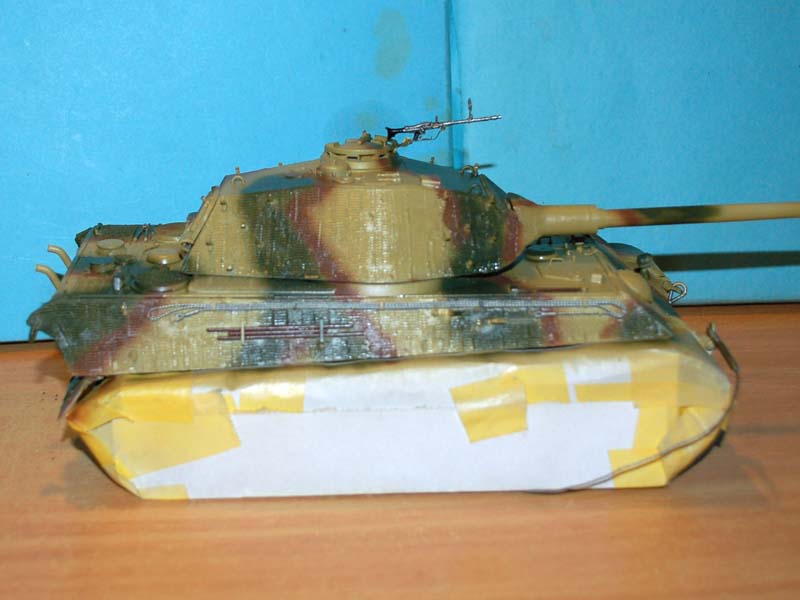
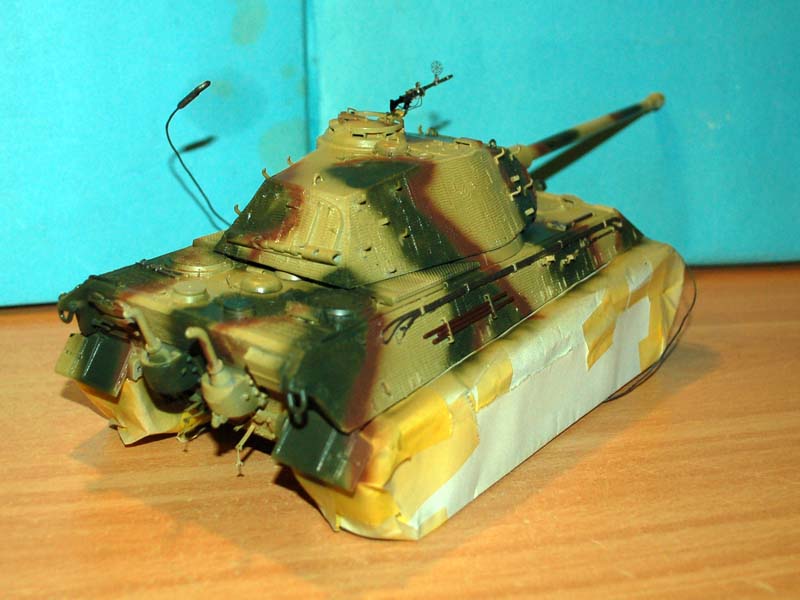
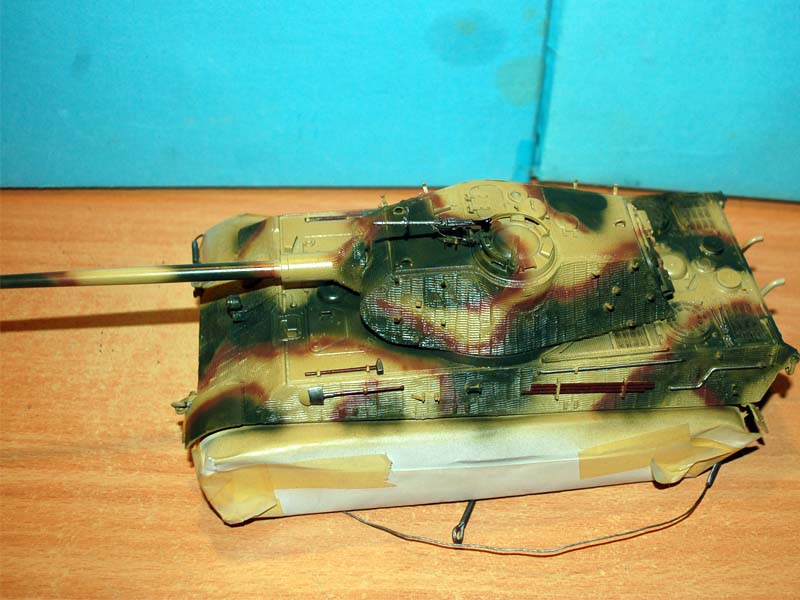
For my entry I decided to dust off a project I entered in a campaign well over a year ago - but this time I'll actually get around to doing some building on it! (I'm developing a bad habit of getting as far as the "before you start" pic, and never actually getting the build going...)
It's an ancient Minicraft "Porsche" KT that I intend to turn into a replica of the Bovington example, warts and all. To help it out I've added some plastic indy link tracks (Tamiya? The box went ages ago) and a metal barrel because the kit one is so crude. The rest will be creative plastic surgery. Hopefully it'll get some bench time in the next few weeks.
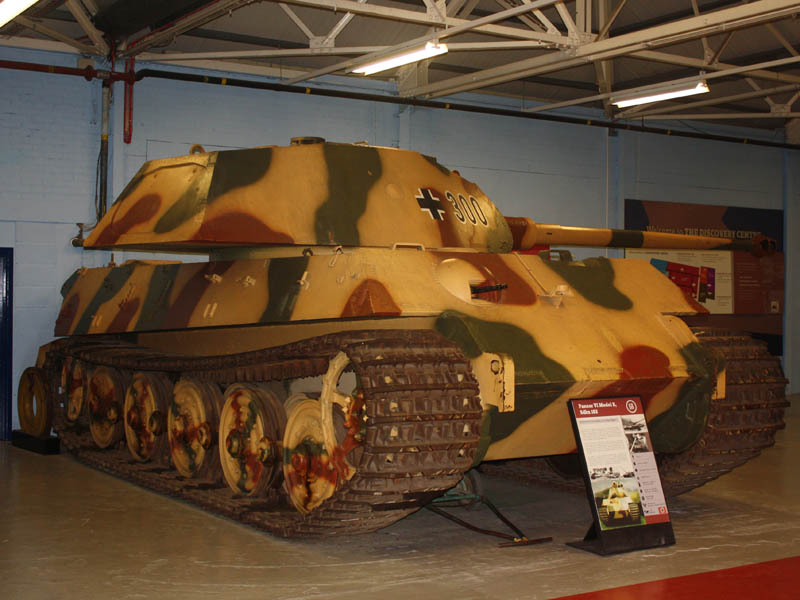
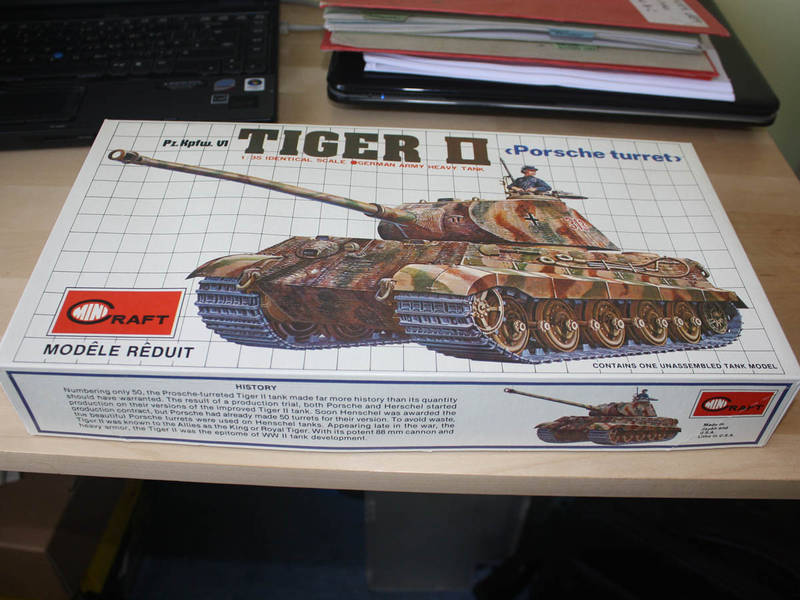
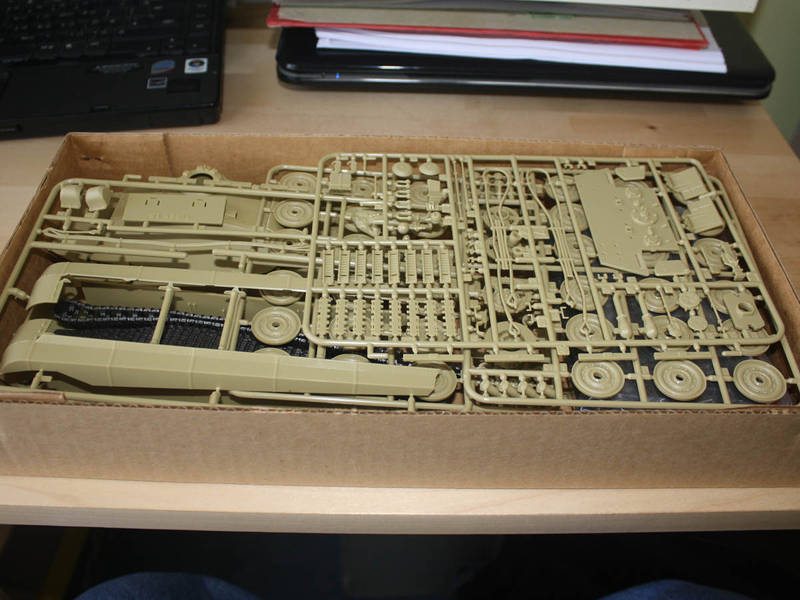
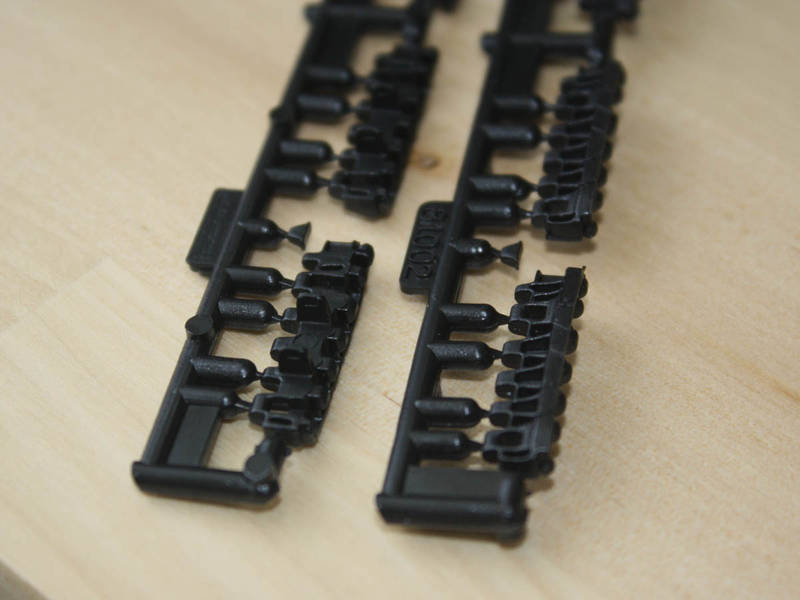
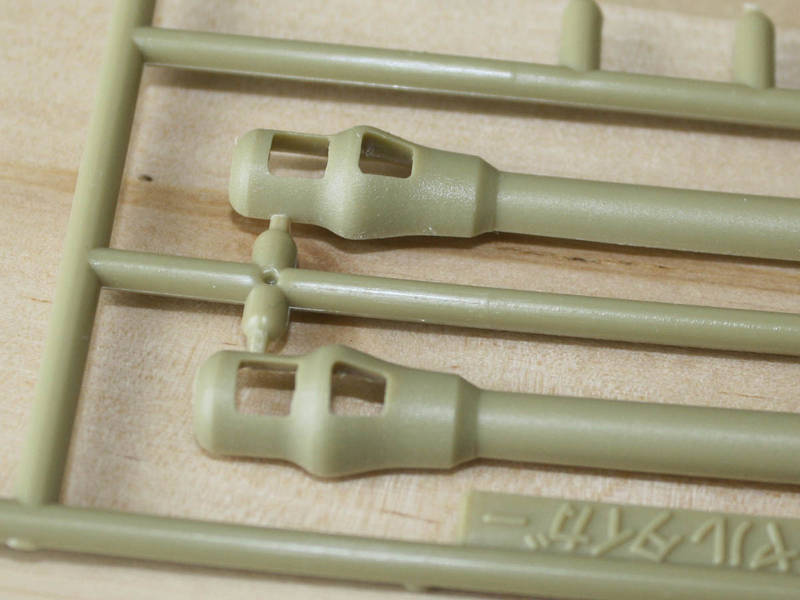
Oh, and why start with the lumpy Minicraft kit? Well, it's already in the stash... (Been there nearly three decades now!) And it seems a shame to cop out of all the modelling fun by buying a newer DML kit. I may live to regret those words...

Tom
"Glue, or Glue Not - there is no Dry-Fit" - Yoda (original script from Return of the Jedi...)
CMOT
 Editor-in-Chief
England - South West, United Kingdom
Joined: May 14, 2006
KitMaker: 10,954 posts
Armorama: 8,571 posts
Posted: Friday, January 18, 2013 - 04:15 AM UTC
Tom was it you I took the pictures of this one for?
CMOT
 Editor-in-Chief
England - South West, United Kingdom
Joined: May 14, 2006
KitMaker: 10,954 posts
Armorama: 8,571 posts
Posted: Friday, January 18, 2013 - 04:34 AM UTC
Quebec, Canada
Joined: November 15, 2002
KitMaker: 3,960 posts
Armorama: 3,579 posts
Posted: Friday, January 18, 2013 - 05:29 AM UTC
Nice work so far Darren!
Rick
barkingdigger
 Associate Editor
#013
England - East Anglia, United Kingdom
Joined: June 20, 2008
KitMaker: 3,981 posts
Armorama: 3,403 posts
Posted: Friday, January 18, 2013 - 06:52 AM UTC
Darren, it was indeed! But I did eventually get there myself to grab a few more. It was a classic case of getting all revved up, but not letting out the clutch...
Tom
"Glue, or Glue Not - there is no Dry-Fit" - Yoda (original script from Return of the Jedi...)
Quebec, Canada
Joined: November 19, 2011
KitMaker: 1,389 posts
Armorama: 1,388 posts
Posted: Friday, January 18, 2013 - 09:38 AM UTC
Nice Darren I knew you had something special for this one!
Don`t be shy on the sbs for the white wash

Can`t wait to see it happen.
Phil.

Modeling...
I rest my case.
Utah, United States
Joined: May 27, 2003
KitMaker: 1,026 posts
Armorama: 654 posts
Posted: Friday, January 18, 2013 - 01:20 PM UTC
Quoted Text
Keith, Were you wearing an Opti-visor and/or rubber gloves? It could make a difference in your score
@Jeff T.--No, but only because I didn't bring them. And, in my defense, I
wasn't sitting in my tighty-whities either.

However, I did finish the last 72 while catching up on FRINGE episodes before the series finale tonight.
@Darren--Nice airbrushing. Lookin' good!
Keith
Build 'em better than the box art!
Maine, United States
Joined: February 11, 2011
KitMaker: 1,654 posts
Armorama: 1,565 posts
Posted: Friday, January 18, 2013 - 09:24 PM UTC
Quoted Text
Quoted Text
Keith, Were you wearing an Opti-visor and/or rubber gloves? It could make a difference in your score
@Jeff T.--No, but only because I didn't bring them. And, in my defense, I wasn't sitting in my tighty-whities either. 
However, I did finish the last 72 while catching up on FRINGE episodes before the series finale tonight.
@Darren--Nice airbrushing. Lookin' good!
Keith
So O.K. Based on the information given,and taking all the other variables into account,our judges have come up with your score

It works out to a 7.Although it looks like you really impressed the Russian Judge
 Darren,
Yes,a SBS on the whitewash would be good,and I agree,great paint work.Jeff T.
The building lamp is lit.Build'em if you got'em.
CMOT
 Editor-in-Chief
England - South West, United Kingdom
Joined: May 14, 2006
KitMaker: 10,954 posts
Armorama: 8,571 posts
Posted: Saturday, January 19, 2013 - 12:28 AM UTC
Thank you all for your positive responses to my build so far and I will see what I can do about an SBS.
Utah, United States
Joined: May 27, 2003
KitMaker: 1,026 posts
Armorama: 654 posts
Posted: Sunday, January 20, 2013 - 02:23 AM UTC
@Jeff T.--lol! That cracked me up. Too bad the rules say you have to toss out the highest and lowest score!
The track treads and road wheels are now done and I have to wait to return home on Tuesday before I can start painting them and the rest of the vehicle. Hopefully sometime this coming week.
Keith
Build 'em better than the box art!
New Jersey, United States
Joined: June 02, 2006
KitMaker: 1,212 posts
Armorama: 674 posts
Posted: Tuesday, January 22, 2013 - 10:56 AM UTC
Darren with the tracks wrapped like that this looks like some sort of secret hovercraft the Germans were working on. Camo looks sweet.
I will post a starter photo later tonight since my PE FINALLY arrive from China. Might even squeak in a progress pic if I get going on the running gear.
Does anyone have links to really good KT workarounds?
CMOT
 Editor-in-Chief
England - South West, United Kingdom
Joined: May 14, 2006
KitMaker: 10,954 posts
Armorama: 8,571 posts
Posted: Tuesday, January 22, 2013 - 11:18 AM UTC
A hovercraft now there's a thought

. I have added a couple of walkarounds on Armorama for both types of KT turret and within reason I can get specific areas as needed given time.
Maine, United States
Joined: February 11, 2011
KitMaker: 1,654 posts
Armorama: 1,565 posts
Posted: Tuesday, January 22, 2013 - 12:31 PM UTC
Marc... Use Bing to search King Tiger walk around and see what you get.There's all kinds of stuff with some good pics.They have a few videos also.Here's a sample
http://www.youtube.com/watch?v=gdOaGhPfUh8 I thought it was pretty cool.Jeff T.
The building lamp is lit.Build'em if you got'em.
New Jersey, United States
Joined: June 02, 2006
KitMaker: 1,212 posts
Armorama: 674 posts
Posted: Wednesday, January 23, 2013 - 02:08 AM UTC
Thnaks jeff.
And so it begins, the official 1st photos.
This is the kit and the PE that will be used. I may add some Friuls to the mix. And when I say "may" that usually means that if I even get the slightest inkling of the though... it's a forgone conclusion.

I've at least got the box open, sprues organized (for the moment) and starting in on the wheels and axles. It would be nice if there was a nice tight mount to get the wheels all lined up to reduce the chance of "floaters" later on. Shouldn't be hard to be precise. But WHOA that's a lot of play. I am guessing 1 of 2 scenarios... Dragon screwed up or they are allowing for changes in position in the even you are doing a dio and there a rock or tree limbs under the track.


#226
British Columbia, Canada
Joined: February 20, 2012
KitMaker: 1,909 posts
Armorama: 1,066 posts
Posted: Wednesday, January 23, 2013 - 11:23 AM UTC
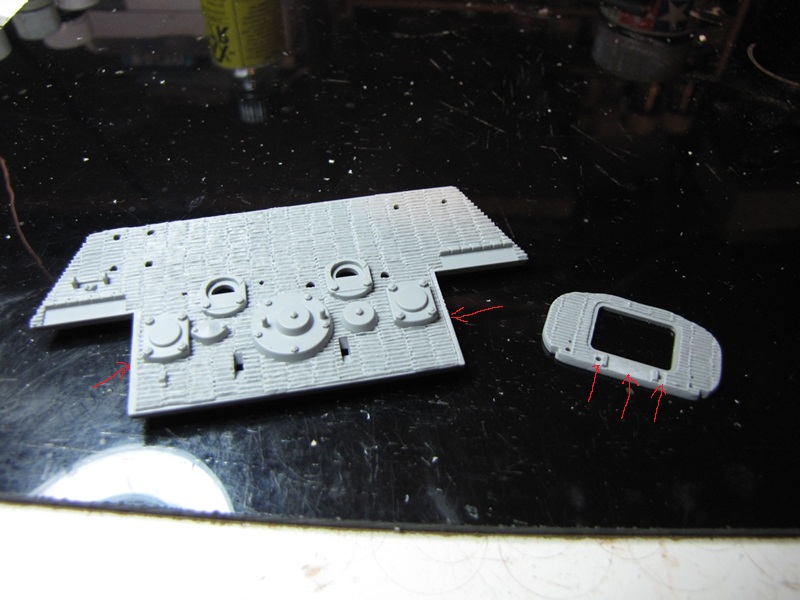
Ran into a couple of areas where the zimmerit didn't look right or interfered with assembly. I did not like the way the zimmerit looked at the back, you could see spaces where the sides of the hull meet it so careful cutting and chiseling removed the zimmerit and I will add some strip plastic to the sides to make up the difference(don`t need any fit issues.LOL) the hatch on the back of the turret needed some zimmerit removed so all the pieces fit correctly.

Cheers Rob.
Anything without guns is a target!
27 completed campaigns and counting :)
Utah, United States
Joined: May 27, 2003
KitMaker: 1,026 posts
Armorama: 654 posts
Posted: Wednesday, January 23, 2013 - 11:44 PM UTC
Gents,
I need some advice, suggestions, or direction. Having never used indie track links before, I'm at a bit of a loss as to how to proceed. I 'knitted' a run together on masking tape figuring I would start by gluing the ones on the ground together and then work my way around the drive sprocket and idler wheel and finish with the sag across the top. Is that how most of you do it? Or am I approaching this all wrong?

Thanks,
Keith
Build 'em better than the box art!
New Jersey, United States
Joined: June 02, 2006
KitMaker: 1,212 posts
Armorama: 674 posts
Posted: Thursday, January 24, 2013 - 01:27 AM UTC
Keith, I learned how to deal with indy tracks with this SBS. Been doing it that way ever since.
https://armorama.kitmaker.net/features/1737&page=2barkingdigger
 Associate Editor
#013
England - East Anglia, United Kingdom
Joined: June 20, 2008
KitMaker: 3,981 posts
Armorama: 3,403 posts
Posted: Thursday, January 24, 2013 - 04:05 AM UTC
Kieth,
On Tigers and Panthers I tend to dry-fit the wheels (so they can slip off afterwards) and then glue up track runs that I wrap around and glue to the wheels. That waqy, I can remove the whole "wheel & track" unit as a lump for painting. I do a long enough run for the top so it extends beyond the sprocket and idler - that way I can set the sag and curl the ends around to hold it in place. The rest then gets added underneath.
This is what i mean:

You'll find as many different methods as there are modellers...
Tom
"Glue, or Glue Not - there is no Dry-Fit" - Yoda (original script from Return of the Jedi...)
CMOT
 Editor-in-Chief
England - South West, United Kingdom
Joined: May 14, 2006
KitMaker: 10,954 posts
Armorama: 8,571 posts
Posted: Thursday, January 24, 2013 - 05:28 AM UTC
I usually glue up a full track run and then leave a connection point on the sprocket, this way I get everything looking as I want and the tracks can still be removed for painting.
New Jersey, United States
Joined: June 02, 2006
KitMaker: 1,212 posts
Armorama: 674 posts
Posted: Thursday, January 24, 2013 - 12:37 PM UTC
I decided to add Friuls to the mix. The decision was easy. I was at the LHS, he had 'em, I bought 'em.
New Jersey, United States
Joined: June 02, 2006
KitMaker: 1,212 posts
Armorama: 674 posts
Posted: Saturday, January 26, 2013 - 04:59 AM UTC
Welds...
There will be a lot of welds and torch cutting m,arks to add. I started on the turret. There was the faintest hint of a weld around the top that was filed out, masked with some Jammydog tape and
welded.


Wheels...
Axles aligned, wheels sanded and mounted temporarily.

WTF?...
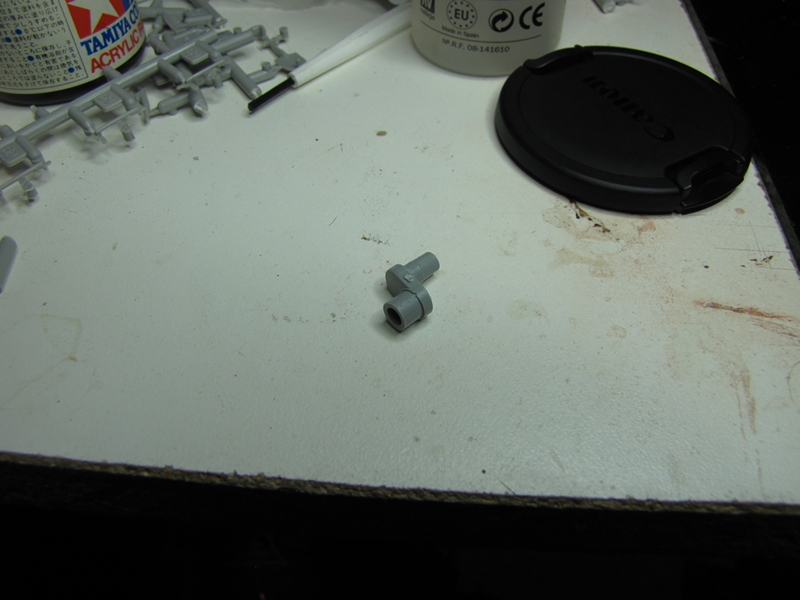
The pivoting arm for the idler, part B1, has no way to mount to the hull. I would have thought that something would go ion form the inside of the hull to make the adjustable pivot. Is that "barley there" ring on the arm supposed to go in that gigundo hole? It doesn't really fit to well and hardly seems it would take the tension of the tracks.

I used a piece of Bare Metal foil to mask the outside eof the MG blister. If any of you non-aircraft type have not sen this stuff it is great for masking since it burnishes down perfectly and irregular shapes can be cut out easily.


I've started on some of the hot rolled steel look. I thinned the Bondo glazing compound to a consistency of paint ready to be sprayed and stippled like I was doing a casting texture. Only thing different was to sand most of it off. It will show better when it's primed.


Maine, United States
Joined: February 11, 2011
KitMaker: 1,654 posts
Armorama: 1,565 posts
Posted: Saturday, January 26, 2013 - 08:54 AM UTC
Marc... Nice work Man,and You where worried you wouldn't fit in

Check this link
http://www.1999.co.jp/eng/image/10043587z/70/1 Does it look like there is another piece mounted on the hull for the swing arm to go into? Pic is so small I can't really tell,but it looks like it to Me.Jeff T.
The building lamp is lit.Build'em if you got'em.

#226
British Columbia, Canada
Joined: February 20, 2012
KitMaker: 1,909 posts
Armorama: 1,066 posts
Posted: Saturday, January 26, 2013 - 10:22 AM UTC
Marc,
Those arms don't seem right, these are the ones from my kit:
Cheers Rob.
Anything without guns is a target!
27 completed campaigns and counting :)
CMOT
 Editor-in-Chief
England - South West, United Kingdom
Joined: May 14, 2006
KitMaker: 10,954 posts
Armorama: 8,571 posts
Posted: Saturday, January 26, 2013 - 11:20 AM UTC
Just a thought Rob but is there another sprue with the correct susopension arm on it? We all know what Dragon is like for including 3 times as many parts as you use.

#226
British Columbia, Canada
Joined: February 20, 2012
KitMaker: 1,909 posts
Armorama: 1,066 posts
Posted: Saturday, January 26, 2013 - 11:51 AM UTC
I looked for one before I posted that is the only one I have, it is a different edition of the kit. I was thinking Marc's might have two sets.
Cheers Rob.
Anything without guns is a target!
27 completed campaigns and counting :)


