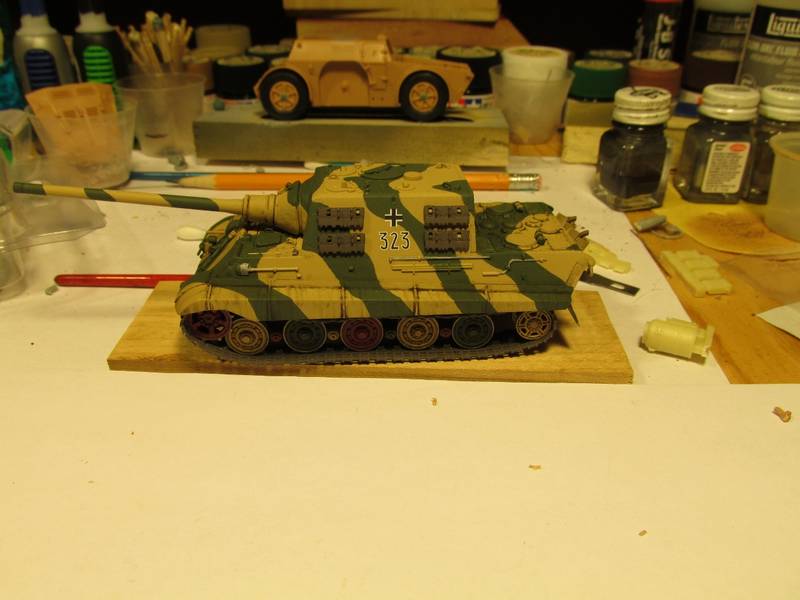
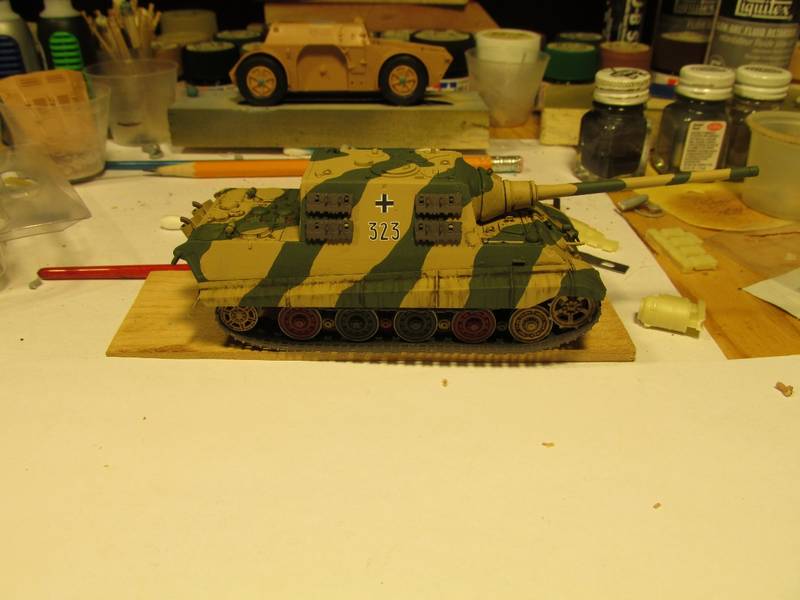
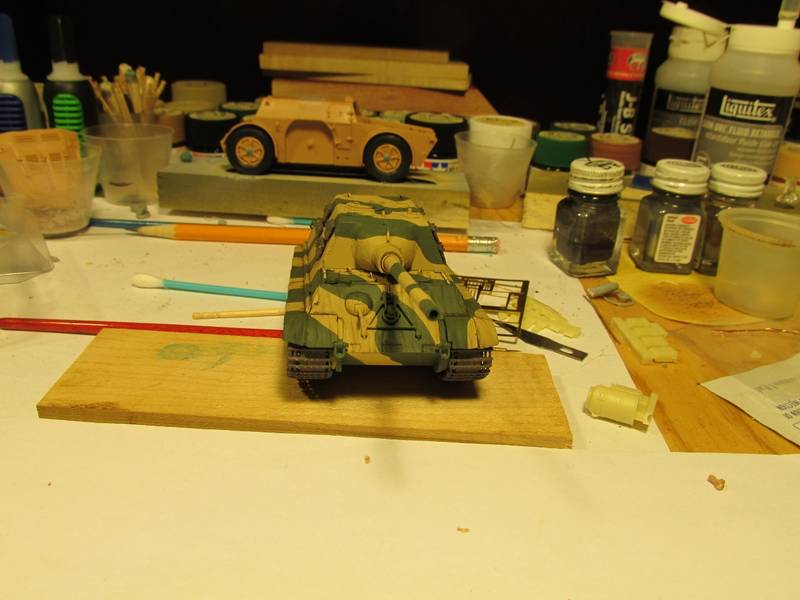
Sal, Man,they just look so clean and neat after they are primed
John & John again, Nice gifts Dude,are you going to put them under the tree? And John your camo nets look sweet,what did you use to make them?
KEITH, Glad you like the paint.It was hand brushed with Tamiya,yes thats right,Tamiya.Go back to page 12 about 2/3 of the way down for more info.
Started weathering My Jagd,here are some pics...
Model on,Jeff T.
Campaigns
Where Armorama group builds can be discussed, organized, and updates posted.
Hosted by Darren Baker, Richard S.
King Campaign
imatanker
Maine, United States
Joined: February 11, 2011
KitMaker: 1,654 posts
Armorama: 1,565 posts
Joined: February 11, 2011
KitMaker: 1,654 posts
Armorama: 1,565 posts
Posted: Tuesday, December 18, 2012 - 11:08 AM UTC
woltersk
Utah, United States
Joined: May 27, 2003
KitMaker: 1,026 posts
Armorama: 654 posts
Joined: May 27, 2003
KitMaker: 1,026 posts
Armorama: 654 posts
Posted: Tuesday, December 18, 2012 - 12:00 PM UTC
Quoted Text
KEITH, Glad you like the paint.It was hand brushed with Tamiya,yes thats right,Tamiya.Go back to page 12 about 2/3 of the way down for more info.
Jeff,
Ah, yes, I do recall that part of the thread. I just got my builds confused. Too many similar paint jobs, plus I'm getting old.
So, what are the issues with brush painting Tamiya? Is it airbrush paint? I have a few jars of their paint and it seems to work well on small areas.
The weathering looks great! What a difference it makes.
Keith
Posted: Tuesday, December 18, 2012 - 01:12 PM UTC
When Tamiya changed from the large to small jars they seemed to mess with the recipe and now Tamiya paint has to be heavily thinned and several layers used to brush paint or it leaves brush strokes and creates too thick a layer of paint. Regarding airbrushing Tamiya paint; I think it is the best paint out there for airbrush application but they could do with a larger range of colours.
jkb_sprint
Thessaloniki, Greece / Ελλάδα
Joined: April 23, 2012
KitMaker: 402 posts
Armorama: 394 posts
Joined: April 23, 2012
KitMaker: 402 posts
Armorama: 394 posts
Posted: Tuesday, December 18, 2012 - 07:25 PM UTC
Sal, nice clean work on that red primer. By the way, maybe leave it like that, put some Xmas lights on it, at least until the end of the Christmas? It will be the Christmas KT! Just kidding. Waiting to see it painted.
Jeff.T, your JT comes along nicely, these tanks practically scream for wear and dirt! As for the camo net, a friend bought it for me from Tellford. They are like A3 pages in size and look quite convincing. This year he got me another one, for more modern vehicles. I don't know if they are both made from the same company, but definately from the UK.
Keith, thanks a lot. That's a nice KT you have there. I like the welding seam. I would go for that one, it will also look better after some weathering, because of the seam.
BBD468
Texas, United States
Joined: March 08, 2010
KitMaker: 2,465 posts
Armorama: 2,383 posts
Joined: March 08, 2010
KitMaker: 2,465 posts
Armorama: 2,383 posts
Posted: Wednesday, December 19, 2012 - 03:40 AM UTC
DANG Jeff...im still impressed you painted that with Tamiya! Its lookin' sweet too....well done sir!
Gary
Gary
Nito74
Lisboa, Portugal
Joined: March 04, 2008
KitMaker: 5,386 posts
Armorama: 4,727 posts
Joined: March 04, 2008
KitMaker: 5,386 posts
Armorama: 4,727 posts
Posted: Wednesday, December 19, 2012 - 04:57 AM UTC
I added the missing cables, track metal pads painted too.
Finished the equipment.
As you can see by the last pic, it's too dark so I hope to post the finished pics tomorrow.
I didn't wanted to get to dirty on this one because I really like the camo, it was fun doing it and I think it looks nice too , so I guess this one is finished..
Last pics tomorrow !! Stay tuned !
asmodeuss
Quebec, Canada
Joined: November 19, 2011
KitMaker: 1,389 posts
Armorama: 1,388 posts
Joined: November 19, 2011
KitMaker: 1,389 posts
Armorama: 1,388 posts
Posted: Wednesday, December 19, 2012 - 02:31 PM UTC
Jeff T, my mate! this is an impressive paint job. I bow to this build
Nito, I love it super nice paint scheme where did you get the inspiration?
Phil.
Nito, I love it super nice paint scheme where did you get the inspiration?
Phil.
Nito74
Lisboa, Portugal
Joined: March 04, 2008
KitMaker: 5,386 posts
Armorama: 4,727 posts
Joined: March 04, 2008
KitMaker: 5,386 posts
Armorama: 4,727 posts
Posted: Wednesday, December 19, 2012 - 02:54 PM UTC
Thanks Philippe,
Well the only scheme I liked on the Tamyia sheet had Zimmerit so I had to find other schemes, even if they didn't match the unit I was picking, I wasn't trying to be accurate.
Searched here:
http://img293.imageshack.us/img293/431/camouflageut3.jpg
Just wanted a camo with a Dark Green base .. and it turned out easier that I expected... just the round opposite tip of the brush with a little paint !
Posted: Wednesday, December 19, 2012 - 04:30 PM UTC
John even though the picture is a little dark I really like the look of the finished build and the 2 primed replacement fender parts add a nice focal point to the model. Don't forget to add a picture to the campaign gallery.
asmodeuss
Quebec, Canada
Joined: November 19, 2011
KitMaker: 1,389 posts
Armorama: 1,388 posts
Joined: November 19, 2011
KitMaker: 1,389 posts
Armorama: 1,388 posts
Posted: Thursday, December 20, 2012 - 02:15 AM UTC
Thanks John! that is going to be usefull.
Nito74
Lisboa, Portugal
Joined: March 04, 2008
KitMaker: 5,386 posts
Armorama: 4,727 posts
Joined: March 04, 2008
KitMaker: 5,386 posts
Armorama: 4,727 posts
Posted: Thursday, December 20, 2012 - 02:35 AM UTC
Finally some sunny morning, so I took some better pics, this time with cables & equipment.
Thanks to all participants, thanks to Darren for starting another great Campaign !!
I will be coming back to see all those nice builds for sure !
Thanks to all participants, thanks to Darren for starting another great Campaign !!
I will be coming back to see all those nice builds for sure !
wing_nut
New Jersey, United States
Joined: June 02, 2006
KitMaker: 1,212 posts
Armorama: 674 posts
Joined: June 02, 2006
KitMaker: 1,212 posts
Armorama: 674 posts
Posted: Thursday, December 20, 2012 - 05:05 AM UTC
A Kingtiger campaign you say? Hmmm, wells seems that since I have swapped some stash kits for 2 Dragon Late KT's, #6254, seems like the perfect opportunity to participation in my 1st Armorama campaign.
When I finish the Panther in the midst of I will start the KT. As soon as on of them arrives I will post a box photo. With all the extras in the box not likely to be any Am stuff but some scratched details are not out of hr realm of possibility.
Anything else I need to do to make it official? Now to go back through 15 pages to see what's what so far.
Posted: Thursday, December 20, 2012 - 06:21 AM UTC
Welcome to the campaign Marc, all you need do is register to the campaign by selecting campaigns at the bottom of the header and register your participation in this campaign.
ltb073
New York, United States
Joined: March 08, 2010
KitMaker: 3,662 posts
Armorama: 3,078 posts
Joined: March 08, 2010
KitMaker: 3,662 posts
Armorama: 3,078 posts
Posted: Friday, December 21, 2012 - 01:10 AM UTC
John, Great finish on you KT 332 by the way what kit was that
I know I said that I was going to use Jay's Work mask but then I read that 332 didnt have the typical camo scheme so I decided to go with a brushed camo
So here is what my KT is looking like now
Still needs another coat of green before I add the brown
I know I said that I was going to use Jay's Work mask but then I read that 332 didnt have the typical camo scheme so I decided to go with a brushed camo
So here is what my KT is looking like now
Still needs another coat of green before I add the brown
imatanker
Maine, United States
Joined: February 11, 2011
KitMaker: 1,654 posts
Armorama: 1,565 posts
Joined: February 11, 2011
KitMaker: 1,654 posts
Armorama: 1,565 posts
Posted: Friday, December 21, 2012 - 01:22 PM UTC
Gary and Phillippe,Thanks guys,as always, your comments mean a lot to me
John (Nitro) Great build Buddy.It looks fantastic.
Marc, Welcome aboard Man.
Sal,Camo looks sweet,now it's My turn to ask.What did YOU use for paint and reducer
My build is coming along well but I have no batteries for My camera I think they are all under the Christmas tree Should have some updated photos tomorrow.Jeff T.
BBD468
Texas, United States
Joined: March 08, 2010
KitMaker: 2,465 posts
Armorama: 2,383 posts
Joined: March 08, 2010
KitMaker: 2,465 posts
Armorama: 2,383 posts
Posted: Friday, December 21, 2012 - 03:59 PM UTC
John, You've done a Damn fine job with your KT! Camo is excellent!
Sal, Your makin' nice progress fella - looks great! Keep'er comin' Sal.....
Gary
Sal, Your makin' nice progress fella - looks great! Keep'er comin' Sal.....
Gary
Nito74
Lisboa, Portugal
Joined: March 04, 2008
KitMaker: 5,386 posts
Armorama: 4,727 posts
Joined: March 04, 2008
KitMaker: 5,386 posts
Armorama: 4,727 posts
Posted: Saturday, December 22, 2012 - 07:22 AM UTC
Thanks Sal, Jeff & Gary !!!!!!
wing_nut
New Jersey, United States
Joined: June 02, 2006
KitMaker: 1,212 posts
Armorama: 674 posts
Joined: June 02, 2006
KitMaker: 1,212 posts
Armorama: 674 posts
Posted: Saturday, December 22, 2012 - 08:30 AM UTC
I've officially enlisted. Now I just need the mailman to do his job
imatanker
Maine, United States
Joined: February 11, 2011
KitMaker: 1,654 posts
Armorama: 1,565 posts
Joined: February 11, 2011
KitMaker: 1,654 posts
Armorama: 1,565 posts
Posted: Sunday, December 23, 2012 - 12:47 AM UTC
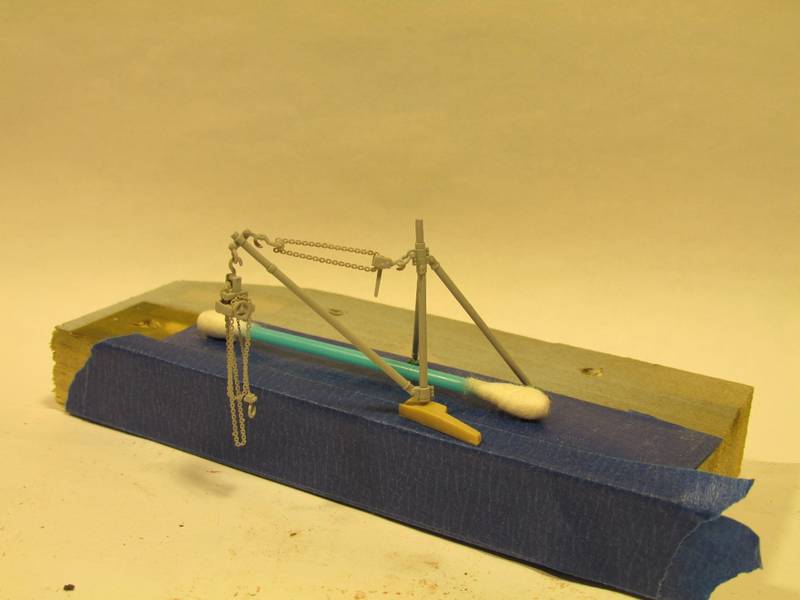
Good morning Gentlemen,I spent most of the day messing with the last major hurdle in My build,THE CRANE.
This turned out to be the most challenging part of the process.The way Dragon had it set up there was no way it could work in real life.I had to drill holes,move parts around,it was just a pain in the butt
Somehow I managed to lose a bunch of pics showing all that I had to do,but here is an example.
There was no mounting bracket for the upper come along
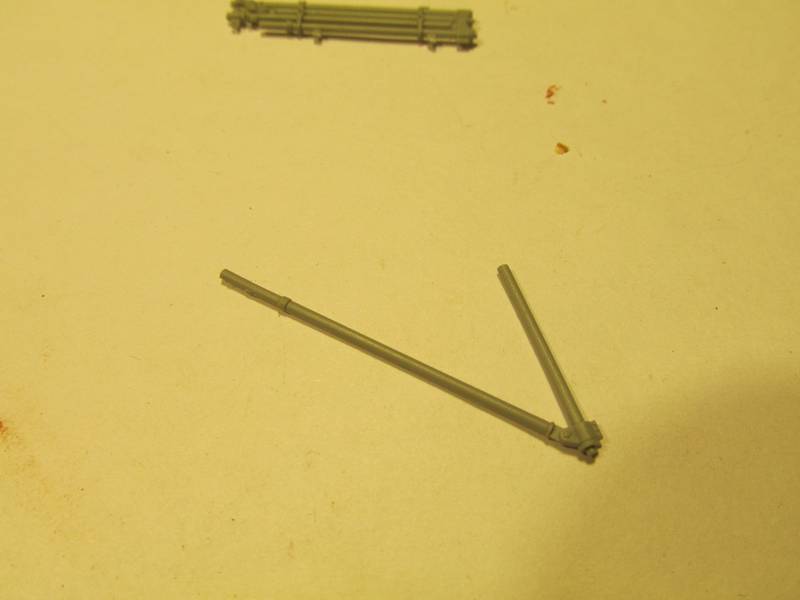
There was a stowed crane part in the kit so I cut the bracket off
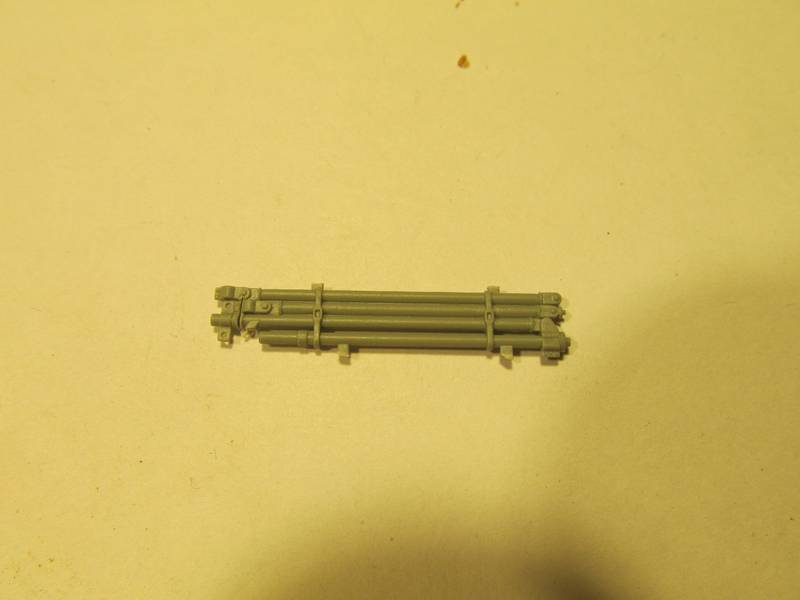
Then cleaned it up
That was just one of the problems.I had to drill a hole for the PE to pass through the winch block,cut the support pole to lenght to put the bracket on,change the way the lifting hook was attached,moved the lifting chain and pulley,and on and on.
So here it is
I think the way I have it now,if you had to use it,it might work
Paint it, do some weathering and I should be done Hope to have some photos up later in the day.Jeff T.
This turned out to be the most challenging part of the process.The way Dragon had it set up there was no way it could work in real life.I had to drill holes,move parts around,it was just a pain in the butt
Somehow I managed to lose a bunch of pics showing all that I had to do,but here is an example.
There was no mounting bracket for the upper come along
There was a stowed crane part in the kit so I cut the bracket off
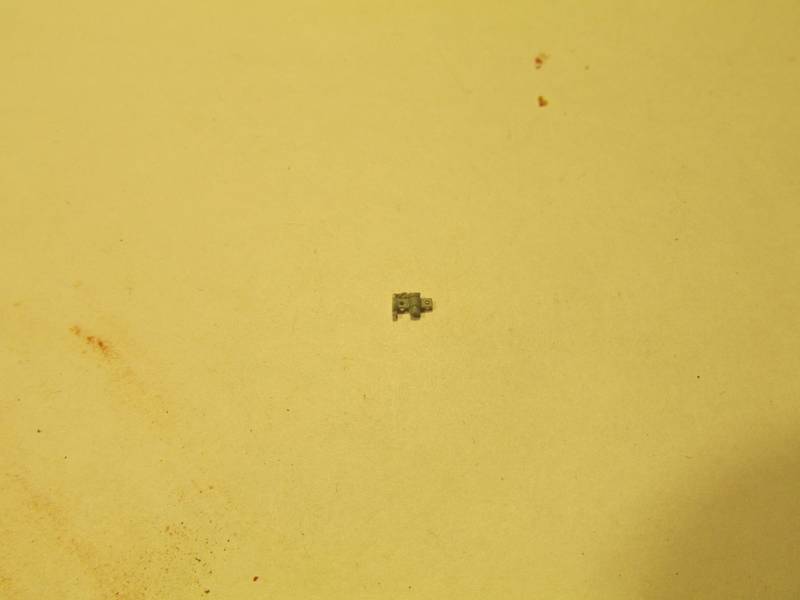
Then cleaned it up
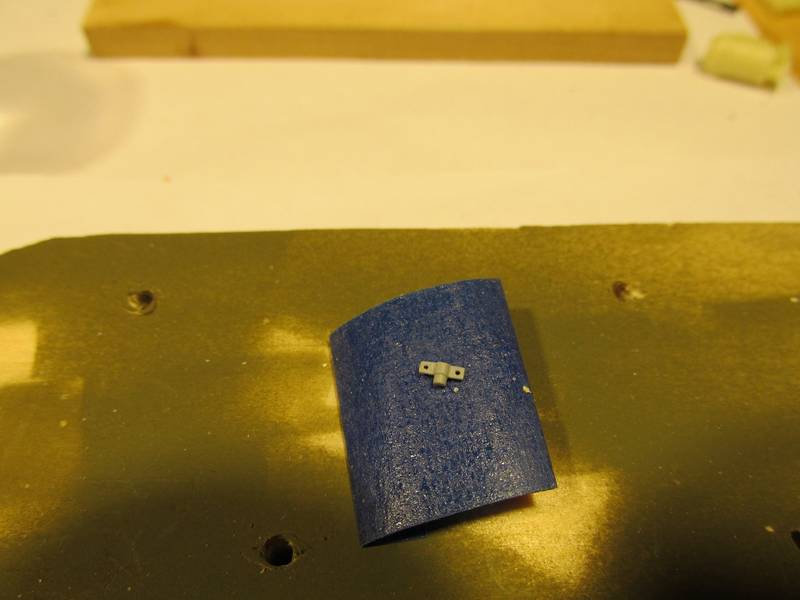
That was just one of the problems.I had to drill a hole for the PE to pass through the winch block,cut the support pole to lenght to put the bracket on,change the way the lifting hook was attached,moved the lifting chain and pulley,and on and on.
So here it is
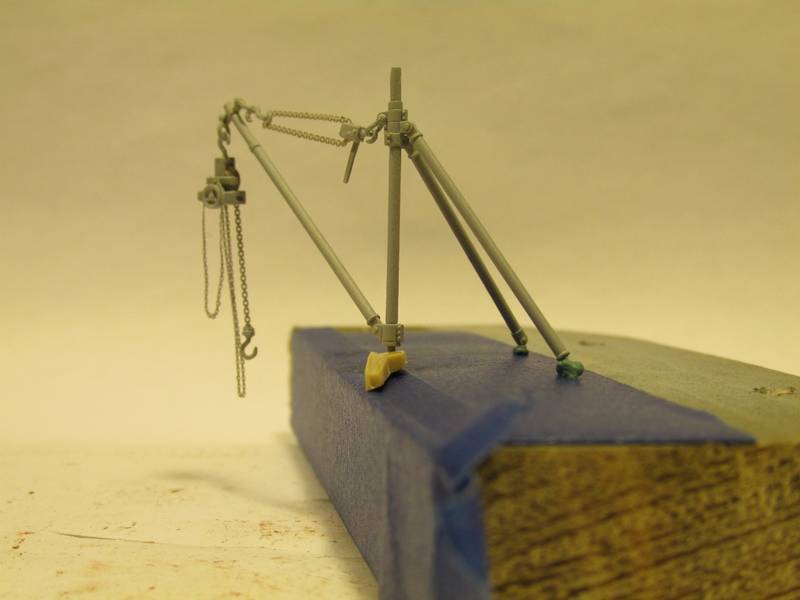
I think the way I have it now,if you had to use it,it might work
Paint it, do some weathering and I should be done Hope to have some photos up later in the day.Jeff T.
Nito74
Lisboa, Portugal
Joined: March 04, 2008
KitMaker: 5,386 posts
Armorama: 4,727 posts
Joined: March 04, 2008
KitMaker: 5,386 posts
Armorama: 4,727 posts
Posted: Sunday, December 23, 2012 - 01:09 AM UTC
Great job Jeff !!!
I really like the detailing !
On your first pic of the assembled crane, the chain on the left side looks odd, it lack some weight, seems to be floating, it might be the angle of the photo, not sure.
I really like the detailing !
On your first pic of the assembled crane, the chain on the left side looks odd, it lack some weight, seems to be floating, it might be the angle of the photo, not sure.
asmodeuss
Quebec, Canada
Joined: November 19, 2011
KitMaker: 1,389 posts
Armorama: 1,388 posts
Joined: November 19, 2011
KitMaker: 1,389 posts
Armorama: 1,388 posts
Posted: Sunday, December 23, 2012 - 01:54 AM UTC
Well well well Jeff, this is a joyfull sight this morning. Very good job on the crane Mister Tucker! I love the fact that you`ve scratch your way out of this one. Model on
Phil.
Phil.
ltb073
New York, United States
Joined: March 08, 2010
KitMaker: 3,662 posts
Armorama: 3,078 posts
Joined: March 08, 2010
KitMaker: 3,662 posts
Armorama: 3,078 posts
Posted: Sunday, December 23, 2012 - 03:16 AM UTC
Quoted Text
Sal,Camo looks sweet,now it's My turn to ask.What did YOU use for paint and reducer
My build is coming along well but I have no batteries for My camera I think they are all under the Christmas tree Should have some updated photos tomorrow.Jeff T.
Jeff great looking crane
I use Tamiya XF-60 cut with a 50/50 with alcohol sprayed on with the air brush for the dunkelgelb and for the green I brushed on straight from the bottle cheap craft store acrylic paint called Apple Barrel #20756 English Ivy Green
Haven't made any progress yet this weekend had a big birthday party for my daughter yesterday 30 people @ my house
imatanker
Maine, United States
Joined: February 11, 2011
KitMaker: 1,654 posts
Armorama: 1,565 posts
Joined: February 11, 2011
KitMaker: 1,654 posts
Armorama: 1,565 posts
Posted: Sunday, December 23, 2012 - 01:33 PM UTC
Thanks for the comments guys.
John,You are right about the chain,that was one of the other problems I had.In order for them to fit on the pullies,I had to stretch and twist them a little.I will see what I can do.
Phillippe,Yeh,don't know how I came up with that,most of the time all I scratch is my head
Sal,Ah,the old "craft paint on my model" trick. I have yet to try this,but I can see that is worth a try.
30 people? Woo-Hoo hope every one had a good time.Don't forget Christmas is Tuesday.
Don't know how much I'll post in the next few days,as our house is starting to fill up with gifts and people
So Happy Holidays Guys Jeff T.
Nito74
Lisboa, Portugal
Joined: March 04, 2008
KitMaker: 5,386 posts
Armorama: 4,727 posts
Joined: March 04, 2008
KitMaker: 5,386 posts
Armorama: 4,727 posts
Posted: Monday, December 24, 2012 - 12:43 AM UTC
Happy Holidays everyone !
Jeff, I hope those gifts fit your workbench
wing_nut
New Jersey, United States
Joined: June 02, 2006
KitMaker: 1,212 posts
Armorama: 674 posts
Joined: June 02, 2006
KitMaker: 1,212 posts
Armorama: 674 posts
Posted: Monday, December 24, 2012 - 08:36 AM UTC
Nice work all... lots of pages of go through
Her is the pic photo f what I will be doing. Pics of AM stuff will follow when I decide what to get.
The scheme will be the same as the braille KT i recently finished.
Her is the pic photo f what I will be doing. Pics of AM stuff will follow when I decide what to get.
The scheme will be the same as the braille KT i recently finished.