Яusso-Soviэt Forum
Russian or Soviet vehicles/armor modeling forum.
Russian or Soviet vehicles/armor modeling forum.
Hosted by Darren Baker, Jacques Duquette
Kladivo
SEDimmick

Joined: March 15, 2002
KitMaker: 1,745 posts
Armorama: 1,483 posts

Posted: Wednesday, October 10, 2012 - 03:51 AM UTC
We had a guy who was in the Chech army, who was an Armor Officer at their Armor training school tell us about his service at our local AMPS club. The one thing I took away from him talking about his time in, was that they had to put a bucket over the wind senor on the vehicle when it was raining out because it screwed up the aiming rectal in the gunners sight. It would float around in the sight too rapidly to be useful! Might be a neat addition to add to your model.

bison126

Joined: June 10, 2004
KitMaker: 5,329 posts
Armorama: 5,204 posts

Posted: Wednesday, October 10, 2012 - 05:06 AM UTC
That's an interesting story Scott.
BTW if your fellow modeler has some pictures of the fuel piping or remember how it is designed, let him not to be shy and share his knowledge. He would make me a happy modeler
Olivier
BTW if your fellow modeler has some pictures of the fuel piping or remember how it is designed, let him not to be shy and share his knowledge. He would make me a happy modeler

Olivier

bison126

Joined: June 10, 2004
KitMaker: 5,329 posts
Armorama: 5,204 posts

Posted: Sunday, October 21, 2012 - 07:59 AM UTC
OK, after looking at the pictures I have, I think I've managed to track all the fuel lines the right way. Here is how the rear lines look.
I still have to add the two for the front fuel cell. This will be an easy job! Then I'll make the fuel cells fasteners.
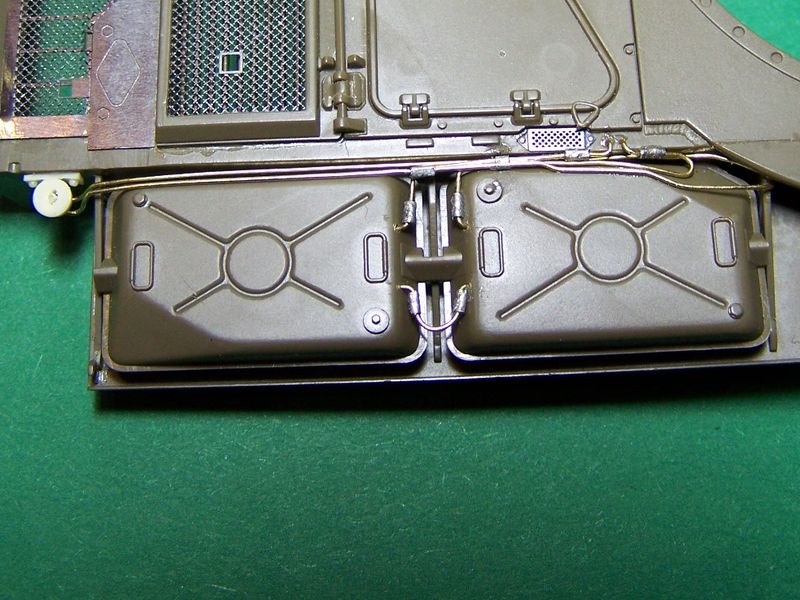
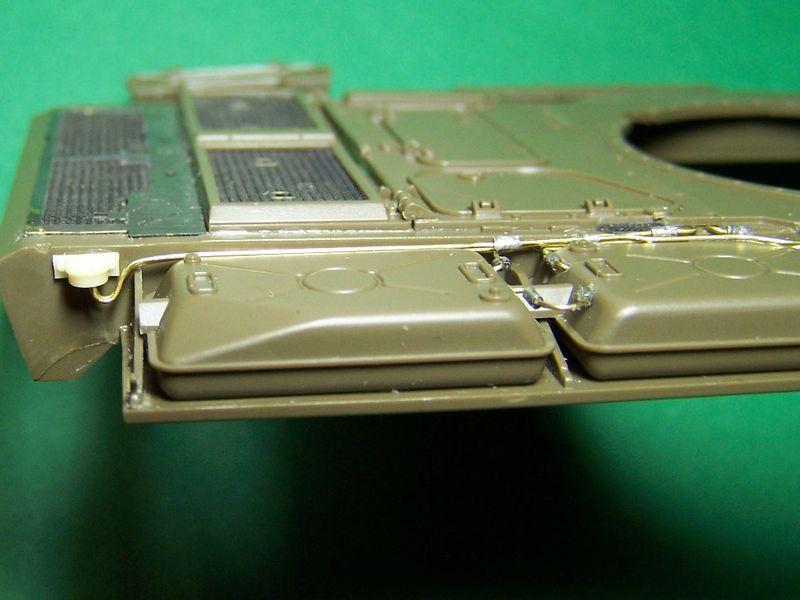
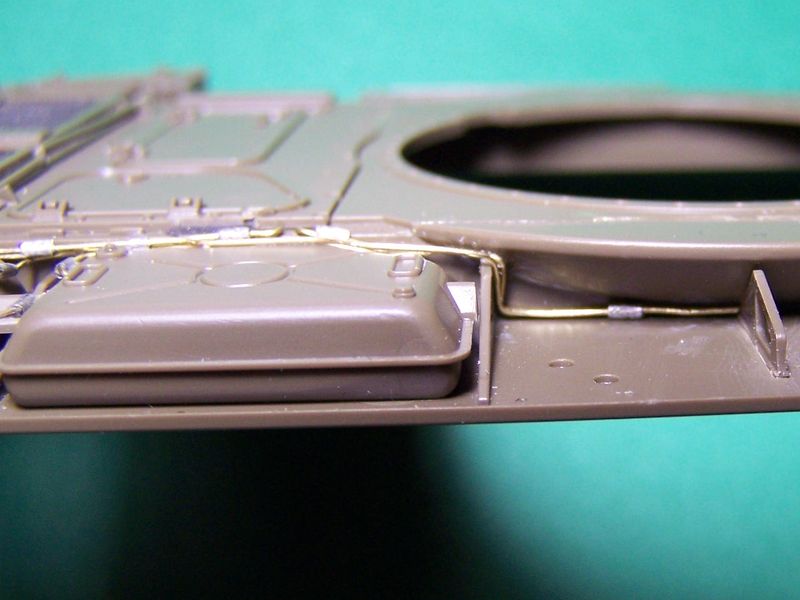
Olivier
I still have to add the two for the front fuel cell. This will be an easy job! Then I'll make the fuel cells fasteners.


Olivier
brunocollin

Joined: September 13, 2011
KitMaker: 98 posts
Armorama: 94 posts

Posted: Monday, October 22, 2012 - 12:06 AM UTC
Salut, Olivier.
Nice job !
I couldn't find any pic of these plumbing since you asked for some. Nothing in my private archives.
As the T-72 use the rear fuel drums too, maybe the pipes follow the same way ? Just a suggestion...
The part receiving the hoses from the rear fuel drums (the resin one on the rear side) looks similar to the one on the T-72.
Keep on the good job !
A+
Nice job !
I couldn't find any pic of these plumbing since you asked for some. Nothing in my private archives.

As the T-72 use the rear fuel drums too, maybe the pipes follow the same way ? Just a suggestion...
The part receiving the hoses from the rear fuel drums (the resin one on the rear side) looks similar to the one on the T-72.
Keep on the good job !
A+
SEDimmick

Joined: March 15, 2002
KitMaker: 1,745 posts
Armorama: 1,483 posts

Posted: Monday, October 22, 2012 - 12:43 AM UTC
Quoted Text
That's an interesting story Scott.
BTW if your fellow modeler has some pictures of the fuel piping or remember how it is designed, let him not to be shy and share his knowledge. He would make me a happy modeler
Olivier
I'd love to, but he wasn't a modeller himself however. He was invited over by the guy who was hosting the meeting at his house. He actually was doing work there for him and they happened to start talking about tanks...LOL

bison126

Joined: June 10, 2004
KitMaker: 5,329 posts
Armorama: 5,204 posts

Posted: Thursday, October 25, 2012 - 07:50 AM UTC
I've been a bit slow on the engine deck. The PE parts are not that easy to deal with. They are made of two layers to give a better rendition so getting both parts aligned is a real pain.
Here are the first pics. I still have a lot to do. The hard job will consist in making the hooks that keep the rear flaps open.
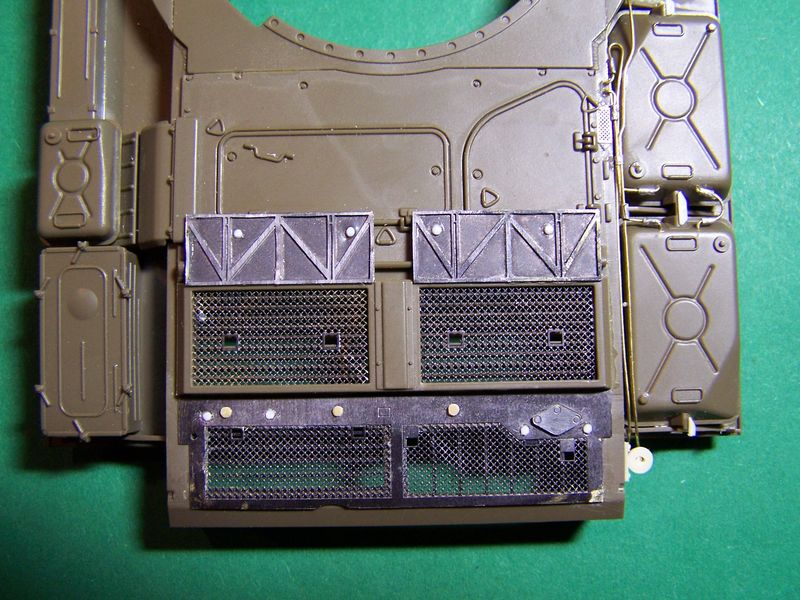
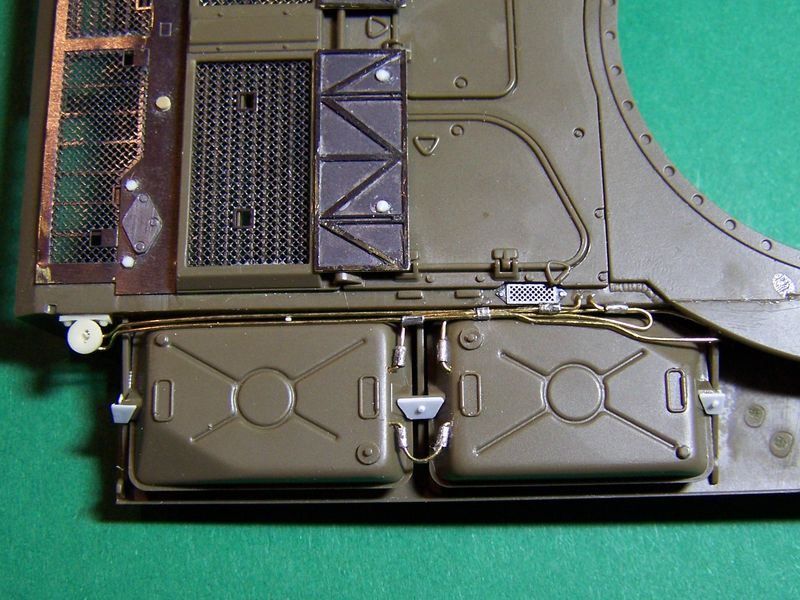
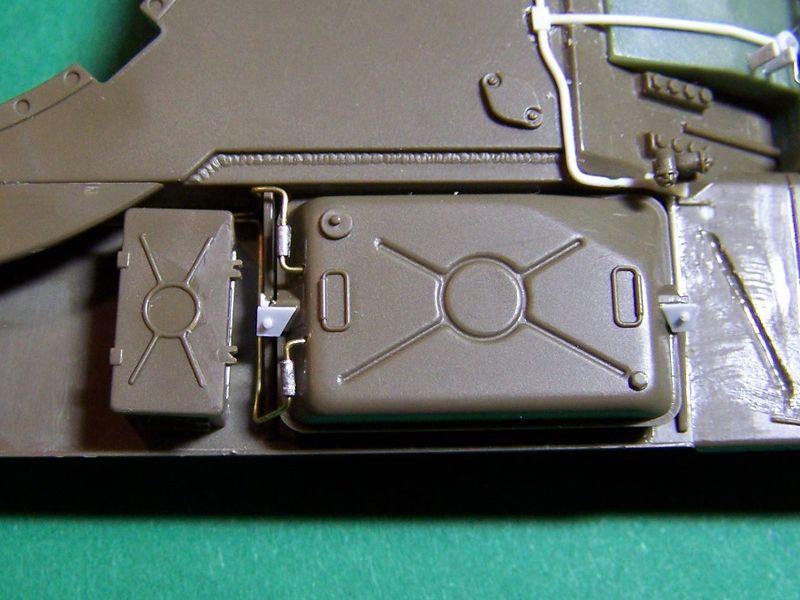
This will be all for at least a week as my boss granted me one week of holidays starting tomorrow evening
Olivier
Here are the first pics. I still have a lot to do. The hard job will consist in making the hooks that keep the rear flaps open.


This will be all for at least a week as my boss granted me one week of holidays starting tomorrow evening

Olivier

Spiderfrommars

Joined: July 13, 2010
KitMaker: 3,845 posts
Armorama: 3,543 posts

Posted: Thursday, October 25, 2012 - 07:53 AM UTC
A great job indeed! Now I know how the Kladivo fuel lines are 

flugwuzzi

Joined: November 02, 2007
KitMaker: 633 posts
Armorama: 599 posts

Posted: Thursday, October 25, 2012 - 11:16 PM UTC
Olivier,
great job on the fuel lines and engine deck.
happy holiday

cheers
Walter
great job on the fuel lines and engine deck.
happy holiday

cheers
Walter

BBD468

Joined: March 08, 2010
KitMaker: 2,465 posts
Armorama: 2,383 posts

Posted: Friday, October 26, 2012 - 03:25 AM UTC
Hello Olivier,
I just found this thread and i must say im impressed with your attention to detail and the results are splendid. Ive subscribed and will watch with great intrest. Great works man!
Gary
I just found this thread and i must say im impressed with your attention to detail and the results are splendid. Ive subscribed and will watch with great intrest. Great works man!

Gary


spiritwalker

Joined: February 20, 2009
KitMaker: 99 posts
Armorama: 97 posts

Posted: Saturday, October 27, 2012 - 03:07 AM UTC
Hi Olivier
Good to see you finally managed to arrange the plumbing for the fuel lines, are you going to add more detail to the rear etch engine deck parts, they look too flat .
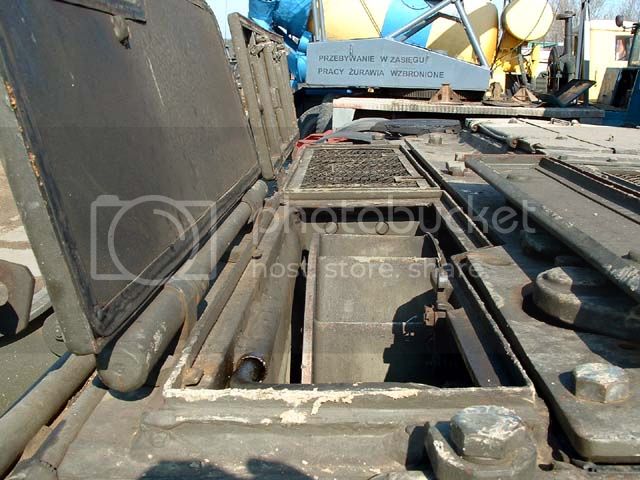
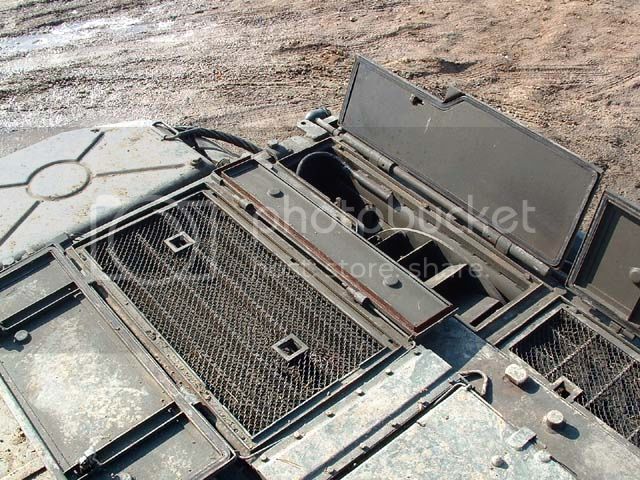
Andy
Good to see you finally managed to arrange the plumbing for the fuel lines, are you going to add more detail to the rear etch engine deck parts, they look too flat .


Andy

bison126

Joined: June 10, 2004
KitMaker: 5,329 posts
Armorama: 5,204 posts

Posted: Saturday, October 27, 2012 - 07:51 AM UTC
Thanks for the comments.
Andy, I intend to add some hinges and other details. In fact I've already added some but with the flaps open they all are hidden underneath
Thanks for the photos.
Olivier
Andy, I intend to add some hinges and other details. In fact I've already added some but with the flaps open they all are hidden underneath

Thanks for the photos.
Olivier

spiritwalker

Joined: February 20, 2009
KitMaker: 99 posts
Armorama: 97 posts

Posted: Saturday, October 27, 2012 - 09:27 AM UTC
Hi,
Its the oil cooler and fan cover grills at the rear that look a bit lacking in detail, maybe adding the raised lip around the edges is needed.
Andy
Its the oil cooler and fan cover grills at the rear that look a bit lacking in detail, maybe adding the raised lip around the edges is needed.
Andy

bison126

Joined: June 10, 2004
KitMaker: 5,329 posts
Armorama: 5,204 posts

Posted: Tuesday, November 06, 2012 - 08:31 AM UTC
Hello Andy,
I got what you meant after reading your message again. You're right. I'll see what I can do. It's not too late but before I need to fix another discrepancy of the conversion I just discovered tonight. Neither CMK nor RM molded the front additional armor plate correctly.
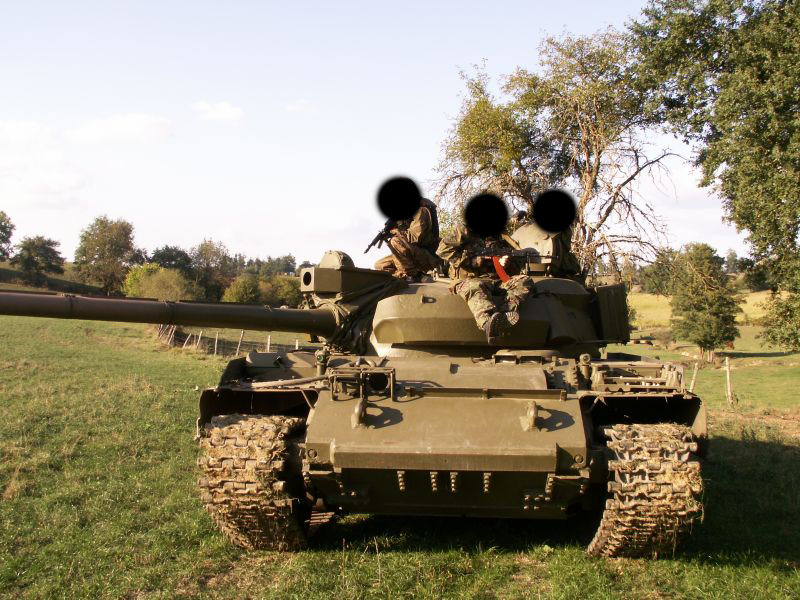
Here is a picture of the real armor plate. Take note of how the cut-out is aligned with the bolted mine roller bracket which supports the footstep.
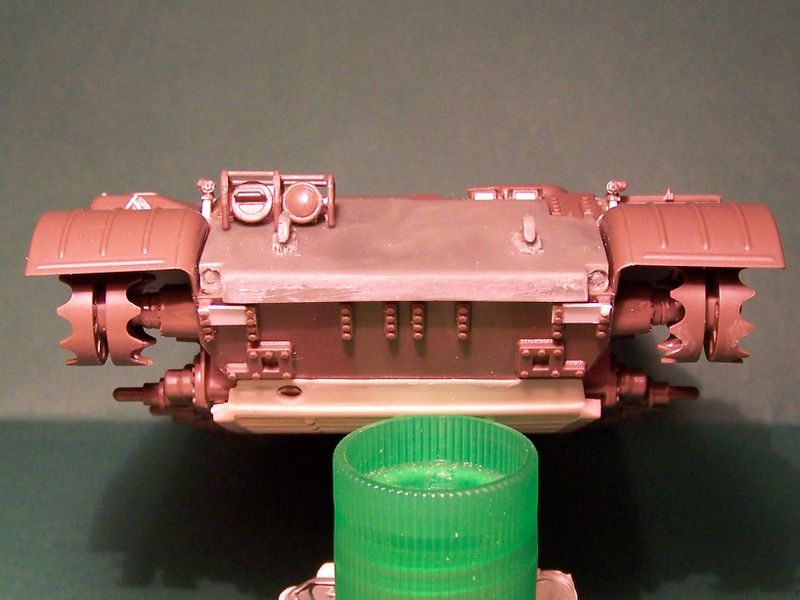
and here is how the resin plate is aligned.
Unfortunately, the resin part is already glued on the glacis with cyano glue.
I will fix this before tackling the engine deck.
Olivier
I got what you meant after reading your message again. You're right. I'll see what I can do. It's not too late but before I need to fix another discrepancy of the conversion I just discovered tonight. Neither CMK nor RM molded the front additional armor plate correctly.
Here is a picture of the real armor plate. Take note of how the cut-out is aligned with the bolted mine roller bracket which supports the footstep.
and here is how the resin plate is aligned.

Unfortunately, the resin part is already glued on the glacis with cyano glue.

I will fix this before tackling the engine deck.
Olivier

spiritwalker

Joined: February 20, 2009
KitMaker: 99 posts
Armorama: 97 posts

Posted: Wednesday, November 07, 2012 - 12:32 AM UTC
Hi Olivier
Sorry to keep knocking your build, but the glacis plate armour you say is already attached is too far forward. It appears to overhang the lower glacis plate attachment points. I found this part to be innacurate in all manufacturers [ not including the latest offering from Miniarm which i havent seen yet] so opting to scratchbuild it.
Andy
Removed by original poster on 11/07/12 - 15:09:06 (GMT).

bison126

Joined: June 10, 2004
KitMaker: 5,329 posts
Armorama: 5,204 posts

Posted: Wednesday, November 07, 2012 - 06:48 AM UTC
Quoted Text
Hi Olivier
Sorry to keep knocking your build, but the glacis plate armour you say is already attached is too far forward. It appears to overhang the lower glacis plate attachment points. I found this part to be innacurate in all manufacturers [ not including the latest offering from Miniarm which i havent seen yet] so opting to scratchbuild it.
Andy
Don't worry Andy, I appreciate your comments from an expert of the T-55

Concerning the overhang, I think this is like the real one in fact.
Look at this picture from militaryvehicle.cz

Olivier

bison126

Joined: June 10, 2004
KitMaker: 5,329 posts
Armorama: 5,204 posts

Posted: Friday, November 09, 2012 - 10:26 PM UTC
I made some additions to the engine deck and started to fix the front add-on armor plate.
I still have to mofidy the overhang. As Andy pointed it, it is too "long".
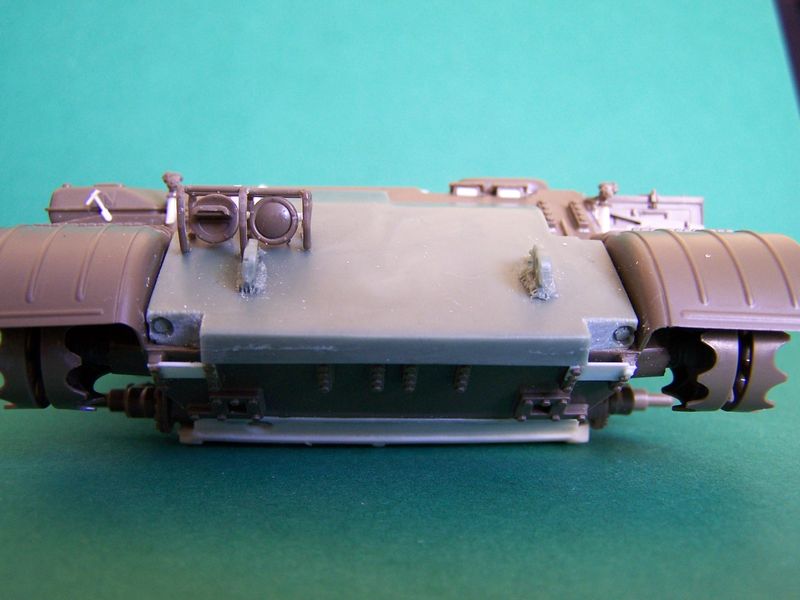
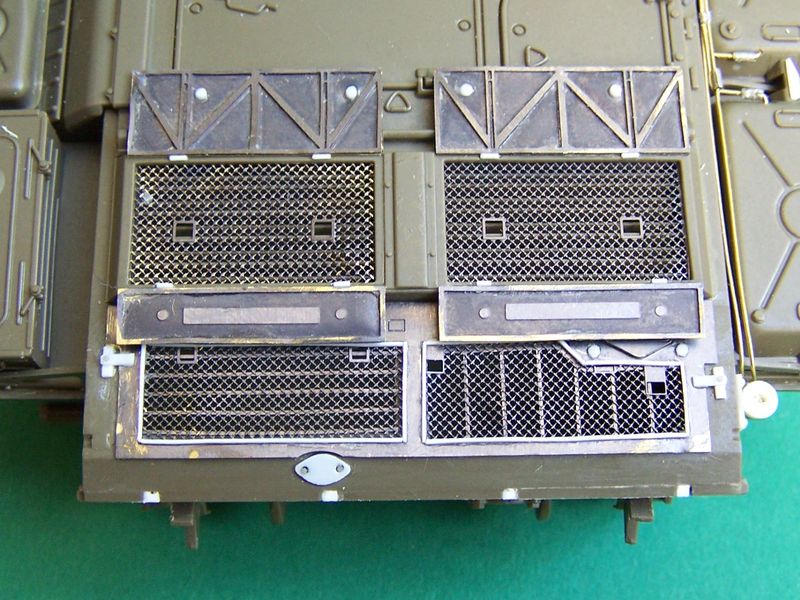
If all go well, I expect to have the engine deck complete tomorrow.
Olivier
I still have to mofidy the overhang. As Andy pointed it, it is too "long".


If all go well, I expect to have the engine deck complete tomorrow.
Olivier

spiritwalker

Joined: February 20, 2009
KitMaker: 99 posts
Armorama: 97 posts

Posted: Saturday, November 10, 2012 - 03:03 AM UTC
Those rear grills are looking better with the raised detail you have added, dont forget to add the extra bolts to the center panel between the radiator grills.
Andy
Andy

bison126

Joined: June 10, 2004
KitMaker: 5,329 posts
Armorama: 5,204 posts

Posted: Saturday, November 10, 2012 - 05:13 AM UTC
Quoted Text
Those rear grills are looking better with the raised detail you have added, dont forget to add the extra bolts to the center panel between the radiator grills.
Andy
Thanks Andy.
Here are the latest progress. The front armor plate should be OK now.
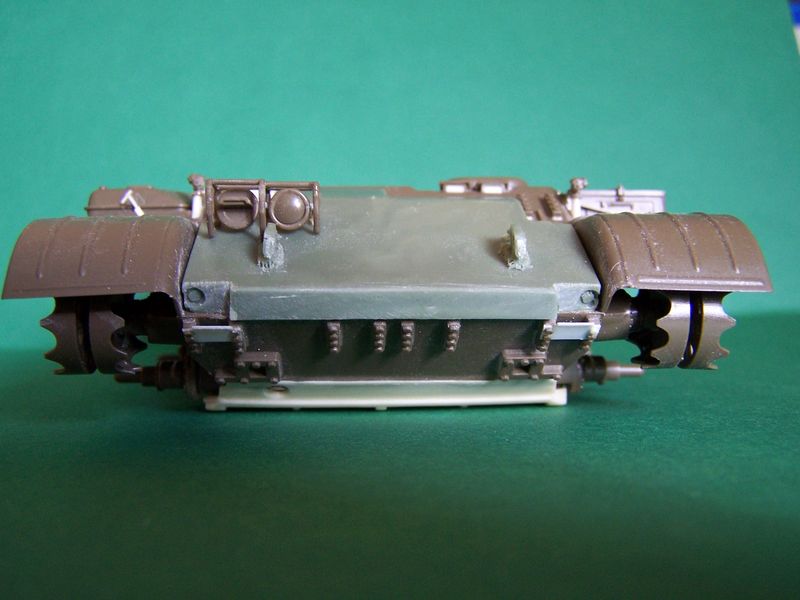
I started to detail the retaining hooks for the rear flaps.
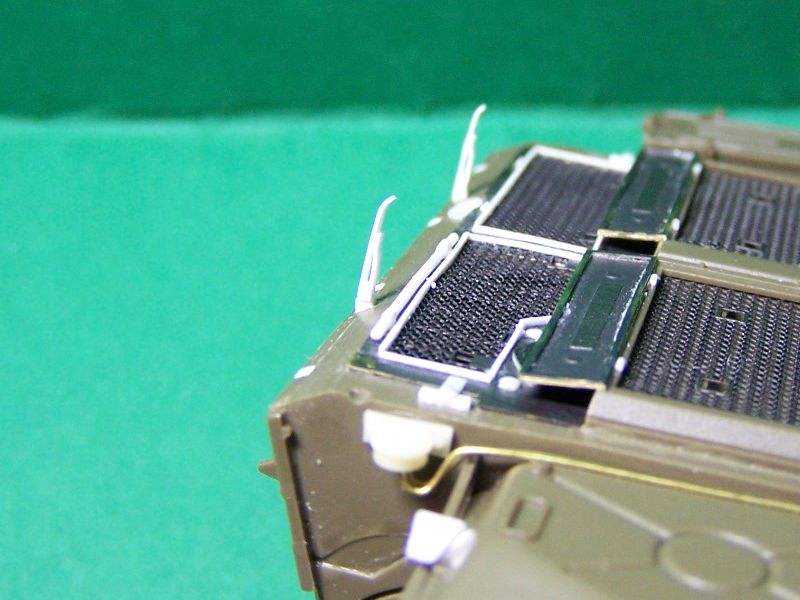
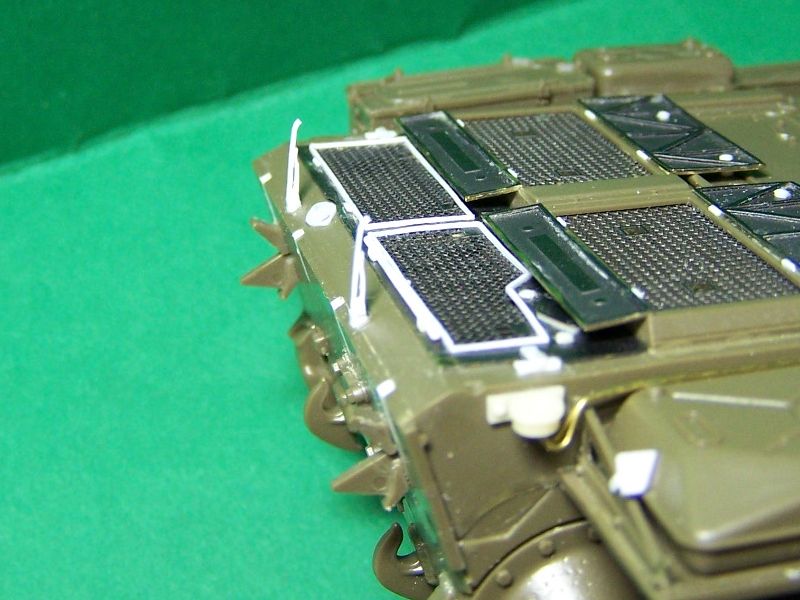
Sorry for the blurry pics.
I understand about the missing bolts. That won't be an easy game to add them all with the flaps in place.
Olivier

bison126

Joined: June 10, 2004
KitMaker: 5,329 posts
Armorama: 5,204 posts

Posted: Sunday, November 11, 2012 - 04:00 AM UTC
I call the engine deck complete.
Here are the pics.
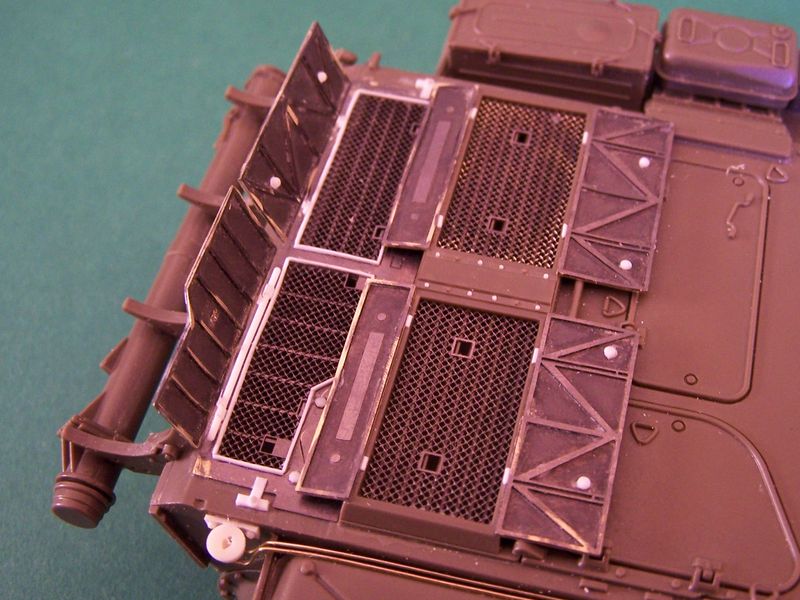
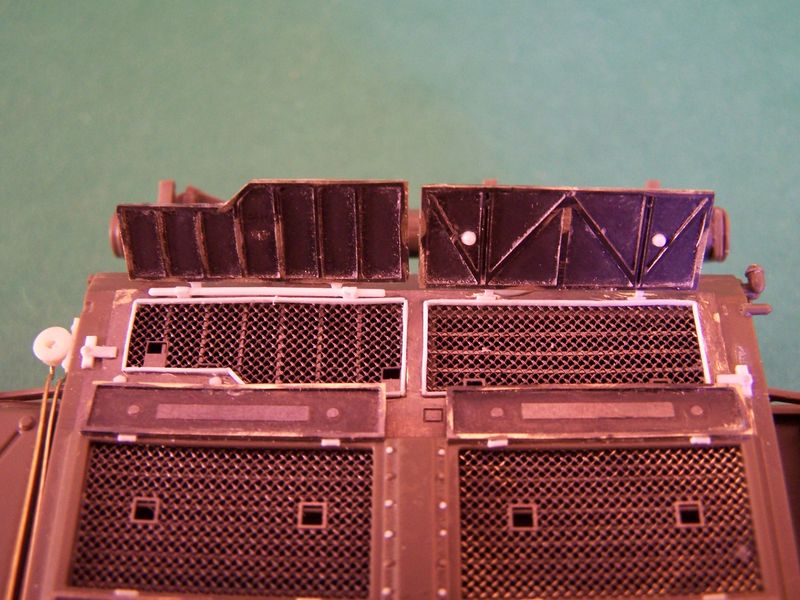
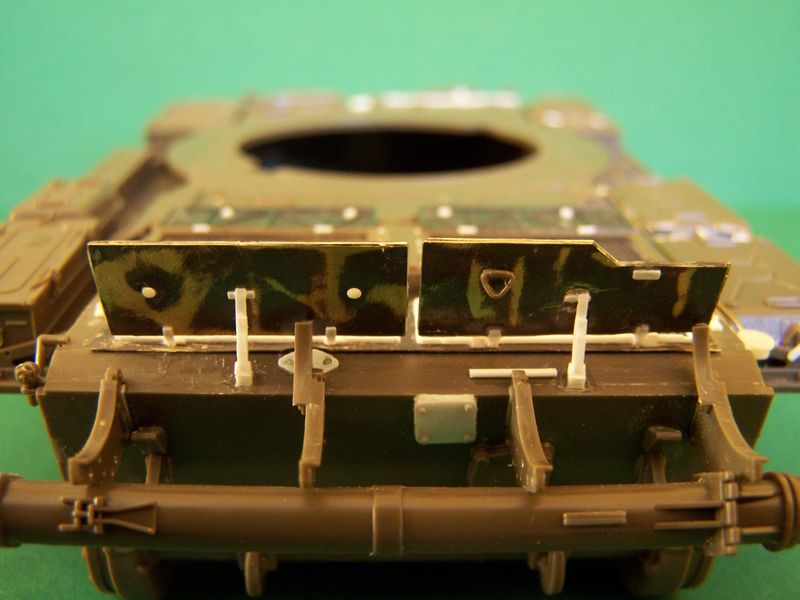
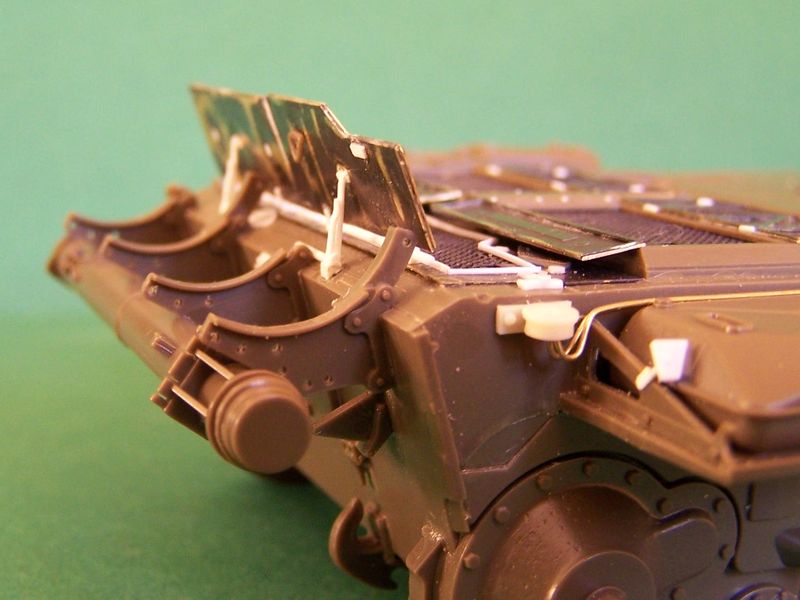
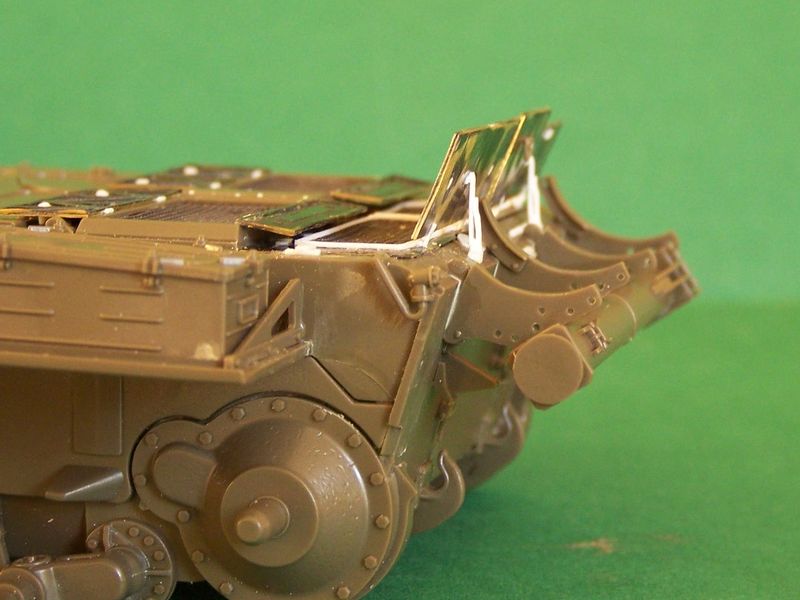
To have the upper hull definitely complete I must add the driver vision blocks cleaning system and then I can pass to the side skirts which are too short
Olivier
Here are the pics.


To have the upper hull definitely complete I must add the driver vision blocks cleaning system and then I can pass to the side skirts which are too short

Olivier

Spiderfrommars

Joined: July 13, 2010
KitMaker: 3,845 posts
Armorama: 3,543 posts

Posted: Sunday, November 11, 2012 - 07:57 AM UTC
Excellent job so far
arpikaszabo

Joined: February 13, 2006
KitMaker: 674 posts
Armorama: 637 posts

Posted: Sunday, November 11, 2012 - 08:22 AM UTC
Graet job, I wish I could find the willpower to finish mine.
flugwuzzi

Joined: November 02, 2007
KitMaker: 633 posts
Armorama: 599 posts

Posted: Saturday, November 17, 2012 - 06:34 AM UTC
Great progress Olivier!
I'm sure you can fix the problem with the sideskirts ;-)
cheers
Walter
I'm sure you can fix the problem with the sideskirts ;-)
cheers
Walter

bison126

Joined: June 10, 2004
KitMaker: 5,329 posts
Armorama: 5,204 posts

Posted: Saturday, November 17, 2012 - 08:43 PM UTC
Quoted Text
Great progress Olivier!
I'm sure you can fix the problem with the sideskirts ;-)
cheers
Walter
Thank you all for the kind comments.
Walter, concerning the skirts I have no other option in fact so I must fix them even if the lazy solution would be to only represent the hinges welded to the fenders and get rid of the skirts.

I hope making some progress during the coming week as I was away for the week-end.
Thanks for your support.
Olivier
Posted: Sunday, November 18, 2012 - 02:17 AM UTC
Very nice build Oliver ... great attention to detail. Love to see so many extras added. 

 |


