_GOTOBOTTOM
Яusso-Soviэt Forum
Russian or Soviet vehicles/armor modeling forum.
Kladivo
bison126
Visit this Community
Correze, France
Joined: June 10, 2004
KitMaker: 5,329 posts
Armorama: 5,204 posts
Posted: Sunday, September 16, 2012 - 03:42 AM UTC
Hi all,
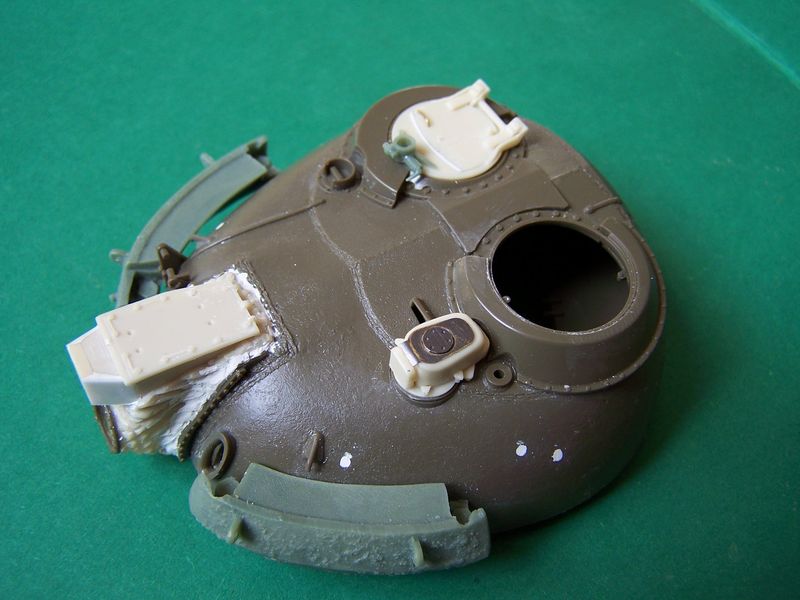
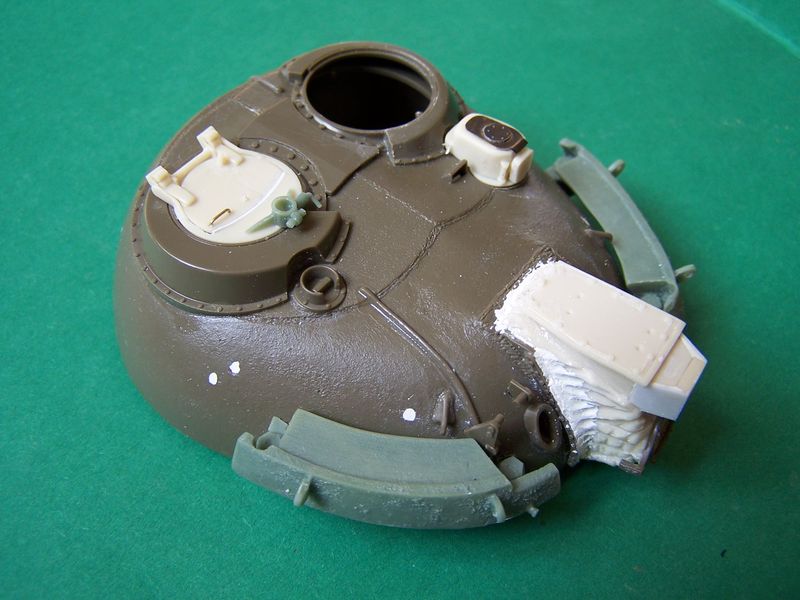
I just started my conversion, conversions should I say, of this Czech tank.
The base is the Tamiya kit and the conversion sets are those of Real Models and CMK. None are perfect but using both sets enable to get the best of each.
To put it simple, CMK gives you a lot of parts, resin and photoetched while RM has released the minimum.

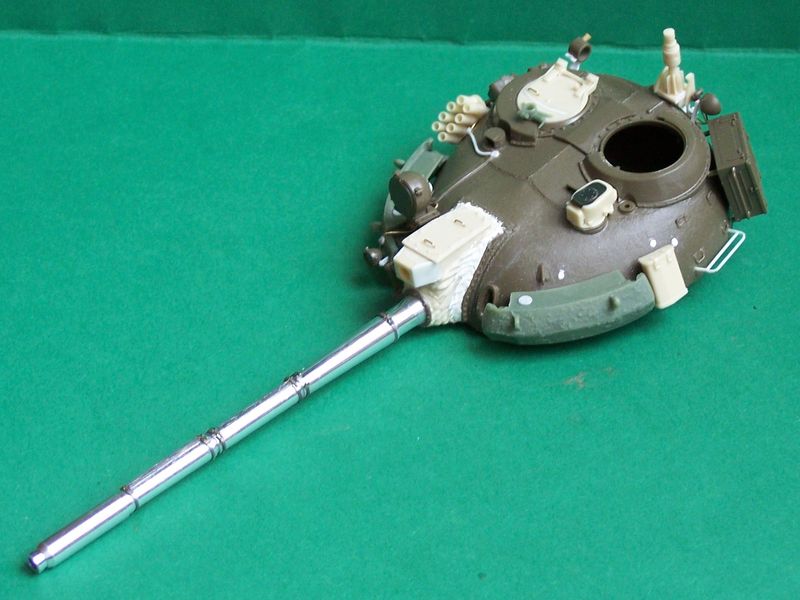
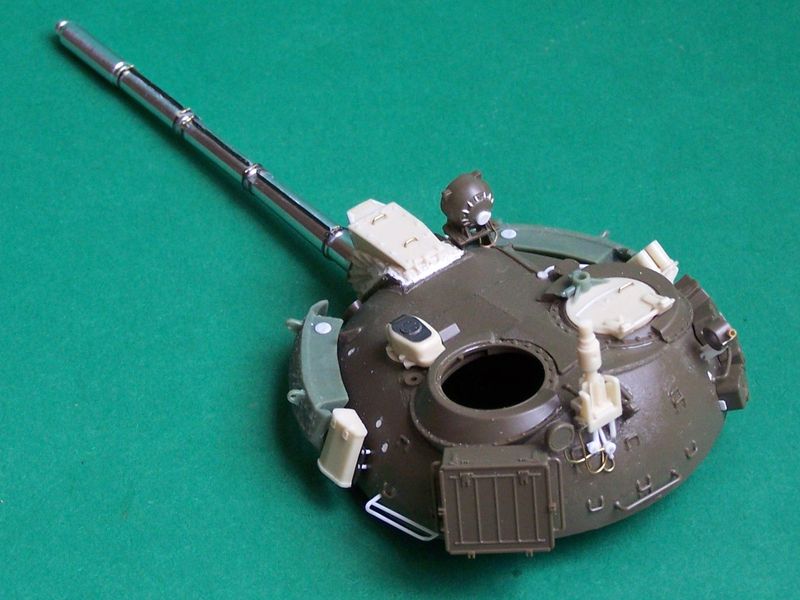
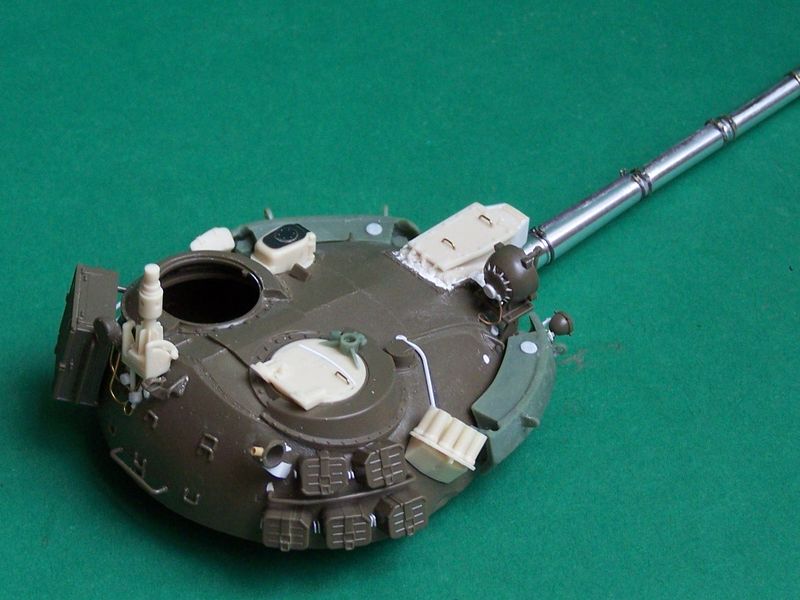
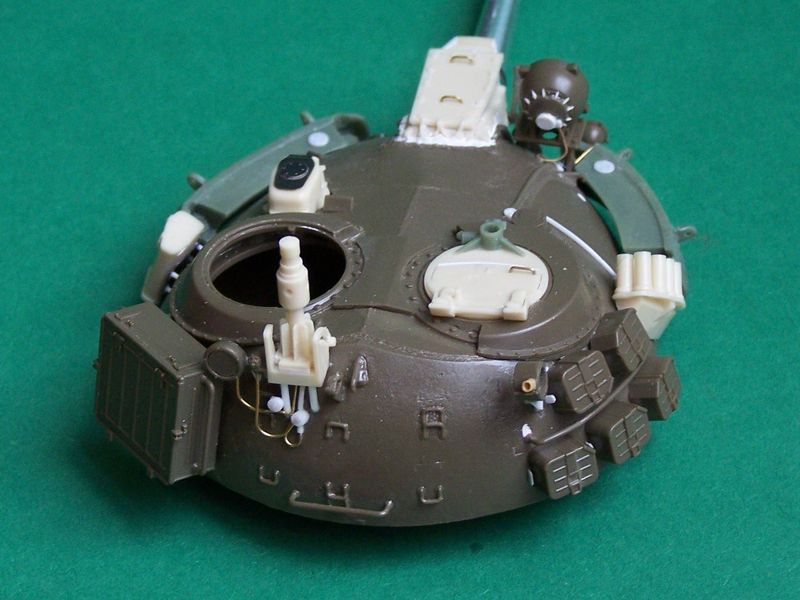
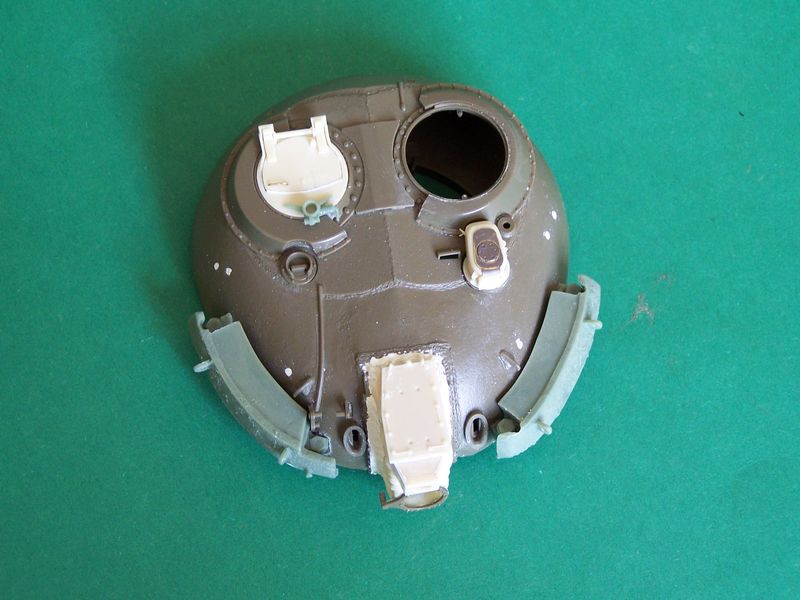
I started wih the turret and found that no laser rangefinder was correct. RM looks OK for the shape but the mantlet cover is off. CMK is too narrow and while the mantlet cover is good, the rangefinder housing is too short. I decided to go with the CMK part and lengthen the housing.
Don't expect an easy fit for both of the parts. The Dremel tool is a must to allow the part to sit on the turret.

For the so-called eyebrow armor I used the RM one as it includes the mounting bracket molded on the rear face of the armor blocks. CMK gives them as separate parts, so 4 x risks of mistake in placing them.

CMK is the only one to give the Bastion missile guidance unit. No major trouble there. You only have to remove the gunner sight housing, sand flat the remaining base and grind the hatch "armor" to allow the back of the guidance unit to sit.

Here are the turret pics so far.


Then I moved to the engine deck. As you know the Czech deck is different from the Russian. RM gives a resin deck with all the armored flaps closed. I wanted to represent the flaps open so the solution was in the CMK (Eduard)PE parts.
First bad surprise, the grilles were too large for the Tamiya frame. This was annoying but an easy fix. Then, the rear PE part was too large and overlapped the Tamiya part which I had to cut. CMK PE is flat where some bolts are present. They are represented by a recessed line. On the pictures you can see holes in the part. In real, they are rubber stops for the flaps.
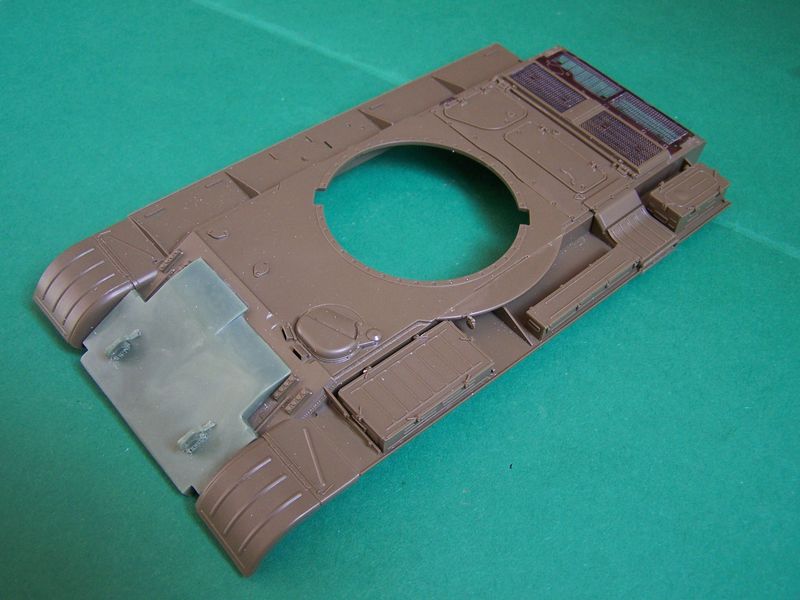
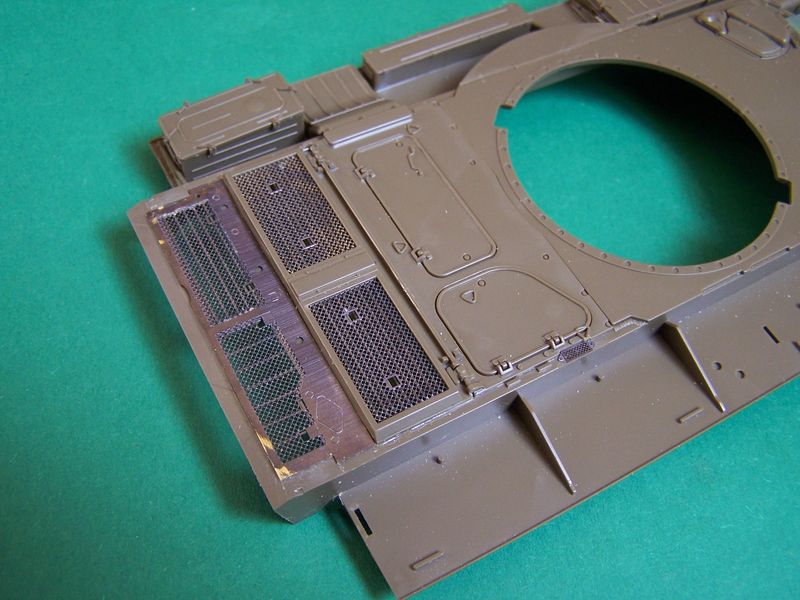


It will be easy to fix too but my conclusion after this small session is that you can't build any of these conversions without a good amount of documentation.
The problem is that you don't have a lot available. The WWP book have some pictures but they are a mix of T-54 and T-55 AM2. Few show the AM2B version, this is disturbing for the Bastion missile guidance unit only.
Prime Portal has a huge walkaround but it is for a East-German tank with some differences from the Czech Kladivo.

I conclude this first post by a question about the fuel piping for this tank. The fuel drums at the back are connected to the general fuel piping. The rear pipes are easy to spot but I can't see where they go after they pass under the turret hump.
Here is a picture that shows the pipes coming from the drums.


TIA
Olivier
Spiderfrommars
Visit this Community
Milano, Italy
Joined: July 13, 2010
KitMaker: 3,845 posts
Armorama: 3,543 posts
Posted: Sunday, September 16, 2012 - 05:41 AM UTC
Olivier, i'll follow your build for sure!

Regarding the fuel line they are equal to the T-55A ones

Now I can't, but when i have alittle time I'll post some pics

cheers
Spiderfrommars
Visit this Community
Milano, Italy
Joined: July 13, 2010
KitMaker: 3,845 posts
Armorama: 3,543 posts
Posted: Sunday, September 16, 2012 - 11:06 AM UTC
Here you are

So, starting from the engine deck


2nd fuel cell


...under the turret


third fuel cell


So, this is the pattern:


I hope this can help you

Regarding the czeck exemplars, I imagine you've already seen here

http://www.brdm2.estranky.cz/fotoalbum/tanky/tankova-vez-t-55am2/

http://www.brdm2.estranky.cz/fotoalbum/tanky/stredni-tank-t-54-am2/

http://www.brdm2.estranky.cz/fotoalbum/tanky/modernizovany-stredni-tank-t-55am-2/

NB PICS HAS BEEN POSTED ONLY FOR DISCUSSION PURPOSE
Spiderfrommars
Visit this Community
Milano, Italy
Joined: July 13, 2010
KitMaker: 3,845 posts
Armorama: 3,543 posts
Posted: Sunday, September 16, 2012 - 07:50 PM UTC
Here some other pics

http://www.brigadyr.net/pozemni_technika/den_pozemniho_vojska_bahna_07/stredni_tank_t55am2/stredni_tank_t55am2.htm

http://forum.valka.cz/viewtopic.php/t/17300
dvarettoni
Visit this Community
South Carolina, United States
Joined: September 28, 2005
KitMaker: 778 posts
Armorama: 763 posts
Posted: Monday, September 17, 2012 - 04:55 AM UTC
Olivier great to see another of you builds again can't wait to see more
dave
bison126
Visit this Community
Correze, France
Joined: June 10, 2004
KitMaker: 5,329 posts
Armorama: 5,204 posts
Posted: Monday, September 17, 2012 - 05:36 AM UTC
Thanks for coming in Dave !
Mauro, I have searched through a couple of your links but I was not aware of some others. Thanks again for sharing them.
Unfortunately, I still can't figure out how the piping is designed.
Your drawing is not good for a Kladivo as the piping for the fuel drums is permanent unlike on the Russian T-55 were the drums were merely huge jerrycans with no connection to the central system.
If you look at the picture I posted you will notice that the two rearmost lines do not come straight from the drum but from a connector bolted to the hull side. See the picture below above the spare track links.

So you really have a different lay-out because of the two extra pipes.

Olivier
Spiderfrommars
Visit this Community
Milano, Italy
Joined: July 13, 2010
KitMaker: 3,845 posts
Armorama: 3,543 posts
Posted: Monday, September 17, 2012 - 07:40 AM UTC
Take a look here. Some other useful pics i hope. Now I'll find to find something which could solve your problem

http://tanksim.org.ru/references/ludob/t55am2/t55am2ld.php

http://tanksim.org.ru/references/ludob/t55am2kladivo/t55am2kladivo.php

bison126
Visit this Community
Correze, France
Joined: June 10, 2004
KitMaker: 5,329 posts
Armorama: 5,204 posts
Posted: Friday, September 28, 2012 - 06:05 AM UTC
Thanks for the links Mauro.
After a two week break I resumed building my Kladivo this afternoon. Without the appropriate fuel line scheme, I decided to go back to the turret.
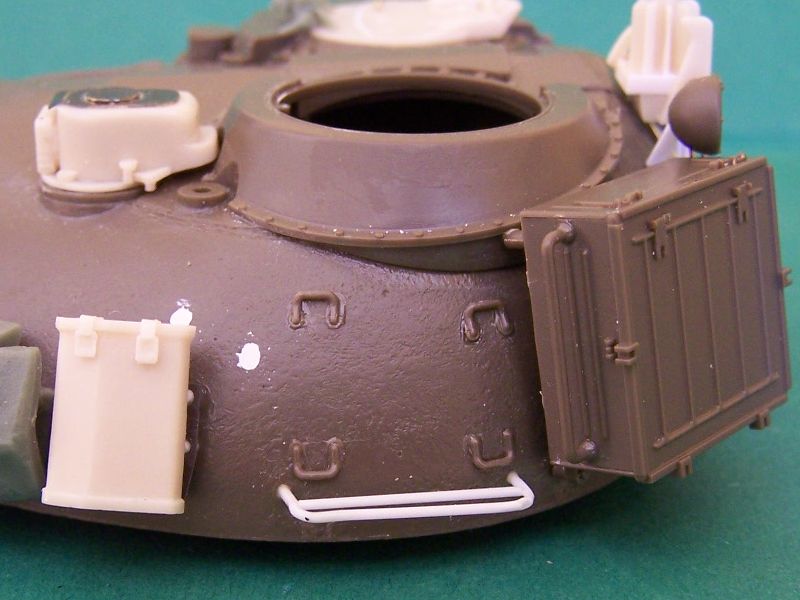
The left side is nearly complete and just misses the stowage double rail.
I started to assemble the wind sensor at the back. Once again I'm stuck because of the lack of appropriate pictures. I can't find how the bracket is fixed to the rear of the turret. All the pictures I checked show two legs under the back of the bracket but thet don't enable to determine if there are others at the front of it or not.
By the way CMK instructions are wrong here as they tell you to glue the bracket on the top of the turret.
I'll show pictures of the progress during the week-end.

Olivier
bison126
Visit this Community
Correze, France
Joined: June 10, 2004
KitMaker: 5,329 posts
Armorama: 5,204 posts
Posted: Sunday, September 30, 2012 - 03:49 AM UTC
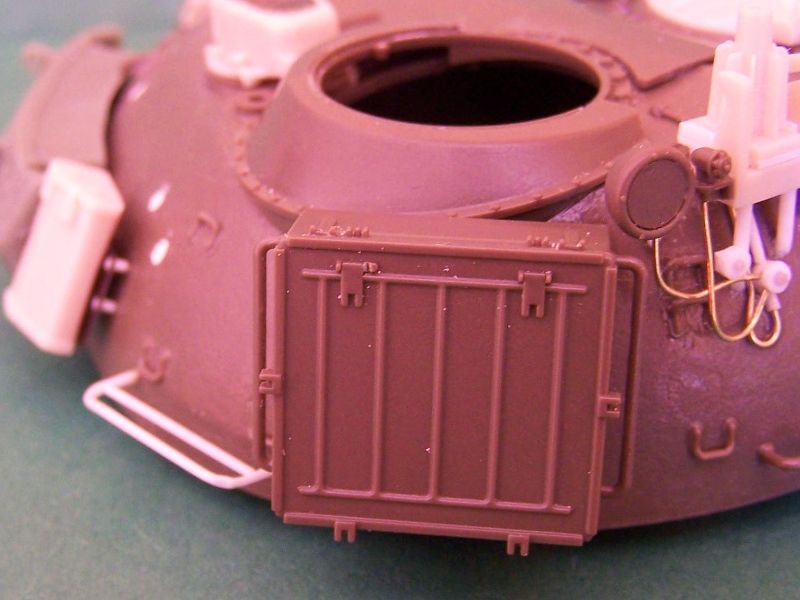
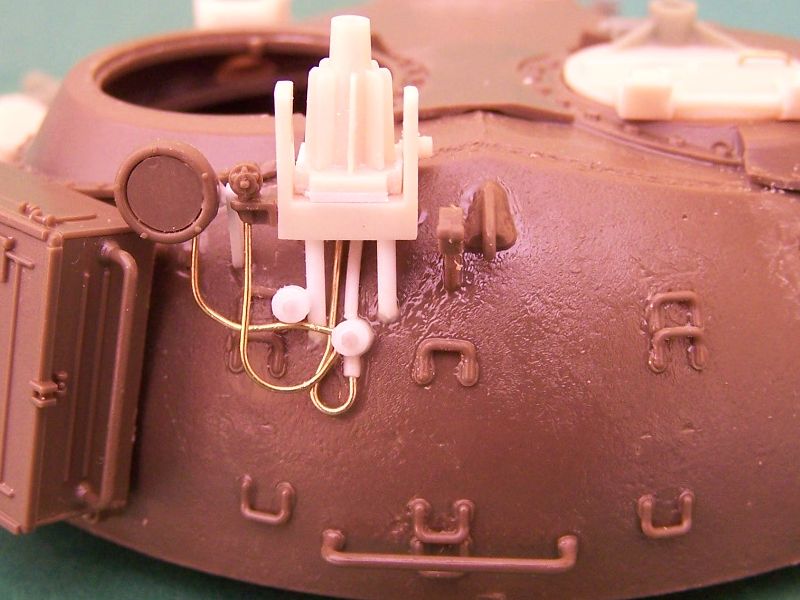
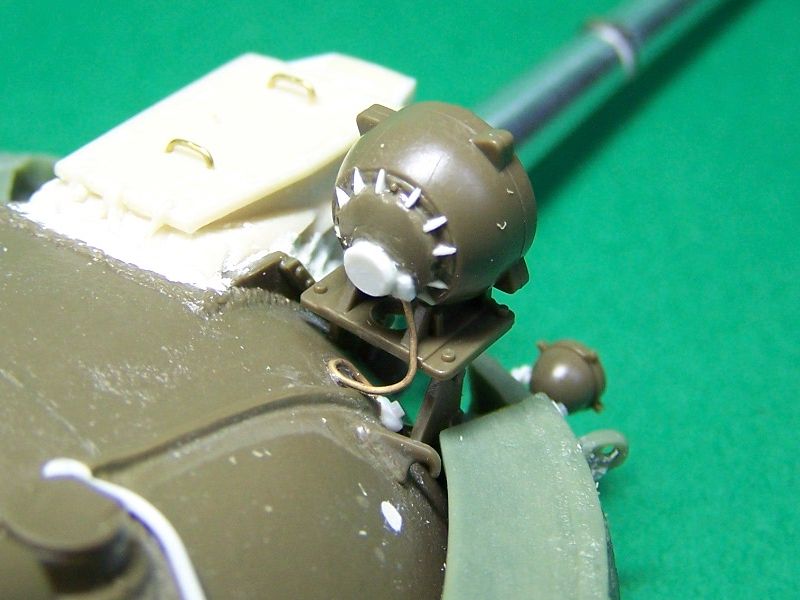
Despite the lack of confirmation about the number of legs of the wind sensor support, I completed this part of the turret. The head of the sensor will be glued later on to prevent any undesired break.
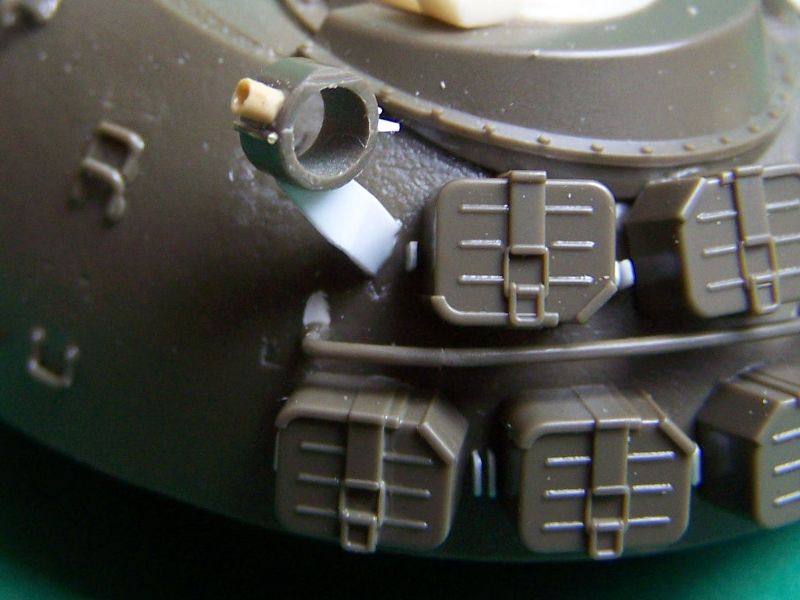
Both CMK and Real Models have oversimplified this area. On the real thing there are a number of wires, lights and sockets. The two lifting hooks are replaced by a single one welded in the center line of the turret.

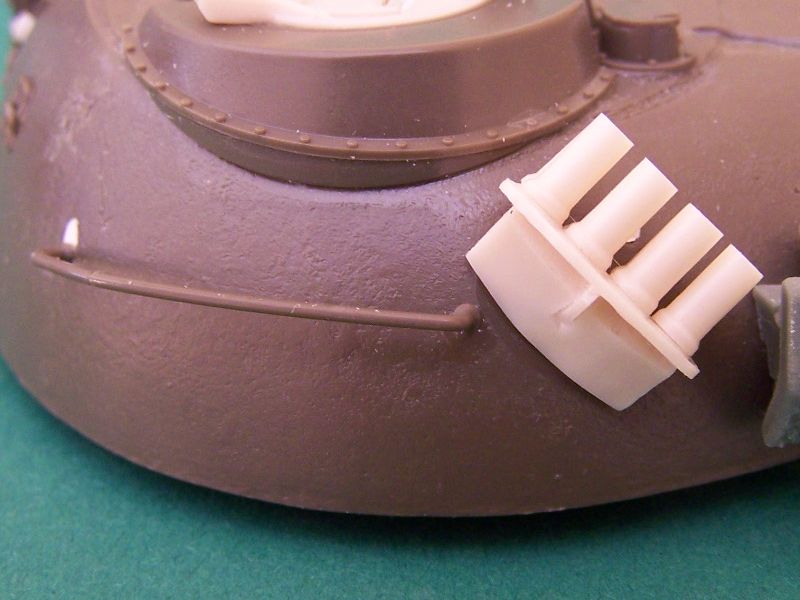
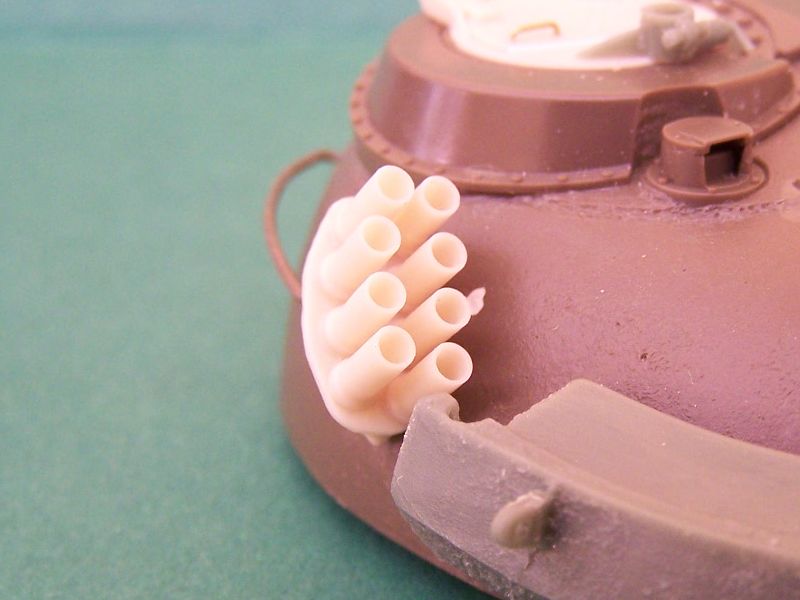
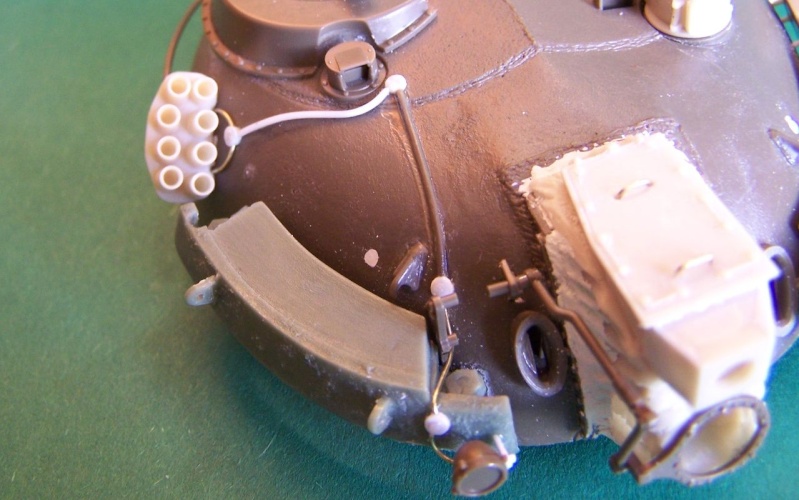
On the right side, I glued the smoke dischargers. From the pictures of the real ones they look a bit smaller than they should be.
I still have to add the specific wiring.


Olivier
bison126
Visit this Community
Correze, France
Joined: June 10, 2004
KitMaker: 5,329 posts
Armorama: 5,204 posts
Posted: Friday, October 05, 2012 - 05:01 AM UTC
Some slow progress on the turret. Adding all the wiring for the smoke dischargers and the various lights was a bit tedious but I'm near completion.
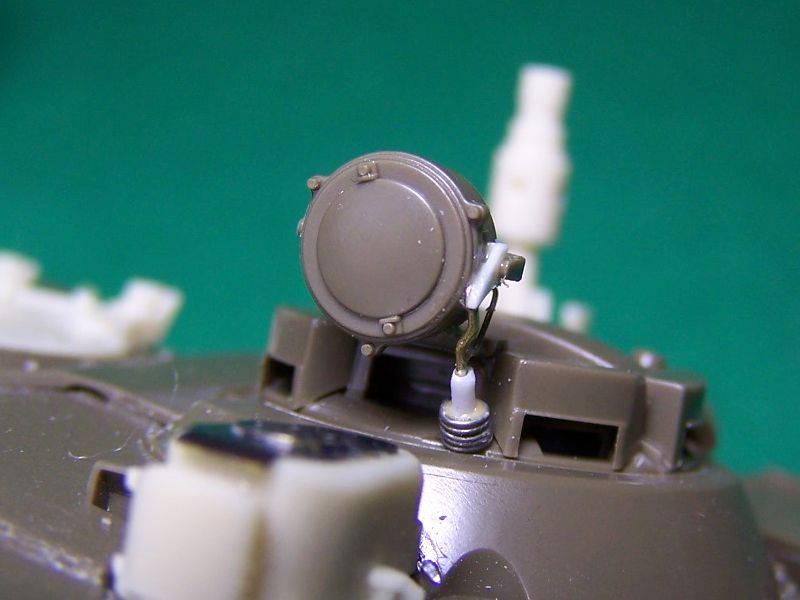
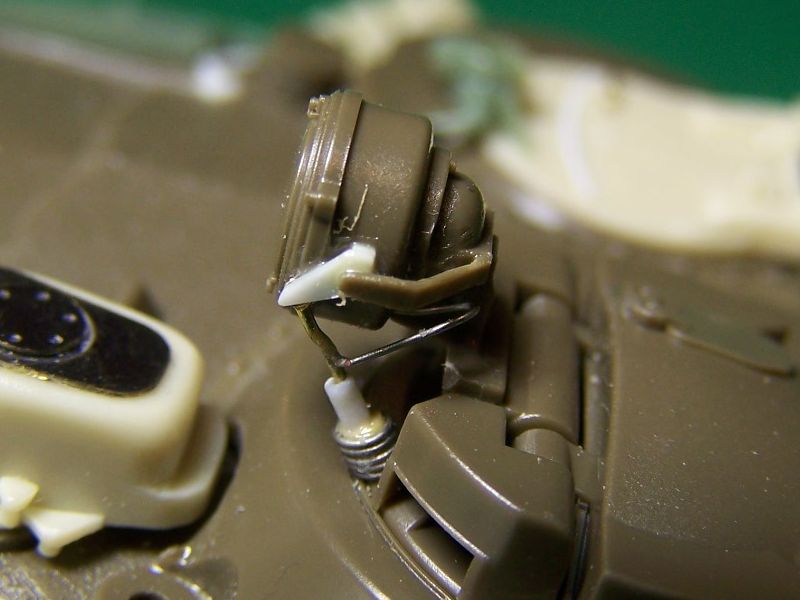
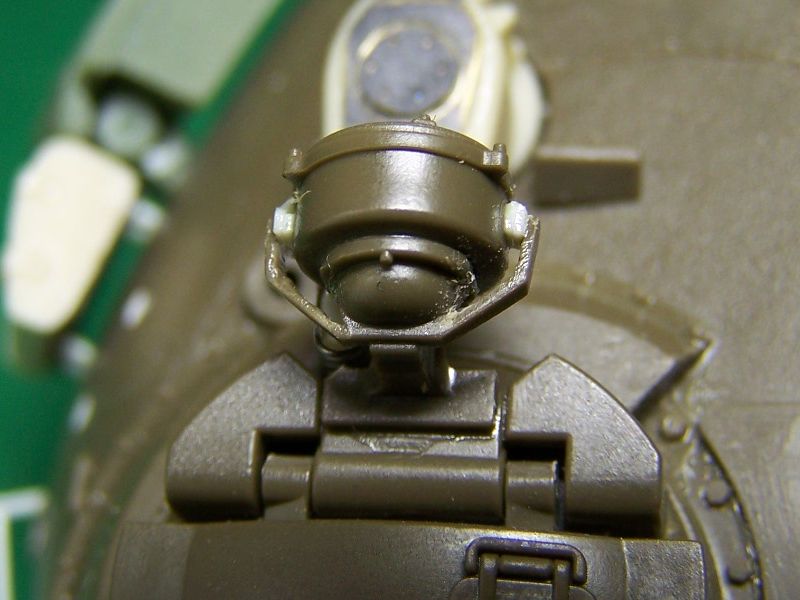
I also had to modify the back of the IR searchlight as the Czech version is quite different from the Russian one provided with the Tamiya kit.


TO any Czech member reading, I'm still looking for the rear fuel drums piping. So if anyone has the opportunity to visit Lesany or Rokycany museums and take some pictures of this area (under the turret), I'd be the happiest modeler of the forum

Olivier
SovietBoy22
Visit this Community
Scotland, United Kingdom
Joined: September 04, 2011
KitMaker: 461 posts
Armorama: 452 posts
Posted: Friday, October 05, 2012 - 05:23 AM UTC
Defiantly gonna follow. Keep it up!
Thanks
Euan
Spiderfrommars
Visit this Community
Milano, Italy
Joined: July 13, 2010
KitMaker: 3,845 posts
Armorama: 3,543 posts
Posted: Friday, October 05, 2012 - 09:13 AM UTC
Great job Olivier!
todorovicandreas
Visit this Community
Austria
Joined: May 01, 2007
KitMaker: 608 posts
Armorama: 593 posts
Posted: Friday, October 05, 2012 - 09:37 AM UTC
Olivier,

very nice work so far. Im following this with great interest! Nice build so far.

Best regards,
Andreas
dvarettoni
Visit this Community
South Carolina, United States
Joined: September 28, 2005
KitMaker: 778 posts
Armorama: 763 posts
Posted: Friday, October 05, 2012 - 04:43 PM UTC
olivier loven the work i just got Legend T-55AM2B Conversion Set in the mail the other day can't wait to get knee deep in to this one
dave
Karl187
#284
Visit this Community
Northern Ireland, United Kingdom
Joined: October 04, 2006
KitMaker: 3,094 posts
Armorama: 2,942 posts
Posted: Friday, October 05, 2012 - 10:42 PM UTC
This is a rather awesome build Olivier, some truly excellent detailing and scratch-building going on.
bison126
Visit this Community
Correze, France
Joined: June 10, 2004
KitMaker: 5,329 posts
Armorama: 5,204 posts
Posted: Saturday, October 06, 2012 - 05:03 AM UTC
Thanks for the comments.
Dave, I'd love to read your appreciation about the Legend conversion. I must admit I'm a bit disappointed by the CMK one.

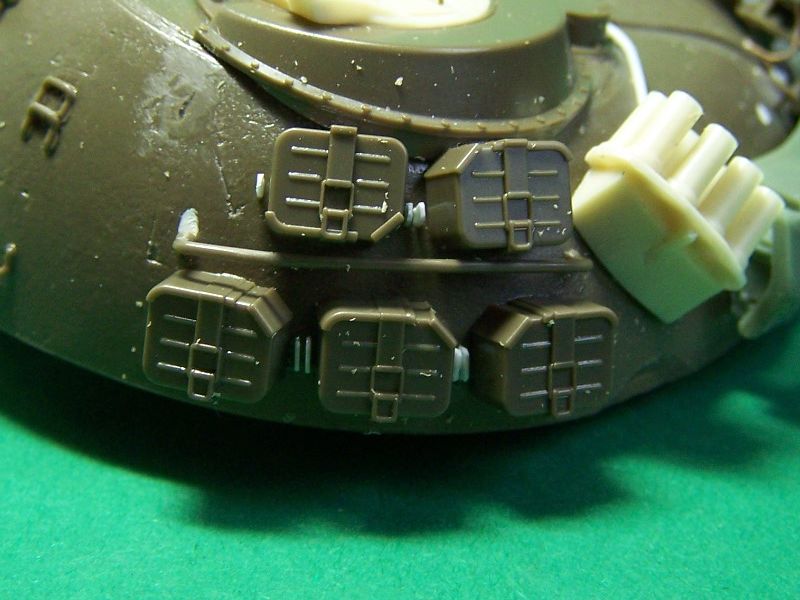
I made some progress this afternoon. I've quite finished the turret. I still need to fix all the thermal sleeve latches and make for the rear of the turret the same kind of support as on the T-62A, the one with the large ring at the top.
I intended to use the resin ammo boxes which are a bit larger than the Tamiya ones but unfortunately the PE latches are impossible to close as they are too short.


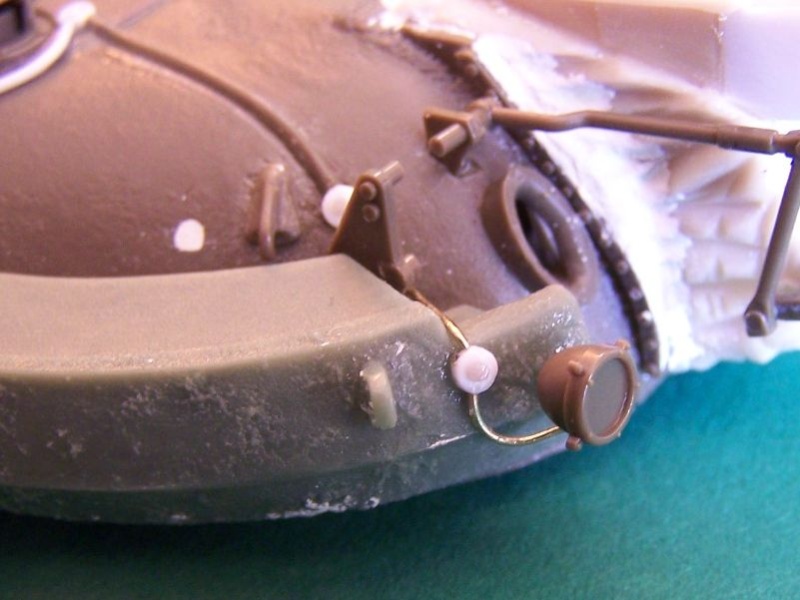
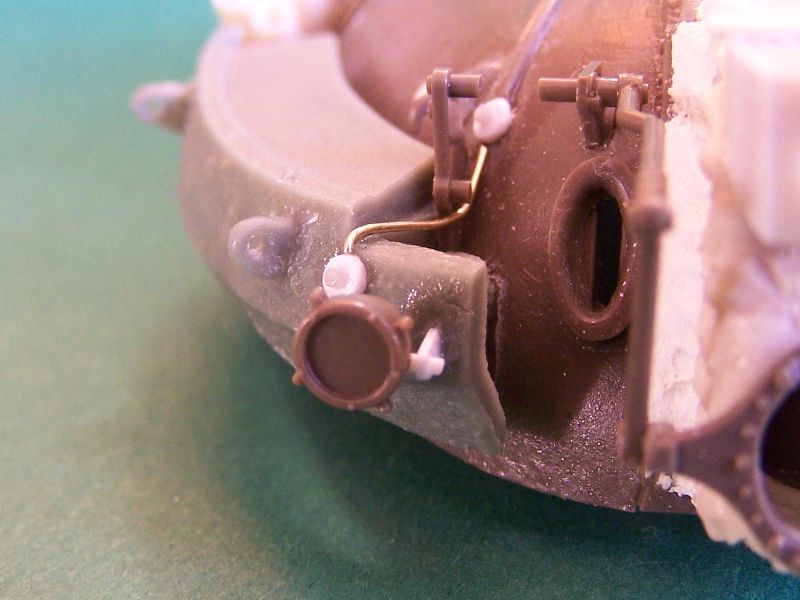
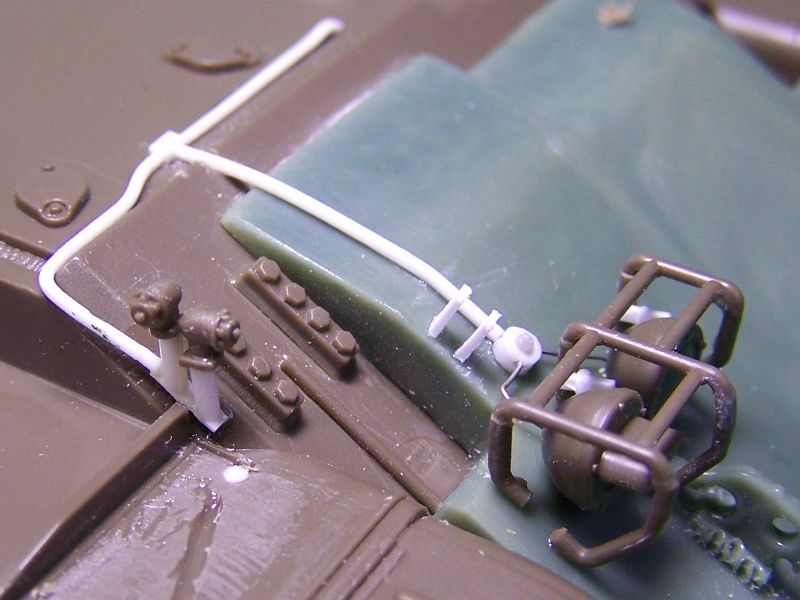
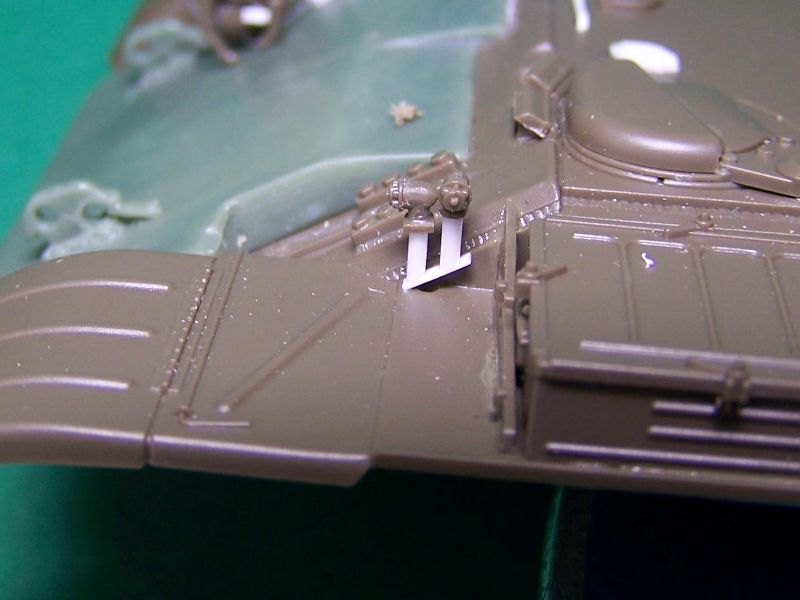
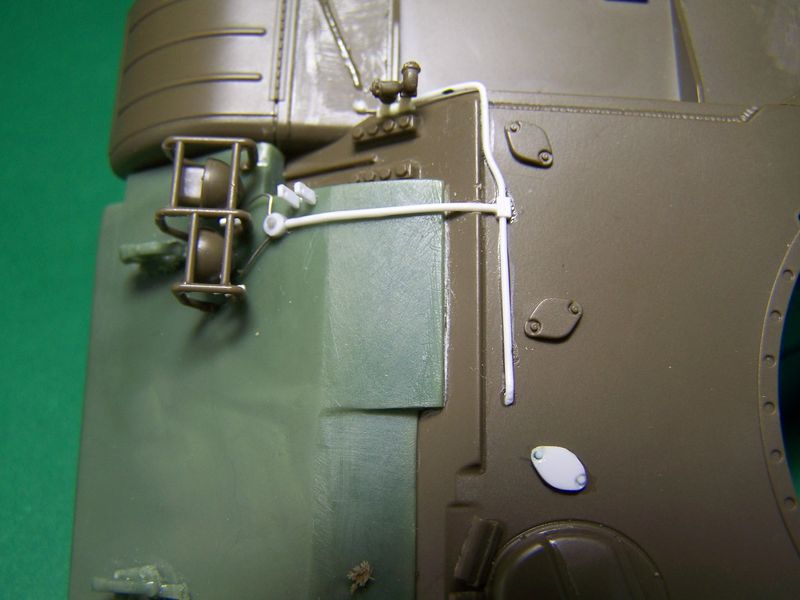
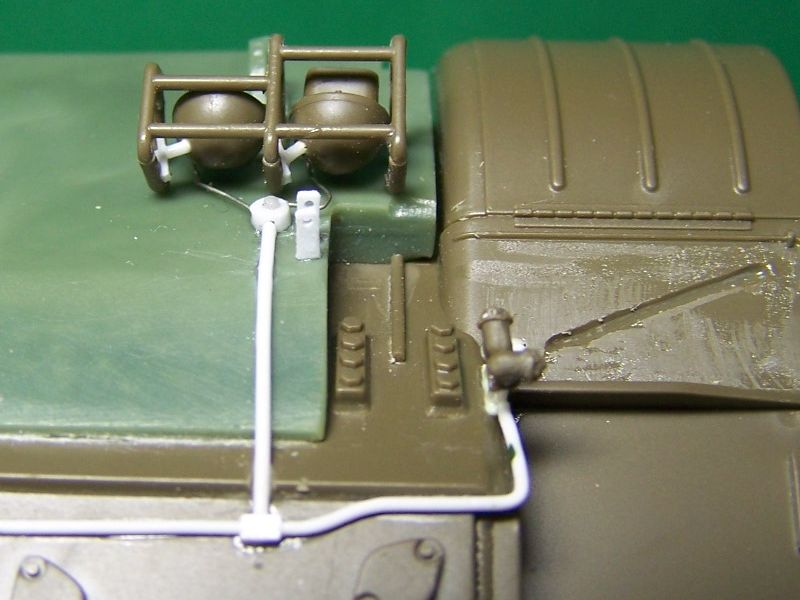
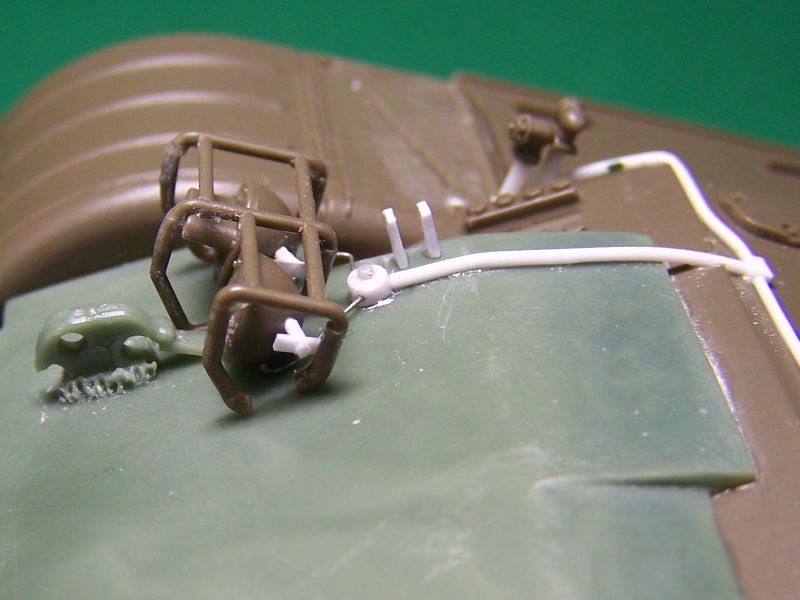
I also shifted to the hull front. The headlight guard has been modified as well as the way the headlights are attached to it. The various wire conduits have been added. The convoy lights supports have been altered too as on the AM2 they are simple tubes.


That's all for today
Olivier
bison126
Visit this Community
Correze, France
Joined: June 10, 2004
KitMaker: 5,329 posts
Armorama: 5,204 posts
Posted: Sunday, October 07, 2012 - 04:31 AM UTC
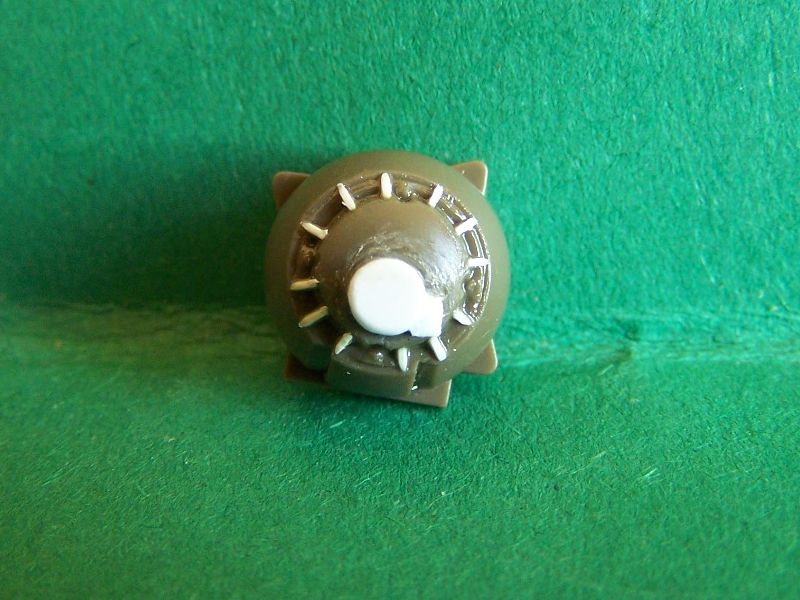
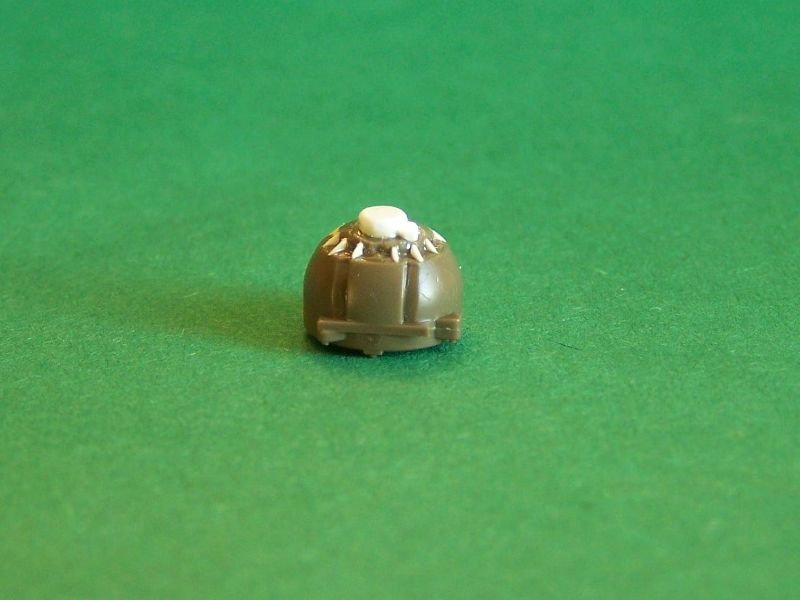
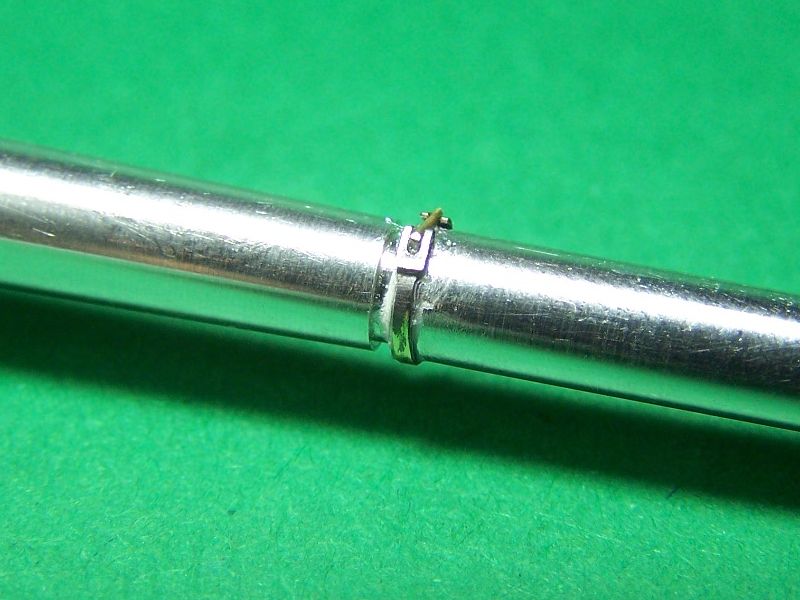
Today was a slow one. I just managed to glue the thermal sleeve latches around the gub barrel. A real PITA. CMK gives the wrong PE part numbers in the instructions. I advised to use the PP3 instead of the PP4 parts to get an easier fit.

The TC cupola apart, I consider the turret done. The cupola will be added after painting so it will be easier to deal with the vision blocks glasses.


Olivier
jkb_sprint
Visit this Community
Thessaloniki, Greece / Ελλάδα
Joined: April 23, 2012
KitMaker: 402 posts
Armorama: 394 posts
Posted: Sunday, October 07, 2012 - 09:00 AM UTC
Olivier i'll try to forget all that i saw in this thread so i can sleep peacefully...... . Great detailing and clean work!
Tanksami
Visit this Community
Victoria, Australia
Joined: August 06, 2011
KitMaker: 1,314 posts
Armorama: 1,217 posts
Posted: Sunday, October 07, 2012 - 10:32 AM UTC
Hi Oliver,

What an amazing fantastic job you are doing!! Wishing I had a quarter of your skills!! Now subscribed to learn as much as possible & follow an amazing detailed build!!
Thanks for sharing!!
Cheers Mike
dvarettoni
Visit this Community
South Carolina, United States
Joined: September 28, 2005
KitMaker: 778 posts
Armorama: 763 posts
Posted: Sunday, October 07, 2012 - 04:54 PM UTC
Olivier quick question in the mian gun still a 100mm or has it been up guned ?
dave
bison126
Visit this Community
Correze, France
Joined: June 10, 2004
KitMaker: 5,329 posts
Armorama: 5,204 posts
Posted: Sunday, October 07, 2012 - 05:55 PM UTC

Quoted Text

Olivier quick question in the mian gun still a 100mm or has it been up guned ?
dave


Thanks all for your kind comments.
John, your M48 MOLF is really good too.
Dave, the gun is still 100mm it looks larger due to the thermal sleeve. This particular version can also fire the antitank missile Bastion that's why the sight in front of the TC cupola is changed.

Olivier
flugwuzzi
Visit this Community
Lower Austria, Austria
Joined: November 02, 2007
KitMaker: 633 posts
Armorama: 599 posts
Posted: Sunday, October 07, 2012 - 11:12 PM UTC
Excellent work Oliver!!
Great detailing and scratchbuilding.

Not sure, but maybe you can find some useful details for your project also from hungarian T-55s.
http://mhrfweb.makett.org/MHRF/index.php?option=com_phocagallery&view=category&id=1&Itemid=11&lang=hu

Cheers
Walter
bison126
Visit this Community
Correze, France
Joined: June 10, 2004
KitMaker: 5,329 posts
Armorama: 5,204 posts
Posted: Monday, October 08, 2012 - 08:21 PM UTC
Thanks for the link Walter.
Unfortunately, the Hungarians haven't modified the fuel piping like the Czechs did for the real fuel drums.

I'll continue to browse the web and hopefully will find something clear enough to sort the things out.

Olivier
asmodeuss
Visit this Community
Quebec, Canada
Joined: November 19, 2011
KitMaker: 1,389 posts
Armorama: 1,388 posts
Posted: Tuesday, October 09, 2012 - 02:35 AM UTC
Suscribed!
It is always great to follow your thread Olivier!
superbe boulot!
Phil.
bison126
Visit this Community
Correze, France
Joined: June 10, 2004
KitMaker: 5,329 posts
Armorama: 5,204 posts
Posted: Tuesday, October 09, 2012 - 08:21 AM UTC
Thanks Philippe !
Here is the result of a little work on the TC cupoal IR searchlight.


And now I have to tackle the side skirts. CMK provides skirts with quite good details but which are too short by approximately 2mm. Not something you can't notice or you can hide. I fear I'll have to make new ones.

Olivier
 _GOTOTOP