Trumpeter's 1/35 Ehkranami KV-1
Quebec, Canada
Joined: November 19, 2011
KitMaker: 1,389 posts
Armorama: 1,388 posts
Posted: Tuesday, October 09, 2012 - 01:24 AM UTC
Hi Mike! Glad you came by. I'll try to be as torough as possible.
Mauro, Thx again mate! Your ARE the man with the infos, sooo great to have you watching my back!
I'll update soon today.
Phil.

Modeling...
I rest my case.
Quebec, Canada
Joined: November 19, 2011
KitMaker: 1,389 posts
Armorama: 1,388 posts
Posted: Tuesday, October 09, 2012 - 02:01 AM UTC
Here is an update.
Ive glued the lower sides on the hull. Aside from minor warping it went pretty well, nothing a little tape and clamps wouldn't fix.
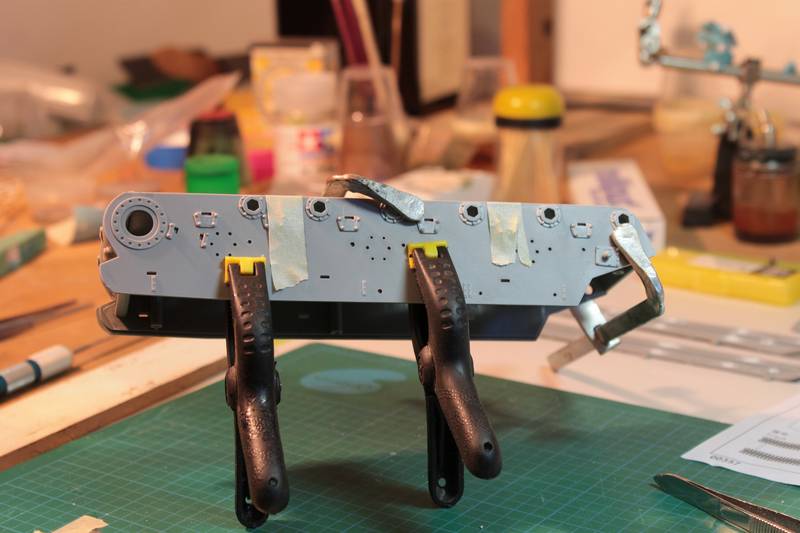
Then the supension bumbers and front glacis went on. After a dragon build it is always great to build a kit with such good fitting (and plan

)
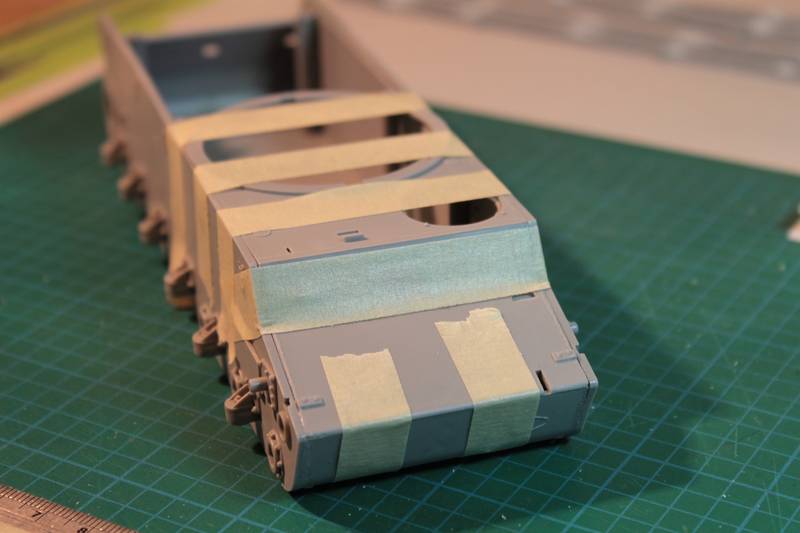
The engine bay was next. I had to sand the side a little since it was slightly wider than the front part and warped up when in place...
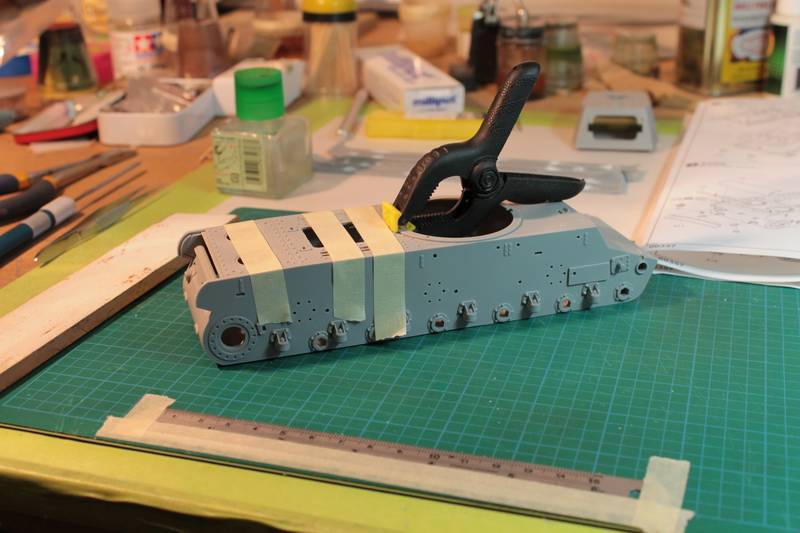
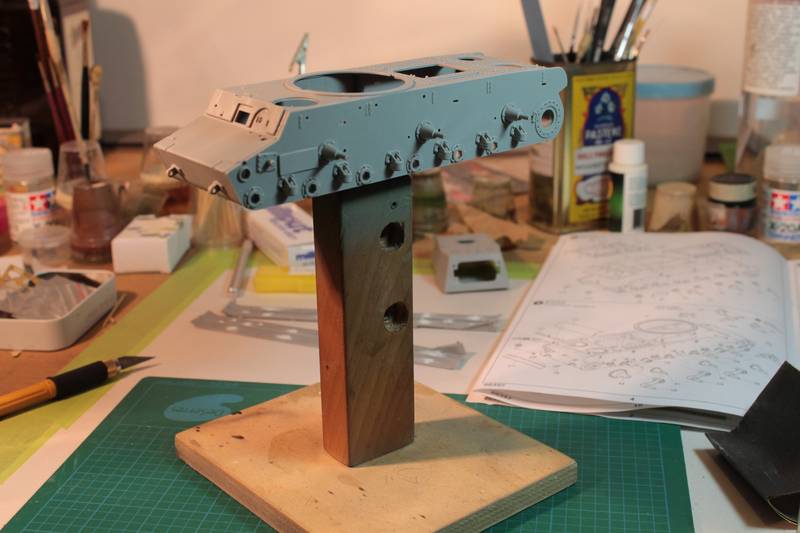
After those step, I finally decided to mount the hull on my homemade jig! Since i'm a tall man it is always more comfortable to work a little higher

The return roller post were mounted without fuss, after the stug's one this was a welcomed gift hehe!
Since I have to wait for the PE parts to arrive I think i'm going to work on the suspension and turret assembly. Does anyone know about the et PE kit? I'm not sure exactly what pieces are included in that one... Just seen the grilles and bought it

Thanks for watching.
Phil.

Modeling...
I rest my case.
Quebec, Canada
Joined: November 19, 2011
KitMaker: 1,389 posts
Armorama: 1,388 posts
Posted: Wednesday, October 10, 2012 - 01:48 AM UTC
Would it be possible to have seen this the 1940 version with those tracks as a retrofit? kind of hard to see on pics.
Another Q: the kit's grilles have many bolts on them and it seems on the pics that it would be not for bolt per section but two bolt and two rivet, am I correct?
Thx
Phil.

Modeling...
I rest my case.
Quebec, Canada
Joined: November 19, 2011
KitMaker: 1,389 posts
Armorama: 1,388 posts
Posted: Thursday, October 11, 2012 - 01:05 AM UTC
I think I'm going to base myself on those plans from the 3rd armored division (1941) Thanks to Mauro for the links
But if the review Frank posted me is accurate, and i'm sure it is, i'll have fender width problems

Is there a solution for this? I'll read the review again since I may have wrongly interpreted the text...language gap

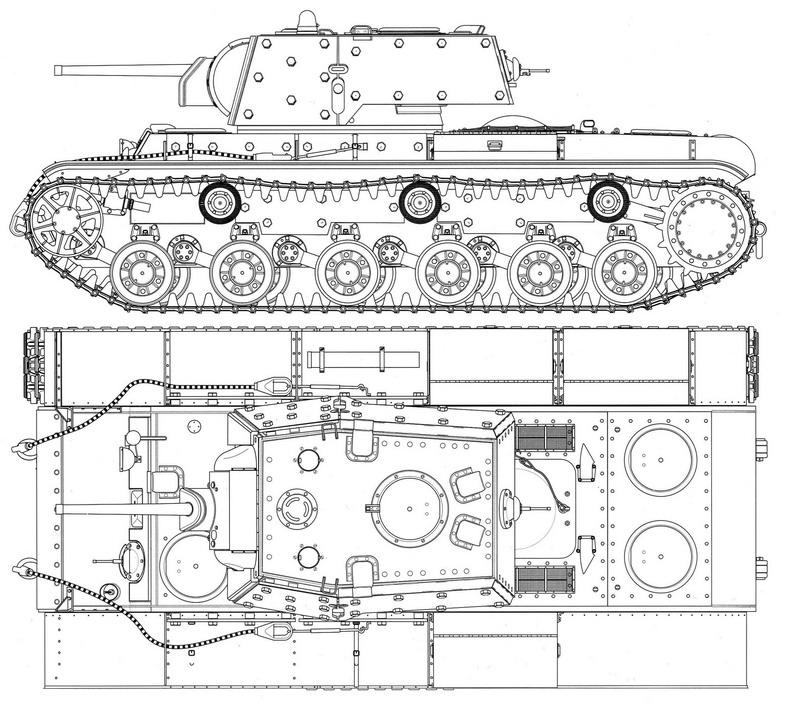
Thanks for the help.
Phil.

Modeling...
I rest my case.
Wisconsin, United States
Joined: June 16, 2008
KitMaker: 418 posts
Armorama: 408 posts
Posted: Thursday, October 11, 2012 - 01:28 AM UTC
What is the question again?
Texas, United States
Joined: March 08, 2010
KitMaker: 2,465 posts
Armorama: 2,383 posts
Posted: Thursday, October 11, 2012 - 06:14 AM UTC
Hey Phil, Comin' along nicely bro! Keep'er comin'!!!

Gary

Quebec, Canada
Joined: November 19, 2011
KitMaker: 1,389 posts
Armorama: 1,388 posts
Posted: Thursday, October 11, 2012 - 08:30 AM UTC
@alex
Quoted Text
Would it be possible to have seen this the 1940 version with those tracks as a retrofit? kind of hard to see on pics.
Another Q: the kit's grilles have many bolts on them and it seems on the pics that it would be not for bolt per section but two bolt and two rivet, am I correct?
As in this previous pics shared by Mauro:
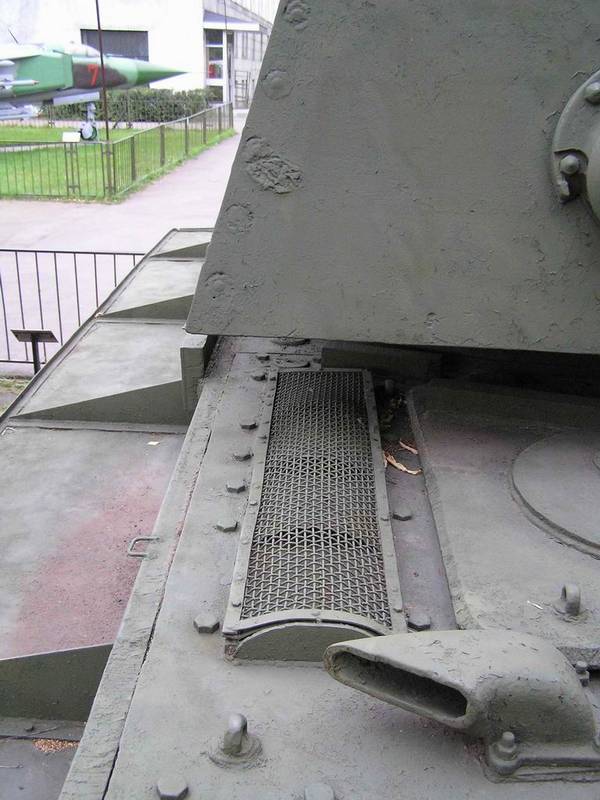
Thx
Phil. 
Modeling...
I rest my case.
Quebec, Canada
Joined: November 19, 2011
KitMaker: 1,389 posts
Armorama: 1,388 posts
Posted: Thursday, October 11, 2012 - 08:32 AM UTC
@Gary Thx mate! always great to have you around bro.
I reread the 4bo reveiew and I misinterpreted. Fenders should be to correct width.
Modeling...
I rest my case.
Quebec, Canada
Joined: November 19, 2011
KitMaker: 1,389 posts
Armorama: 1,388 posts
Posted: Thursday, October 11, 2012 - 08:37 AM UTC
Good god! I don't know why the pic won't show but here it is again Alex:

Modeling...
I rest my case.
Portugal
Joined: September 05, 2012
KitMaker: 9 posts
Armorama: 4 posts
Posted: Thursday, October 11, 2012 - 09:56 AM UTC
There were two types of engine mesh. The image shows the last version.
Milano, Italy
Joined: July 13, 2010
KitMaker: 3,845 posts
Armorama: 3,543 posts
Posted: Thursday, October 11, 2012 - 11:15 AM UTC

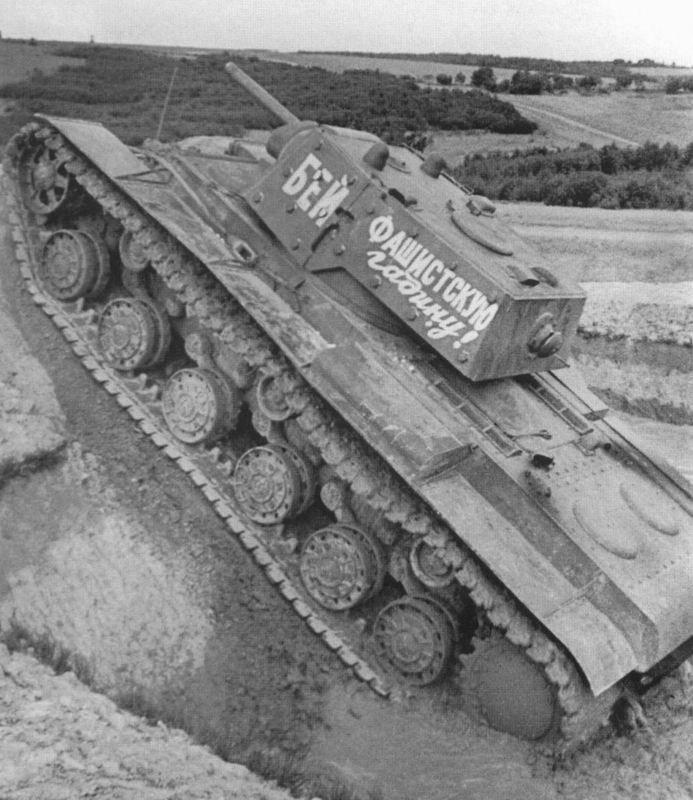
I think they are correct
Sorry but I didn't understand... what's the problem with the track links?

You're doing a great job so far
...well in my opinion T-55 isn' t just a tank. Actually it is THE TANK...
Quebec, Canada
Joined: November 19, 2011
KitMaker: 1,389 posts
Armorama: 1,388 posts
Posted: Thursday, October 11, 2012 - 12:25 PM UTC
@Mauro,
I've read that the track in the kit are a little too wide, I just wanted a second opinion on the matter.

Hey! Am I the only one not recieving the e-mail update on that thread? (My own!) I've suscribed 2 time and still I have to go fetch my thread.
I've started texturing the edge of the side armor to give them the blowtorch cutted look.
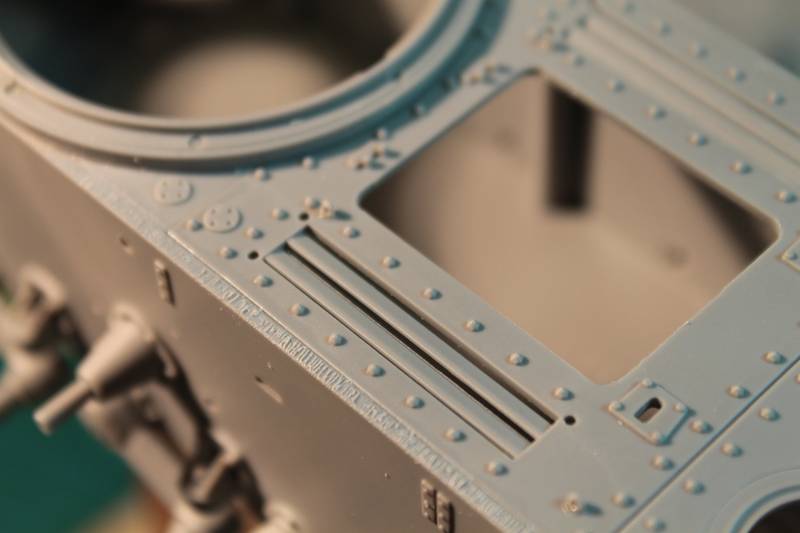
The scratching sound really interested Ilia the workbench dog!
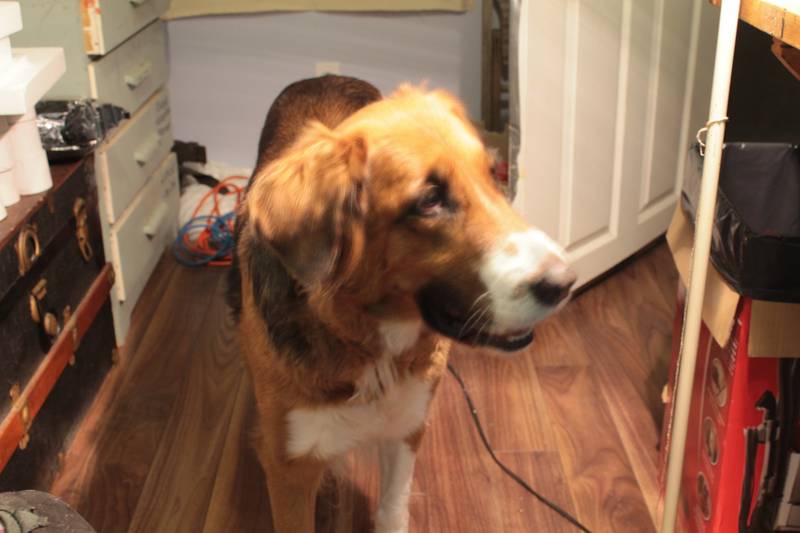
So? is the texturing a good idea?
Thanks for watching.
Phil.

Modeling...
I rest my case.
Milano, Italy
Joined: July 13, 2010
KitMaker: 3,845 posts
Armorama: 3,543 posts
Posted: Thursday, October 11, 2012 - 07:16 PM UTC
To be honest, that's the first time I've heard about this flaw.
I've read several threads and reviews about, and no one has reported this problem. In my humble opinion they look fine enough.
Quoted Text
So? is the texturing a good idea?
Yes it is! Russian used to make the tank iron parts in rough molds. They didn't used to smooth the mold surfaces so on average their final parts looked quite rough. For the Russian, having a large production of exemplars was more important than having a high quality because they had the urgency of rebuff the German invasion.
For exemple, look at the engine hatch edges

As you can see it's made in a really rough way! If it had been a Panzer, that edge would have looked clean smooth and straight

However in my opinion, in this case, to replicate the surface roughness, it would be better to use the thin liquid glue than the Mr surfacer. That's I think I'll do on my Kv1
Just my two cents anyway
...well in my opinion T-55 isn' t just a tank. Actually it is THE TANK...
Quebec, Canada
Joined: November 19, 2011
KitMaker: 1,389 posts
Armorama: 1,388 posts
Posted: Friday, October 12, 2012 - 12:10 AM UTC
Thx Mauro, I tought about using tam extra thin cement for texturing the large surfaces on this beast...But I never did use this method. Do I just apply a thin coat on the desired area and stiple it with a stiff brush, or there is a special twist to this technique?

Modeling...
I rest my case.
Wisconsin, United States
Joined: June 16, 2008
KitMaker: 418 posts
Armorama: 408 posts
Posted: Friday, October 12, 2012 - 01:11 AM UTC

Maybe I am not sleeping enough lately but I still don't understand what is going on here.

1. Anyhow, those blueprints/plans are very not to scale. You don't really want to use them. Sorry...
2. Never heard or have read about the two types of engine intakes mesh. Could you elaborate on it, Duarte, please?
3. If someone is worrying about width of the track, they were 700mm wide. Occasionally, (though, it is very rare) you can see a different type of a track on KV. But it is a very rare find.
So just measure your tracks, and see how it compares to the real ones in scale.
Cheers!
Milano, Italy
Joined: July 13, 2010
KitMaker: 3,845 posts
Armorama: 3,543 posts
Posted: Friday, October 12, 2012 - 01:29 AM UTC
Quoted Text
Thx Mauro, I tought about using tam extra thin cement for texturing the large surfaces on this beast...But I never did use this method. Do I just apply a thin coat on the desired area and stiple it with a stiff brush, or there is a special twist to this technique?

That's what exactly you have to do. You have to work sevaral times on small surfaces because the glue tends to evaporate fast. I usually apply the glue with a flat brush which is larger than the tiny one provided by the Tamiya bottle. To stiple, you can use a stiff brush. Sometime to texturing the areas, I also use a fine sponge. When glue is well cured, you can sand down just a bit your parts to refine them in a better way. I usually adopt this method when I need to render a finer roughness, such for exemple the one that you can see on the worn exhaust pipes
To find many others reference pics, try to put in your internet broswer the words
КВ-1Э
;-)
...well in my opinion T-55 isn' t just a tank. Actually it is THE TANK...
Quebec, Canada
Joined: November 19, 2011
KitMaker: 1,389 posts
Armorama: 1,388 posts
Posted: Saturday, October 13, 2012 - 03:48 AM UTC
Thanks alot Mauro! You are always a mine of infos

The tip for the browser was very helpfull!
Alex, don't worry, the plan depict de model of tank I want to build, I won't be using them for scale scratch. Thanks for the tracks width, You have reference for that? I would love to sneak into those thechnical reference while drinking the morning coffe!

Phil.

Modeling...
I rest my case.
Quebec, Canada
Joined: November 19, 2011
KitMaker: 1,389 posts
Armorama: 1,388 posts
Posted: Sunday, October 14, 2012 - 02:49 AM UTC
Hi gents!
I was looking for good pics of the reinforced piece on the tip of the front glacis that has the welded bolt marks as provided in the kit. In fact I found none of that particular model. Except on the plan I posted earlier all reference pics with such bolt welds I found were with the welded turret.
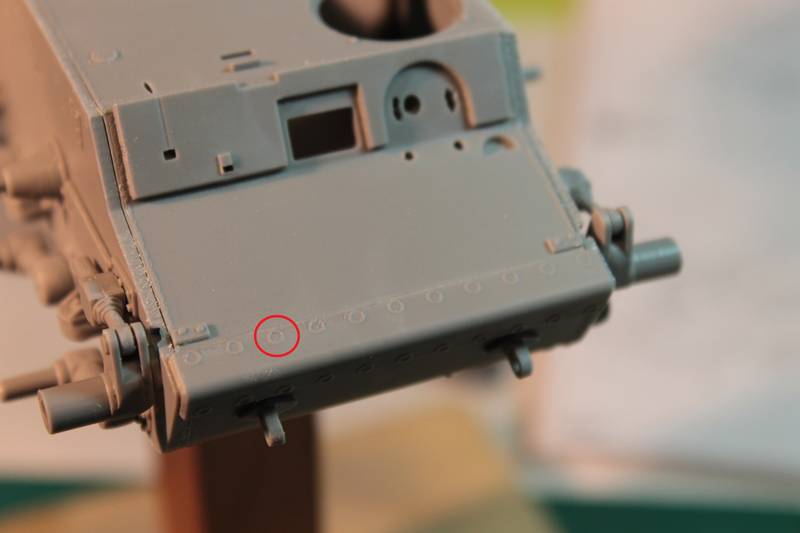
I'm pretty sure I should sand those...Any advice?
Phil.

Modeling...
I rest my case.
Milano, Italy
Joined: July 13, 2010
KitMaker: 3,845 posts
Armorama: 3,543 posts
Posted: Sunday, October 14, 2012 - 06:18 AM UTC
...well in my opinion T-55 isn' t just a tank. Actually it is THE TANK...
Quebec, Canada
Joined: November 19, 2011
KitMaker: 1,389 posts
Armorama: 1,388 posts
Posted: Sunday, October 14, 2012 - 09:49 AM UTC
Ho Man! I soooo knew you had the goods!
Hahaha mauro still had a trick up his sleave.
Thx mate.
Glad I did not sand those.
Phil.

Modeling...
I rest my case.
Quebec, Canada
Joined: November 19, 2011
KitMaker: 1,389 posts
Armorama: 1,388 posts
Posted: Monday, October 15, 2012 - 01:25 AM UTC
Did lot of picture gazing this weekend, thanks to you guys and your sweet links. Mauro thx for the the link and pdf, it is just what i was looking for.
Here is some progress. I've worked the engine bay hatch a little for it to look a bit more rough casted.
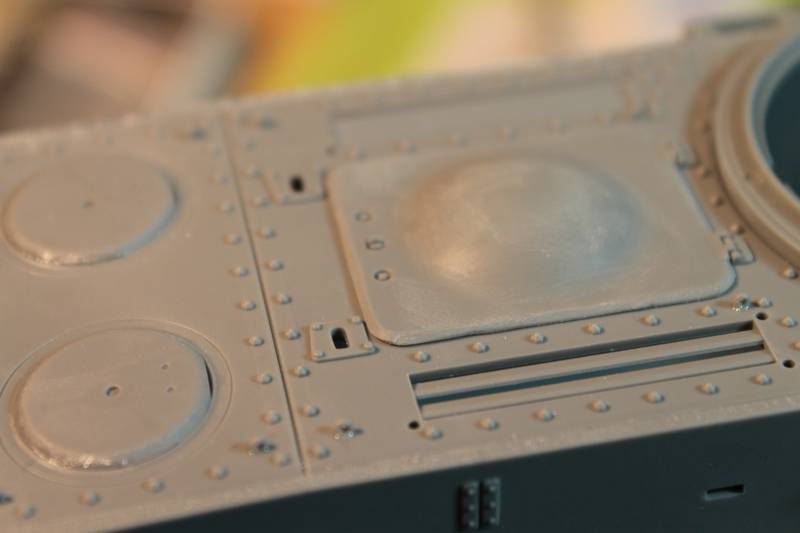
With the help of clamp I manage to secure down some added side armor...they were a little warped.
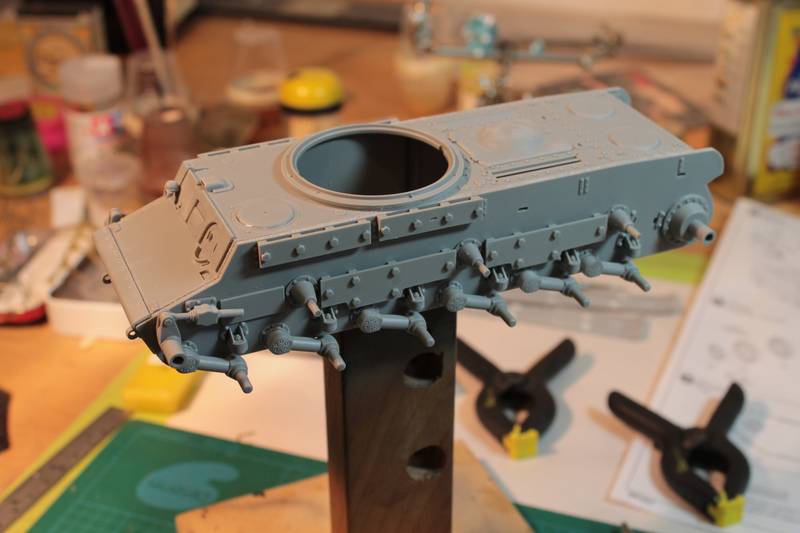
I should receive tools and the pe fret I've ordered soon. Maybe I'll work on building som of the engine grills to receive the pe mesh.
Thanks for watching.
Phil.

Modeling...
I rest my case.
Arkansas, United States
Joined: June 29, 2009
KitMaker: 11,610 posts
Armorama: 7,843 posts
Posted: Monday, October 15, 2012 - 01:54 AM UTC
I'm enjoying watching your progress. Glad to see that you are building a true representation, rather than sticking strictly to the box. My LHS has one of these I may have to pick up.
Ideals are peaceful. History is violent.
Wisconsin, United States
Joined: June 16, 2008
KitMaker: 418 posts
Armorama: 408 posts
Posted: Monday, October 15, 2012 - 02:13 AM UTC
Well, I guess the subscription feature is not working anymore...

Yes, I have collected a sizable amount of reference on KV tanks, though I have never dive in it deep enough. The reference for the track width was the manual from 1941. Unfortunately I don't have all the pages, but if you are interested I can post what I have.
I will also post all the images I have of up-armored KV.
Quebec, Canada
Joined: November 19, 2011
KitMaker: 1,389 posts
Armorama: 1,388 posts
Posted: Monday, October 15, 2012 - 02:14 AM UTC
Thank you Matt! You should it is a great kit indeed and with 10$ worth of after market I'm pretty sure you can make a fine build.
Here is where i'm at, since I always get up 2 hours prior to go to work (for modelling pupose

) I've took one of the kit grilles( part d-9) and prepared it for the pe mesh.
First I've drilled some holes in it to allow unwanted plastic to move to the inside and not break the smal outer strip I wanted to keep. Then I carefully cut the unwanted part (the center) and the thicker end was cut of to prevent the spliting of the corner. After that I took a piece of paper put the two pieces together and glued. The paper act as a tiny clamp since the plastic, with the action of the glue, sticks to thr paper. When it is cured the paper is easly removed by sanding or scraping.
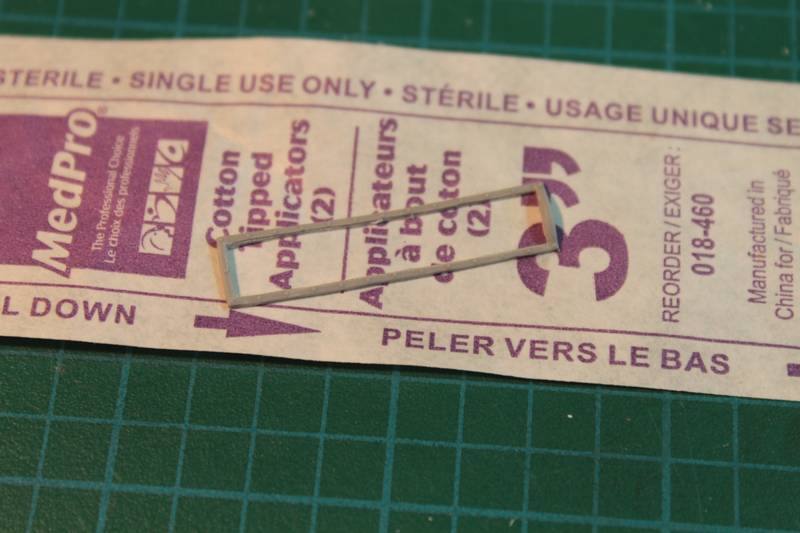
Ther is stil some clean up to do when it will be cured.
Thanks for comments and watching.
Phil.

Modeling...
I rest my case.
Wisconsin, United States
Joined: June 16, 2008
KitMaker: 418 posts
Armorama: 408 posts
Posted: Monday, October 15, 2012 - 02:37 AM UTC


 )
)

 The return roller post were mounted without fuss, after the stug's one this was a welcomed gift hehe!




 Maybe I am not sleeping enough lately but I still don't understand what is going on here.


 The tip for the browser was very helpfull!


 ) I've took one of the kit grilles( part d-9) and prepared it for the pe mesh.


