Hosted by Jacques Duquette
Trumpeter's 1/35 Ehkranami KV-1
stevieneon

Joined: January 24, 2009
KitMaker: 144 posts
Armorama: 143 posts

Posted: Sunday, October 28, 2012 - 08:09 AM UTC
Agreed - the tracks look great. Don't know what you mean 1 or 2 too many. Just use how many it takes until it looks right. And yours looks right! Stevie.

retiredyank

Joined: June 29, 2009
KitMaker: 11,610 posts
Armorama: 7,843 posts

Posted: Sunday, October 28, 2012 - 08:12 AM UTC
Quoted Text
Agreed - the tracks look great. Don't know what you mean 1 or 2 too many. Just use how many it takes until it looks right. And yours looks right! Stevie.
Each side has a set number of links. This number should be the same for boths sides. However, on link and length tracks this is not always true.
Minsk94

Joined: June 16, 2008
KitMaker: 418 posts
Armorama: 408 posts

Posted: Sunday, October 28, 2012 - 08:32 AM UTC
This model of KV had only 6 lifting rings, not 8.

asmodeuss

Joined: November 19, 2011
KitMaker: 1,389 posts
Armorama: 1,388 posts

Posted: Sunday, October 28, 2012 - 10:12 AM UTC
Thanks guys!
@ Darren. As for the lifting hooks eyelets Thats where I tought they went but can not find any pics to confirm there presence...I know I've seen some but can't find the photo I'm looking for Is someone here think it is not apropriate to have those eyelet on the lifting hooks? Because I'll go with Darren here(and my memory). I've already rebored the lifting hooks to the right diameter.
@ Alex. You say that there is only 6 lifting hooks on this particular model, could you tell me(us) where they are?
Thank you for the educational comments gents, this is much apreciated.
Phil.
@ Darren. As for the lifting hooks eyelets Thats where I tought they went but can not find any pics to confirm there presence...I know I've seen some but can't find the photo I'm looking for
 Is someone here think it is not apropriate to have those eyelet on the lifting hooks? Because I'll go with Darren here(and my memory). I've already rebored the lifting hooks to the right diameter.
@ Alex. You say that there is only 6 lifting hooks on this particular model, could you tell me(us) where they are?
Thank you for the educational comments gents, this is much apreciated.
Phil.


asmodeuss

Joined: November 19, 2011
KitMaker: 1,389 posts
Armorama: 1,388 posts

Posted: Sunday, October 28, 2012 - 10:22 AM UTC
In fact, I've just checked in this book(Thanks to you guys!!)I think it's Alex but maybe Mauro or Darren...god! you guys gaved me so much!  I should write the names on the files hehe.
Anyways
Alex seems to be right, I can't find the two lifting hooks near the rear of the engine bay on the riveted extra armor models.

phil.
 I should write the names on the files hehe.
Anyways
Alex seems to be right, I can't find the two lifting hooks near the rear of the engine bay on the riveted extra armor models.
phil.

Minsk94

Joined: June 16, 2008
KitMaker: 418 posts
Armorama: 408 posts

Posted: Sunday, October 28, 2012 - 12:28 PM UTC
Posted: Sunday, October 28, 2012 - 02:10 PM UTC
Why would the rear plate only have two lifting points as it was my understanding that it was four for ease of fitting and removal by keeping the plate level.

asmodeuss

Joined: November 19, 2011
KitMaker: 1,389 posts
Armorama: 1,388 posts

Posted: Monday, October 29, 2012 - 01:14 AM UTC
That IS an interesting question! Was there an hinge on the last plate of the engine bay? Or since it was smaller they only used two hooks? I think we need someone who speak russian  Cause the book is kind of hard to read...when like me you dont know russian. I really should have not hesitate when I had the opportunity to take a russian class at university
  .
.
Phil.
 Cause the book is kind of hard to read...when like me you dont know russian. I really should have not hesitate when I had the opportunity to take a russian class at university
  .
. Phil.

Minsk94

Joined: June 16, 2008
KitMaker: 418 posts
Armorama: 408 posts

Posted: Monday, October 29, 2012 - 01:46 AM UTC
Those books don't talk about the rear plate.
Posted: Monday, October 29, 2012 - 02:44 AM UTC
Phil a quick note to Neil Stokes should get the required information as he is a member here and an authority on the KV tank.
pseudorealityx

Joined: January 31, 2010
KitMaker: 2,191 posts
Armorama: 1,814 posts

Posted: Monday, October 29, 2012 - 03:39 AM UTC
Quoted Text
Quoted TextAgreed - the tracks look great. Don't know what you mean 1 or 2 too many. Just use how many it takes until it looks right. And yours looks right! Stevie.
Each side has a set number of links. This number should be the same for boths sides. However, on link and length tracks this is not always true.
It is not always the same for both sides. Because the torsion bars are sometimes offset, there can be small differences.
The number of tracks is not important... the tension on them is.

Minsk94

Joined: June 16, 2008
KitMaker: 418 posts
Armorama: 408 posts

Posted: Monday, October 29, 2012 - 04:14 AM UTC
According to the manual there should be 87-90 tracks on each side. The slack between two supporting rollers should be 50-60 mm.
No offence to Neil and his fan club, but many of his conclusions are really questionable.
Quoted Text
Neil Stokes ... as he is ... an authority on the KV tank
No offence to Neil and his fan club, but many of his conclusions are really questionable.
rovertacr1

Joined: February 26, 2012
KitMaker: 7 posts
Armorama: 6 posts

Posted: Monday, October 29, 2012 - 04:30 AM UTC
hi, your KV looking very good, i wish i had taken time to replace mesh screens on mine! too late now  i'm building the trumpeter KV1with light cast turret 1942. overall a very good kit when considering the price. looking forward to seeing your completed kit. keep up the good work. Kevin.
 i'm building the trumpeter KV1with light cast turret 1942. overall a very good kit when considering the price. looking forward to seeing your completed kit. keep up the good work. Kevin.
asmodeuss

Joined: November 19, 2011
KitMaker: 1,389 posts
Armorama: 1,388 posts

Posted: Monday, October 29, 2012 - 10:34 AM UTC
Thank you Kevin! much appreciated. If I can be of any help with my little knowledge  just let me know.
Thanks for the intel Alex, the numbers in the kit are about right.
Darren! I'll make sure to ask Mr. Stokes, thanks a lot Since i'm from a science background I always cross reference my sources when I want to be sure of something.
Man! I'm glad you guys are following
Phil.
 just let me know.
Thanks for the intel Alex, the numbers in the kit are about right.
Darren! I'll make sure to ask Mr. Stokes, thanks a lot Since i'm from a science background I always cross reference my sources when I want to be sure of something.
Man! I'm glad you guys are following

Phil.
jkb_sprint

Joined: April 23, 2012
KitMaker: 402 posts
Armorama: 394 posts

Posted: Monday, October 29, 2012 - 09:05 PM UTC
Philippe this is a very nice build. Interesting subject. Picking up ideas from you for a small turret version i have of this kit.
Dont worry about the track links, just use as many as you have so that they look good. In reality on older tanks that used torsion bars, they usually had one or two (rare cases though having two), more track links on one side for the reason Jesse already said. For the rear plate issue there is a posibility that it could be raised in a vertical way with the one side securing under the fixed top hull plate. I have seen that in some cases, although i dont know if this was the case with the KV. Anyway i like the job you've done so far.
Keep it up!

asmodeuss

Joined: November 19, 2011
KitMaker: 1,389 posts
Armorama: 1,388 posts

Posted: Tuesday, October 30, 2012 - 01:28 AM UTC
Thanks a lot John!
I've checked with Mr. Stokes and here what he have to say about the lifting hooks on this particular model.
``The bolt configuration on the engine compartment and transmission compartment roof plates is correct, with eleven equally spaced bolts across the rear edge of the engine compartment roof plate, and the same number on the front and rear edges of the transmission compartment roof plate. The bolts have the correct conical heads for a July 1941 vehicle. The lifting eyes are present and of the correct shape, including those beneath the turret bustle. However, Trumpeter includes four lifting eyes on the transmission compartment roof plate, rather than the correct two. Omit the two lifting eyes in the rear corners of the plate, and fill their locating holes.``
So with the cross refernce in mind, I did just that!
Now it is time to move on to another matter.
Phil.


asmodeuss

Joined: November 19, 2011
KitMaker: 1,389 posts
Armorama: 1,388 posts

Posted: Wednesday, October 31, 2012 - 01:30 AM UTC
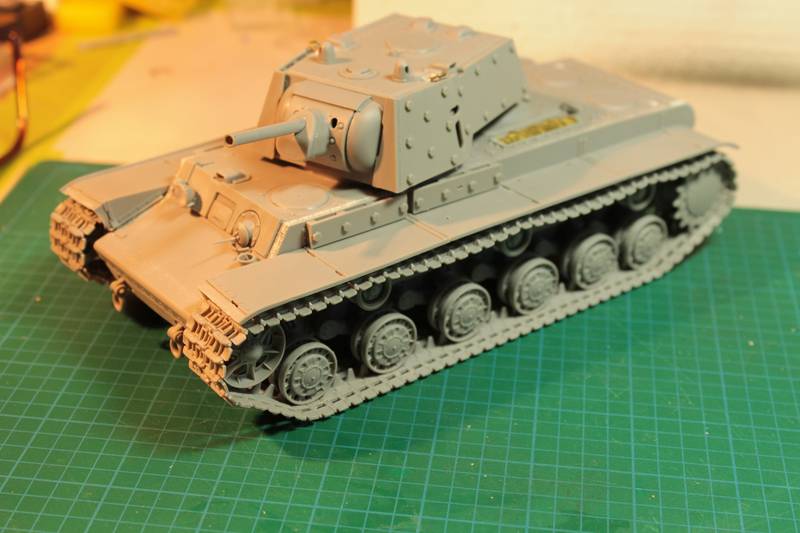
Here is a small update gents.
I've finished the tracks (fenders are just snaped on do not worry)
Just like the right side left side have what looks like 1/2 track too manny and since there is no way to adjust tension... i'm screwed. any tips on how I could move the iddler wheel 2 mil.?
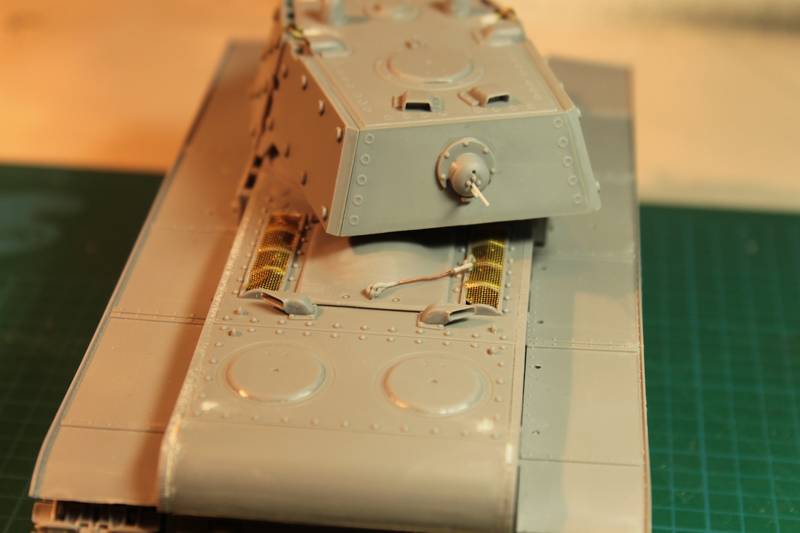
After what Alex showed me and what I've read on Neil Stokes's 4bo I've taken care of the two lifting hooks at the rear.
No explaination needed I think...cut'n'putt.
I've also added the wire on the front lamp wich I've glued on the glass...Have I seen one not busted on the battlefield?...not sure mehhh Looks nice.
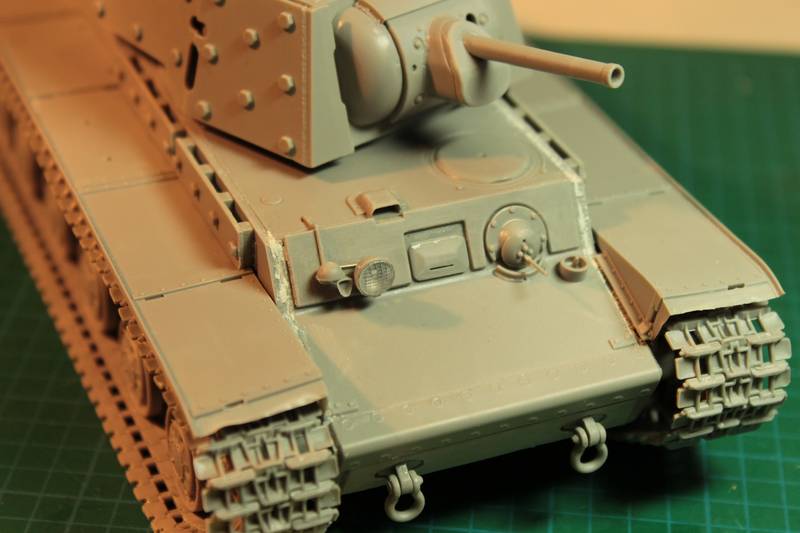
Now I'm moving on to the fenders wich will have some battle damage and have one pe box on, or three if I receive my tools some day!
Thanks for comments and watching guys.
Philippe.
I've finished the tracks (fenders are just snaped on do not worry)
Just like the right side left side have what looks like 1/2 track too manny and since there is no way to adjust tension... i'm screwed. any tips on how I could move the iddler wheel 2 mil.?

After what Alex showed me and what I've read on Neil Stokes's 4bo I've taken care of the two lifting hooks at the rear.

No explaination needed I think...cut'n'putt.
I've also added the wire on the front lamp wich I've glued on the glass...Have I seen one not busted on the battlefield?...not sure
 mehhh Looks nice.

Now I'm moving on to the fenders wich will have some battle damage and have one pe box on, or three if I receive my tools some day!
Thanks for comments and watching guys.
Philippe.

lone-ronin

Joined: January 31, 2006
KitMaker: 147 posts
Armorama: 93 posts

Posted: Wednesday, October 31, 2012 - 02:06 AM UTC
I did this on one of my KV's. You could clip the idler adjusting rod behind the idler, it really won't show. Then try to soften up the main idler attachment point with some cement, just enough so that you can rotate the idler forward some.
Posted: Wednesday, October 31, 2012 - 02:11 AM UTC
If you want to adjust the tensioner on the front idler cut the bar and remove, then glue the idler mount in the desired position after which use some plastic stock or metal bar of the correct size and drill out the slide and position the new adjuster bar.

asmodeuss

Joined: November 19, 2011
KitMaker: 1,389 posts
Armorama: 1,388 posts

Posted: Wednesday, October 31, 2012 - 02:11 AM UTC
Thanks Lone-Ronin! I'll try something like that.

asmodeuss

Joined: November 19, 2011
KitMaker: 1,389 posts
Armorama: 1,388 posts

Posted: Wednesday, October 31, 2012 - 02:12 AM UTC
Quoted Text
Thanks Lone-Ronin and Darren! I'll try something like that.

asmodeuss

Joined: November 19, 2011
KitMaker: 1,389 posts
Armorama: 1,388 posts

Posted: Thursday, November 01, 2012 - 09:34 AM UTC
Ok two problems solved! got my iddlers right on and my eyelets on the engine bay lifting hooks!
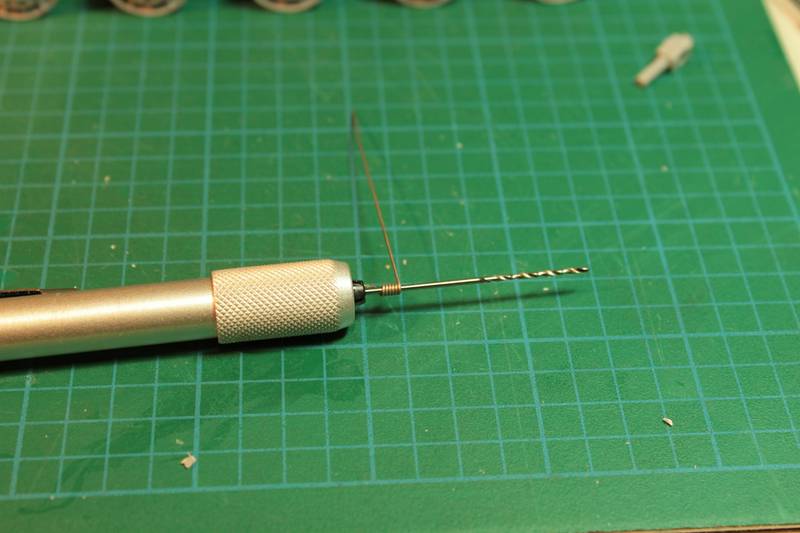
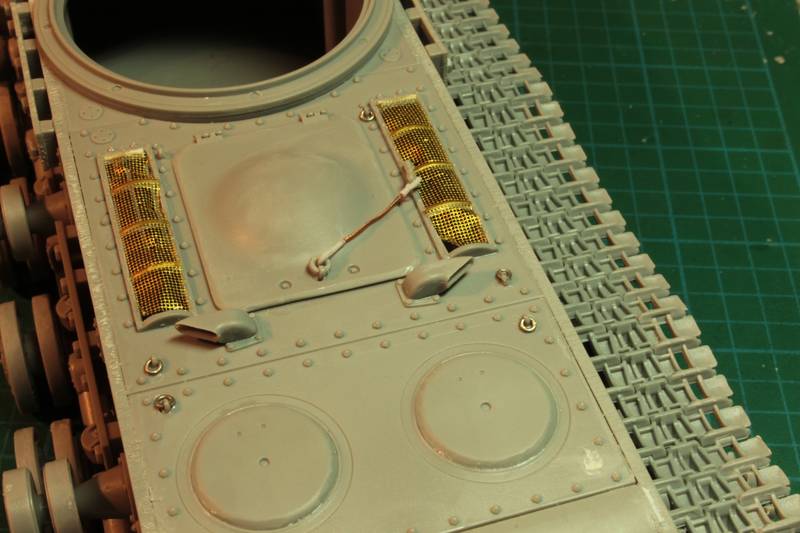
One of the fenders have been cut to spice things up...In fact I was looking at: tanks, the great battles, Koursk. And there was a kv-1 just like that
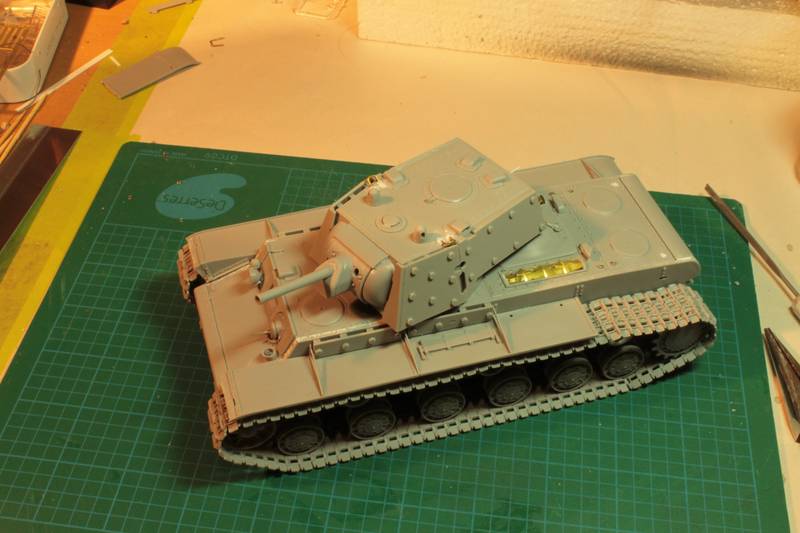
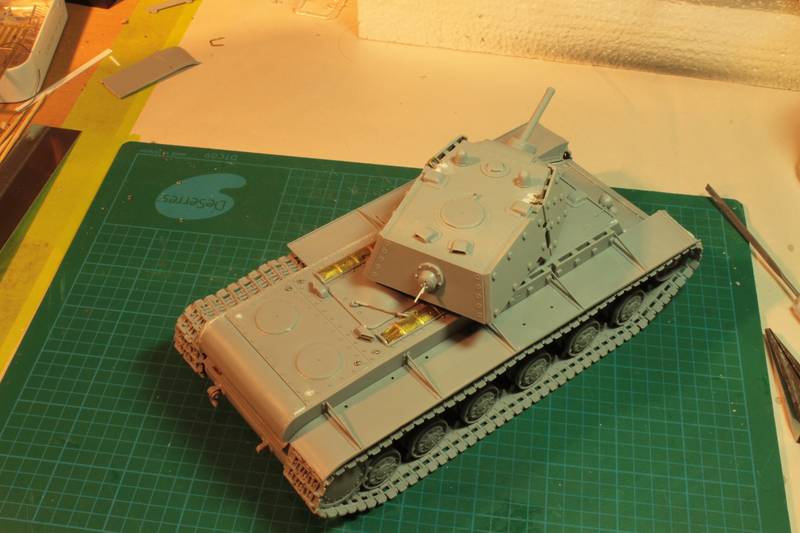
I'm waitting on my pe tool to arrive...Still got some putty and research to do on the fenders.
Let's gaze at some pics now!
Thanks for watching.
Phil.


One of the fenders have been cut to spice things up...In fact I was looking at: tanks, the great battles, Koursk. And there was a kv-1 just like that


I'm waitting on my pe tool to arrive...Still got some putty and research to do on the fenders.
Let's gaze at some pics now!
Thanks for watching.
Phil.

Posted: Thursday, November 01, 2012 - 10:45 AM UTC
Those rings are a small detail but look good when added and explain what the lifting points are for. Regarding the damaged fender are you going to put damaged hangers to tell the story of why that portion is missing?
The thread update notification seems to be working again.
The thread update notification seems to be working again.
Posted: Thursday, November 01, 2012 - 10:48 AM UTC
Another word of warning Phil is that the hangers at the very front of the fender usually need thinning to fit well.

asmodeuss

Joined: November 19, 2011
KitMaker: 1,389 posts
Armorama: 1,388 posts

Posted: Friday, November 02, 2012 - 12:02 AM UTC
Thanks Darren I'll keep that in mind. I'll try to do something with the hanger, not to leave the empty part too clean.
Phil.
Phil.

 |


