Hi guys I just got done painting all the parts I worked on this week. Boy this kit sure has some detail. I should get most of these assamblies put together this week. I am going to start a couple of other campaigns so I will be very busy. Pics are in the gallery.
Sheldon
Campaigns
Where Armorama group builds can be discussed, organized, and updates posted.
Where Armorama group builds can be discussed, organized, and updates posted.
Hosted by Darren Baker, Richard S.
Heart of Gold
sroth88

Joined: August 13, 2007
KitMaker: 109 posts
Armorama: 63 posts

Posted: Saturday, August 25, 2007 - 12:19 PM UTC
CaptainA

Joined: May 14, 2007
KitMaker: 3,117 posts
Armorama: 564 posts

Posted: Sunday, August 26, 2007 - 05:31 AM UTC
Quoted Text
Hi Carl,
I just found out about this campaign. Some months ago I started with the old M2 Bradley from Tamiya but I didn't finish it. So I like to join if possible as this would be a chance to complete it.
greetings ro
Guten Tag
Go for it. Glad to have you join in.
CaptainA

Joined: May 14, 2007
KitMaker: 3,117 posts
Armorama: 564 posts

Posted: Sunday, August 26, 2007 - 05:37 AM UTC
Quoted Text
Hi guys I just got done painting all the parts I worked on this week. Boy this kit sure has some detail. I should get most of these assamblies put together this week. I am going to start a couple of other campaigns so I will be very busy. Pics are in the gallery.
Sheldon
Nice Pics. Do your completed models ever end up with stray cat hairs in them?
surgeon01

Joined: February 20, 2005
KitMaker: 204 posts
Armorama: 98 posts

Posted: Sunday, August 26, 2007 - 07:30 AM UTC
Hi to all,
Carl thanks a lot for the possibility to join. As this is the first campaign here for me I'm very pleased.
For today some pics where I am at the moment with my Bradley.


Thanks for looking
greetings ro
Carl thanks a lot for the possibility to join. As this is the first campaign here for me I'm very pleased.
For today some pics where I am at the moment with my Bradley.
Thanks for looking
greetings ro

sroth88

Joined: August 13, 2007
KitMaker: 109 posts
Armorama: 63 posts

Posted: Monday, August 27, 2007 - 10:46 AM UTC
Yes they do, I am always finding them were they don't belong.
Sheldon
sroth88

Joined: August 13, 2007
KitMaker: 109 posts
Armorama: 63 posts

Posted: Monday, August 27, 2007 - 10:48 AM UTC
Very nice I built one a while back I really liked the kit.
Sheldon
Sheldon
CaptainA

Joined: May 14, 2007
KitMaker: 3,117 posts
Armorama: 564 posts

Posted: Monday, August 27, 2007 - 11:31 AM UTC
Quoted Text
Yes they do, I am always finding them were they don't belong.
Sheldon
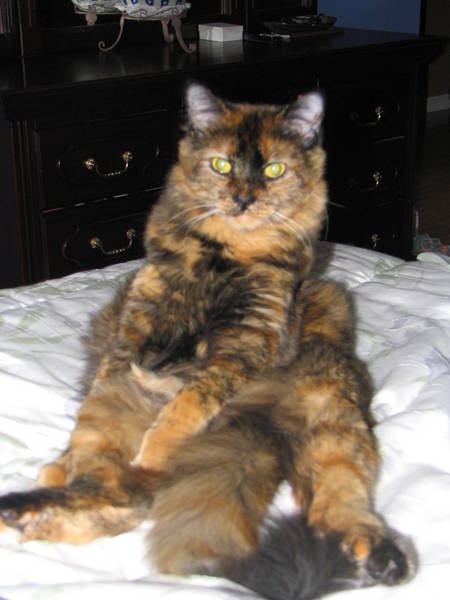
I have 4. I can almost handle the hair. The real trouble starts when they decide to "help" me. This one is Ding-a-ling.
Posted: Monday, August 27, 2007 - 06:23 PM UTC
Robert, really nice interior on that Bradley. It will be a truly golden heart 
Carl, Cute little "helper" you there. I can imagine it can be difficult when all four of them get interested in what you are building and wants to add to the process.


Carl, Cute little "helper" you there.
 I can imagine it can be difficult when all four of them get interested in what you are building and wants to add to the process.

CaptainA

Joined: May 14, 2007
KitMaker: 3,117 posts
Armorama: 564 posts

Posted: Tuesday, August 28, 2007 - 06:50 AM UTC
I basicly started over again from scratch last week. So, once more from the beginning, and away we go.....
I "Chunked" and painted the roadwheels. They just didn't look right. So I took all of them, put them in a bottle of thinner and shook it till there was no paint left. I have painted them again, and they look much better. I have also fired up the airbrush and have the hull mosly painted, along with some of the other parts on the sprues. This is a fantastic kit. I am really suffering from builders block though. I am progressing so I hope to work through the block soon. I will post some pictures soon.
As for Ding-a-ling, (that is her real name) I have a picture of her on a model box, while I am working. I wish I could find it. It really shows how much help I do get from the helpers. I don't think I have complteted a model that doesn't have a few stray hairs on it. Life certainly is interesting when you share your home with felines.
I do like that Bradley kit. I have been carrying one around with me since 1985. Basically the same kit. I bought it in the PX at Ft. Jackson in South Carolina. It has literally traveled around the world. I do plan on building it one day...
cuales

Joined: February 21, 2004
KitMaker: 54 posts
Armorama: 45 posts

Posted: Monday, September 03, 2007 - 03:34 PM UTC
Hello everyone!
College and work haven't been good to me lately. This is what I got so far:
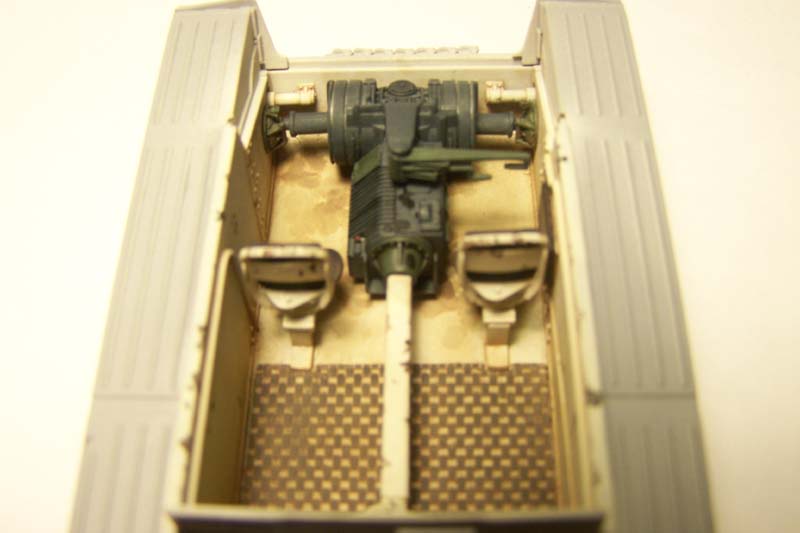
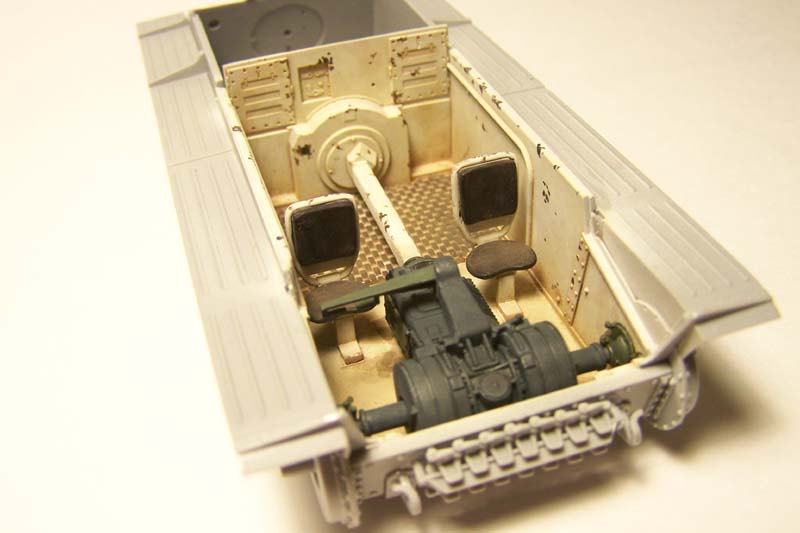
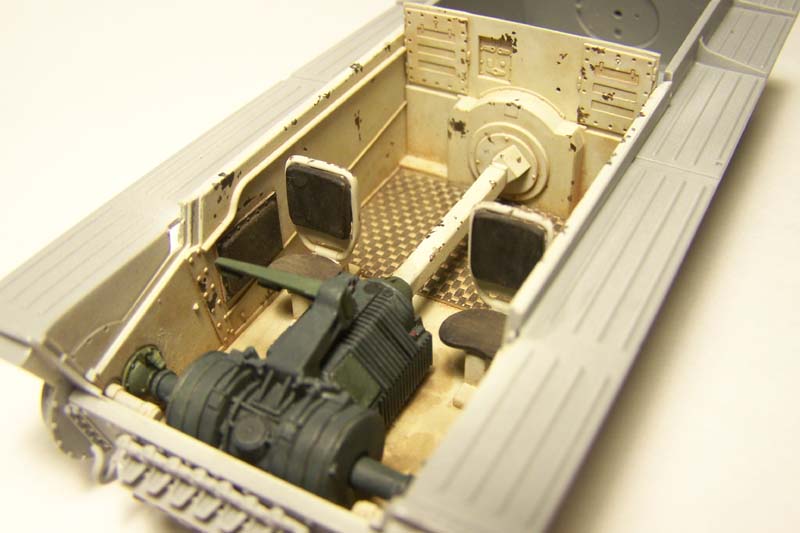
I plan to finish this by the end of this month. However I'm afraid that I won't have time to finish the second project I promised to do, so my apologies if that happens.

College and work haven't been good to me lately. This is what I got so far:


I plan to finish this by the end of this month. However I'm afraid that I won't have time to finish the second project I promised to do, so my apologies if that happens.

CaptainA

Joined: May 14, 2007
KitMaker: 3,117 posts
Armorama: 564 posts

Posted: Tuesday, September 04, 2007 - 01:59 AM UTC
Don't worry about finnishing two. Just have fun getting one done.
Posted: Friday, September 07, 2007 - 11:08 PM UTC
Progress pic of my entry, verlinden 1/15 Tiger 1 with engine compartment.

sroth88

Joined: August 13, 2007
KitMaker: 109 posts
Armorama: 63 posts

Posted: Saturday, September 08, 2007 - 03:19 AM UTC
Just a update thr T34 is moving alone fine, engine and trans are in wheels are on and the tracks go on today, I will post some pics on Sunday.
Sheldon
Sheldon
sroth88

Joined: August 13, 2007
KitMaker: 109 posts
Armorama: 63 posts

Posted: Sunday, September 09, 2007 - 01:55 PM UTC
I am working on doing these pics

CaptainA

Joined: May 14, 2007
KitMaker: 3,117 posts
Armorama: 564 posts

Posted: Monday, September 10, 2007 - 09:19 AM UTC
That Interior looks great.
I am back from a week in Beautiful Sarasota. I will be back to my build desk in the morning, so I hope to have some pics in the next few days.
You are all doing a wonderful job on your builds.
I am back from a week in Beautiful Sarasota. I will be back to my build desk in the morning, so I hope to have some pics in the next few days.
You are all doing a wonderful job on your builds.
CaptainA

Joined: May 14, 2007
KitMaker: 3,117 posts
Armorama: 564 posts

Posted: Tuesday, September 25, 2007 - 11:15 AM UTC
I have been putting a lot of time into this build over the last few weeks. Although the build has seemingly been progressing at a snails pace, I am finally seeing some results.
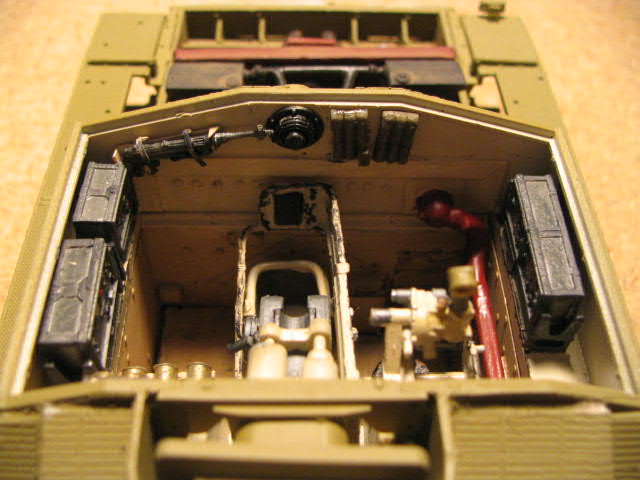
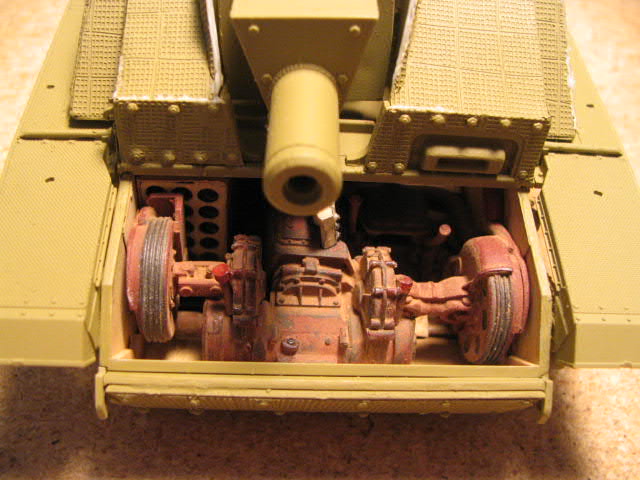
This is a shot from the front end, into the fighting compartment. The Dragon StuG III Smart kit is fantastic. The missing details are compliments of the very nice Verlinden resin Detail kit. I have also been doing a lot of scratch building to finish some of the areas.
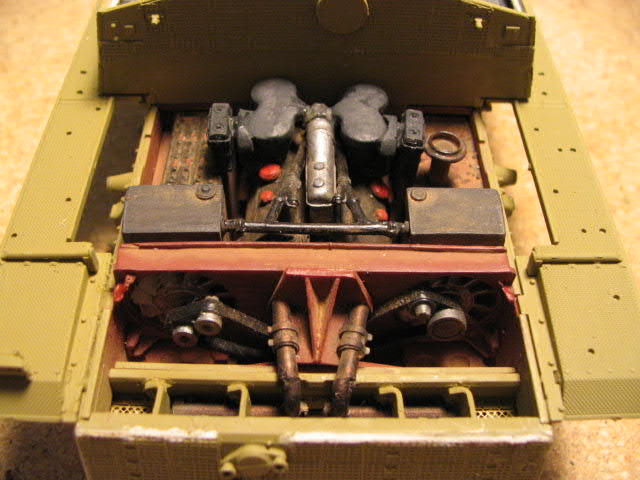
Here is the engine compartment. In this shot you can see I have also added some of Eduards Waffle Pattern Zimmerit. I guess nobody said this was going to be a cheap build.
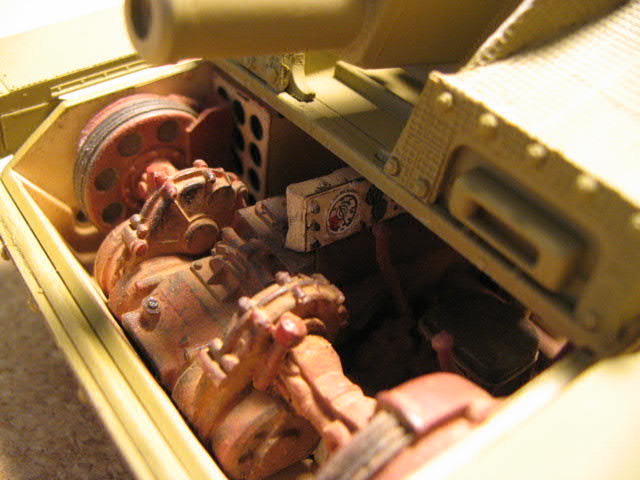
The transmission is from the Verlinden set. I am using mostly kit parts because they are actually more detailed than the resin. But, as good as thekit parts are, there are areas that are not addressed. The decals for the instrument panel are Archer Dry Rubs. They will be visible (barely) when it is all closed up.
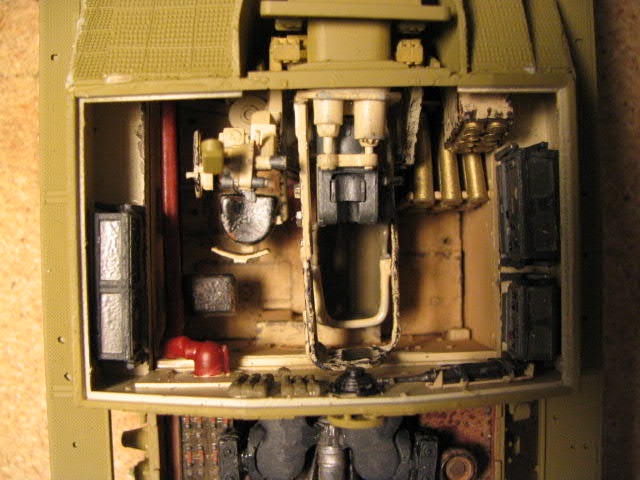
The fighting compartment from straight above. Most of the weathering was done in this shot, but a few areas still needed some dust.
Another view of the transmission.
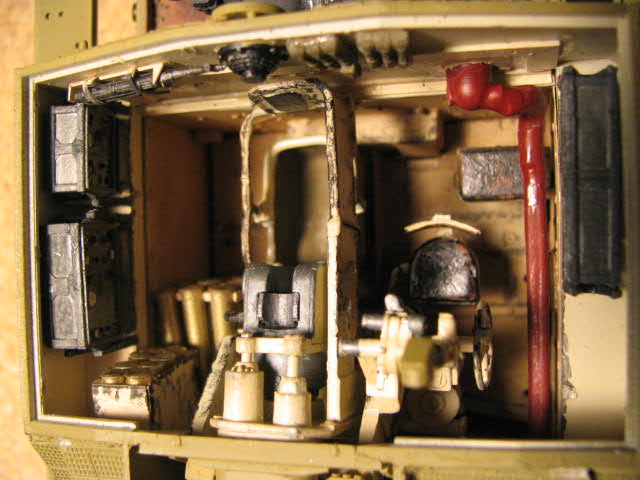
Those are the kit radios. I opted for a full ammo load, compliments of yet another Verlinden resin kit. I would have used brass, but could not find the right type. Painted resin looks OK. But brass looks much better.
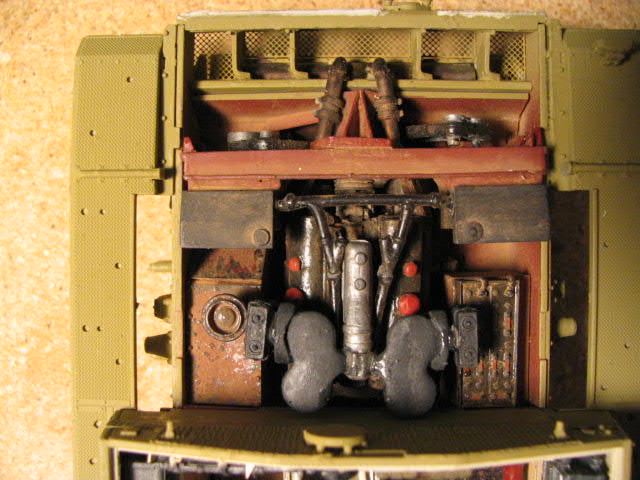
From straight over the engine compartment. I am modeling a StuG that was subject to a lot of dust. I also put some paint and oil spills on and around the fuel tank. The StuG will get some more dust before this battle is over.
The fighting compartment top cover and the engine compartment cover will not be glued down to allow these compartments to be seen. The transmission unfortunately will need to be attached because of the zimmerit. Fruil tracks are sitting on the work desk and will be used. I will also be adding Lion Roar side skirts and brackets. I hope to be done in about a week. Thanks for looking. Coments encouraged and appreciated.

This is a shot from the front end, into the fighting compartment. The Dragon StuG III Smart kit is fantastic. The missing details are compliments of the very nice Verlinden resin Detail kit. I have also been doing a lot of scratch building to finish some of the areas.

Here is the engine compartment. In this shot you can see I have also added some of Eduards Waffle Pattern Zimmerit. I guess nobody said this was going to be a cheap build.

The transmission is from the Verlinden set. I am using mostly kit parts because they are actually more detailed than the resin. But, as good as thekit parts are, there are areas that are not addressed. The decals for the instrument panel are Archer Dry Rubs. They will be visible (barely) when it is all closed up.

The fighting compartment from straight above. Most of the weathering was done in this shot, but a few areas still needed some dust.

Another view of the transmission.

Those are the kit radios. I opted for a full ammo load, compliments of yet another Verlinden resin kit. I would have used brass, but could not find the right type. Painted resin looks OK. But brass looks much better.

From straight over the engine compartment. I am modeling a StuG that was subject to a lot of dust. I also put some paint and oil spills on and around the fuel tank. The StuG will get some more dust before this battle is over.
The fighting compartment top cover and the engine compartment cover will not be glued down to allow these compartments to be seen. The transmission unfortunately will need to be attached because of the zimmerit. Fruil tracks are sitting on the work desk and will be used. I will also be adding Lion Roar side skirts and brackets. I hope to be done in about a week. Thanks for looking. Coments encouraged and appreciated.
cuales

Joined: February 21, 2004
KitMaker: 54 posts
Armorama: 45 posts

Posted: Tuesday, September 25, 2007 - 11:55 AM UTC
it's been a while since I saw some progress in this tread! Nice work Carl. I hope to post some pictures latter today.
CaptainA

Joined: May 14, 2007
KitMaker: 3,117 posts
Armorama: 564 posts

Posted: Wednesday, September 26, 2007 - 06:27 AM UTC
Thanks.
I have been putting a lot of effort into the build. But with all the individual sanding, shaping, and trimming of pieces, it seemed I would never get done. Progress is picking up. I got the painting done before the rainstorms hit tday. There is not enough light to get good pictures though. I will try to get some good shots in the morning. It is almost to the wash & weather stage.
I have been putting a lot of effort into the build. But with all the individual sanding, shaping, and trimming of pieces, it seemed I would never get done. Progress is picking up. I got the painting done before the rainstorms hit tday. There is not enough light to get good pictures though. I will try to get some good shots in the morning. It is almost to the wash & weather stage.
sroth88

Joined: August 13, 2007
KitMaker: 109 posts
Armorama: 63 posts

Posted: Wednesday, September 26, 2007 - 03:23 PM UTC
Very nice build my progess is also slow too many projects at once.
Sheldon
Sheldon
Posted: Wednesday, September 26, 2007 - 06:32 PM UTC
Good progress on the StuG, Carl. That truly is a heart of Gold.
Looking forward to see more.
Looking forward to see more.

CaptainA

Joined: May 14, 2007
KitMaker: 3,117 posts
Armorama: 564 posts

Posted: Thursday, September 27, 2007 - 09:30 AM UTC
Thanks guys.
I am done with most of the painting. Still cant take good pictures becase of the rain. I also got some of the weathering started. I will probably will be working on the tracks tonight with football on in the background.
This is really a great kit for those of you interested in building it. I didn't see much about it on line when it came out. I really look forward to seeing more of these smart kits in the future.
cuales

Joined: February 21, 2004
KitMaker: 54 posts
Armorama: 45 posts

Posted: Thursday, September 27, 2007 - 06:26 PM UTC
Here is what I got so far!!!
The hull completed: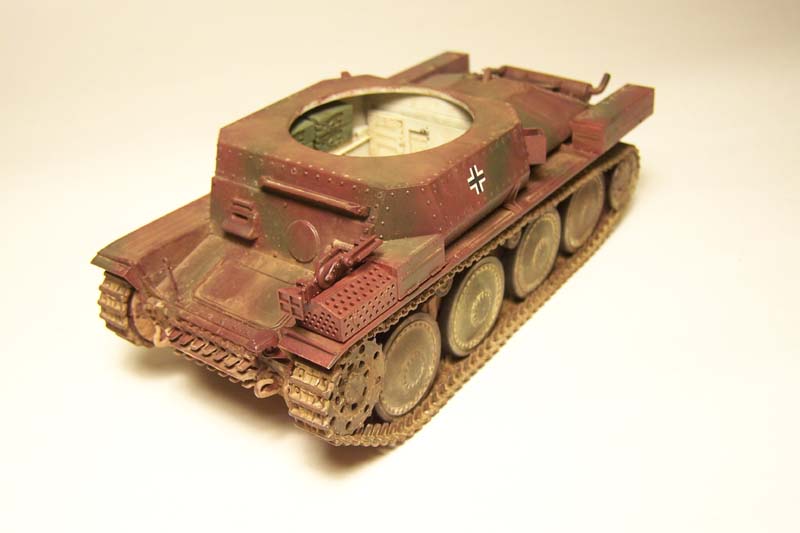
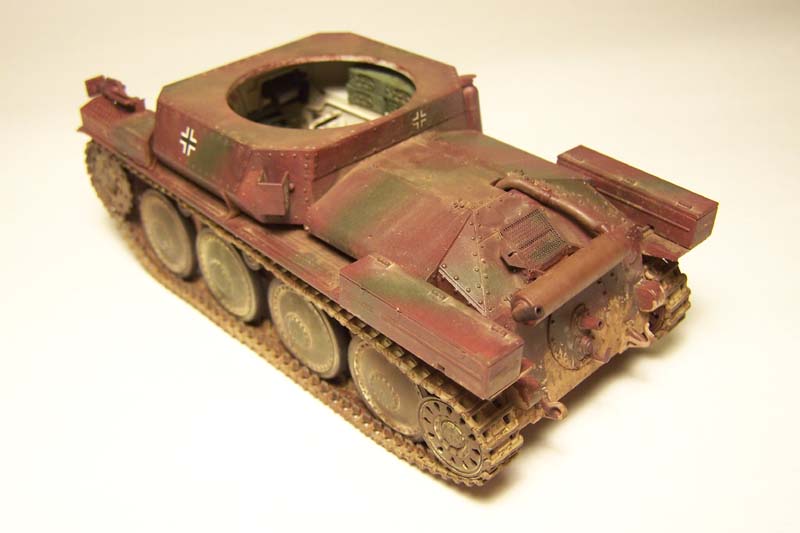
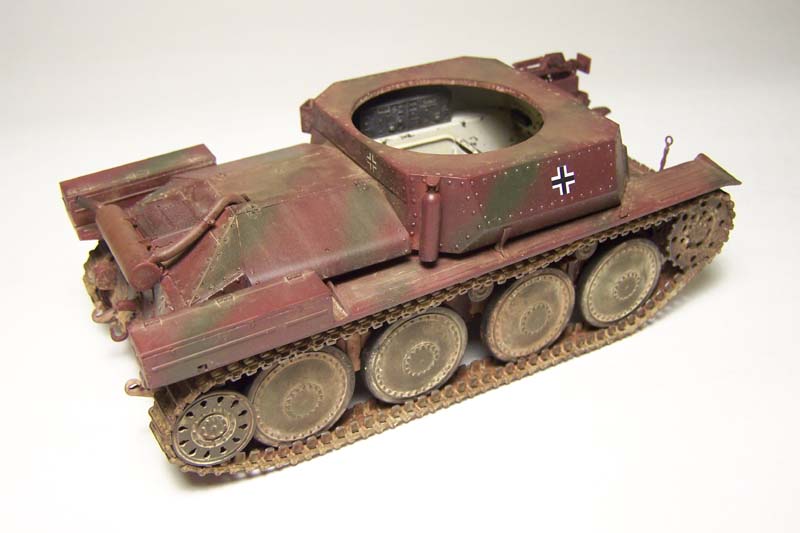
The turret completed:
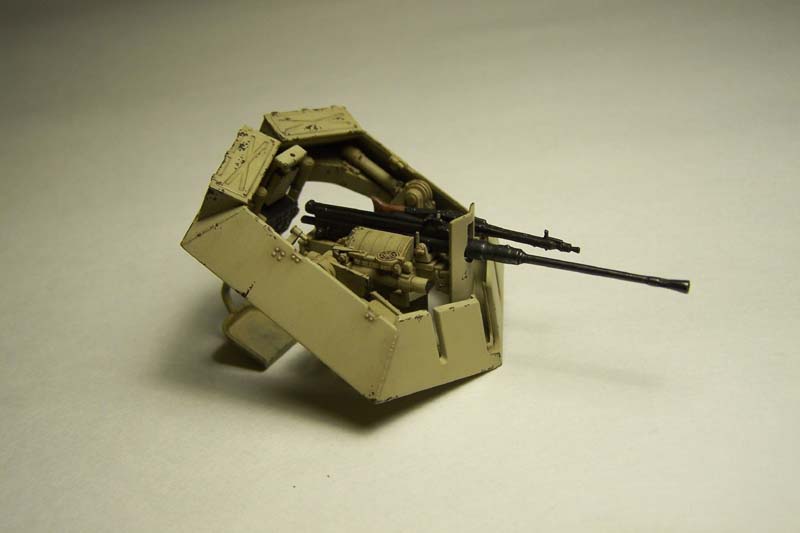
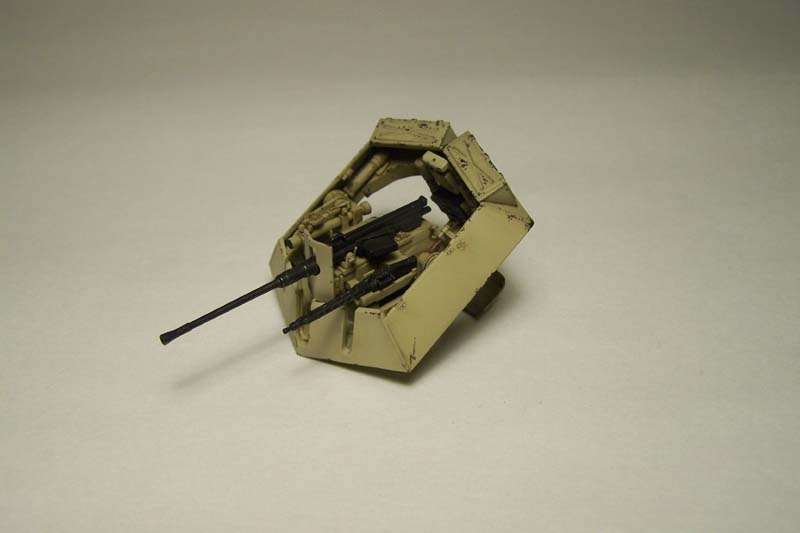
Now they meet for the first time!
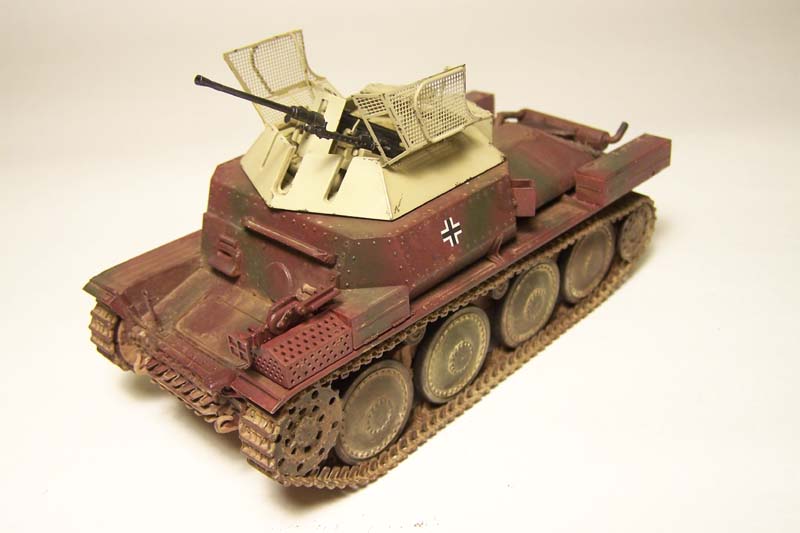
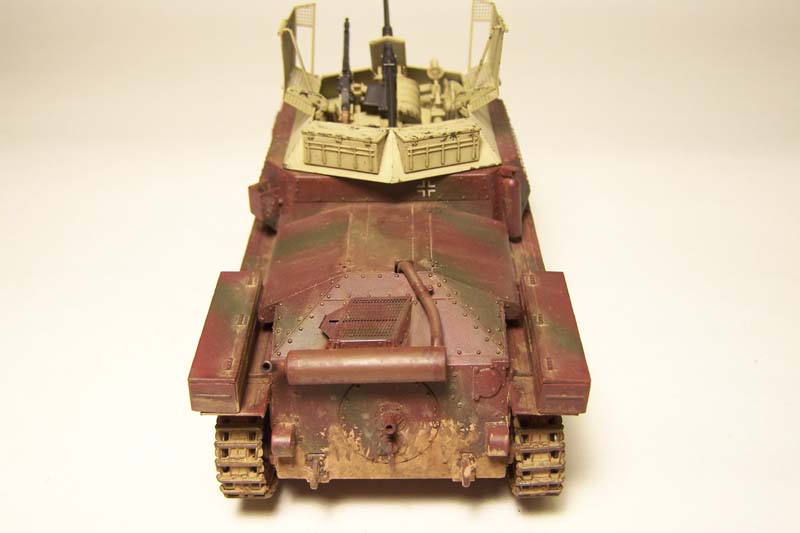
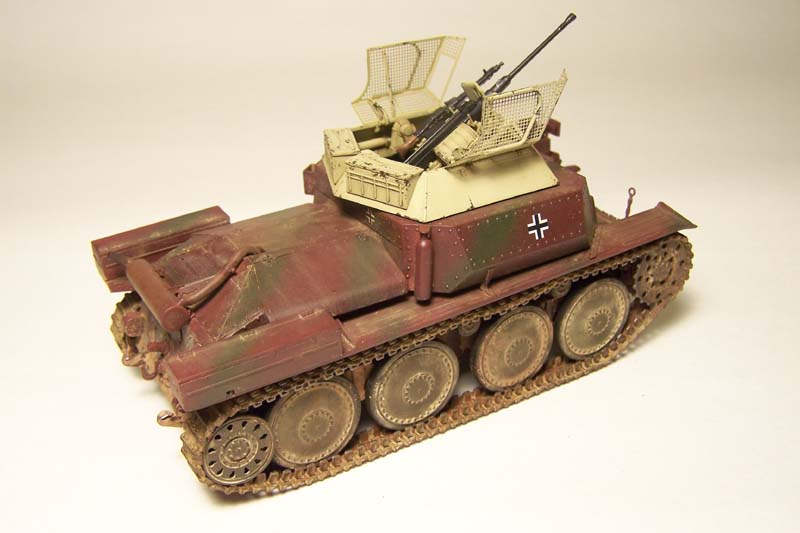
The hull completed:


The turret completed:


Now they meet for the first time!


Posted: Thursday, September 27, 2007 - 11:18 PM UTC
Looks cool, Gaston!
Very parculiar camouflage scheme. Are you basing the vehicle on any particular reference?
Thanks for sharing
Very parculiar camouflage scheme. Are you basing the vehicle on any particular reference?
Thanks for sharing

CaptainA

Joined: May 14, 2007
KitMaker: 3,117 posts
Armorama: 564 posts

Posted: Friday, September 28, 2007 - 07:43 AM UTC
I agree. It really looks cool.
I like the dust and dried mud look you got on it.
I like the dust and dried mud look you got on it.
CaptainA

Joined: May 14, 2007
KitMaker: 3,117 posts
Armorama: 564 posts

Posted: Friday, September 28, 2007 - 07:49 AM UTC
Finally, some proof of the slow progress.
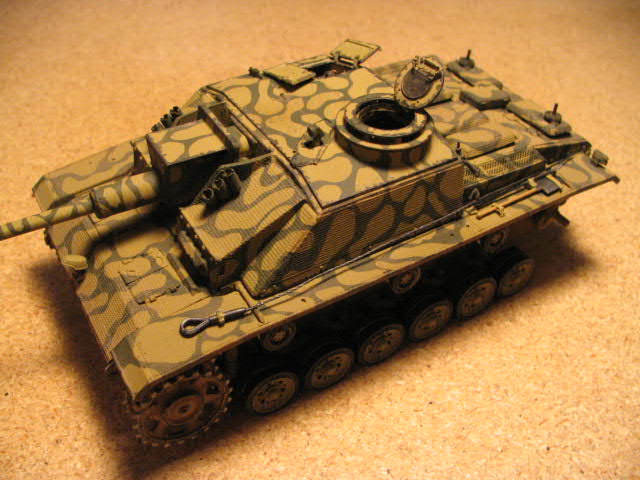
It is painted and I have given it a dusting to tone down the colors. I hav just starte to attach tools to the left side. The waffel Zimmerit really looks good

It is painted and I have given it a dusting to tone down the colors. I hav just starte to attach tools to the left side. The waffel Zimmerit really looks good
 |


