

1⁄35Panther Ausf.G
9
Comments
Painting
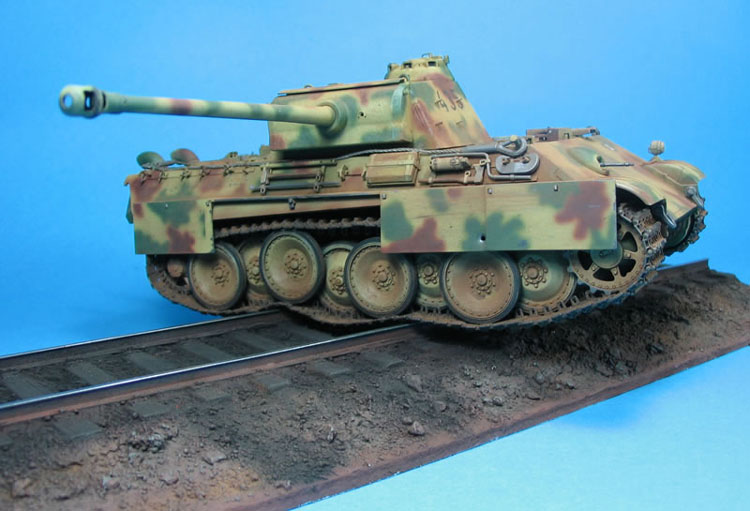
I have often seen experienced tankers say that 10 minutes in a dusty field will pretty much hide any camouflage pattern on a tank. I thought it would be fun to try and get this look, without any mud and little or no chipping. I usually paint the wheels and tracks separately from the hull, and then add them during final construction. On Vinnies prompting I assembled the entire model and then sprayed it Nato Black. I then masked off the tracks and sprayed a base coat of Dunkelgelb. The result is very good, the initial black coat adds shadows and depth to the base colour that I would not have otherwise achieved. I will certainly be using this method from now on. Brown and green were then added in an oak-leaf type pattern. A coat of Future sealed the tank which was then washed with burnt umber and Mig pigments added for effect. I also tried a new approach to painting tools I left them on the sprue and cut all injection points except one, then painted and weathered them in situ. This made them much easier to handle and paint, and once the last cut was made, touch up was easy.the Base
This is a stunning item in plaster and styrene from Great North Roads for £10. I wanted this base to represent a heavily used area in a shunting yard, possibly where iron ore is loaded. I masked off the rails and base coated it with a dark brown. The base was then masked and the rails sprayed with MRMetal Color Iron, and the top of the rail was polished. Rail ties were painted with a black-brown and then the whole base give a seal of Future. Everything was then washed with Burnt-Umber and left to dry. Various Mig pigments were used on the ground and rust added to the rail sides. Finally the rail bed and edges were given a dusting of Mig pure black to represent coal dust.Things I have learned from this build
Magic Tracks can be fully assembled on the model prior to painting. A base coat of Nato Black is also great as a colour for track links and rubber wheels. Tamiya thinner works far better on Tamiya paints than an IPA mix. Tools can be painted and weathered on a sprue, and attached last.Conclusion
A fantastic kit to build OOB, whether you want the extra in the update kit is a personal choice. It may be that the problems I encountered on the two items above were of my own making, but I doubt it. I did spend a lot of time trying different ways to correct both of them and always ended up with the same result. Although this update is excellent in many respects, I think Cyberhobby need to look at the two items mentioned with a view to correcting the design. My thanks to Vinnie for help on the project and to Cyberhobby for the update kit.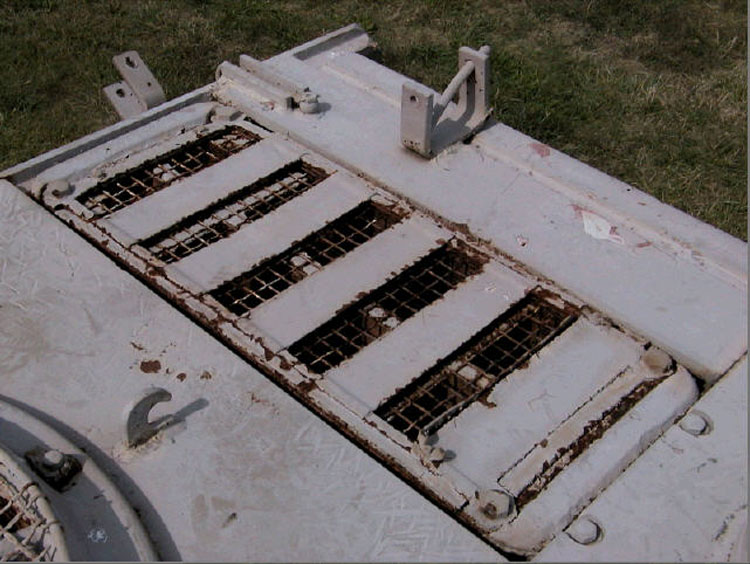


About the Author


FROM: ENGLAND - EAST MIDLANDS, UNITED KINGDOM
Spent time in specialised sales to militay, non-destructive testing, risk engineering, engineering underwriting surveys on mines and mineral processing plants. Modelling from Airfix days, I took a 25yr break and came back to the hobby 18month ago. Currently working on a Sturmtiger with fully detaile...
Comments

A very nice informative article Brian.
Nice job on the model also.
AUG 30, 2006 - 11:20 PM

Well done, but I have a question about the painting method. Since you put it all together first and mask off the tracks, am I correct in assuming that the area behind the wheels and under the fenders is left primarily black?
AUG 31, 2006 - 03:25 AM

Thanks Michael
No I was able to reach most of this area with the yellow. I was also dubious about the method but as Vinnie explained "if you can see it you can spray it - if you can't see it, it doesn't matter if you spray it because no one else will see it either". Once everything was sprayed with Nato Black I masked?wrapped off the tracks with a single length of masking tape (effectively all the way round) and sprayed above them to get paint under the sponson. The black base really gets an effective shadow under there. The tape also covers the horns and top/bottom of the rubber rims where they contact the track. I then sprayed the wheels (very low pressure here) with little or no overspray onto the rims. Any minor overspray was touched up with the appropriate colour.
I will definitely use this method in future (unless magic tracks ever become workable), as its much simpler, quicker, and you do not have to do any post shading. On my next build I will take pictures all the way through and detail each step. I did not do it this time round because I was only half convinced about the method and thought I would screw it up! (Sorry Vinnie - you were right)
Brian
AUG 31, 2006 - 02:35 PM

Congrats Brian for a really good job on the build and the review, hopefull a helpful suggestion not not to criticise the excellent effect but Tamiya Buff or Deck tan, really thinned makes a great dust effect, working carefully as a little goes a long way would add to the contrast. My thoughts only of course.
John
AUG 31, 2006 - 03:22 PM
Thanks a lot for the response Brian. I've been terribly impressed with Vinnie's technique but have had my doubts that a mere mortal such as I could pull it off. I've read everything I could find on preshading over the past couple of days getting ready to start spraying a 251/7 that I just finished. I have to say that I still wasn't quite convinced that I should put the wheels and tracks on first, but after reading your helpful explanation I'm going to go for it. Thanks again.
Michael
AUG 31, 2006 - 06:30 PM

Thanks! great article and a great looking model, as a newbie to this hobby I have learned alot so thanks again.
One question if I may, what did you use to get the dusty look on the deck and over the decal it looks very realistic.
AUG 31, 2006 - 10:52 PM
Thanks Tim
The turret markings are sprayed onto the camo via an Eduard vinyl soft stencil - I use this method 'cos I'm crap at decals. The model was then sealed with Future. Then I washed the entire surface with a thin Burnt Umber/Turpenoid wash - I find this gives the sort of sheen often seen on armour. Then I took Mig Dark Mud pigment and used a blush brush (large soft makeup type) to gently apply it all over the model.
Johns earlier tip of using Tamiya Buff gently misted over the model is also a good way to do this. Instead of Mig pigments you can also use MMP powders which I find are more forgiving (Mig pigments tend to smear if not applied very carefully)
Hope this helps
Brian
SEP 01, 2006 - 01:05 AM

Brian.
Thanks for the great review. I really like the idea of building the wheels and tracks first and spraying black undercoat. Sounds much easier. I shall give this a go on my next model.
Cheers
Tony
SEP 05, 2006 - 06:42 AM
Copyright ©2021 by Brian Balkwill. Images and/or videos also by copyright holder unless otherwise noted. The views and opinions expressed herein are solely the views and opinions of the authors and/or contributors to this Web site and do not necessarily represent the views and/or opinions of Armorama, KitMaker Network, or Silver Star Enterrpises. All rights reserved. Originally published on: 2006-08-31 00:00:00. Unique Reads: 19934

WEB HOSTING BY


Copyright ©2021 Armorama and Kitmaker Network, a subsidiary of Silver Star Enterprises
All Rights Reserved. Please read our Conditions of Use and Privacy Policy.
All Rights Reserved. Please read our Conditions of Use and Privacy Policy.