1⁄35Elefant Keeping
9
Comments
Upper Hull and Gun Mount
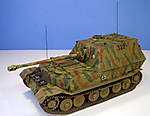
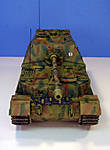
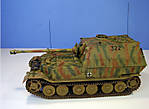
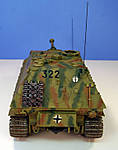
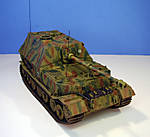
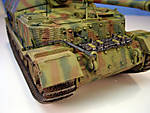
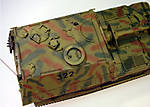
Due to the sparse interior provided by DML, I decided early on that I would not open up any of the hatches but would drill out one of the armor plugs in order to make use of the Voyager set. The armor plug on the left side was chosen as the victim and drilled out with a pin vise and carefully enlarged just slightly with a sharp #11 blade until the brass plug fit snugly in place. Due to the retaining ring arrangement, this was installed along with the other interior parts before the gun box was fitted. I installed all the breech and gun mount parts in order to provide a counterweight to the aluminum barrel more than anything else and also drilled out the gunner’s sighting periscope before installation. The Jordi Rubio barrel is a two-piece affair consisting of a turned barrel and separate white metal muzzle brake. The brake required a good bit of cleanup both inside and out but some careful work with a 600 grit sanding stick soon had it in good shape and some care had to be taken as the fit to the barrel was a little on the loose side, but easily addressed with gap-filling CA gel. The installation into the mount provided a challenge as the DML kit parts have a grooved slot that they slide into to mate up with the gun mount and this had to be removed in order to accept the JR barrel. This in turn made it possible for the JR barrel to slide too far into the gun-box, easily fixed with some Apoxie Sculpt stuffed in the mount and the barrel adjusted to the proper length. Allowed to set up overnight, it was rock solid, literally, and extremely secure. The Zimmerit panels and rear hull hatch were also installed with the same methods as the lower hull without incident, again with great initial fit and very little trimming or putty required. Some final small details were added in the form of a scratch-built grab handle from brass rod for the gunner’s hatch and some PE details from the Voyager set for the commander’s cupola. Installation of the gun box and alignment with the hull required some care as the added slight thickness of the lower hull zim panels was just enough to throw off the kit designed friction fit between the upper and lower hull. Final touch based on same reference photos for the toolbox came in the addition of an antenna base from the spares bin to the rear hull mount so this would be a “command” Elefant and it was ready for painting.Painting
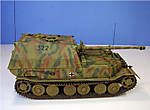
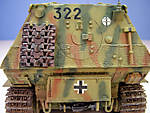
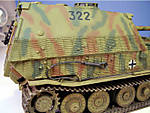
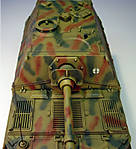
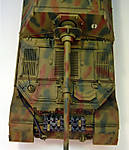
I prefer Testor’s Model Master enamel line mostly for familiarity and ease of access through my local hobby shop and all paints used are from that line. I laid down an AB overall coat of Flat Black both to serve as a primer and a pre-shading coat and followed that up with a basecoat of Dunkelgelb in varying layers/passes to serve as the foundation and then allowed that to cure up several days. Once it was fully cured, I sketched out a camouflage pattern using Prisma Color pencils to serve as a template for application of the 3-tone scheme using Russian Armor Green mixed with Panzer Schwarzgrau for the green patterns and Military Brown for the brown patterns. This also was allowed to cure up after some minor touchups and then Dunkelgelb was dry-brushed to blend in the overall patterns.Track Installation, Decals, and Weathering
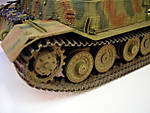
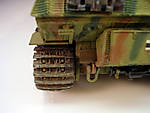
The moment of truth had arrived but before installation, the tracks needed to be painted. These were sprayed with a basecoat of Flat Black by airbrush then brush painted Non-buffing Metalizer Gunmetal as a general coat. This was followed with a dry-brushing of Steel and a 90/10 (thinner/paint) wash of Rust. Some weathering was also applied to the lower hull to simulate normal wear and tear and then the track installation began. The left-side track installed after a little working through without issues but the right side quickly revealed that the idler wheel wouldn’t rotate due to interference from the mud scraper. This was quickly resolved by cutting away the scraper arm with sprue cutters, installing the track, then re-gluing the offending piece back in place. Why this was a problem on only the one side remains one of the great unanswerable mysteries. Next steps involved a coat of Future and the decals. The kit-supplied markings are not 100% accurate but I decided to go ahead with them anyhow for a command vehicle in Poland 1944. The decals are the older variety and were fragile due to their age and careful handling was in order. Some Decal Sol and careful application of decanted Glosscoat by brush and they snuggled down nice and tight against the Future. Weathering took the form of an initial pin wash of Burnt Umber and some more dry-brushing of Dunkelgelb in various areas. Another Future coat was applied followed by filter washes first of Burnt Umber and then Dunkelgelb mixed with Field Drab and then overall sealed with a coat of Dullcoat to seal it all up. The tracks were revisited with some Steel dry-brushed on the high points and contact areas. Final weathering for the tracks and running gear was applied using Mig European Dust mixed in regular water and applied by brush and allowed to dry. Excess was removed using a stiff bristled brush and a moistened Q-tip to expose the desired areas and allow the base colors to show through. Voyager included in their PE set a length of copper wire and resin tow cable heads and these were put to good use for the left side hull mounting by carefully threading the cable through the brackets and then attaching the head ends and securing in place. Last but not least, I drilled out the antennae bases on both the front and rear hulls and installed some brass rod painted with Non-buffing Metalizer Gunmetal and the Elefant was ready for the shelf. So, how do you eat an Elefant? Why one bite at a time of course!Comments
hi Vinny, Bill, i followed this when you built it bill it was cool to watch it come together and it turned out great, makes a very nice article too i'll probably be useing it when i build mine, well done and thanks for sharing.
OCT 25, 2006 - 09:47 PM
Hey Bill:
Great build story. I got this beast in my stash with some Fruil tracks. Cant wait to build her now.
Thanks for sharing
OCT 26, 2006 - 12:49 AM
Ron,
It most definitely qualifies as the project that sat the longest before I decided to finally tackle it and once I did, I had a blast with it but I am glad that I waited to be "in the mood" for it. I think this was kit # 2 or # 3 in terms of stash additions....you know, those days when you'd say "i've only got 3-4 waiting" in the stash type of thing. :-)
Brian,
Thanks for the comments! Elefants are herd animals, can't have too many of 'em running around!
OCT 26, 2006 - 05:57 AM
Very nice Bill.
Good job on those decals, I have tried to apply decals over zimmerit in the past, but always ended up painting them. Nice Camo scheme as well.
Cheers
Henk
OCT 27, 2006 - 10:22 PM
Great build up Bill. I started building mine almost 7 months ago, with all of the same parts that you used, except for the brass MG and am using an Aber barrel. I have the Voyager PE fenders, which shoud be real fun to do with no hold and fold tool. I purchased the Premium edition and also the Verlinden interior, which I would highly recommend to anyone wanting one. I have both of the kits sitting on my bench right now screaming at me to finish them. Gotta love 60 to 70 hr work weeks.
OCT 27, 2006 - 11:21 PM
Thanks Henk!
The kit decals, since this was an older kit from DML, were thicker than the ones usually supplied these days. To get them to lay down I used the Testor's DecalSol solution and a soft brush to gently push it into the folds. Took several careful passes to accomplish. I've heard of others using Archer transfers or stencils to overcome the zimmerit vs. decals problem but haven't ever done it myself.
OCT 28, 2006 - 12:32 AM
Another excellent build writeup Bill,you have been quite prolific recently and with many good tips as well. Thanks for taking the time, which is extensive to write and illustrate these articles.
Just about convinced me to break my rule and buy a Dragon Elephant ( but I will have to get the upcoming Dicker Max anyway )
OCT 29, 2006 - 12:08 PM
Thanks Dave, appreciate the comments.
Adolph,
Take the excuse of Christmas and get both! :-) The DM is something I know I'll be drooling over in anticipation until the release date comes.
As far as being prolific goes, I usually work on only one build/project at a time and carry it through to the end, only occasionally starting a 2nd one and extremely rarely getting 3 running at the same time. Vast majority of my build time is on the weekends where I have nice big chunks of time (no kids) to really focus in on if I wish to and that helps as well. This usually means I finish 1 build/project about every 4-5 weeks or so depending. The Elefant was an anomaly (for me at least), it actually took 2 months to complete from start to finish.
OCT 29, 2006 - 07:47 PM
Copyright ©2021 by Bill Plunk. Images and/or videos also by copyright holder unless otherwise noted. The views and opinions expressed herein are solely the views and opinions of the authors and/or contributors to this Web site and do not necessarily represent the views and/or opinions of Armorama, KitMaker Network, or Silver Star Enterrpises. All rights reserved. Originally published on: 2016-02-11 19:05:01. Unique Reads: 27456


