

1⁄35Elefant Keeping
9
Comments

Introduction
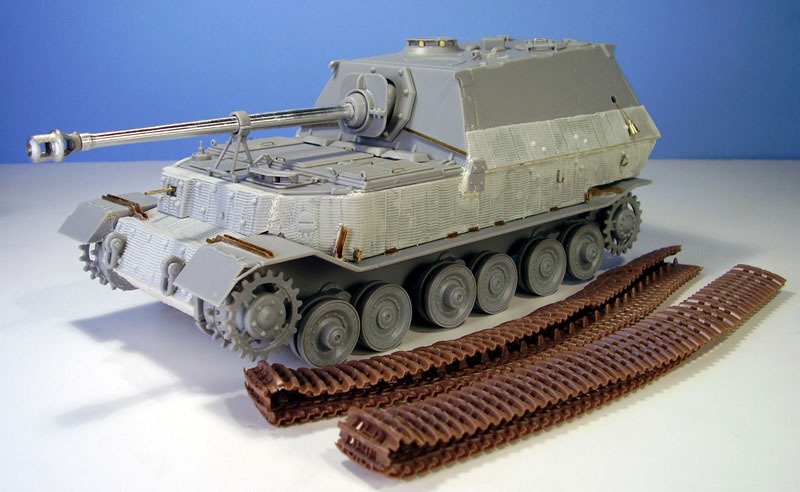
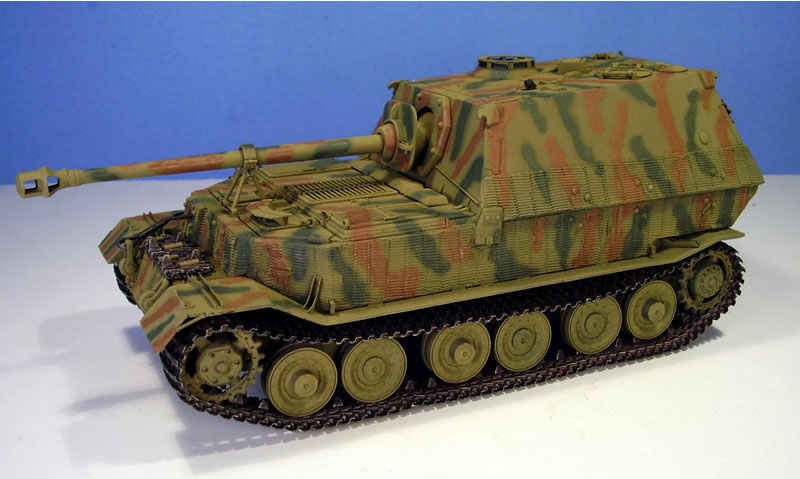
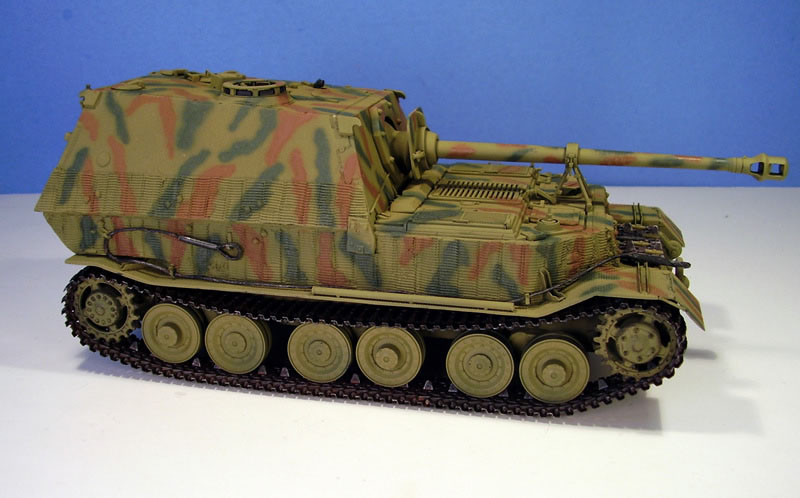
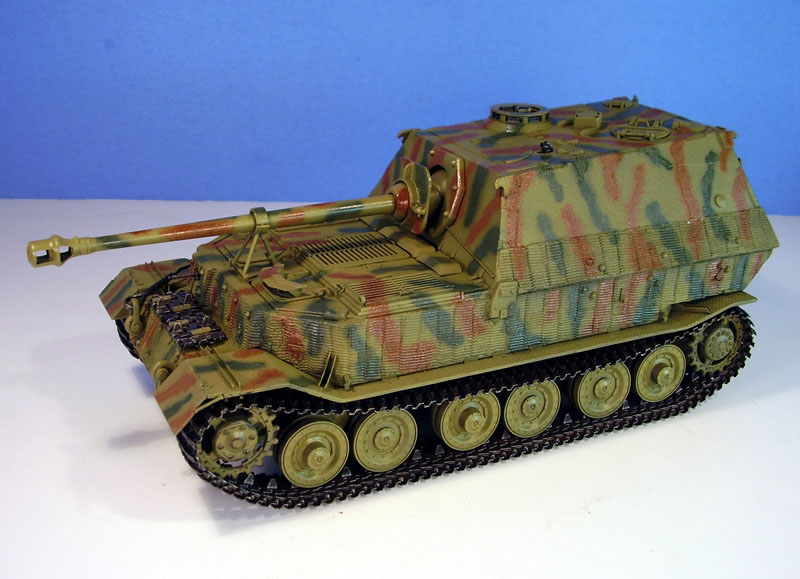
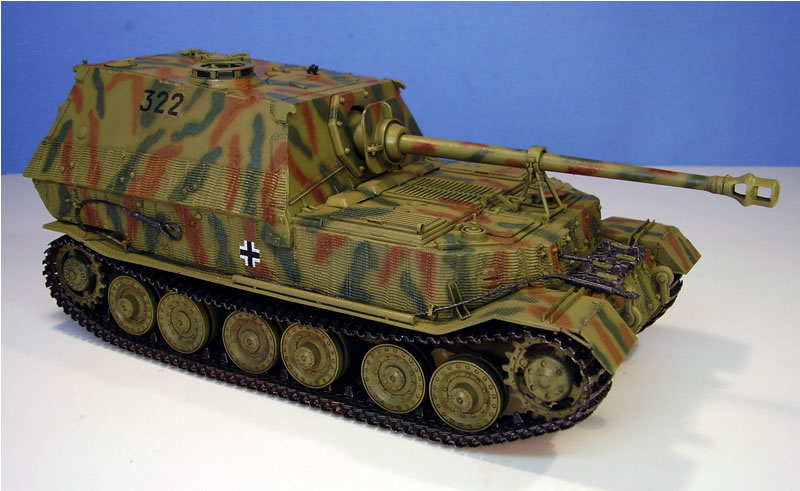
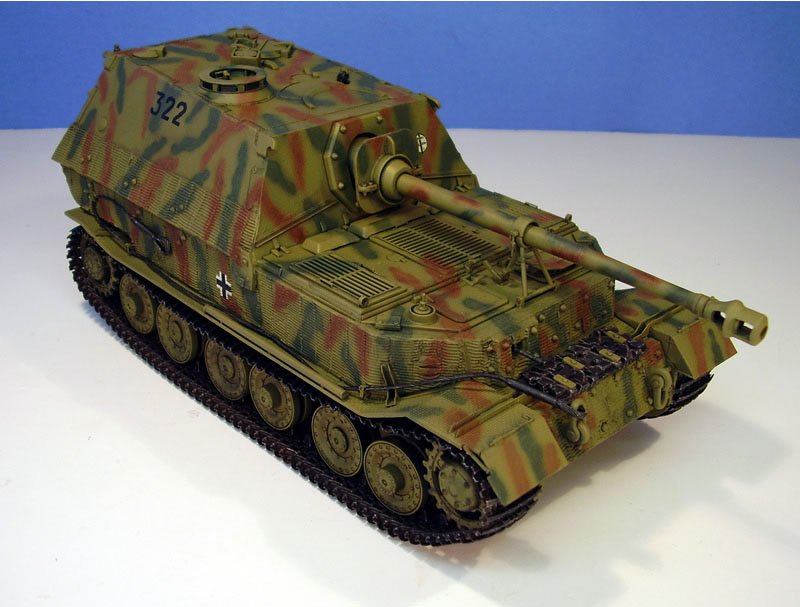
Ive always been drawn to the more oddball type of subjects and the Sd.kfz.84 Elefant first caught my eye on a vendors table at an IPMS contest back in October of 2004. I knew that the kit had some flaws after reading several of the online reviews and doing some research and so I began quietly accumulating various items in a slow build-up to finally tackling the project beginning in August, 2006. The project involved a horde of items from many manufacturers. The base kit is Dragons non-Premium kit, number 6126 and this was supplemented with Cavaliers resin Zimmerit set, a Jordi Rubio turned aluminum barrel with white metal muzzle brake, Model Kasten workable tracks to replace the incorrect kit supplied tracks, Voyager detail PE set and armor plug set, and a replacement turned brass hull MG from ModelPoint to top off the list.Lower Hull
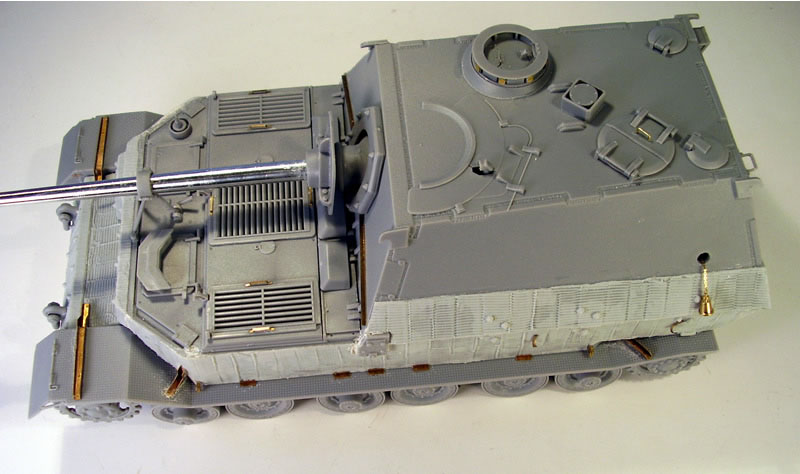
I started out with the usual order of things from the kit instructions perspective and immediately noticed that they call, oddly for the road wheels to have a rubber rim, which I ignored. The Model Kasten track set also includes several small spacer disks for installation with the wheels to give them the correct gap to take the guide horns on the MK links, without which the wheels will be too narrow to take the correct sized links. These were a nice addition but required a little more care on the alignment of the wheel halves to insure they were uniform as the DML fit is somewhat shallow to begin with and the spacers make that even shallower. Installation of the suspension gear and a quick test fit of the wheels revealed that the mount arms and the wheel holes were wobbly on several, some worse than others, and some poster bluetac was required to hold them in place as a working solution for the duration through painting, after which they were carefully fixed in place with regular glue so theyd sit level. Step 5 calls for the drive sprockets to be installed along with their mounts (parts B15/16) but the MK track set includes an additional part to allow these to be tensionable, with the additional part including a disk being secured on the inner hull surface and allowing the sprocket to rotate to a limited degree up or down as desired when the tracks are installed. This comes in extremely handy later on as the clearance for the tracks is very tight and only the rear idler sprocket can rotate fully to allow for the tracks to be fed through. I also installed the scrapers (part E24) at this time not realizing they would cause a problem with the right hand side sprocket to feed properly, more on that later. I also took advantage of time in front of the TV to gradually work on the MK track set, a couple of hours a night for about a week, and had a beautiful set of working tracks as a reward for the tedium, along with a substantial sprue debris pile! Model Kasten made sure to make the tracks handed with the retaining pins being different and provided just enough extras to allow for me to hang a set of 6 links off the rear hull hangers and get a natural drape over the hull as a result. It did mean though that I would have to use kit supplied links for the front hull spares but that didnt pose any real problem as the kit part inaccuracies are mostly on the face down portions. I also modified, using reference photos as a guide, the kit supplied tool box by removing the raised ribs on the lid as the vehicle/unit I had chosen clearly had a smooth-topped toolbox, a sharp blade and a little sanding provided the easy solution in no time.Zimmerit
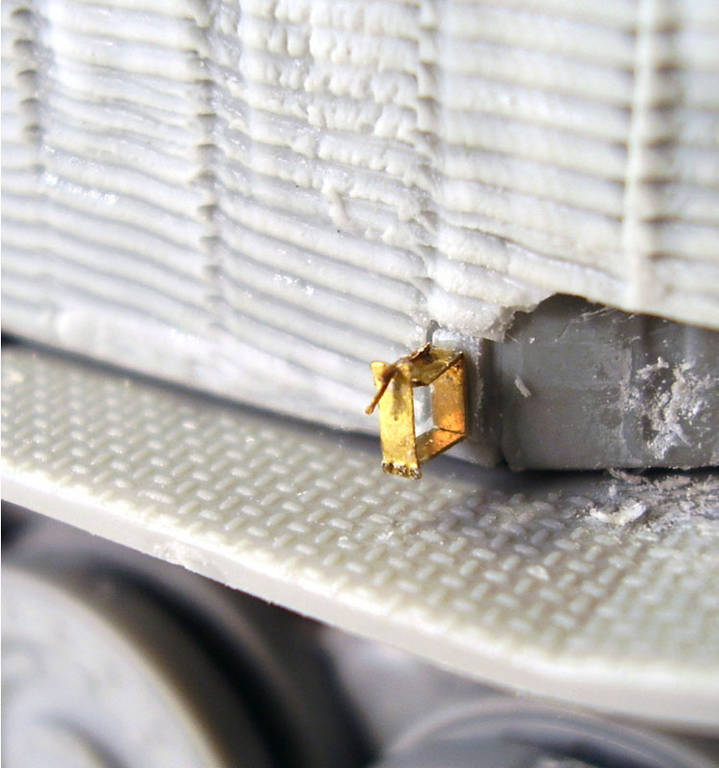
The Cavalier set included several very well done resin pieces in addition to the panels themselves and dry-fit very well both to each other and the kit parts. Some surgery was required to remove molded on raised detail but this was no great loss and easily accomplished. In addition to the regular parts, Cavalier thoughtfully provided a mini Zimtool to allow for extending patterns over the fill lines and for the areas such as the lower hull exhaust sides where panels were not provided but still required the Zimmerit application. I used Squadron white putty and the tool for these areas but had to work fast due to the short work time on the Squadron putty. Very little trimming or filling was needed, either with the joins to the resin pieces or with the panels themselves. I used Testors Window Maker glue to fix the panels, gently pressing outward to the edges to remove any excess and wipe it away with a Q-tip. Once that had set up, a little CA gel was used along the edges to insure they dont peel away and provide a sanding friendly surface for final cleanup.PE Details
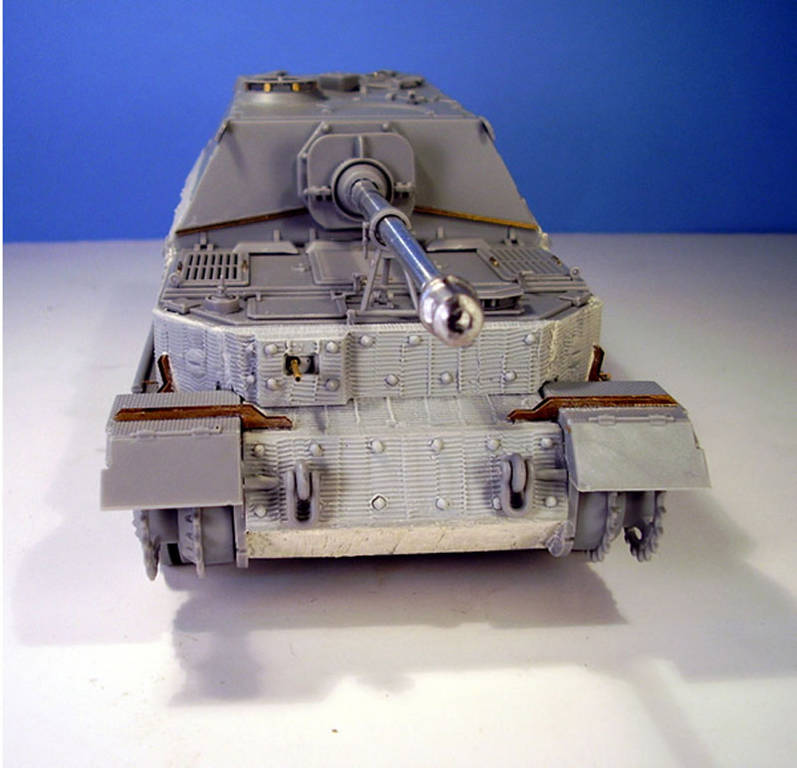
Upon opening up the Voyager set and examining it more closely, I discovered that it had replacement tread pattern and replacement mud flaps, but not the full fenders themselves as Id originally thought. Rather than perform complicated surgery to remove the molded in tread plate in favor of the PE pattern, I went with the kit fenders and instead gave some attention to the mud flaps at the front by first sanding down the flaps to a more scale thickness and second by scribing in the missing demarcation lines. The rest of the detail PE set was dutifully applied in the form of the fender support brackets, annealed heat shields and convoy light for the rear, and tow cable brackets/hooks on the hull sides. I also installed the beautifully rendered Model Point hull MG into the resin gun mount and was ready to tackle the upper hull and gun box.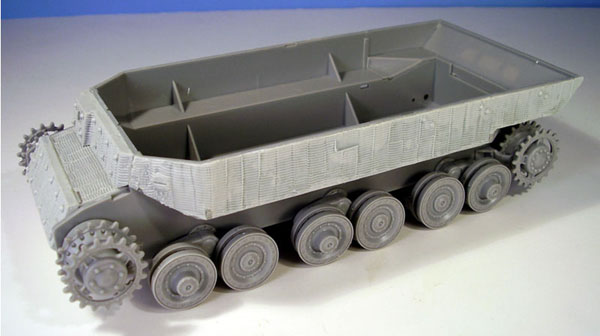


About the Author


FROM: TEXAS, UNITED STATES
Like many, I started out in the hobby as a kid building airplanes to hang from my bedroom cieling. I took a long break from the hobby, returning in 2001 with an interest in armor inspired mostly by online gaming. WW2 armor, 1/35 scale, is my preferred genre with a special taste for the stranger vehi...
Comments

hi Vinny, Bill, i followed this when you built it bill it was cool to watch it come together and it turned out great, makes a very nice article too i'll probably be useing it when i build mine, well done and thanks for sharing.
OCT 25, 2006 - 09:47 PM

Hey Bill:
Great build story. I got this beast in my stash with some Fruil tracks. Cant wait to build her now.
Thanks for sharing
OCT 26, 2006 - 12:49 AM

Ron,
It most definitely qualifies as the project that sat the longest before I decided to finally tackle it and once I did, I had a blast with it but I am glad that I waited to be "in the mood" for it. I think this was kit # 2 or # 3 in terms of stash additions....you know, those days when you'd say "i've only got 3-4 waiting" in the stash type of thing. :-)
Brian,
Thanks for the comments! Elefants are herd animals, can't have too many of 'em running around!
OCT 26, 2006 - 05:57 AM

Very nice Bill.
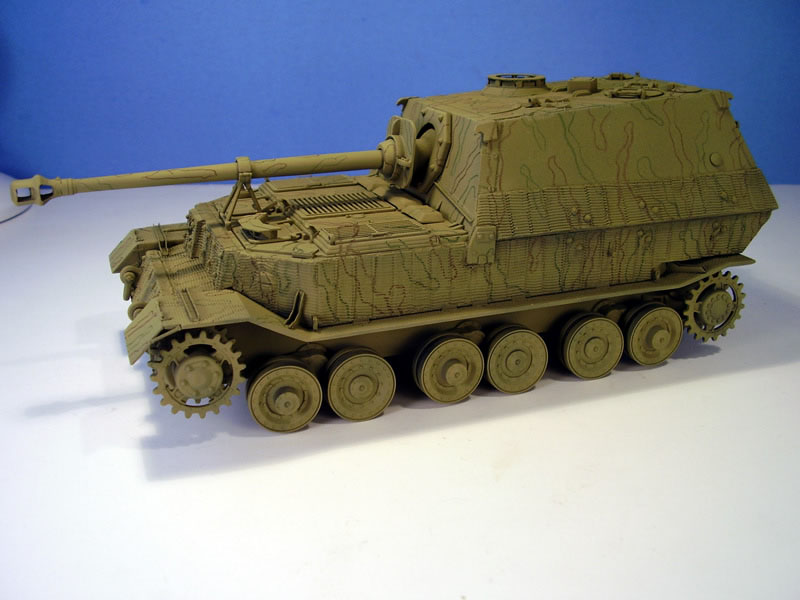
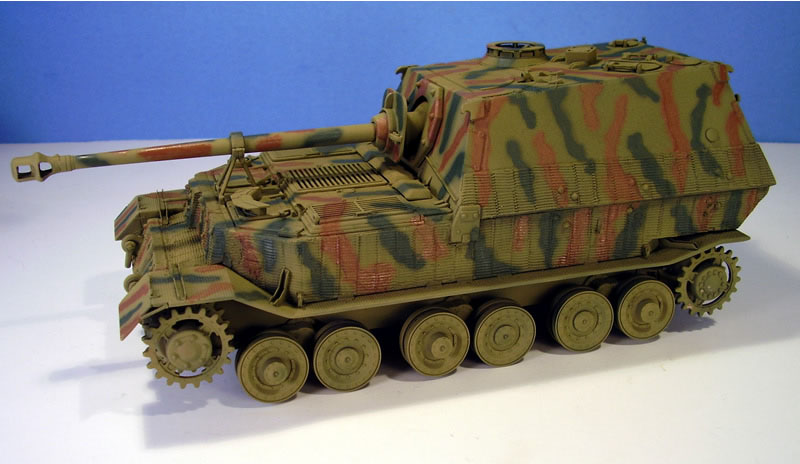
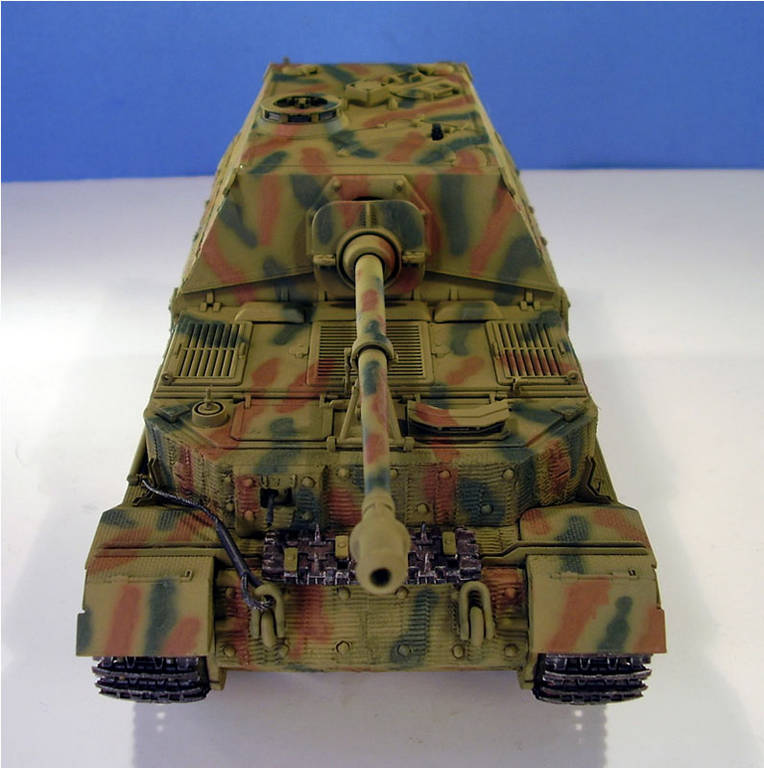
Good job on those decals, I have tried to apply decals over zimmerit in the past, but always ended up painting them. Nice Camo scheme as well.
Cheers
Henk
OCT 27, 2006 - 10:22 PM

Great build up Bill. I started building mine almost 7 months ago, with all of the same parts that you used, except for the brass MG and am using an Aber barrel. I have the Voyager PE fenders, which shoud be real fun to do with no hold and fold tool. I purchased the Premium edition and also the Verlinden interior, which I would highly recommend to anyone wanting one. I have both of the kits sitting on my bench right now screaming at me to finish them. Gotta love 60 to 70 hr work weeks.
OCT 27, 2006 - 11:21 PM
Thanks Henk!
The kit decals, since this was an older kit from DML, were thicker than the ones usually supplied these days. To get them to lay down I used the Testor's DecalSol solution and a soft brush to gently push it into the folds. Took several careful passes to accomplish. I've heard of others using Archer transfers or stencils to overcome the zimmerit vs. decals problem but haven't ever done it myself.
OCT 28, 2006 - 12:32 AM


Another excellent build writeup Bill,you have been quite prolific recently and with many good tips as well. Thanks for taking the time, which is extensive to write and illustrate these articles.
Just about convinced me to break my rule and buy a Dragon Elephant ( but I will have to get the upcoming Dicker Max anyway )
OCT 29, 2006 - 12:08 PM
Thanks Dave, appreciate the comments.
Adolph,
Take the excuse of Christmas and get both! :-) The DM is something I know I'll be drooling over in anticipation until the release date comes.
As far as being prolific goes, I usually work on only one build/project at a time and carry it through to the end, only occasionally starting a 2nd one and extremely rarely getting 3 running at the same time. Vast majority of my build time is on the weekends where I have nice big chunks of time (no kids) to really focus in on if I wish to and that helps as well. This usually means I finish 1 build/project about every 4-5 weeks or so depending. The Elefant was an anomaly (for me at least), it actually took 2 months to complete from start to finish.
OCT 29, 2006 - 07:47 PM
Copyright ©2021 by Bill Plunk. Images and/or videos also by copyright holder unless otherwise noted. The views and opinions expressed herein are solely the views and opinions of the authors and/or contributors to this Web site and do not necessarily represent the views and/or opinions of Armorama, KitMaker Network, or Silver Star Enterrpises. All rights reserved. Originally published on: 2016-02-11 19:05:01. Unique Reads: 27462

WEB HOSTING BY


Copyright ©2021 Armorama and Kitmaker Network, a subsidiary of Silver Star Enterprises
All Rights Reserved. Please read our Conditions of Use and Privacy Policy.
All Rights Reserved. Please read our Conditions of Use and Privacy Policy.