

1⁄35Changing the Gepard's Spots
5
Comments
running gear
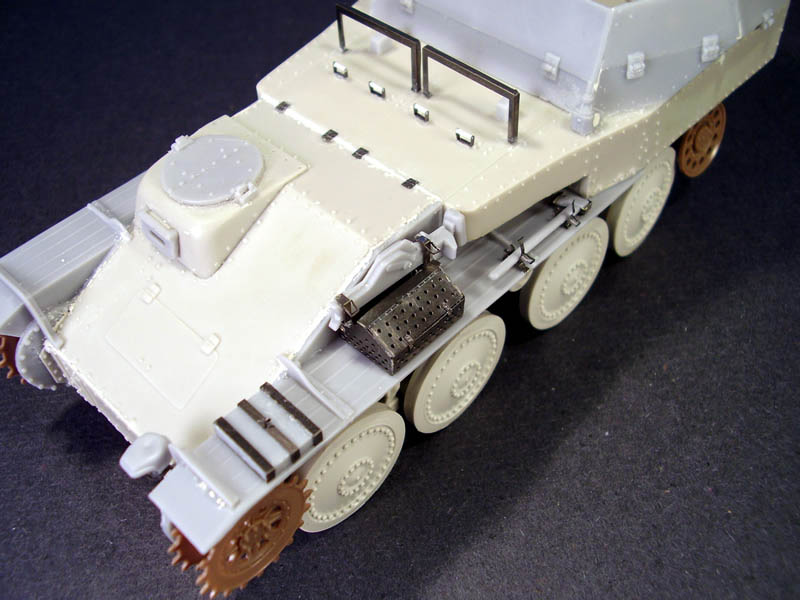
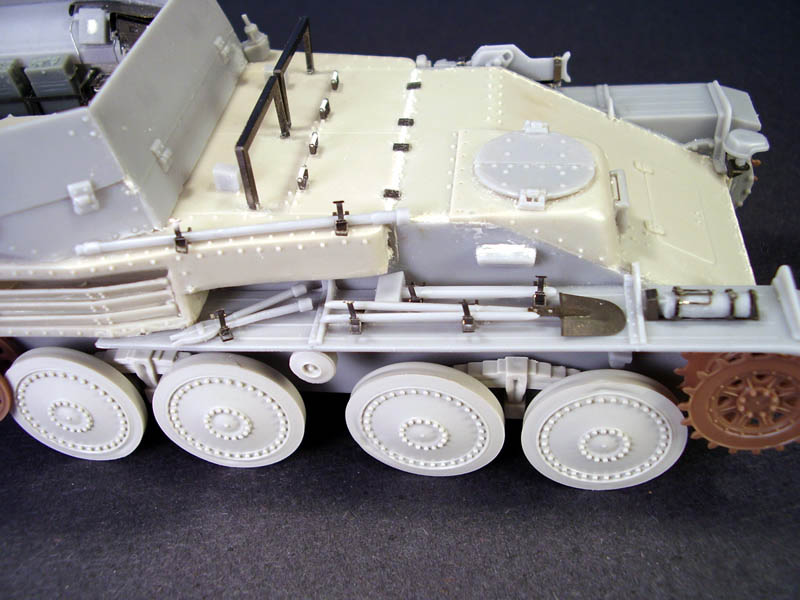
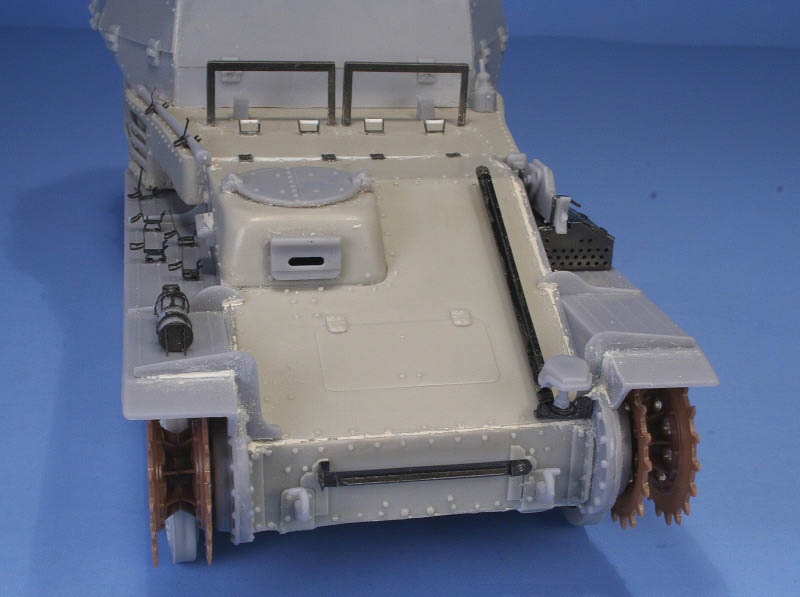
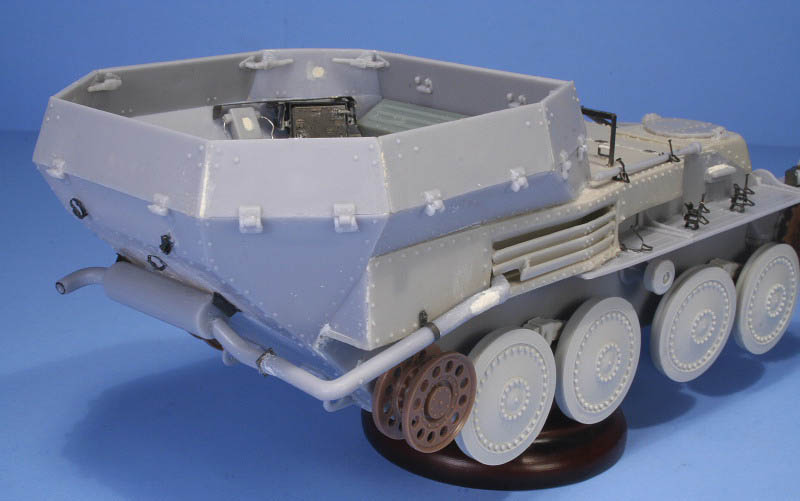
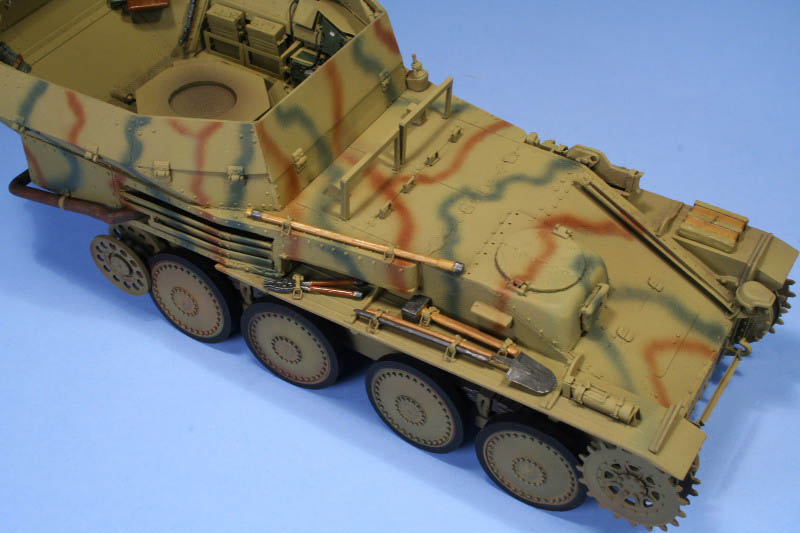
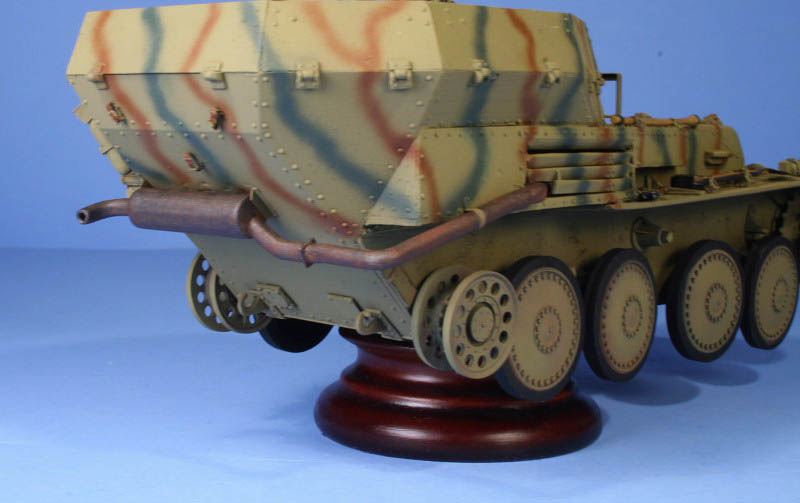
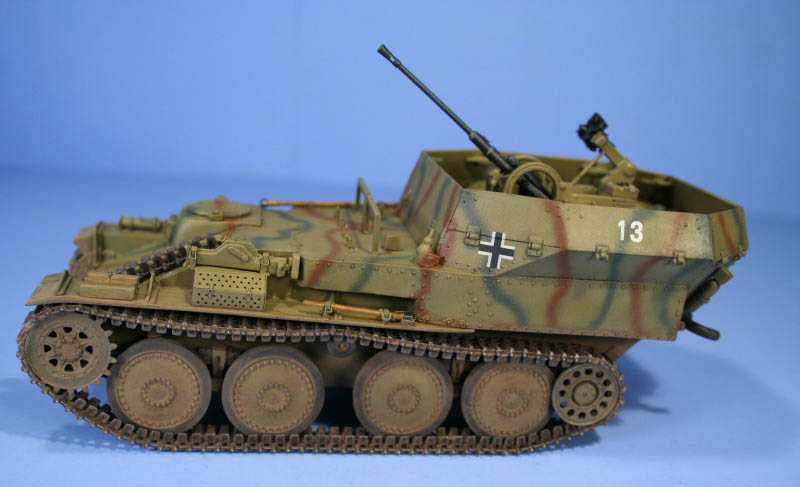
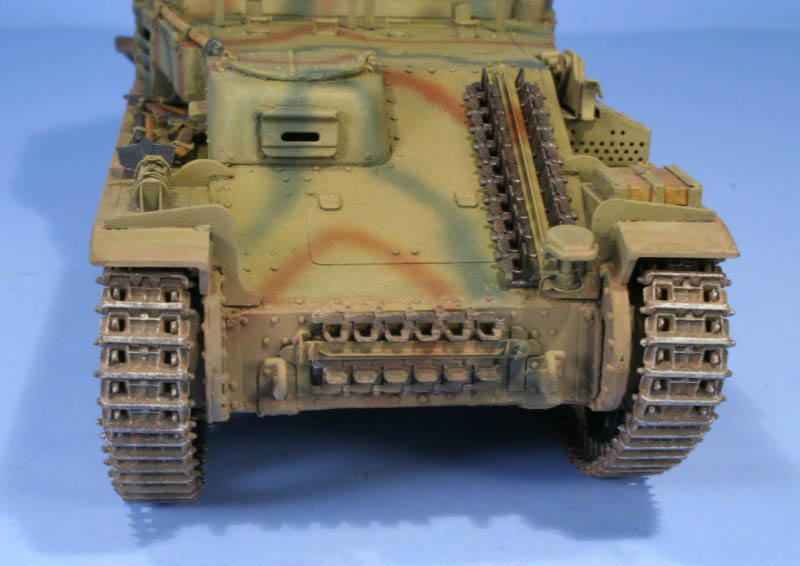
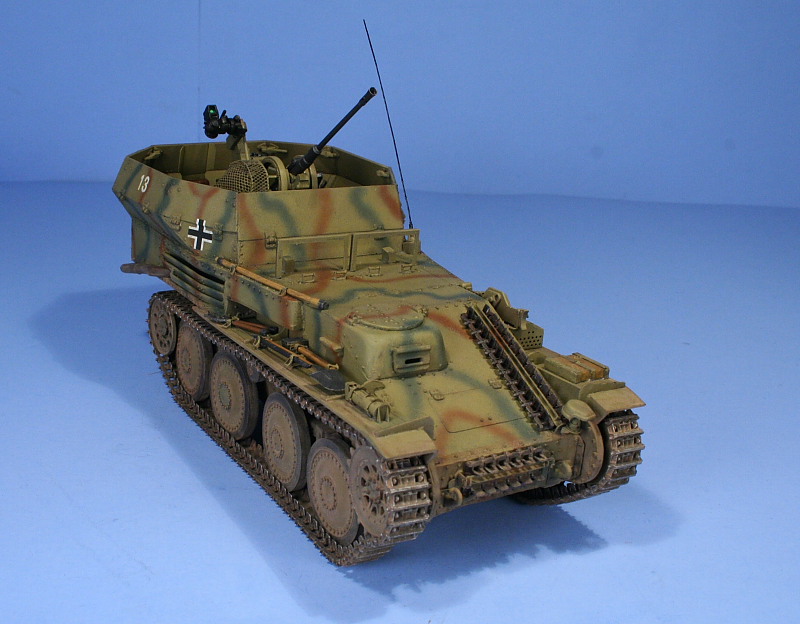
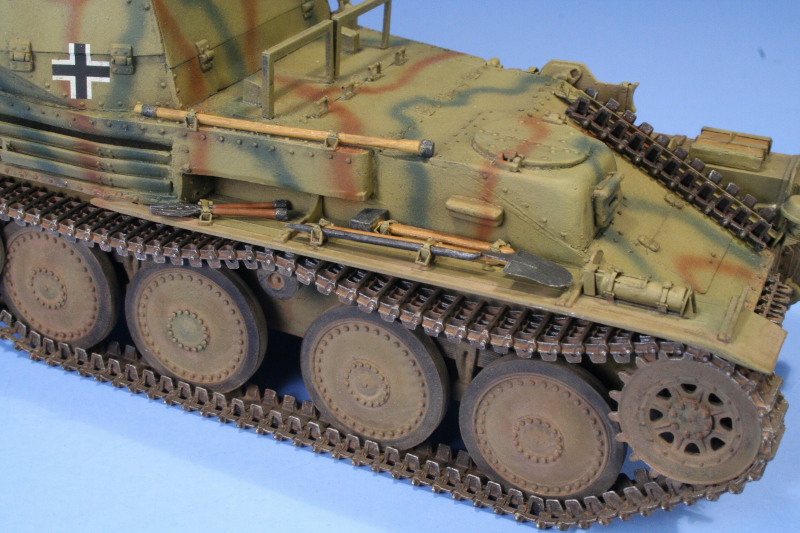
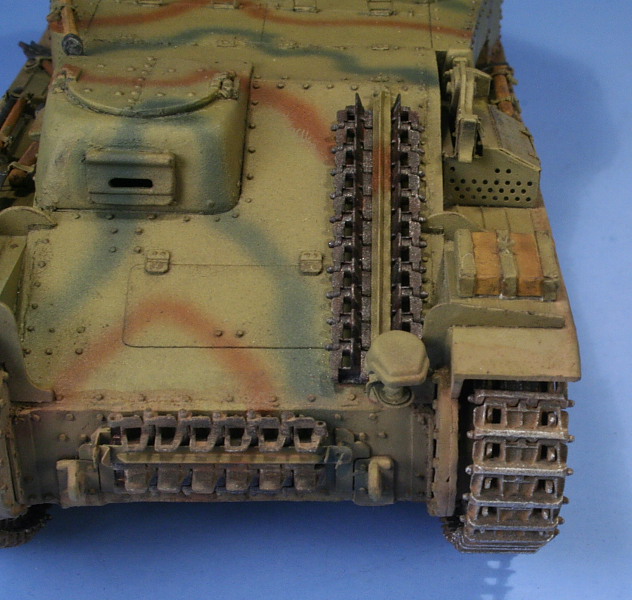
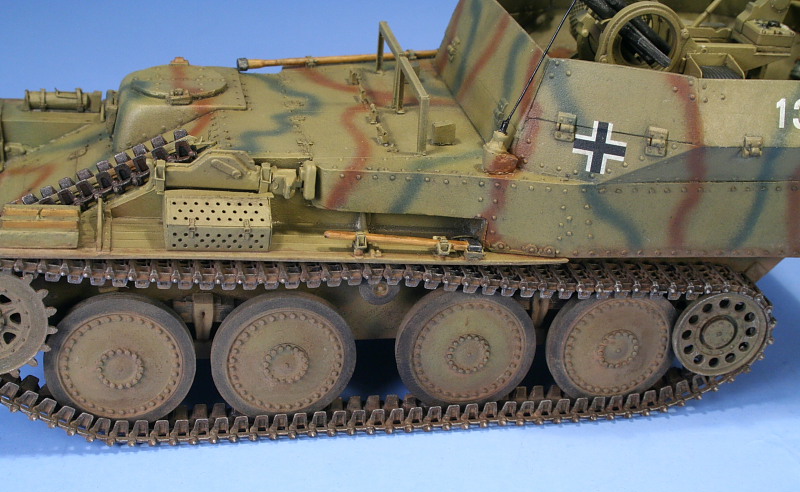
The kit included individual track links, wheels, and suspension molded in white plastic and identical to the sets sold by Maquette and stamped Made in Russia so Im not sure who the original molds belong to. The sprockets and idlers included in the kit are for the earlier style used on the 38(t) family of light tanks and were replaced with the ModelKasten correct pattern later style although the sprocket mounting pins had to be modified to allow the resin hull to clear them and sit properly. The molded on idler mounts on the Alan hull sides were also removed and the mount hole enlarged slightly to accept the ModelKasten arms and mounts and temporarily secured with blue tack until the tracks were painted to allow them to be adjusted to the correct tension and secured in place at that time. The tracks were also replaced with ModelKasten individual workable styrene links with 94 links per side to provide the desired sag. The kit provided road wheels, return rollers, and suspension springs were also put to use to round out the running gear. Extra MK links were also used to construct the spare track runs for the front and glacis areas.painting & weathering
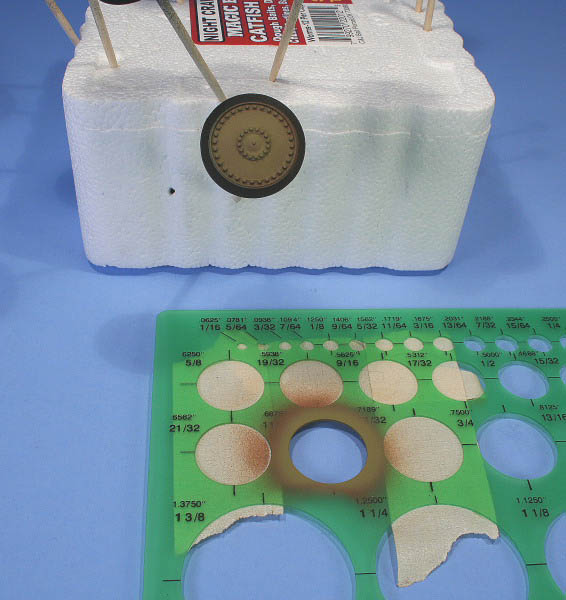
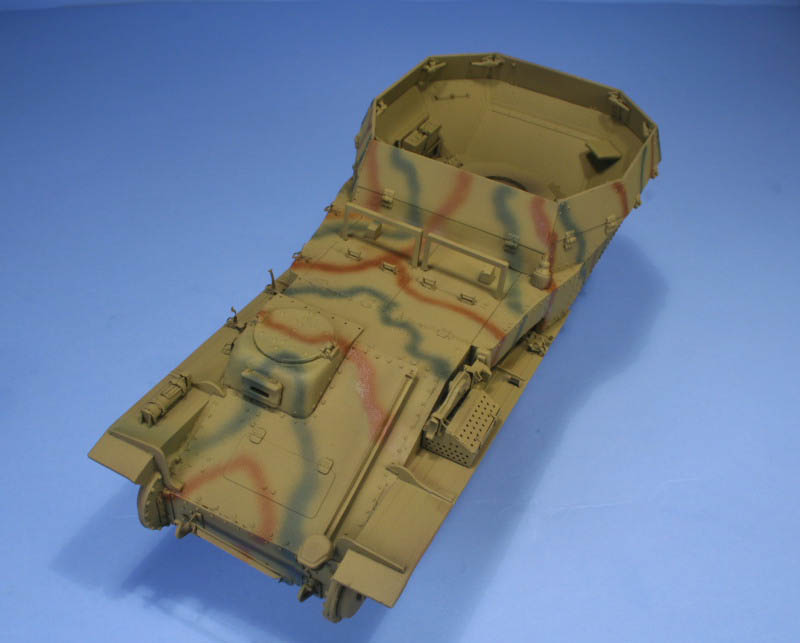
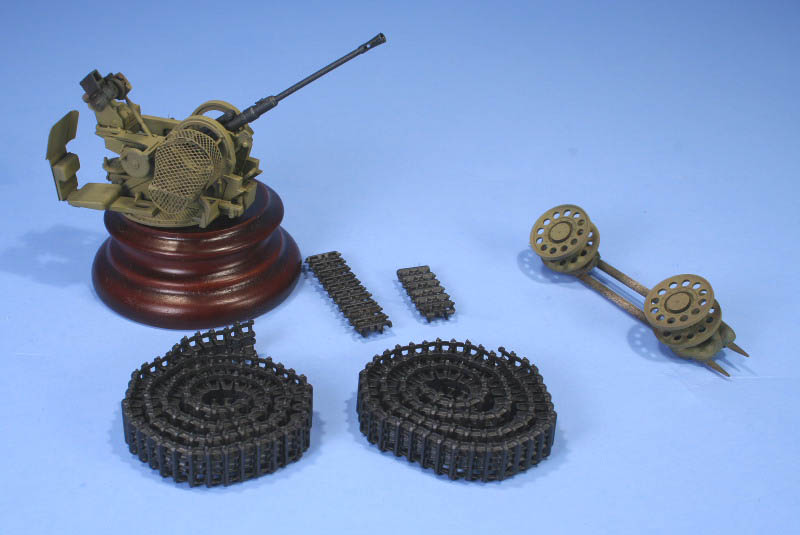
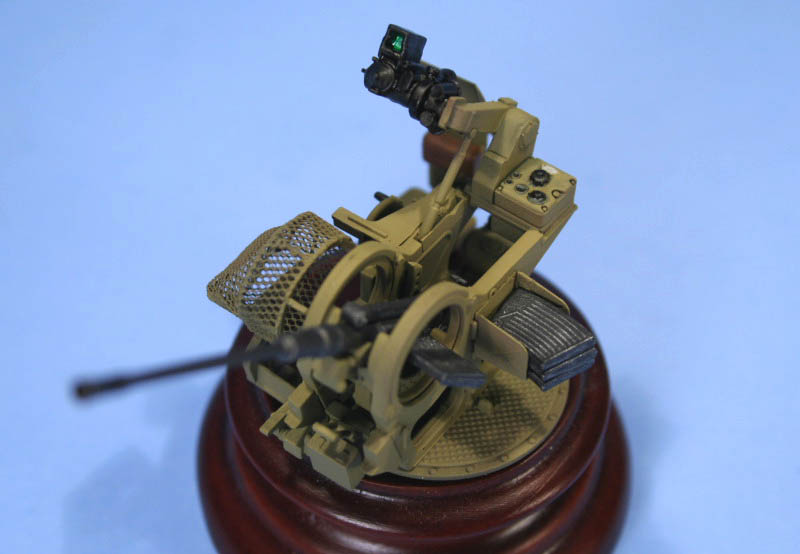
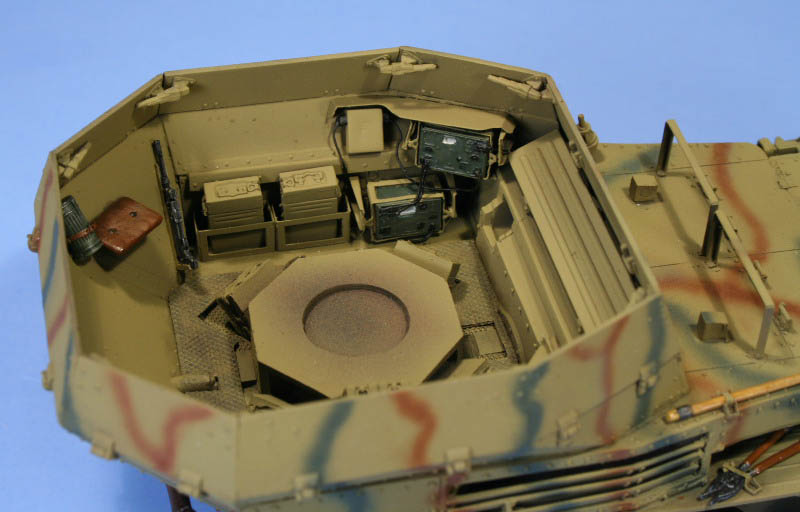
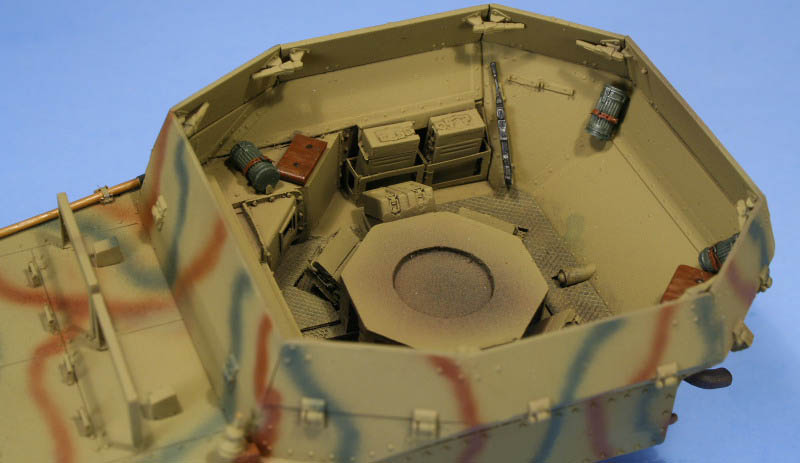
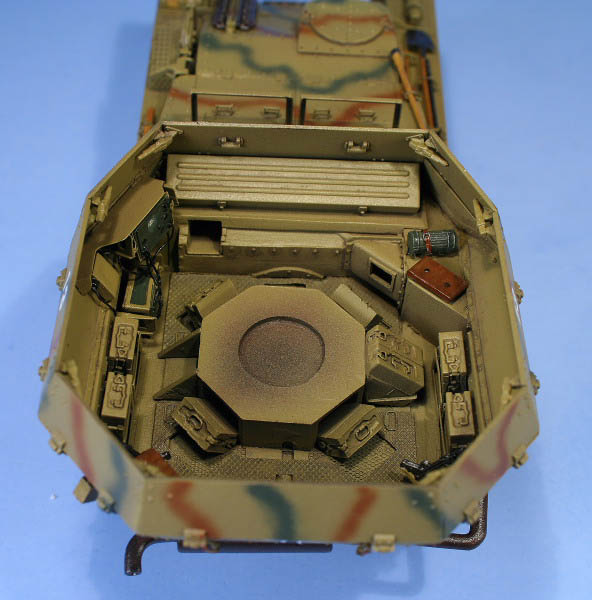
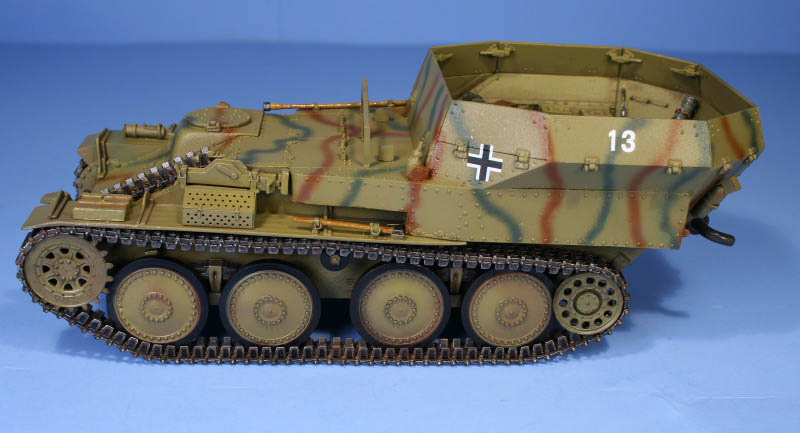
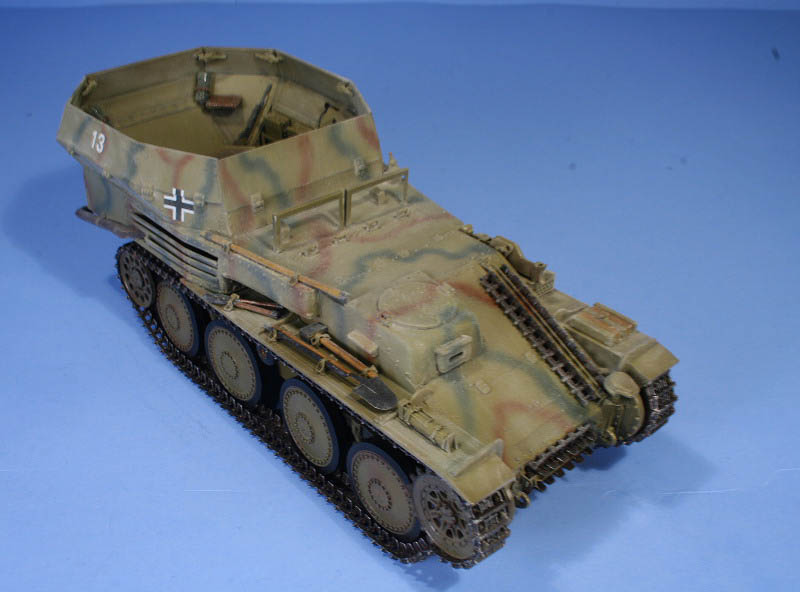
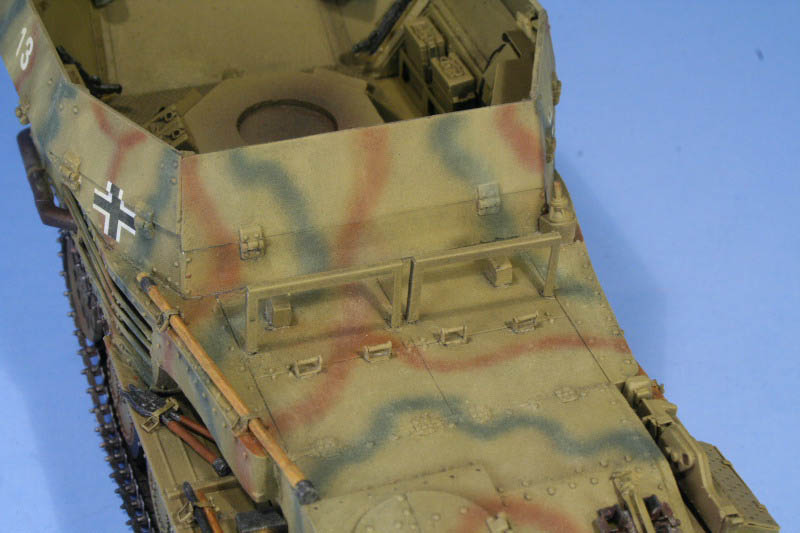
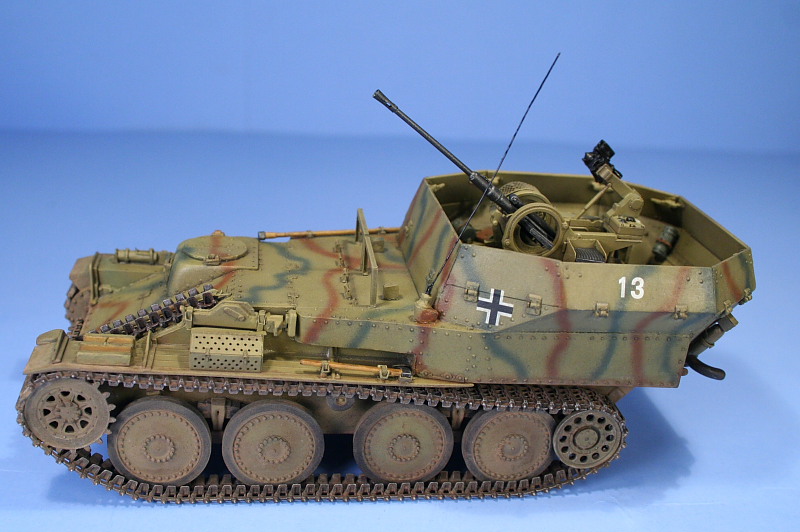
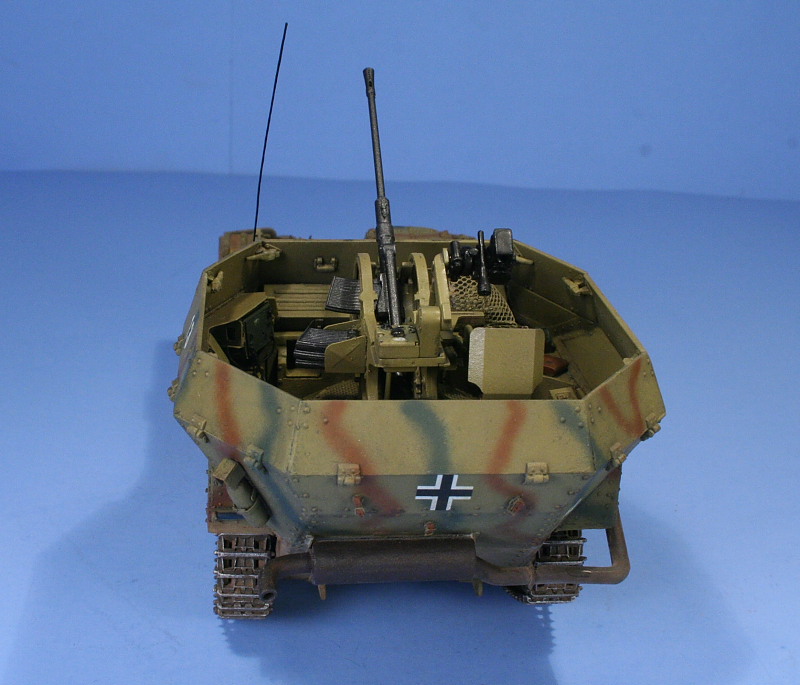
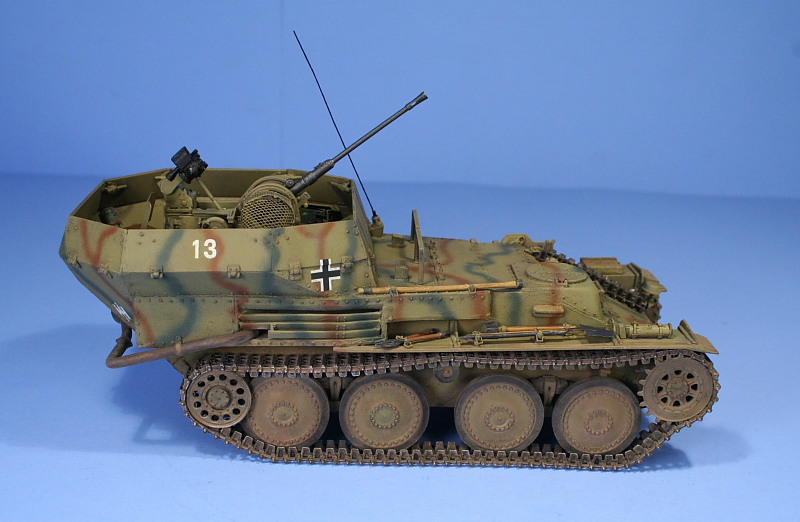
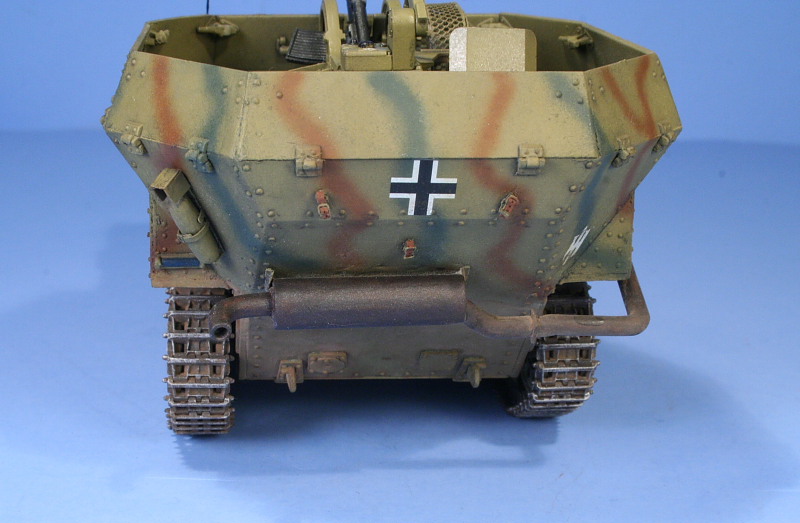
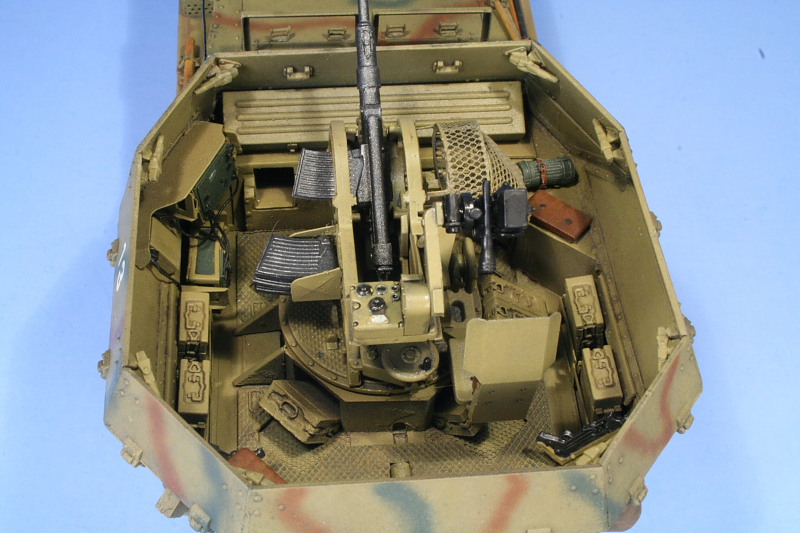
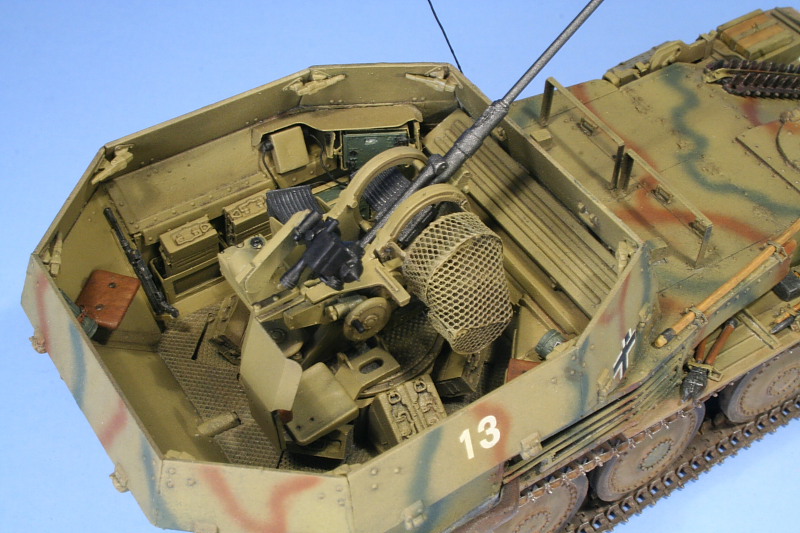
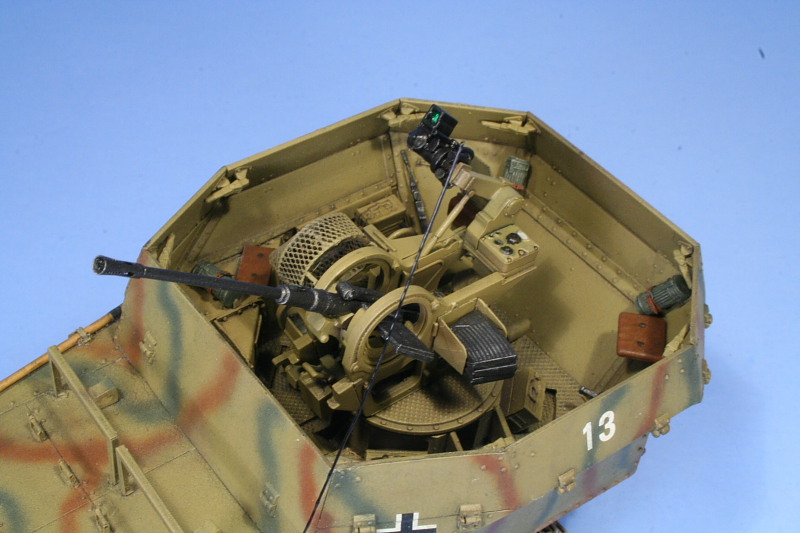
The paint finish was achieved using a variety of Testors Model Master line of enamel paints applied both by airbrush and hand detailing. The entire model was first given a primer coat in Flat Black followed by several light mist coats of Rust to establish a simulated Red Oxide base. This was followed by additional mist coats of Dunkelgelb as the primary vehicle camo scheme color with the additional 2 tones to make up the standard 3 tone consisting of a 50-50 mix of Military Brown and Leather for the Rotbraun and a 70-30 mix of Russian Armor Green and Panzer Schwarzgrau for the Olivgrun for the hull exterior. The road wheels had their rims painted using a standard circle template with the rubber rims left in Flat Black. The tracks were primed with Flat Black to help protect the MK working pins and avoid them becoming fragile due to exposure to the lacquer base of the Metalizer with a follow on coat of Non-Buffing Metalizer Gunmetal applied by airbrush. The tracks were dry-brushed with Steel followed by a light wash of Rust before installation on the vehicle. With the basecoat and camo applied, the interior of the fighting compartment was weathered with a pin wash of Burnt Umber and an overall wash of Gunmetal to give it a slightly worn/used look suitable to my eye for a new vehicle recently in the field but not yet a battle hardened survivor. Details including the crew gas masks, seats, and MP40s were detailed and installed with the gas masks and MP40s supplied by the Azimut set with Eduard mounting brackets used for the gasmasks. The radios and wiring were also detail painted along with details on the Flak 38 for the gun sights, control wheels, and gunners seat. The pioneer tools were also detailed and installed and light weathering/staining for the wood handles applied in the form of a wash of Dark Earth and Leather followed by a dusting of raw umber artist soft pastels with a blender brush. The muffler and exhaust were painted with Non-buffing Metalizer Gunmetal followed by a light wash of Rust. The entire vehicle was then given a sealing coat of Future prior to decals and full exterior weathering being applied. The kit supplied decal markings proved to be extremely fragile and oversized, with only the vehicle numbers and one unit insignia being utilized. The balkenkreuze markings were oversized and were replaced with spare decals left over Cartograf decals from a DML PZ IV build. The decals were sealed with a 2nd coat of Future in preparation for overall weathering which began with an overall wash of 90-10 thinner-paint Gunmetal applied with a large sable brush. This was followed by a dust coat of MMP Faded Panzer Yellow weathering powder that would serve as a filter to blend in the wash and underlying basecoats. This was sealed with a coat of Testors spray-can Dullcoat to render it transparent and followed up with a selective application of light ochre artist soft pastels in various places to further enhance the color variation and blending. This also was fixed in place with a 2nd coat of Dullcoat and allowed to dry. High points and raised detail were then dry-brushed with Burnt Umber and a 20/0 brush to add depth as a final touch. The tracks, lower hull, and running gear were weathered with a combination of MiG pigments using equal parts African Earth, Europe Dust, Russian Earth, and Gulf War Sand ground together and mixed as a dry powder, then combined with ordinary tap water in an old contact lens holder, and applied wet by brush to the desired areas. After air drying, the excess was removed with a stiff bristled brush and the track high points dry-brushed with Steel to allow their worn points to show through.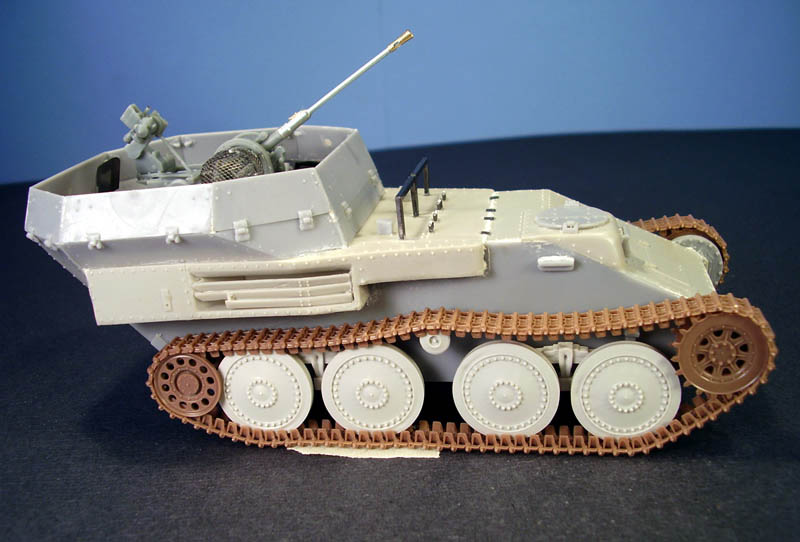


About the Author


FROM: TEXAS, UNITED STATES
Like many, I started out in the hobby as a kid building airplanes to hang from my bedroom cieling. I took a long break from the hobby, returning in 2001 with an interest in armor inspired mostly by online gaming. WW2 armor, 1/35 scale, is my preferred genre with a special taste for the stranger vehi...
Comments

Interesting & informative article & nice finished model. I didn't realise the Alan model had so many errors on it! Puts my OOB build in perspective, mind you I thought that was hard enough!
JAN 06, 2007 - 01:39 AM

Thanks for the comments Dave!
Hohenstaufen,
I originally picked up the Alan kit on a sale for around $15 if memory serves me correctly...and then it quietly sat for a while until the moment was right and I felt ready to build it. It wasn't until I started to look into the history and features of the Gepard that I realized where the areas for potential improvement were and then had to decide if I wanted to take the plunge or not to correct it or just build it as is. Turned out to be the most involved $15 project I've ever worked on, at least the story I've kept to for my wife at any rate. :-)
JAN 06, 2007 - 03:01 AM

Copyright ©2021 by Bill Plunk. Images and/or videos also by copyright holder unless otherwise noted. The views and opinions expressed herein are solely the views and opinions of the authors and/or contributors to this Web site and do not necessarily represent the views and/or opinions of Armorama, KitMaker Network, or Silver Star Enterrpises. All rights reserved. Originally published on: 2007-01-06 00:00:00. Unique Reads: 25001

WEB HOSTING BY


Copyright ©2021 Armorama and Kitmaker Network, a subsidiary of Silver Star Enterprises
All Rights Reserved. Please read our Conditions of Use and Privacy Policy.
All Rights Reserved. Please read our Conditions of Use and Privacy Policy.