1⁄35Making Trees with Wire
My wife's grandma is 94. When she was only a few years
younger, her eyesight was better and here hands more steady. She used to pass
some of her spare time making miniature trees with copper wire and beads. The
exact same method works excellently to make trees for dioramas. Here's how you
can make diorama trees that are larger than the mini-trees you'll find in a
hobby store. They look very convincing. It may look hard at first, but it's
really easy.
The whole method consists of making a metal wire skeleton, that can be covered
by different methods of your choice to simulate the bark.
You need nine or twelve strands of wire. The length of each strand is easy to
calculate : first you decide how high the tree needs to be, then you multiply
its heighth with 2,5. (two point five). For example : a tree of 30 cm needs
strands of wire of 30 x 2,5 = 75 cm. I use the kind of wire that you'll find in
a DIY store or garden center, with a thickness of about 0,5 mm.
Part One : Making the Roots
You cut nine or twelve strands to equal size, and hold them together. You bend the whole bunch in the middle.
 Next, you place 3 or 4 fingers (depending on tree size) on the middle section to form a loop around your fingers. |
 Next, you twist the strands a few times to make this a firm loop. |
 The loop that you now created, will become the base of the tree's root system. Divide the loop into bunches of one, two, three or four wires each, thus creating separate loops. |
 Now start twisting each of these loops to form the root system. These roots are placed horizontally: they become the basis of your tree. This basis will be buried in the base of your diorama, or you can even make part of those tree roots visible on top of the grass or soil the tree "grows" in. |
 Start twisting each of the individual loops a few times, then split them in two or three again and continue twisting till you get a root-like system. |

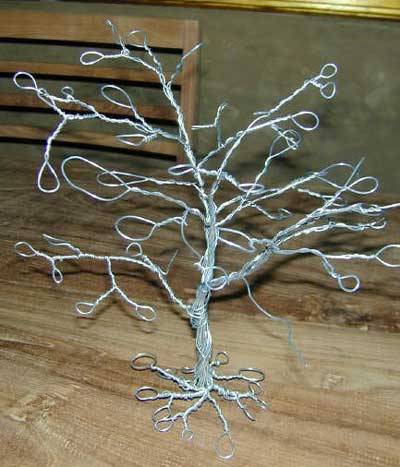
Now the root system starts taking shape. First you spread the roots horizontally
in a way that you like, and that seems natural. The roots in this picture show
you the result we have reached thus far (branches come in the next chapter). |


