

1⁄35De Arend
8
Comments
Layout and design modifications
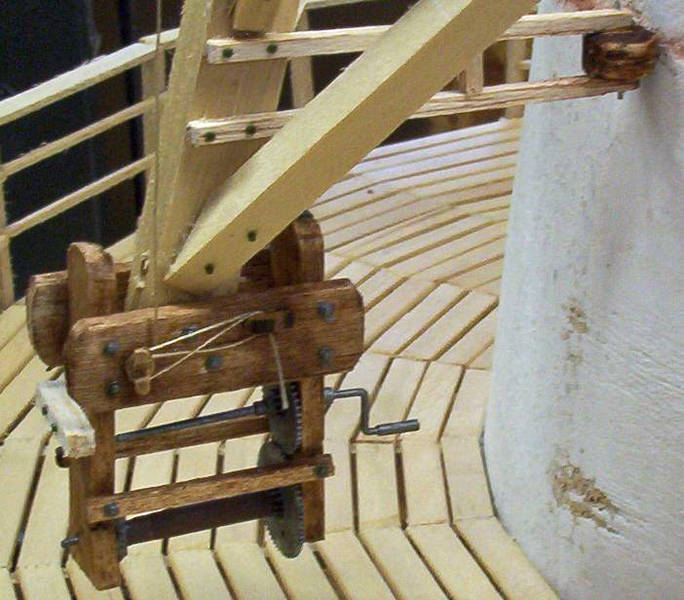
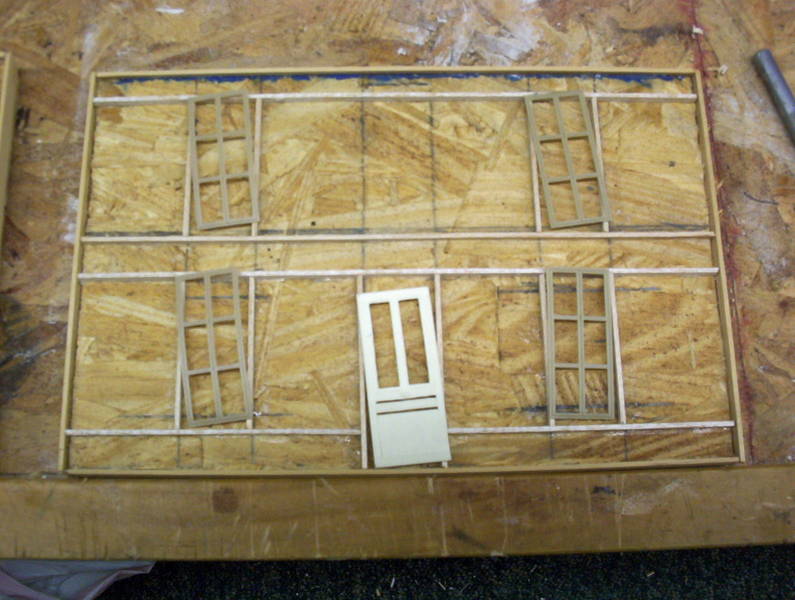
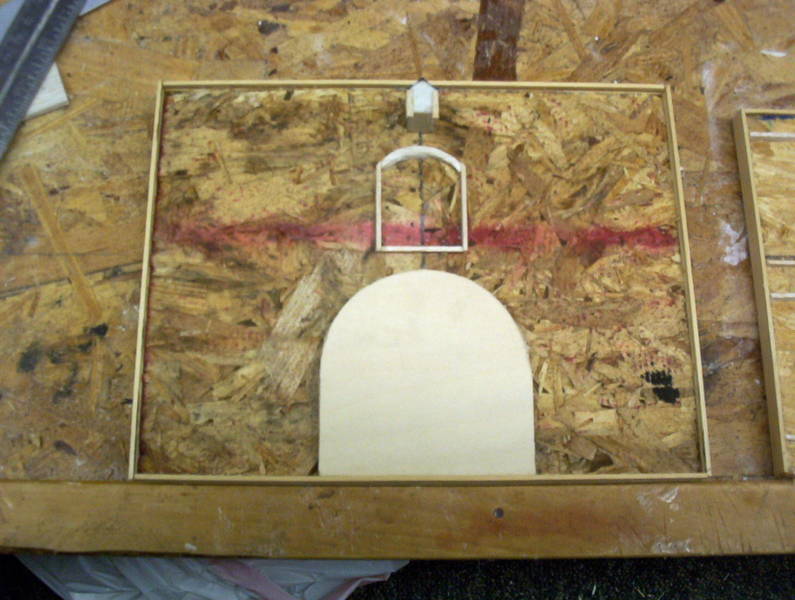
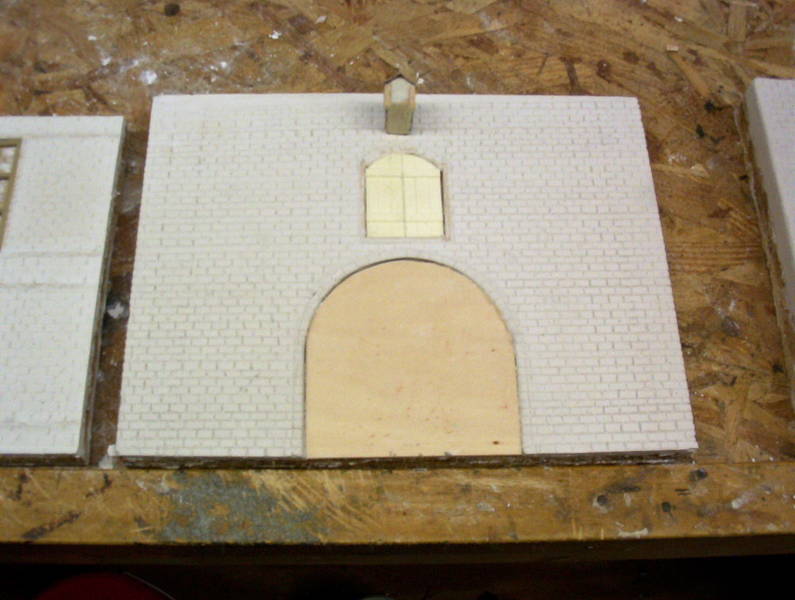
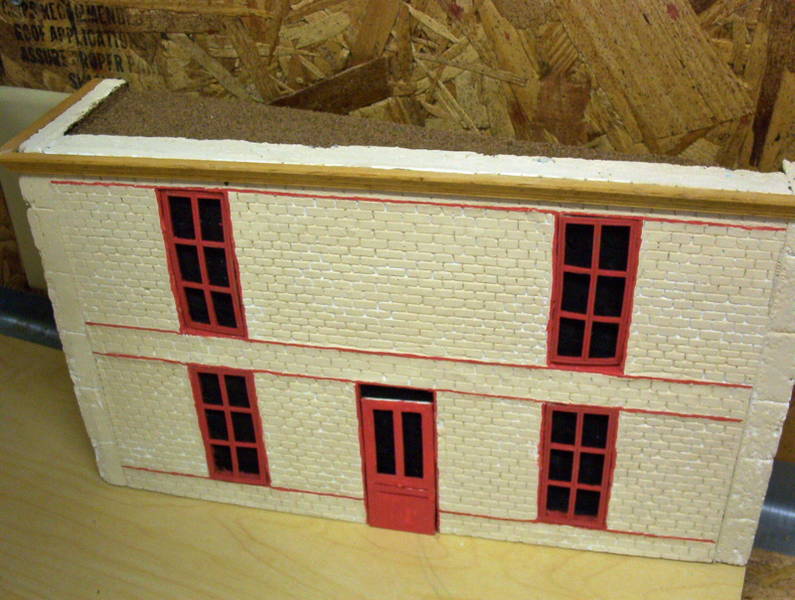
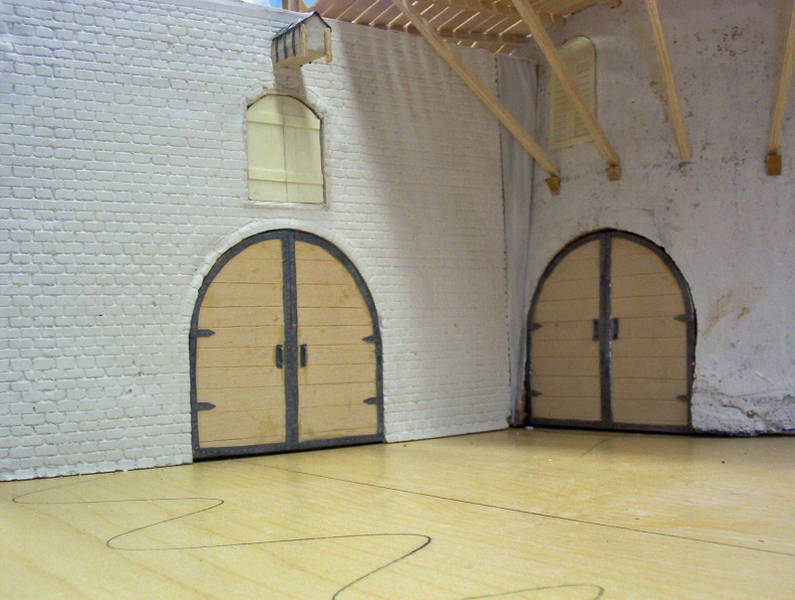
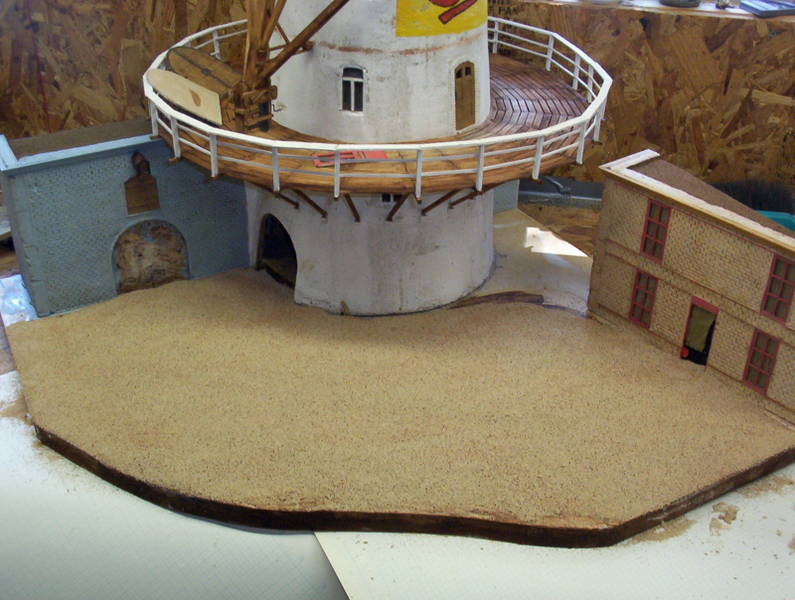
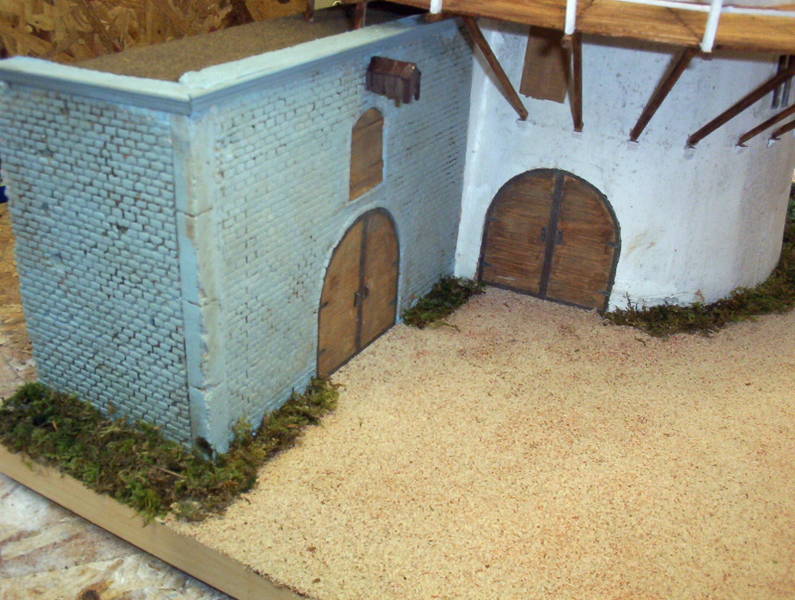
The first thing to change now was the layout. With the addition of the attached building, I no longer had room for the building on the left and to properly show the curve in the road I moved the building on the right about 10 to 15 feet closer than it should be which works out to be about 4 inches in scale. I also removed the old capstan and, with the help of the photo of the actual one in use, made a new one. I then decided to start on the two buildings. I knew these were all brick buildings and needed to show this design. From lessons learned, I always try and make my own buildings and bridges or similar items as the cost can really get up there if youre not careful. This is my simple method on making a building wall. If the interior doesnt matter you can just use particle board, if it does I would suggest a one sided finished plywood leaving the finished side inside, making it easier to apply wall paper and such. All windows and doors have frames of some type, even if the walls are brick they still require frames. Using a piece of board the size of the wall needed, I drew out the locations for the windows and doors keeping in mind that the ends of the board would require some kind of covering. I used balsa wood for the frames and the window and doors are from Verlinden. In this case, the boards across the width of the building would serve as trim and mixing up a very thin mixture of plaster, I poured this onto the forms to form my outside wall. This is where the particle board is important; with all the holes and ridges it holds the plaster extremely well. After about 2 days, wanting to make sure they are dry, I removed the side boards and started scribing my bricks. I first scribed the brick frames where I needed to then measured out the sizes and, with a ruler and scribe, finished them up. I used another method to make 3 of the 4 side walls. Using drywall, I cut a piece a little larger then the size of the wall needed and removed the paper from one side. I wanted to show a larger type block used on the corners of the buildings and this was the easiest way to do so. Scribing the larger block first, I then scribed in the bricks. The one thing I like about this is that drywall has a different consistency and chips more when scribing, giving it a more used look. It also has a lot more holes which can be used to show bricks missing from the walls.Roof switch
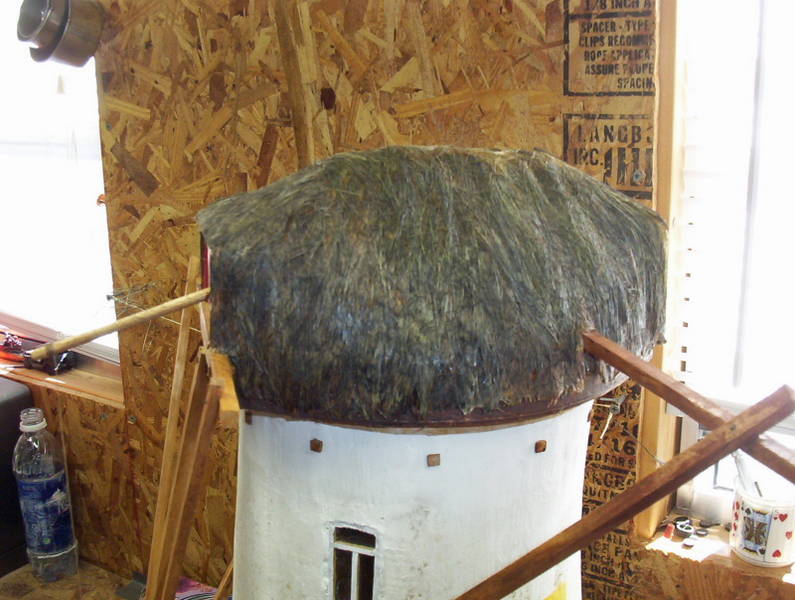
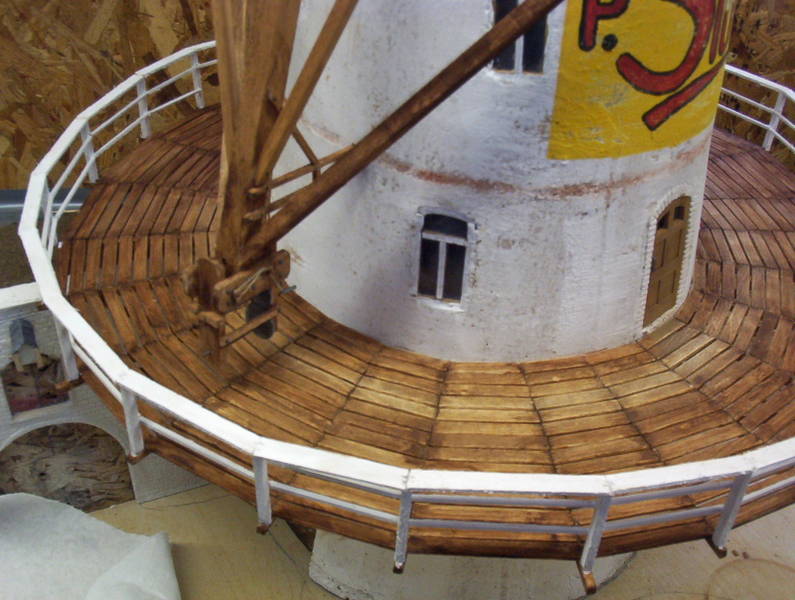
At this point after receiving some great feedback from Pascal Hut and Frank Glackin on the look of the shingles, I decided to change them to thatch instead. Using my Dremel tool and a cutting disk, I removed the majority of the shingles. With a mixture of white glue and water, I applied some layers of Field Grass from Woodland Scenics and glued them in place. After 3 layers of this I used some Burnt Umber and thinner, basically my vehicle wash, and painted the entire top for an over all color with some of the original colors coming through. At the same time I glued down my buildings and cut my base as needed. Looking at the photos I now had of the existing buildings, I decided to go with the unattached building just about how it looks today since the shading of the original photos also seems to confirm this. I also added on some roof trim to correspond with the original photo and finished up the construction on the 2 main doors on the windmill by scribing some boards and adding trimming with lead. Lastly, I cut and installed my missing windows and door on the upper windmill. The next step was to paint the attached building and stain the stage and both buildings. I again just used my wash mixture for the staining of the stage and buildings. After drying, I used my Dremel with a buffing pad and wore down an area on the deck to represent the main work area used.Road and groundwork
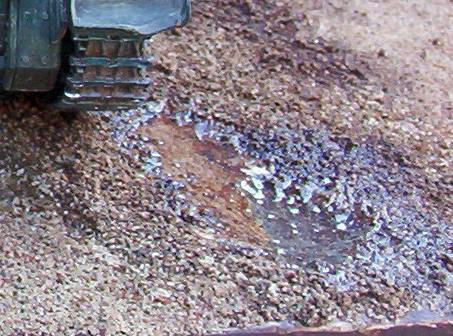
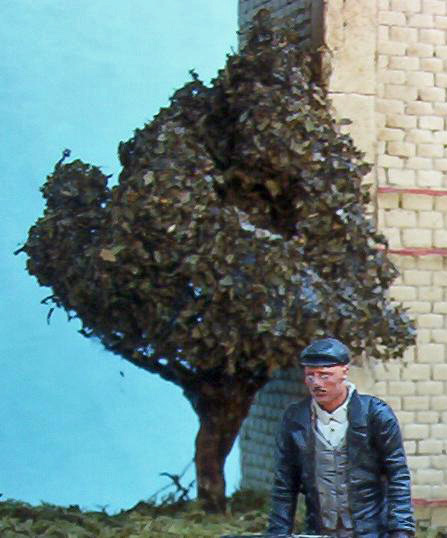
For the road surface, I used plaster to raise the road area to compensate for the thickness of the grass and again used my wash mixture to tint the entire base. Following on, I mixed up my own version of gravel using ballast from Woodland Scenics and applied it over a mixture of white glue and water. After some experimenting, I found it was easiest to pour a puddle of glue mixture on the base and then add in some gravel and mix this up and spread it out to form a uniform covering on the road, then coming back and sprinkling another layer of dry gravel right over this. The end result made for a much smoother road surface. After allowing this to dry and brushing off the excess, I applied grass, or in this case Sheet Moss or Floral Moss, I used the cloth glue Fabri-Tac liberally over the area I wanted, then shaking and removing the unwanted parts of the moss I laid it down on the glue and pressed it in. To show wear from the passing tanks, I applied 2 track areas around the curve with more gravel in a more loose appearance and added the puddle first by using floor wax, which didnt quite work, but with some added Tamiya X-22 Clear achieved the final look I was after. I also added a tree using the wire-frame method using steel wool thinly applied for a base to glue on parsley flakes to represent the leaves.

About the Author


Comments
very impressive work. stunning job on everything; from the mill to the tanks and figures.
-Mike
SEP 26, 2007 - 04:19 PM
I guess I can imagine the work that it takes to get such an accuracy! I love such things and it's just looking absolutely great! Thanks for sharing the process in such a detailled way as well.
Great work! I hope you will present this nice piece of work in public once in a while...!?
SEP 26, 2007 - 08:22 PM

Amazing work, one to be proud of for sure!
I'd never even contemplate a dio on this scale (mainly as i'd have no-where to put something so huge!) so a lot of respect for all the hard work and skill that has gone into this.
A real beauty, and something a bit different, well done.
James
SEP 26, 2007 - 08:27 PM

I am so happy this became a feature. I love seing such a bold building get a permanent home.
Well done.
SEP 26, 2007 - 10:04 PM

The finished piece turned out looking fantastic Bob.
Excellent work.
SEP 26, 2007 - 10:32 PM
Wow, just gorgeous! Brings back memories of a lot of time I spent in Holland 6-7 years ago! This is really superb and impressive! Good show!
SEP 27, 2007 - 04:57 PM


Thanks everyone for the kind remarks.
I still stand by the fact I couldn't have done this without the great members on Armorama helping out.
Thanks again,
Bob
SEP 30, 2007 - 10:53 AM
Copyright ©2021 by Bob Card. Images and/or videos also by copyright holder unless otherwise noted. The views and opinions expressed herein are solely the views and opinions of the authors and/or contributors to this Web site and do not necessarily represent the views and/or opinions of Armorama, KitMaker Network, or Silver Star Enterrpises. All rights reserved. Originally published on: 2007-09-26 00:00:00. Unique Reads: 26508

WEB HOSTING BY


Copyright ©2021 Armorama and Kitmaker Network, a subsidiary of Silver Star Enterprises
All Rights Reserved. Please read our Conditions of Use and Privacy Policy.
All Rights Reserved. Please read our Conditions of Use and Privacy Policy.