

1⁄35De Arend
8
Comments
Vehicles and Figures
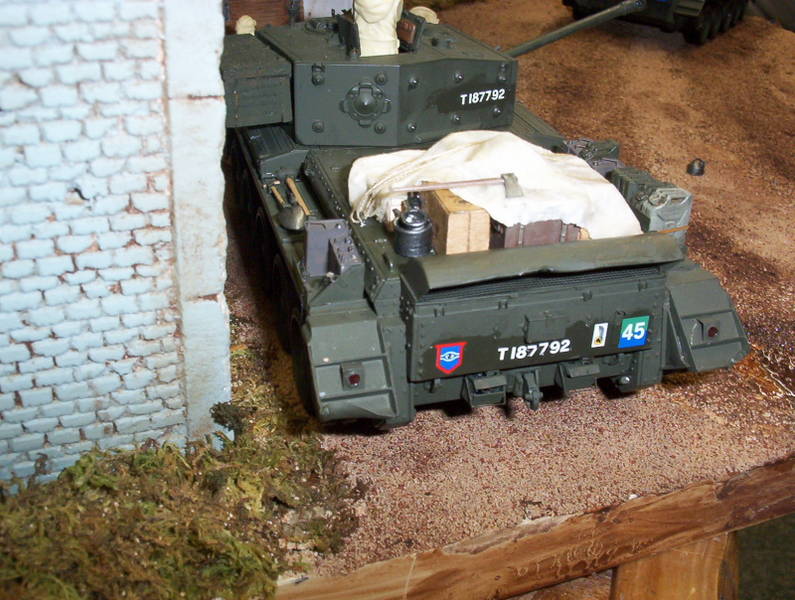
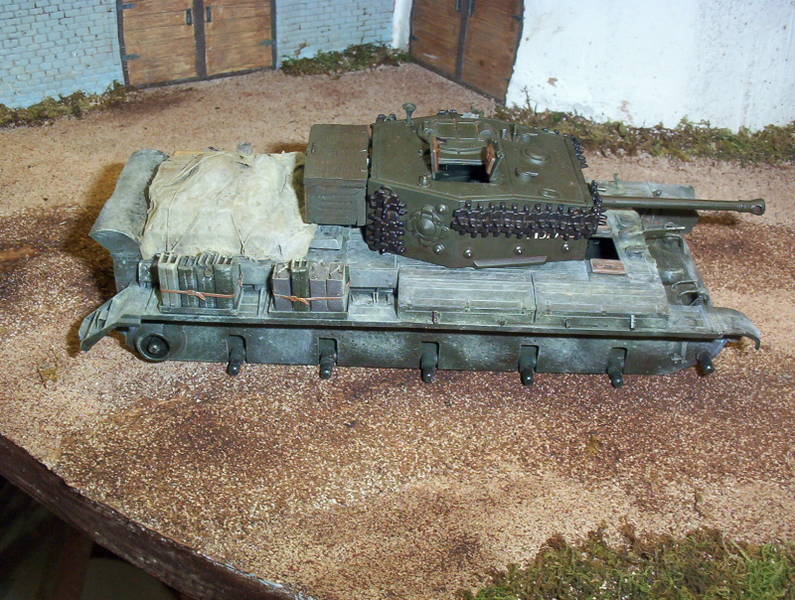
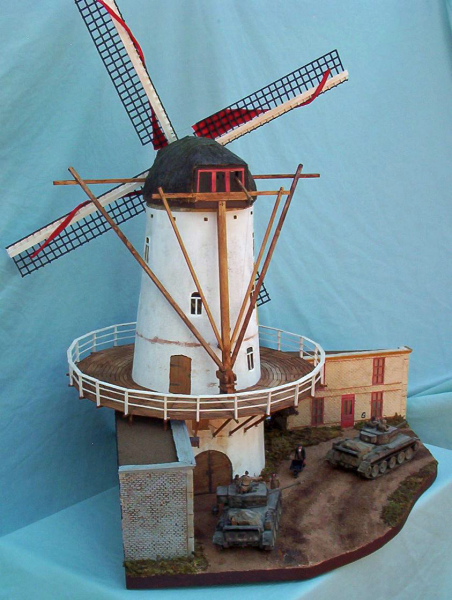
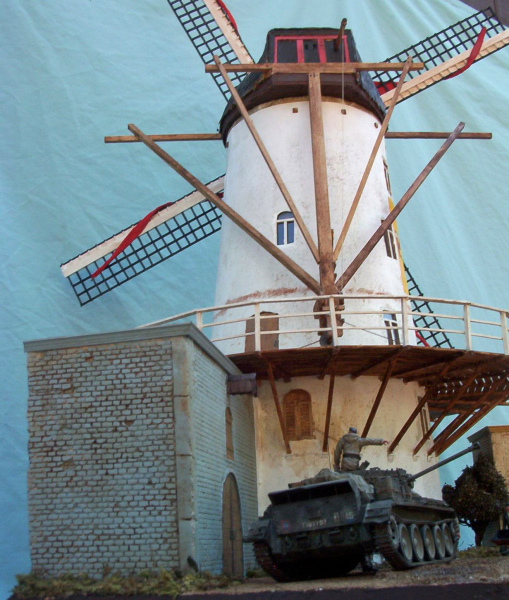
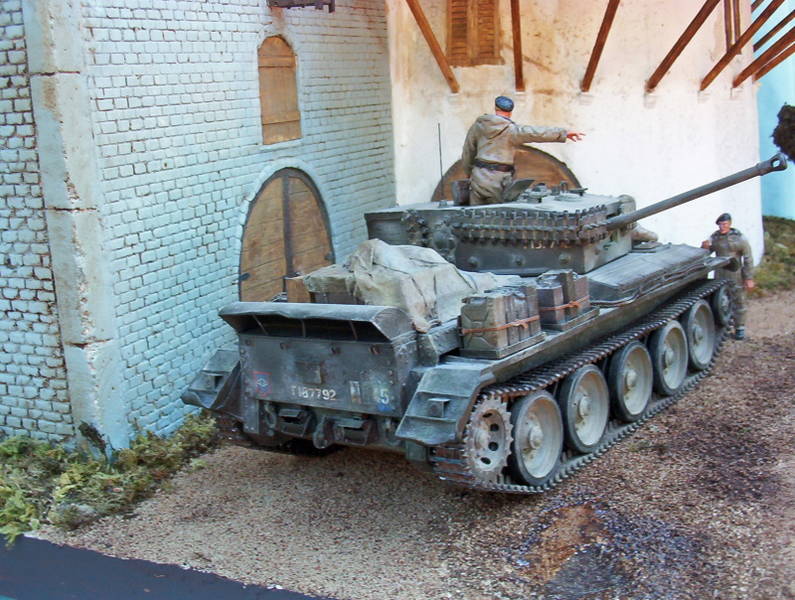
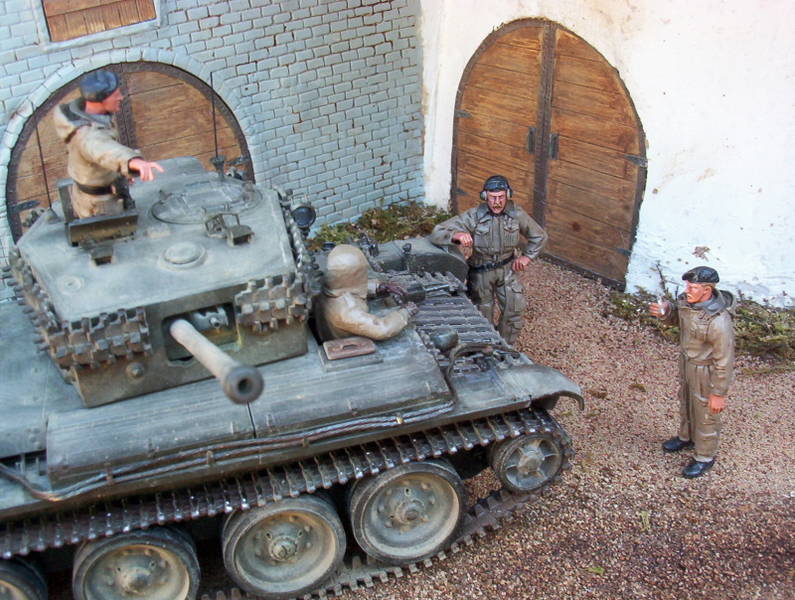
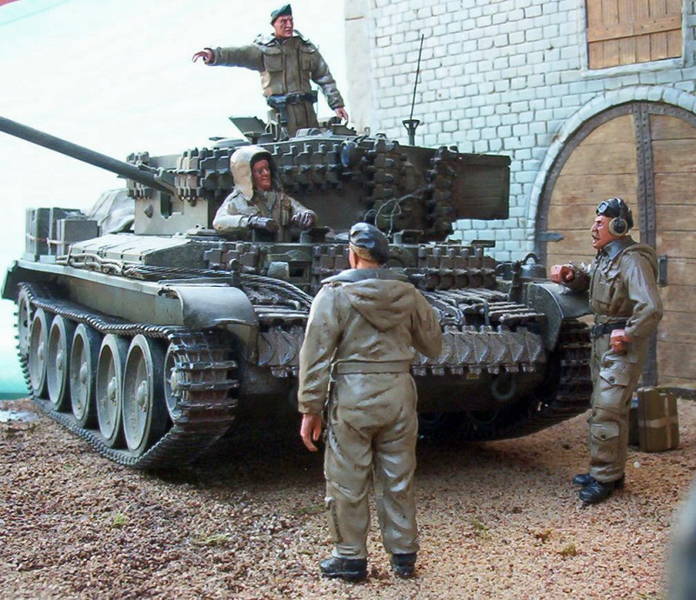
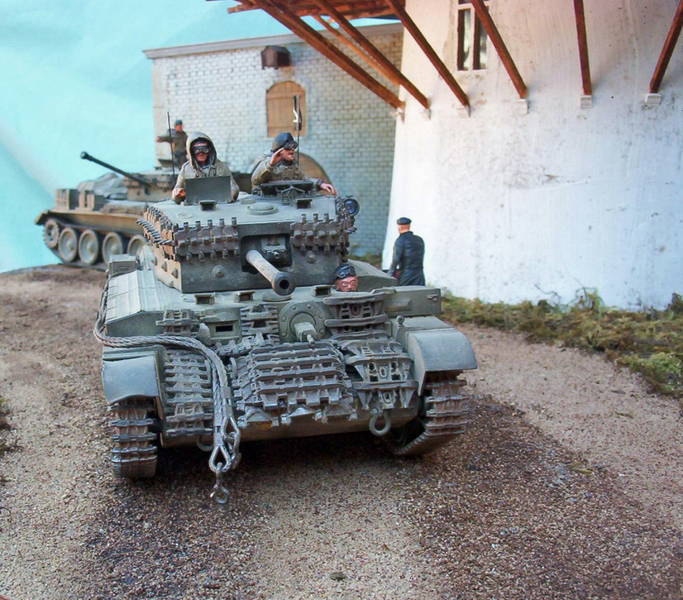
Switching my attention back to my unfinished Cromwells and their crews, I knew there would be stowage and welded on track to be added which raised the question of how much in the way of markings I needed to include as well as other details to be added or arranged. I decided to apply all markings that would normally be seen on these vehicles, even if it was just a small piece that would be visible, to add to the detail. Determining the stowage was harder, ultimately I decided to cover the majority with a tarp and show some British items peaking out from underneath. This way I could put in things with some nice bulges and outlines and would leave one to guess what might be underneath. I knew I had to tie down the tarp, so grab handles were a must, the rest on the engine deck was just covered up. I ended up cutting off everything on the engine deck so the stowage would sit flat and not rock around and the rest of the stowage items were installed as required. For the tarp, I cut off a piece of unprinted, un-pressed paper towel about the size of the area to be covered, dipped it in liquid starch, squeezed out the excess, stretched it back out, and laid it over what I wanted covered. While still wet, I used string and tied it all down except where I wanted to show a corner untied. Using a brush dipped in starch, I worked the covering to the locations and shapes I wanted. Any excess starch dries clear and also produces a nice texture on the tarp when dry and is durable for painting and weathering. After the normal painting and washes were applied to the vehicles and dried I used Powders from Bragdon Enterprises for the final stages. Weathering is in the eye of the beholder. I weather with the following ideas in mind, this division was on the go moving from town to town , I could see a lot of road dirt and wear on what ever was on the tank, mixed in with a couple of sprinkles along the way, this being early November and all. To produce rain spots and streaks, I used a spray bottle of water to lightly mist over them and allowed it to run, creating natural streaks and spots in the powders. At this point in time I worked simultaneously on the welded on extra armor tracks, making the sails for the windmill, and starting in on the figures. After checking out the stance and positions of all my figures, I found an excellent Pixie suit photo on the web, and using this as my guide, I painted all the tank crews the same, using washes and dry-brushing where needed. The added on tracks are almost a story in themselves. I had a lot of suggestions as to what type of tracks they were and if I tried to buy a set of each that were suggested I would have paid more then the entire project added together. The only ones I couldnt get away with are the chevron tracks. I tried some Sherman sized ones but could only fit 2 across and as can be seen in the reference photos there should be 3. I bought a set of Stuart sized chevron tracks from Accurate Armour and three sets of those fit perfectly. I had some tiger tracks from a previous diorama, and I picked the rest of the tracks off of old models lying around to finish them up in a mix of Churchill, Half-track, and just some more Cromwell links.Conclusion
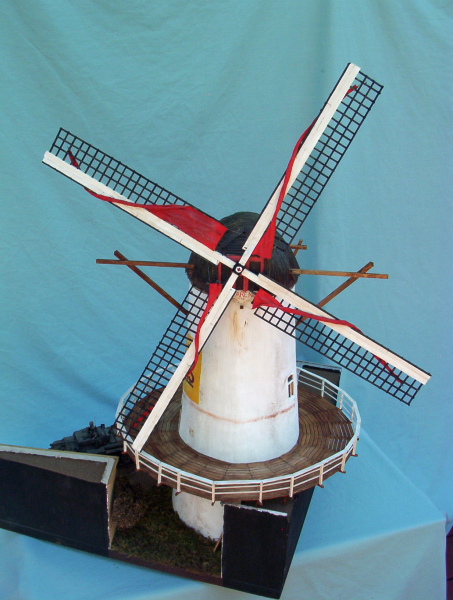
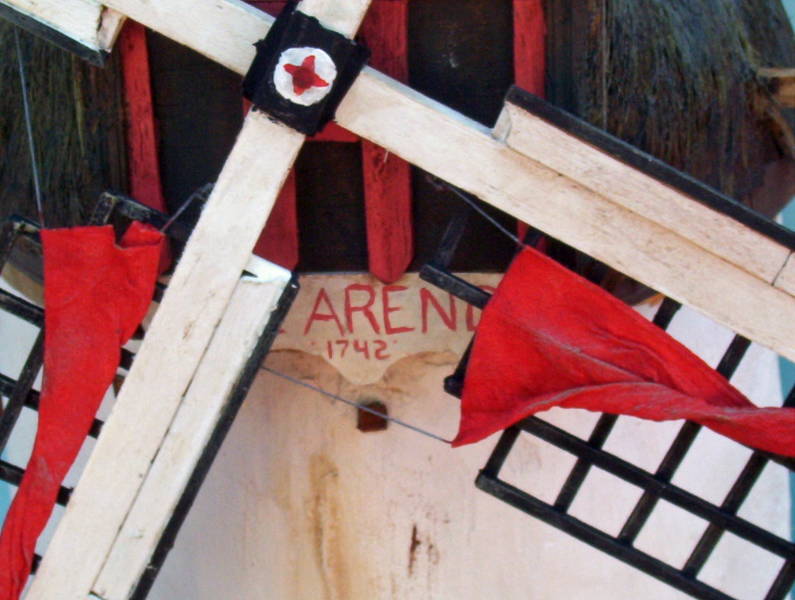
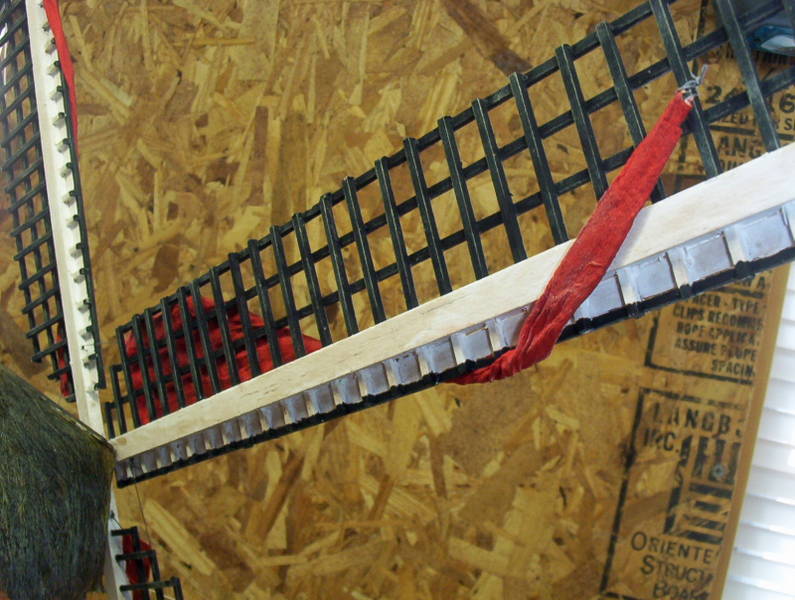
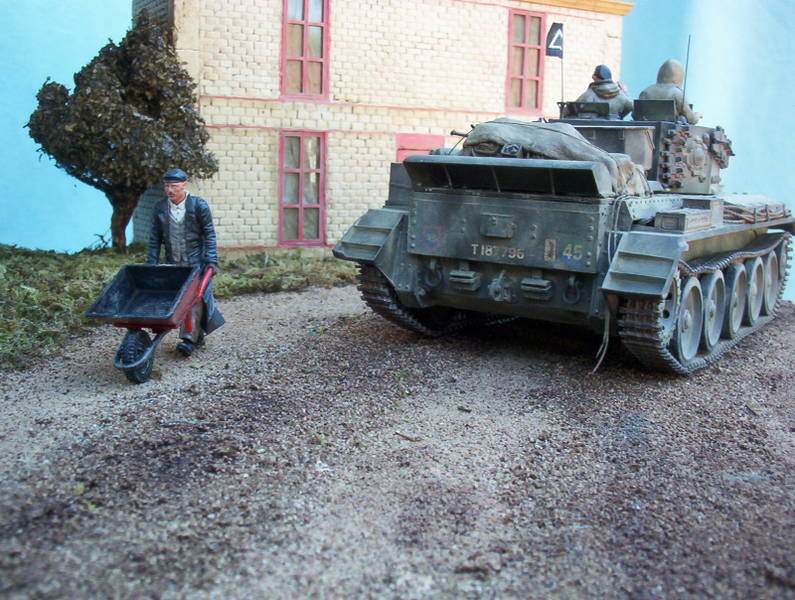
And last but not least, the sails. They are completely made from balsa wood sticks and engineered from an example from The Dutch Windmill Site. I made them in exactly the same method with the exception of the Pole End. I cut and shaped strips from a lead sheet, gluing them in place and then painting them. For the furled sail cloth, I used my handy tarp method and made the correct sized sails with the cord inserted and just twisted them up as they normally would be on a real windmill. Finally, to give the proper credit, I eventually found the original photo with the caption Cromwell tanks of the First polish Armored Division attached to the 1st Canadian Army-Photo research by Dennis Berkin. I enjoyed this project and hope you can find some tip or method in this description that might help you on future projects!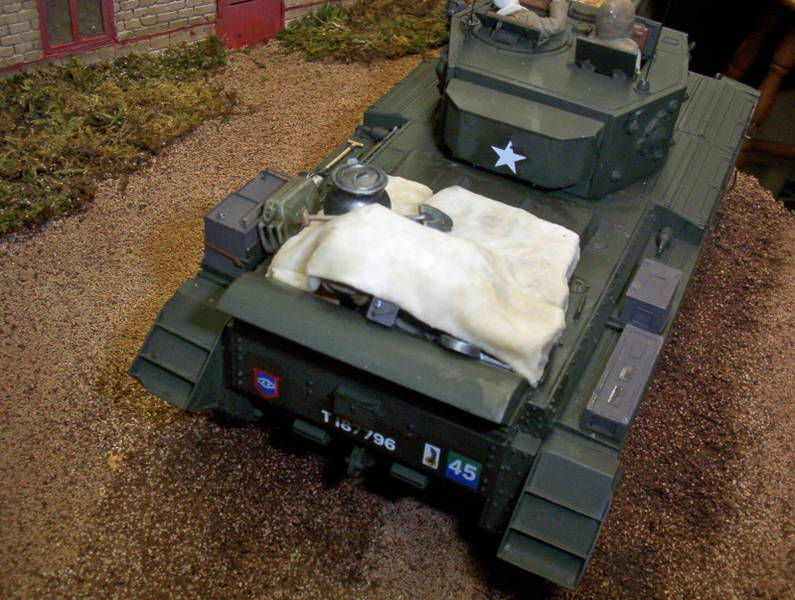


About the Author


Comments
very impressive work. stunning job on everything; from the mill to the tanks and figures.
-Mike
SEP 26, 2007 - 04:19 PM
I guess I can imagine the work that it takes to get such an accuracy! I love such things and it's just looking absolutely great! Thanks for sharing the process in such a detailled way as well.
Great work! I hope you will present this nice piece of work in public once in a while...!?
SEP 26, 2007 - 08:22 PM

Amazing work, one to be proud of for sure!
I'd never even contemplate a dio on this scale (mainly as i'd have no-where to put something so huge!) so a lot of respect for all the hard work and skill that has gone into this.
A real beauty, and something a bit different, well done.
James
SEP 26, 2007 - 08:27 PM

I am so happy this became a feature. I love seing such a bold building get a permanent home.
Well done.
SEP 26, 2007 - 10:04 PM

The finished piece turned out looking fantastic Bob.
Excellent work.
SEP 26, 2007 - 10:32 PM
Wow, just gorgeous! Brings back memories of a lot of time I spent in Holland 6-7 years ago! This is really superb and impressive! Good show!
SEP 27, 2007 - 04:57 PM

Thanks everyone for the kind remarks.
I still stand by the fact I couldn't have done this without the great members on Armorama helping out.
Thanks again,
Bob
SEP 30, 2007 - 10:53 AM
Copyright ©2021 by Bob Card. Images and/or videos also by copyright holder unless otherwise noted. The views and opinions expressed herein are solely the views and opinions of the authors and/or contributors to this Web site and do not necessarily represent the views and/or opinions of Armorama, KitMaker Network, or Silver Star Enterrpises. All rights reserved. Originally published on: 2007-09-26 00:00:00. Unique Reads: 26508

WEB HOSTING BY


Copyright ©2021 Armorama and Kitmaker Network, a subsidiary of Silver Star Enterprises
All Rights Reserved. Please read our Conditions of Use and Privacy Policy.
All Rights Reserved. Please read our Conditions of Use and Privacy Policy.