

1⁄35Sd.Kfz. 250/1 Neu
12
Comments
Exterior Hull
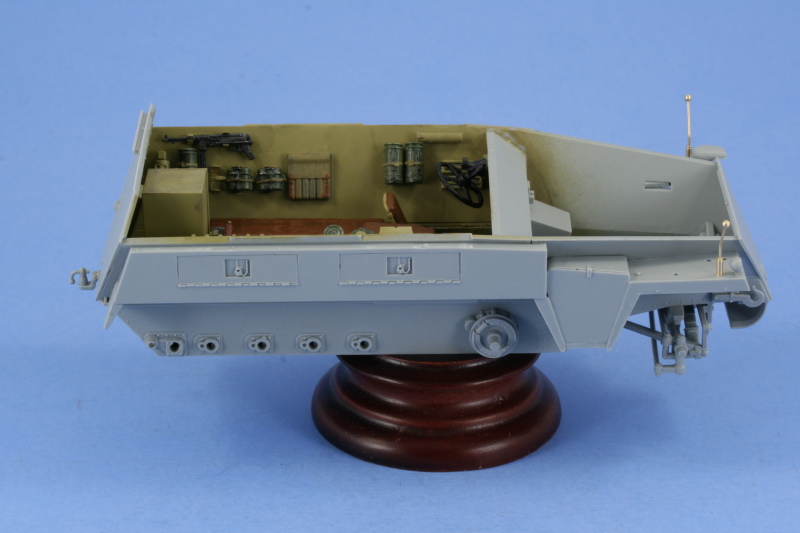
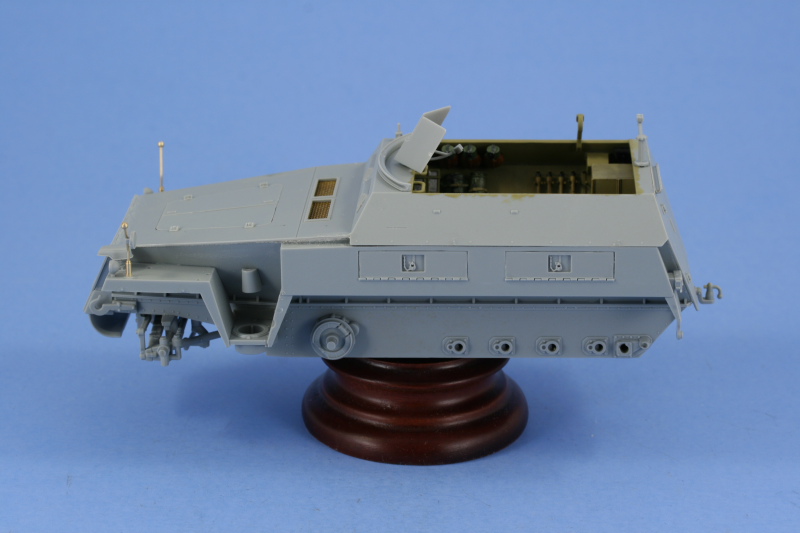
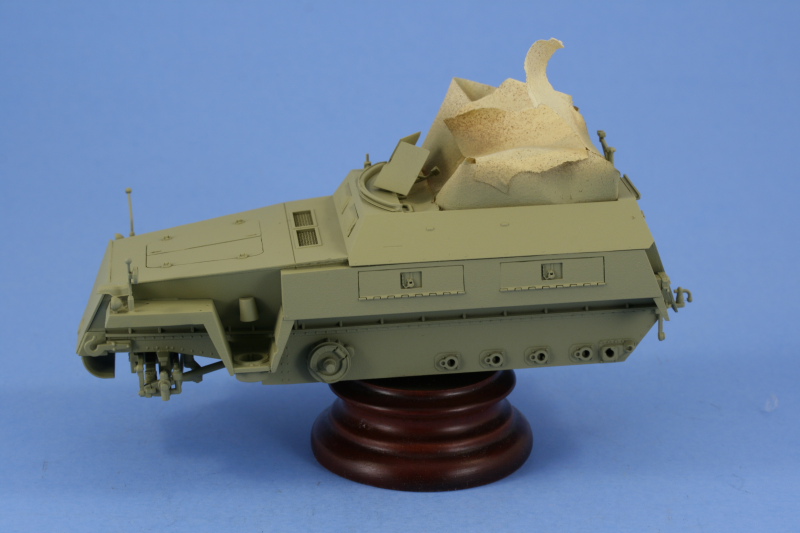
With the interior largely in place, the next step was to install the exterior details and hull top. The left and right side fenders were installed along with their respective stowage boxes. I opted to close up all 4 boxes and also chose the kit-supplied brass width indicators for the front fenders. These were bent to shape with a pair of needle-nose pliers using the kit parts as a bending guide. The brass indicators however arent the same diameter at the base as the original kit parts and needed a little help to install properly. I rolled out two small balls of Aves Apoxysculpt 2-part putty and applied them to the underside of each fender then used CA gel to glue the indicators into the putty as a solution. Due to the nature of the one-piece hull top design, it has a tendency to bow slightly in the middle and since its vital to get an even join front-to-back, I opted to use several strategically placed rubber bands to help. I started at the back, using the same glue combination as with the hull sides, and worked my way forward being sure to get the glue in first and then add the rubber bands after. Once it had set up, the bands were removed and the remaining details added in the form of the engine access doors and the MG mounts. The forward mount splinter shield is beveled to make the edges appear more to-scale in thickness at the edges but the bevel is too obvious so I carefully sanded it down using sanding twigs until the whole shield was the same thickness. The forward mount was installed and left movable while the rear mount was glued in place.Painting and Tracks
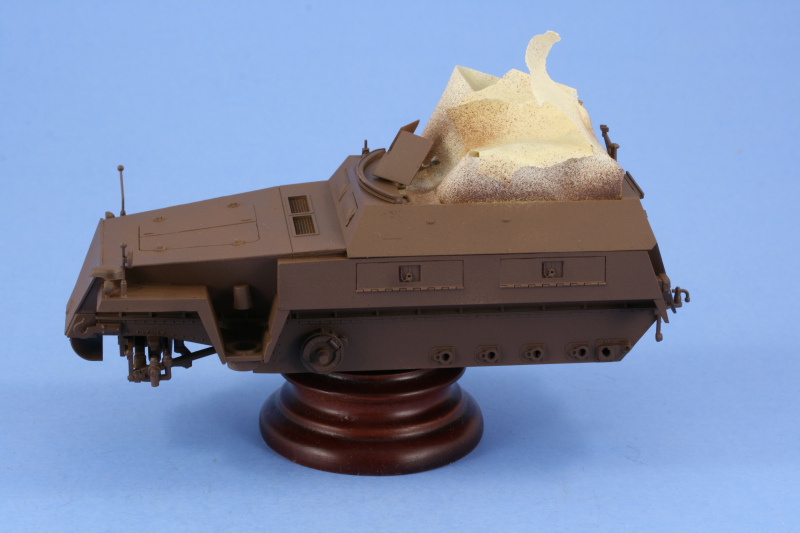
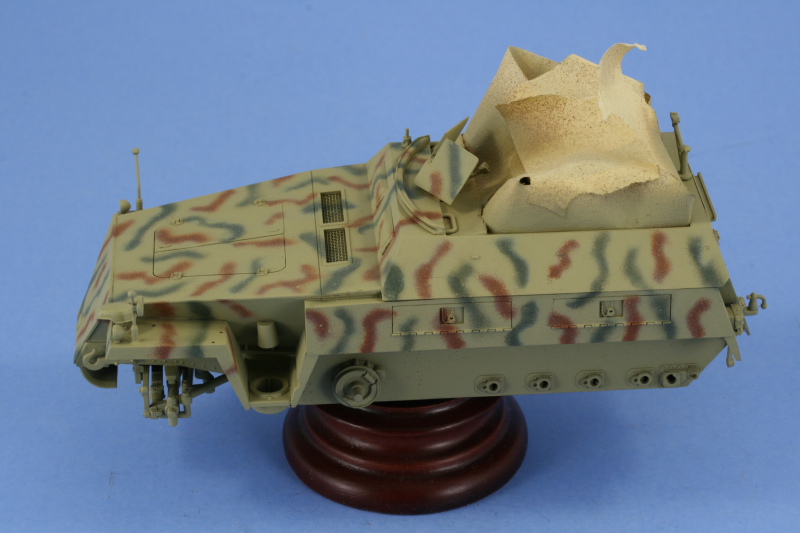
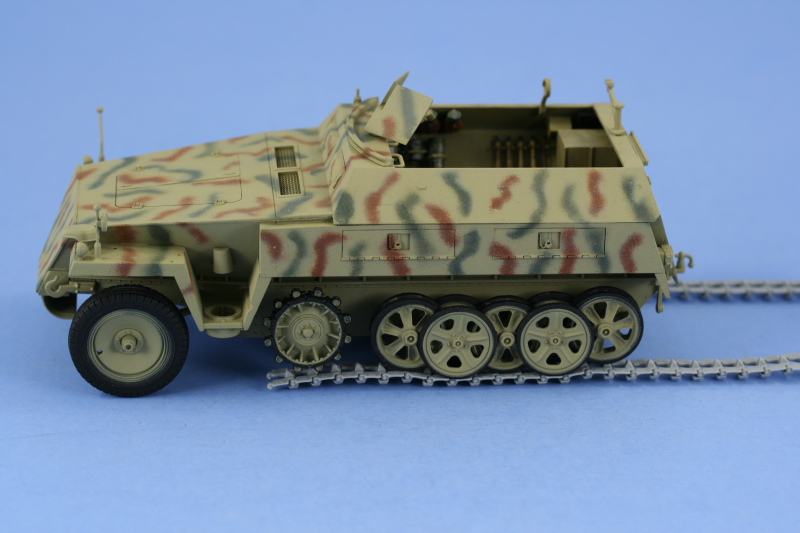
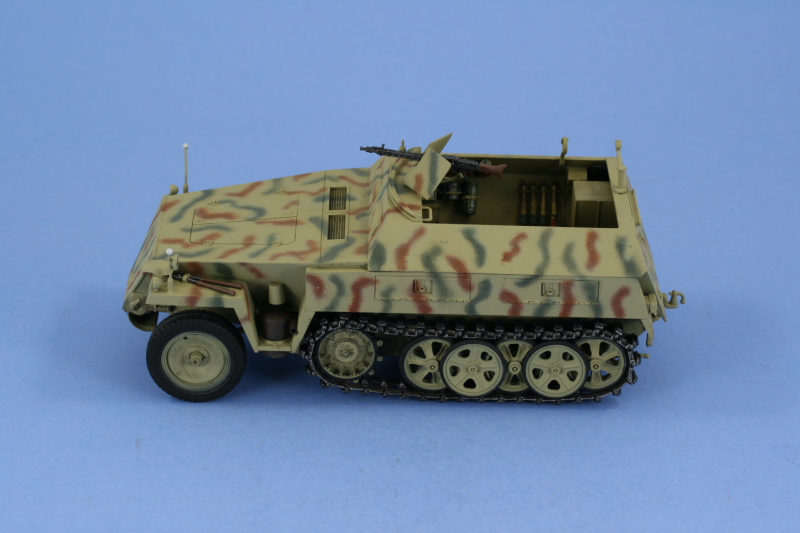
With major construction complete, the interior was carefully masked off with strips of masking tape and a primer coat of Italian Dark Brown applied. This was followed by multiple thin passes of an 80/20 mix of Dunkelgelb/Light Gray to slowly build up the base coat. For the 3-tone camouflage scheme, I chose to use the box art scheme as a guide, and applied a mix of 50/50 Leather/Military Brown first for the red-brown portion and then applied an 80/20 mix of Russian Armor Green/Panzer Gray for the olivgrun portion. Overspray was touched up with the base coat mix where needed and then a very light mist coat of base coat applied by holding the model out at arms length and spraying a quick pass with the airbrush to tie everything together. For the wheels, they were painted first in Flat Black and then a circle template used to paint their hubs with the lightened Dunkelgelb mixture. Now that everything was painted, it was time for the tracks. The 250 tracks are a link-and-block style and, with care, the kit tracks can be assembled fully workable. I did this by first cleaning up the two raised ejector marks on each Magic link and then assembling them as pairs, then joining them into 4s, then 8s, then into single runs of 38 links as directed by the instructions. The suspension arms and road wheels were installed and the runs test-fit to the suspensions with the moveable idler allowing for slight adjustments for just the right sag. The tracks were then painted and prepped and installed along with the sprockets and the main wheels glued down to insure a level stance for the vehicle. The pioneer tools were also painted and installed along with the pot-style muffler to round out the remaining details.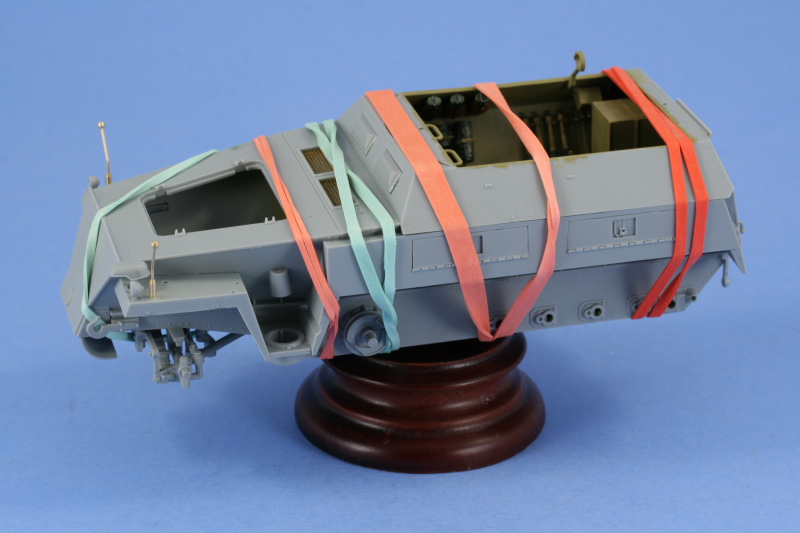

About the Author


FROM: TEXAS, UNITED STATES
Like many, I started out in the hobby as a kid building airplanes to hang from my bedroom cieling. I took a long break from the hobby, returning in 2001 with an interest in armor inspired mostly by online gaming. WW2 armor, 1/35 scale, is my preferred genre with a special taste for the stranger vehi...
Comments
Very nicely done Bill !!! Makes me want to take a crack at my kit
Darryl
JAN 17, 2008 - 01:29 PM

Thanks Bill
accualy what I was thinking wa how to get those nice clean lines on the outside of the visors
Thanks for any help Mark
JAN 18, 2008 - 11:44 AM

Mark,
Ah, sorry, didn't understand the question. If I understand you this time, the outlines around the exterior is achieved using a pin wash. Highly thinned paint applied with a small detail brush and allow the capillary action to pull it in.
JAN 18, 2008 - 12:24 PM
Yes, same idea. I use Burnt Umber thinned about 90% with thinner as my preferred pin wash.
JAN 18, 2008 - 02:58 PM

Bill, WOW ! I just picked one up recently and when I'm ready to build I hope mine turns out well also. Thanks for sharing your 250/1 with all of us.
JAN 30, 2008 - 03:24 PM

Darn Bill I think you have to much "free" time.
Care to shoot up to OK. and build a few for me got a closet and a half full.
Great Job BTW.
Thanks for sharing.
FEB 24, 2008 - 11:53 PM
Thanks Jeff, tempting offer to be sure but I've got a full closet of my own that needs attention!
FEB 25, 2008 - 02:26 AM
Copyright ©2021 by Bill Plunk. Images and/or videos also by copyright holder unless otherwise noted. The views and opinions expressed herein are solely the views and opinions of the authors and/or contributors to this Web site and do not necessarily represent the views and/or opinions of Armorama, KitMaker Network, or Silver Star Enterrpises. All rights reserved. Originally published on: 2008-01-14 00:00:00. Unique Reads: 37979

WEB HOSTING BY


Copyright ©2021 Armorama and Kitmaker Network, a subsidiary of Silver Star Enterprises
All Rights Reserved. Please read our Conditions of Use and Privacy Policy.
All Rights Reserved. Please read our Conditions of Use and Privacy Policy.