

1⁄35Brummbär
19
Comments
Painting and Finishing
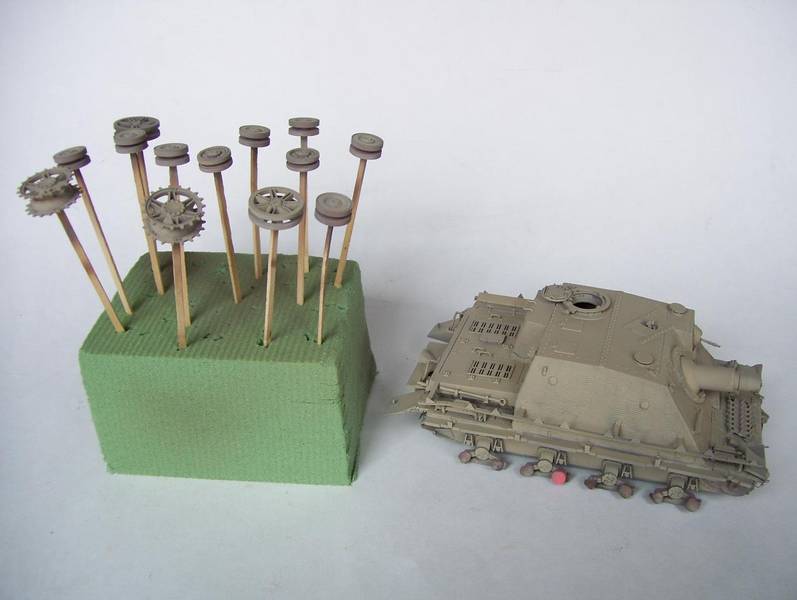
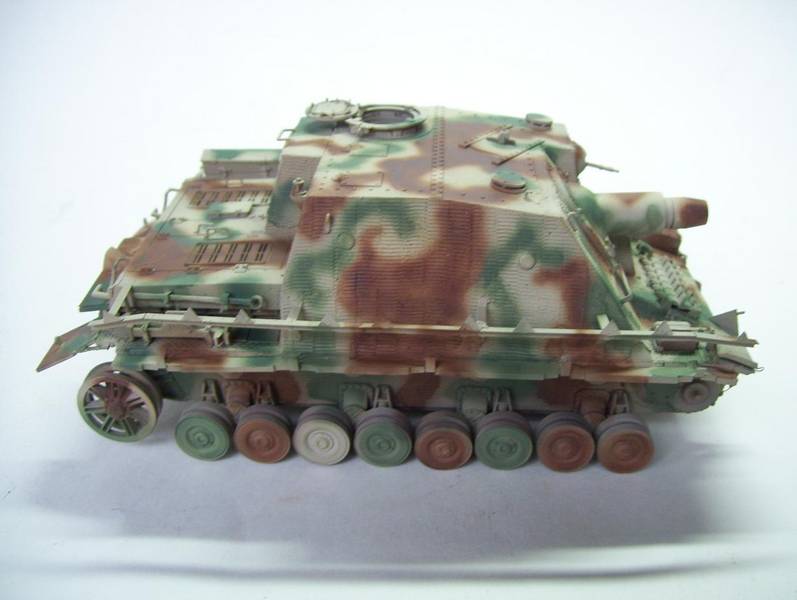
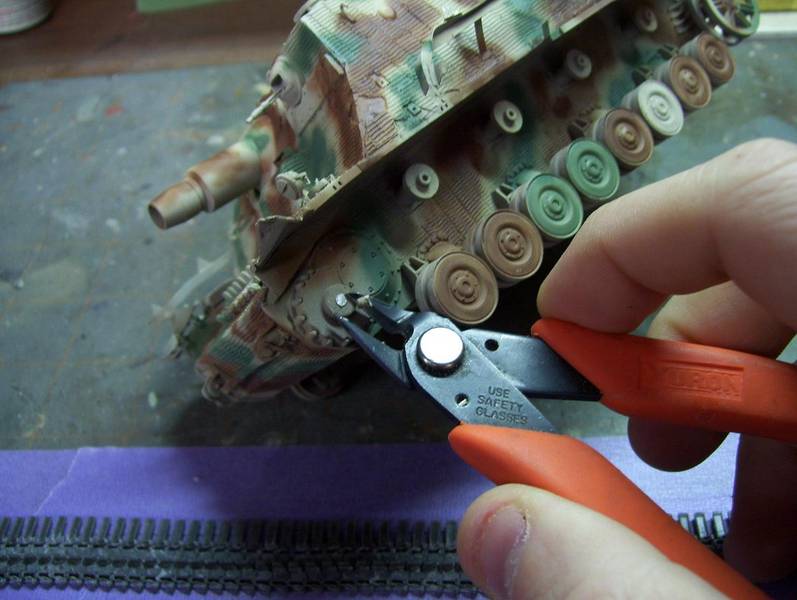
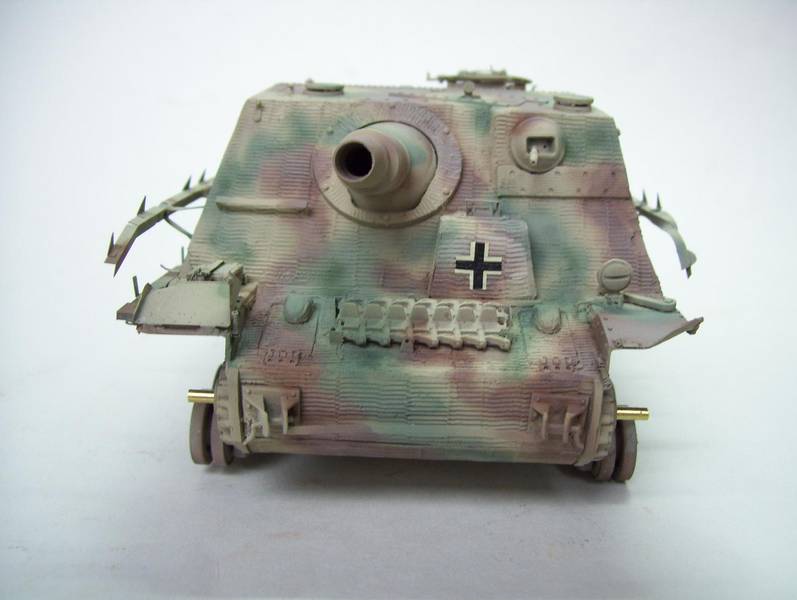
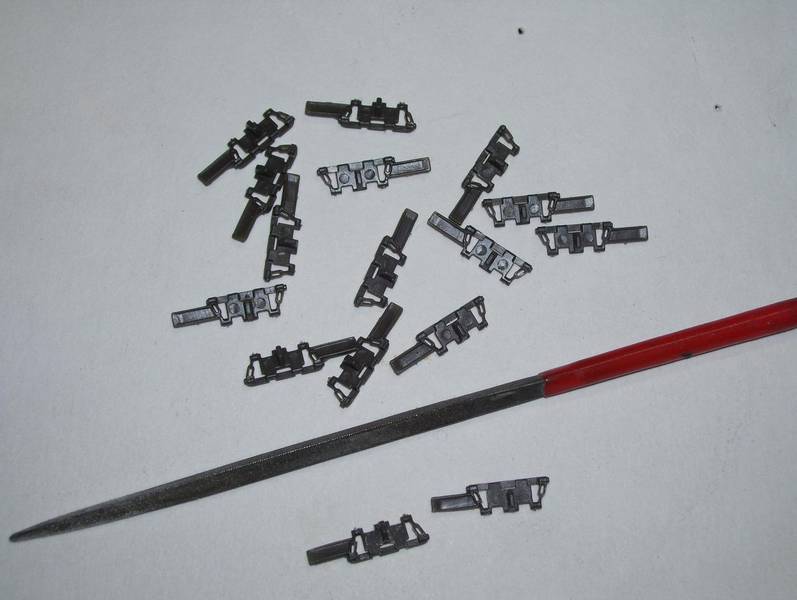
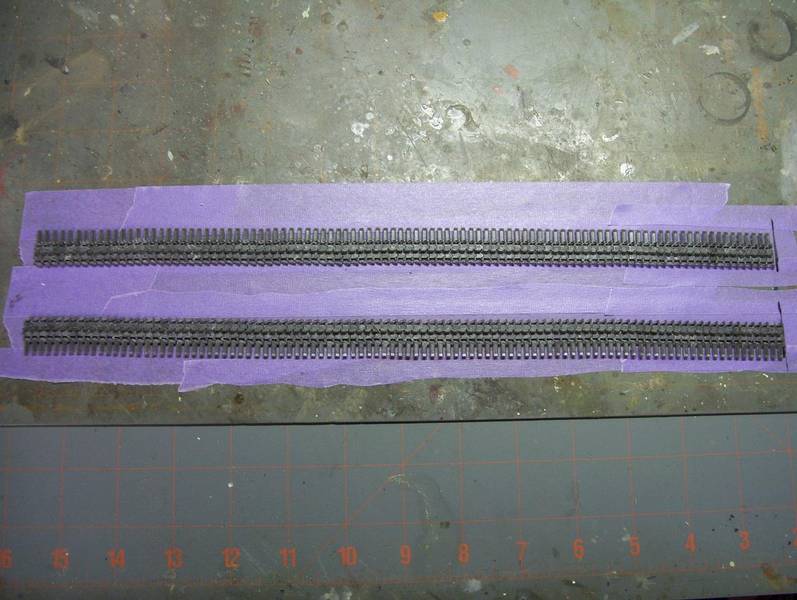
After first masking the wheel posts with Playdough clay, I gave the model a rough initial primer coat of Tamiya XF Red Brown, mainly just to see if there were any flaws needing fixing before laying down the real base coat. I always mix a very light shade of Tamiya XF Dark yellow, mixing probably 30-70 with White. This is to account for scale distortion; the effect of light on a small model, and a technique I learned from Tony Greenlands excellent Panzer Modeling Master Class book. After weathering, it really looks the part of a nicely faded basecoat. The wheels, mounted on cocktail sticks, received the same. Tamiya Red Brown and then Model Master Olivegrun were then added freehand. Lastly, a light misting of Tamiya buff was sprayed over the whole model to tone down the colors. While everything was drying, I started on my DML Winterketten tracks. These were extra-wide tracks designed to reduce the weight of a vehicle over the snow. Im not sure if Brummbars were ever actually fitted with them, but as they seem to have been used on many Pz IV variants, and since the Brummbär was used in the Bulge, I figured it was theoretically sound. Before even starting on them however, every single link had one or two nasty knock-out marks on the inner face, and so with a small needle file, I set aside a long evening of The Outlaw Josey Wales on DVD playing in the background, and committed myself to cleaning them up. In the pics, the ones on the top of the photo are before sanding, the bottom ones are cleaned up. If you have seen my Indy-link track tutorial, you already know my method for doing indy link tracks, but I shall condense the method here. I start by applying two long strips of painters or masking tape with the sticky side up, secured on the sides by tape. I then use tweezers to carefully add as many links as long as I need, and then using a slow-setting glue (Testors Liquid Cement is my preferred type) I paint on a coat of cement, allowing it to settle in between the links. I press them together to aid in the setting, and then step aside for about a half-hour, enough to let them bond, but before they actually stiffen. I can then pick them up and form them around the sprockets, idlers, and wheels; the missing outside return rollers allows me to simply slip the tracks on and off even after they are dry and stiff. I realized, however, that if I were going to be able to follow this method, and place the sprocket onto the hull without glue yet, I would have to strengthen the mount, as the kits simple small post was inadequate. To do this, I first clipped off the post, drilled it out, and then added a brass rod through it, enlarging the hole in the sprocket to fit. This allowed me to then complete the tracks. I wrapped them around the assembled components, and set some sag into them using little balls of facial tissue between them and the hull, and set them aside to stiffen overnight.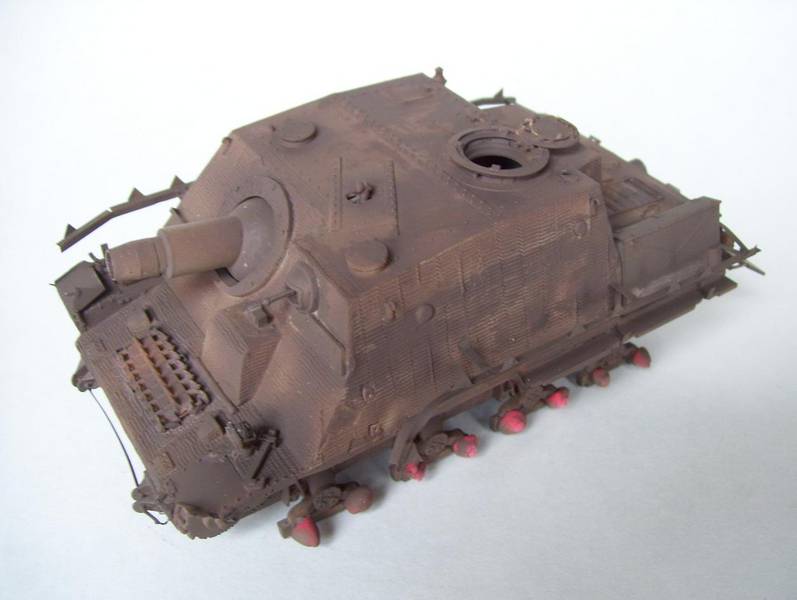


About the Author


FROM: NEW YORK, UNITED STATES
I am a professional musician, and have been a featured author in Finescale Modeler magazine, in Jan 08, Nov 08, Dec 08, and Jan 09. I am also featured in a special issue called "Essential Techniques for the Model Builder". I have won several IPMS "Best of Show" awards, and "Best of the Master Mod...
Comments
Glad you all are enjoying the feature!
Thanks for all your comments and compliments! I do appreciate you taking the time to leave them!
APR 20, 2008 - 05:26 PM

Although I don't build Germen armour, I do have to say you've done an excellent job on the kit and the article.
Thanks for taking the time to write it and sharing it with everyone.
APR 20, 2008 - 05:32 PM
Excellent job, Karl. The finishing of the tracks is especially interesting.
Thanks for your time and effort making the article.
APR 22, 2008 - 11:40 PM
Doog great job as always.I am going to practice the oil dot method on an old panther I have will let you know how it comes out, good or bad.
APR 26, 2008 - 09:36 AM

Karl,
A first rate piece of ART!!! You've captured the look and ruggedness of that beast of a tank. My favorite tank happens to be the Strumtiger and as Steve mentions, "and since that beast isn't entirely dissimilar to your Grizzly", I just had to go out and add one to my stash.
Excellent article with plenty of great photos. This is exactly why I come here to ARMORAMA. Thank you so much for taking the time to share your build with all of us out here on the net. I will be trying some of your techniques on my builds. I especially like your use of figures on your builds. This adds life and scale to your subject vehicle making it all the more interesting.
TOTOALLY INSPIRATIONAL. . . Keep up the excellent work!
-Eddy
APR 27, 2008 - 11:43 AM

Karl,
Awsome job, it is always great to read how you guys pull off those great builds. I am slowly trying to intigrate your techniques to my projects.
Thanks for shareing with the rest of us.
APR 27, 2008 - 10:16 PM
Thanks Andrew and Eddy!
As long as people appreciate them and I can continue to share this great hobby with you all, I'll continue writing these features!
Thanks for the kind comments!
APR 28, 2008 - 08:09 AM
Doog,
Finally had some time to catch up on reading and posts. Love the article and I really liked the detail in it. Thanks!
MAY 14, 2008 - 06:40 AM
Copyright ©2021 by Karl Logan. Images and/or videos also by copyright holder unless otherwise noted. The views and opinions expressed herein are solely the views and opinions of the authors and/or contributors to this Web site and do not necessarily represent the views and/or opinions of Armorama, KitMaker Network, or Silver Star Enterrpises. All rights reserved. Originally published on: 2008-04-17 00:00:00. Unique Reads: 35653

WEB HOSTING BY


Copyright ©2021 Armorama and Kitmaker Network, a subsidiary of Silver Star Enterprises
All Rights Reserved. Please read our Conditions of Use and Privacy Policy.
All Rights Reserved. Please read our Conditions of Use and Privacy Policy.