

1⁄35Brummbär
19
Comments
the art of oil filters
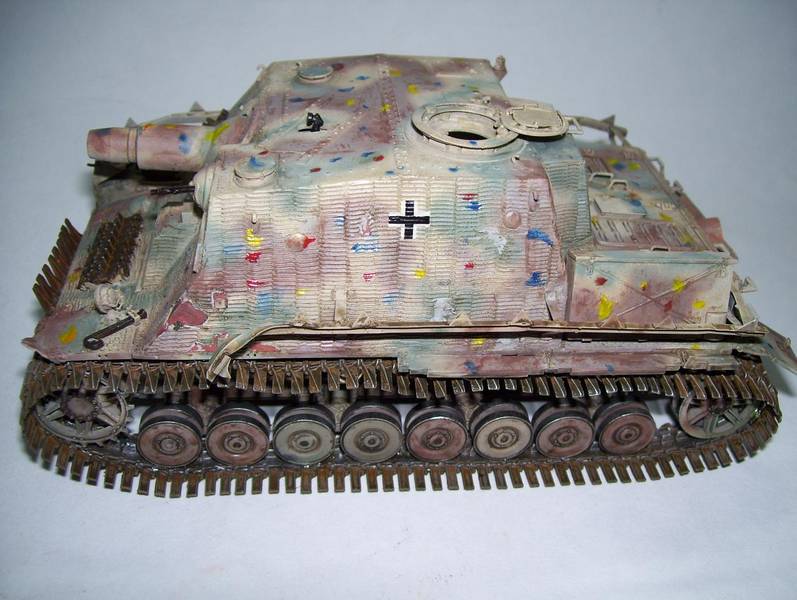
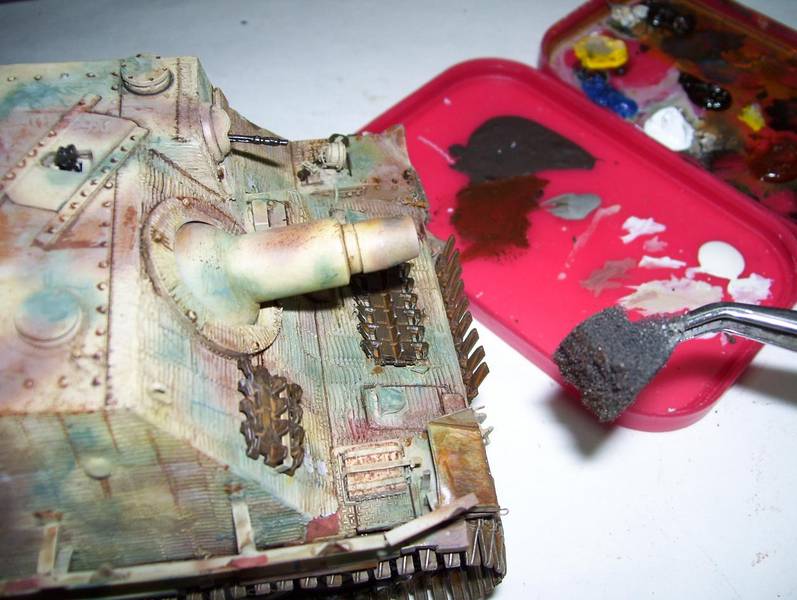
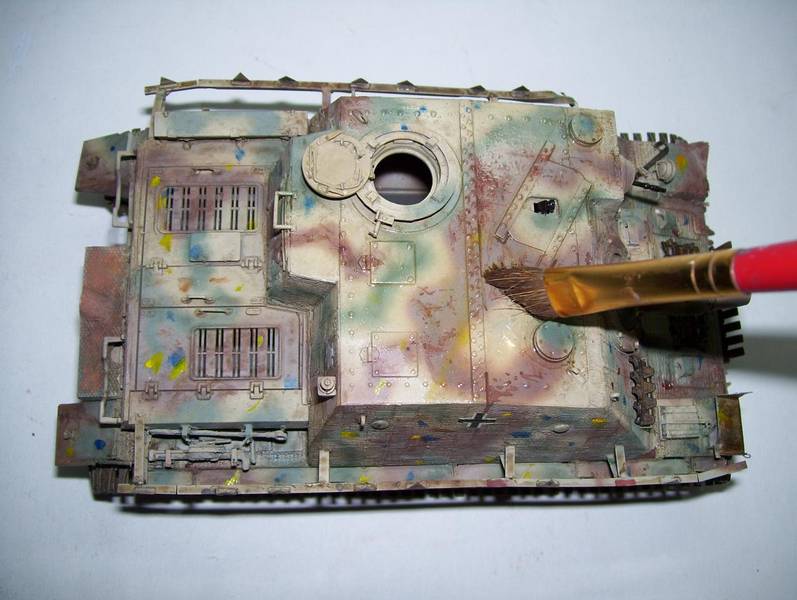
I then proceeded to the Oil Dot Method of adding various assorted filters to the model. This is an intimidating step for some modellers; I have often heard comments like Oh I dont want to risk ruining my whole paint job!but the truth is that its a lot easier and less risky than you might think if you plan correctly. There are three keys to a successful application of this technique: * 1. Choose the right colors stay away from normal weathering wash colors like Raw Umber or Black; what you want are the primary colors like Red, Blue, Yellow, and sometimes, White. The combinations of these will give you all other Secondary hues: Green, Purple, Orange, etc. * 2. The proper amount all you really need is a small dab of paintnotice the distribution and amount of paint I have applied in the photo. I have tried to get a relatively even distribution of all colors, in small amounts-in most cases, merely a thin smear of the color. * 3. Use a LOT of thinner use a wide brush and scrub, scrub, scrub away at the colors until they virtually disappear beneath the brush. Clean the brush if necessary. What you want is a barely-there thin patina of unexpected hues that subtly filter the base colors; they are indeed almost unnoticeable, but can add a great deal of depth to the base colors. Make sure you have adequately dissolved all of the individual dots; you dont want a noticeable splotch of strange color left behind! (You can actually see some yellow blotches on my photos before I corrected themeasy enough to do.) Once that step was finished, I added some more painting details; picking out some flat spots in the zimmerit where it looked like the zimmerit had been abradedI painted them the same light grey as previously used to outline the chips, and washed them with Raw Umber. I then started about doing pin washes all over the entire model, applying either Black oil or Raw Umber with a fine tipped brush on every seam, and around every detail. After this, I applied chipping by dipping a torn piece of fine grey packing foam into a palette of Raw Umber and Black oil paint mixed with steel, and then, after dabbing most of it off onto a paper towel, applying it to the model on high spots and edges. This is easy to overdo; again, it can be a somewhat intimidating step but if you follow the less is more maxim, youll find yourself with a nice beat up look to your finish. This can be done with Scotch Brite sponge as well, or even with an old brush. The tools received a somewhat heavier treatment than the hull. I added the spare wheels on the rear, choosing to paint them in primer red only because I saw someone else depict them this way and thought they looked cool. Of course, dont forget--you wouldnt weather the rims with steel!

About the Author


FROM: NEW YORK, UNITED STATES
I am a professional musician, and have been a featured author in Finescale Modeler magazine, in Jan 08, Nov 08, Dec 08, and Jan 09. I am also featured in a special issue called "Essential Techniques for the Model Builder". I have won several IPMS "Best of Show" awards, and "Best of the Master Mod...
Comments
Glad you all are enjoying the feature!
Thanks for all your comments and compliments! I do appreciate you taking the time to leave them!
APR 20, 2008 - 05:26 PM

Although I don't build Germen armour, I do have to say you've done an excellent job on the kit and the article.
Thanks for taking the time to write it and sharing it with everyone.
APR 20, 2008 - 05:32 PM
Excellent job, Karl. The finishing of the tracks is especially interesting.
Thanks for your time and effort making the article.
APR 22, 2008 - 11:40 PM
Doog great job as always.I am going to practice the oil dot method on an old panther I have will let you know how it comes out, good or bad.
APR 26, 2008 - 09:36 AM

Karl,
A first rate piece of ART!!! You've captured the look and ruggedness of that beast of a tank. My favorite tank happens to be the Strumtiger and as Steve mentions, "and since that beast isn't entirely dissimilar to your Grizzly", I just had to go out and add one to my stash.
Excellent article with plenty of great photos. This is exactly why I come here to ARMORAMA. Thank you so much for taking the time to share your build with all of us out here on the net. I will be trying some of your techniques on my builds. I especially like your use of figures on your builds. This adds life and scale to your subject vehicle making it all the more interesting.
TOTOALLY INSPIRATIONAL. . . Keep up the excellent work!
-Eddy
APR 27, 2008 - 11:43 AM

Karl,
Awsome job, it is always great to read how you guys pull off those great builds. I am slowly trying to intigrate your techniques to my projects.
Thanks for shareing with the rest of us.
APR 27, 2008 - 10:16 PM
Thanks Andrew and Eddy!
As long as people appreciate them and I can continue to share this great hobby with you all, I'll continue writing these features!
Thanks for the kind comments!
APR 28, 2008 - 08:09 AM
Doog,
Finally had some time to catch up on reading and posts. Love the article and I really liked the detail in it. Thanks!
MAY 14, 2008 - 06:40 AM
Copyright ©2021 by Karl Logan. Images and/or videos also by copyright holder unless otherwise noted. The views and opinions expressed herein are solely the views and opinions of the authors and/or contributors to this Web site and do not necessarily represent the views and/or opinions of Armorama, KitMaker Network, or Silver Star Enterrpises. All rights reserved. Originally published on: 2008-04-17 00:00:00. Unique Reads: 35653

WEB HOSTING BY


Copyright ©2021 Armorama and Kitmaker Network, a subsidiary of Silver Star Enterprises
All Rights Reserved. Please read our Conditions of Use and Privacy Policy.
All Rights Reserved. Please read our Conditions of Use and Privacy Policy.