

1⁄35Brummbär
19
Comments
ruining that beautiful paint job
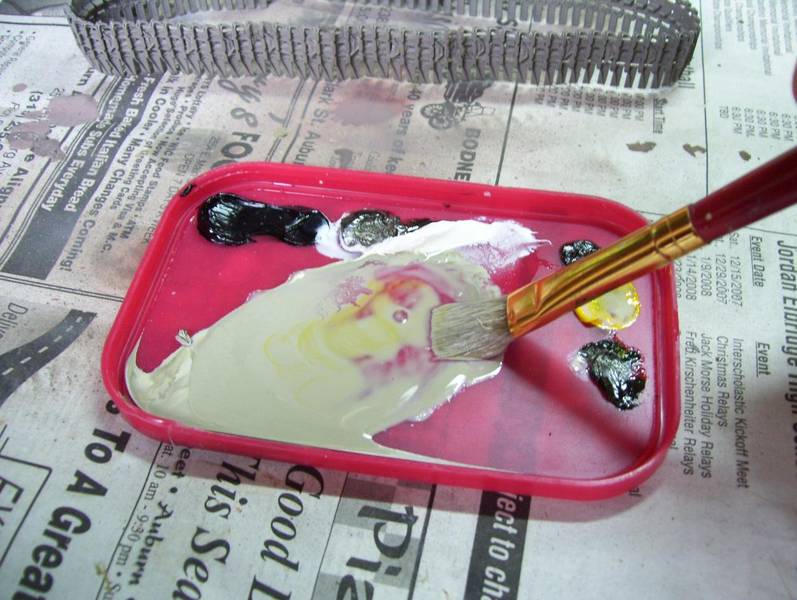
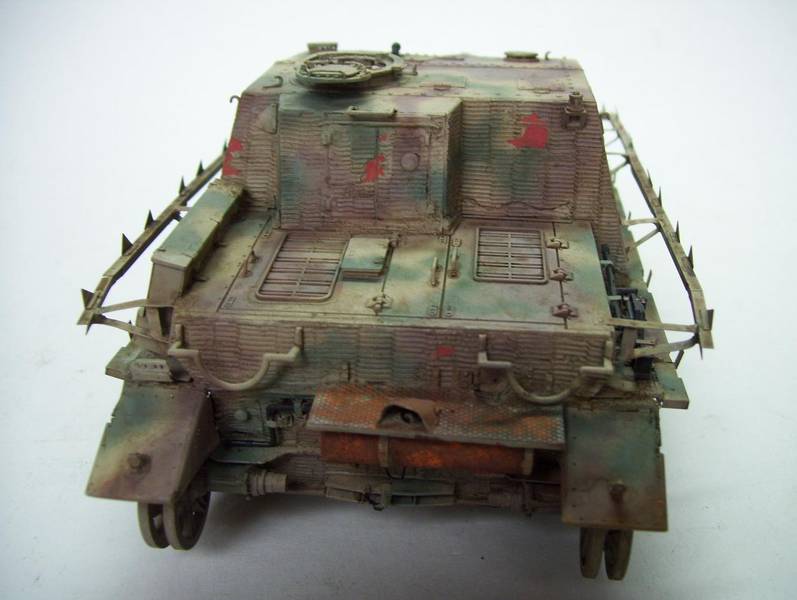
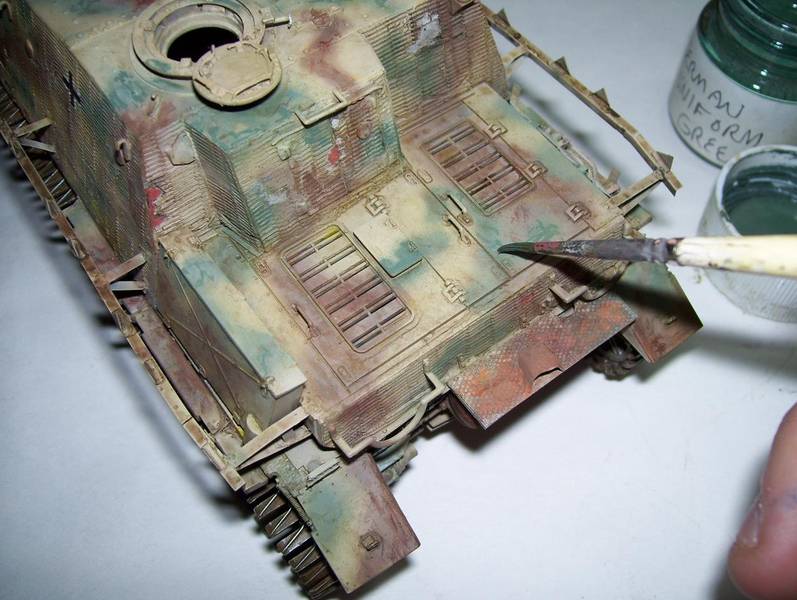
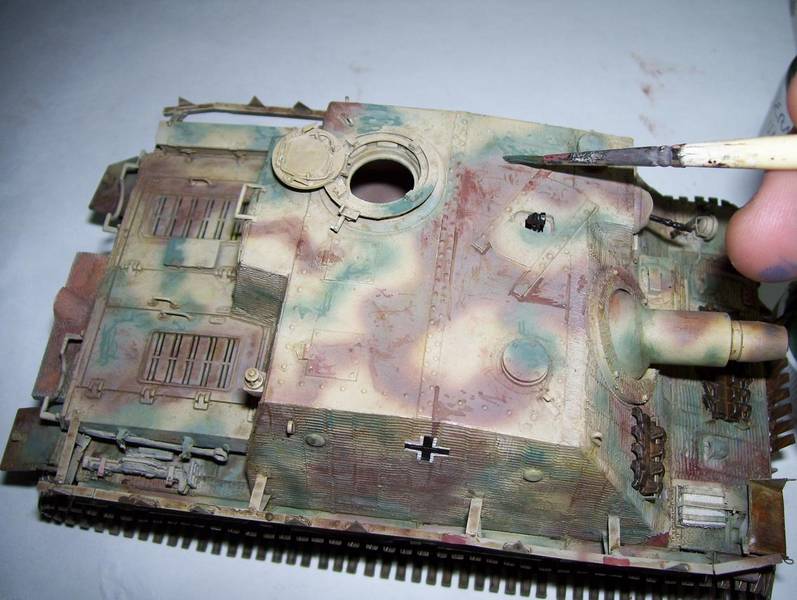
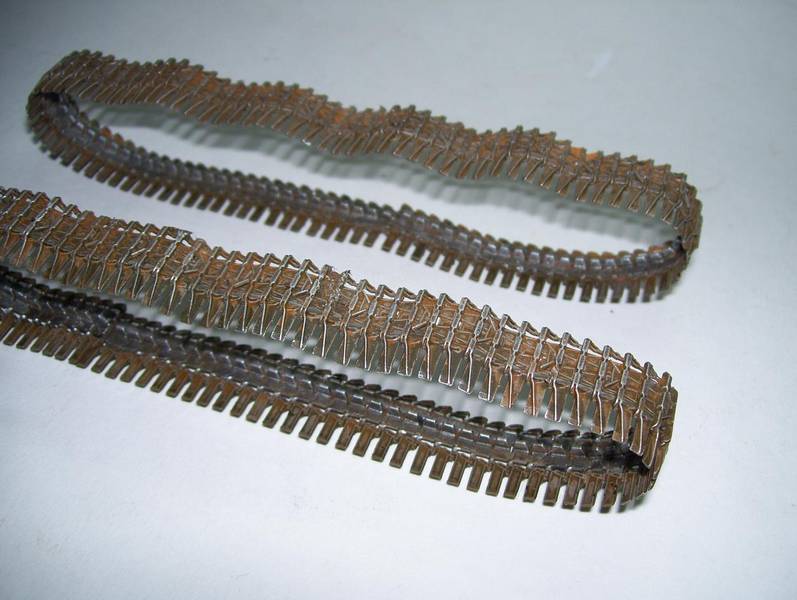
I started with an initial wash of a light tan oil mix. I use Windsor and Newton oil paints, and mixed Raw Umber and White, with a tiny dab of Yellow, to an appropriate shade. This was liberally applied over the whole model with a wide soft brush, and the excess dabbed off with a paper towel. At this point, I added some simple markings to the hull; two German crosses on the hull sides, and one on the front drivers hatch. I may be unique in the way that I apply my decalsI never opt for the coat of Future so favoured by many modellers. I simply apply the decals to the painted model, and, using a wide, soft brush dipped in Solvaset decal setting solution, I roll the brush onto the decal from front to back, applying gentle pressure with my fingers, to help the decal snuggle down. The hundreds of bristles seem to act as a kind of contour gauge, helping to press the softened decal into all irregularities that may be presenteven on zimmerit. I have never had a problem with silvering with 99% of decals when using this method. I brushed a light coat of acrylic flat over the decals to dull their sheen. I then went about painting some details before proceeding. I painted some of the chipped zimmerit areas in red primer, using, and outlining them with, POLLY SCALE Model Railroad Colors #414293 Zinc Chromate Primer, and painting the edges of the zimmerit in light grey. I painted the muffler by first laying down a base of dark brown, and when that was dried, stippling various rust colors all together for variety. Finally, I applied some pastels in various rust colors, working from dark brown to bright orange. The spare tracks were finished in the same manner. I then applied a wash of Raw Umber. At this point I had a dirty, faded patina to the model. I wanted to try to simulate the kind of scuffing you might see in a dusty coat, so I used thinned tinctures of the camo colors and stabbed and stippled them onto the areas where I wanted to show wear. I painted the wheel rims in dark metallic steel enamel--I custom mix this from Testors Steel and Black oil paintand then highlighted the edges with bright silver. I then turned my attention to painting the tracks. I started with a base coat of Tamiya Dark Earth. I then added successive washes of Raw Umber, Black, and Rust. I then drybrushed a dark metallic steel over both sides, and then further highlighted the high points on the outside with bright silver enamel. The interior track faces were also given special attention, with dark metallic gray scrubbed onto the insides where the wheels would have worn down the metal, and the track guides also receiving bright silver to add depth. The tracks were then added, first slipping them into the sprocket teeth, and the idler grooves, and then sliding the whole assembly onto the lower hull. The outside return rollers were added later when I remembered them!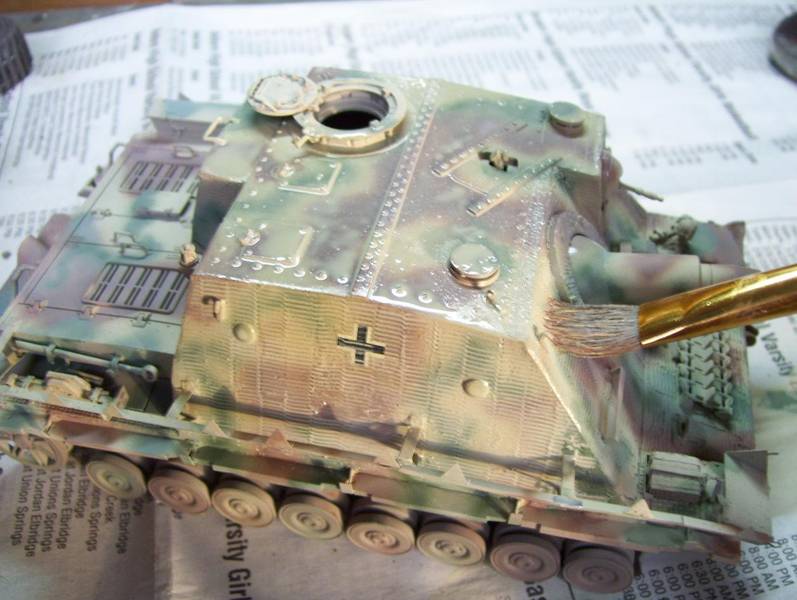
About the Author


FROM: NEW YORK, UNITED STATES
I am a professional musician, and have been a featured author in Finescale Modeler magazine, in Jan 08, Nov 08, Dec 08, and Jan 09. I am also featured in a special issue called "Essential Techniques for the Model Builder". I have won several IPMS "Best of Show" awards, and "Best of the Master Mod...
Comments
Glad you all are enjoying the feature!
Thanks for all your comments and compliments! I do appreciate you taking the time to leave them!
APR 20, 2008 - 05:26 PM

Although I don't build Germen armour, I do have to say you've done an excellent job on the kit and the article.
Thanks for taking the time to write it and sharing it with everyone.
APR 20, 2008 - 05:32 PM
Excellent job, Karl. The finishing of the tracks is especially interesting.
Thanks for your time and effort making the article.
APR 22, 2008 - 11:40 PM
Doog great job as always.I am going to practice the oil dot method on an old panther I have will let you know how it comes out, good or bad.
APR 26, 2008 - 09:36 AM

Karl,
A first rate piece of ART!!! You've captured the look and ruggedness of that beast of a tank. My favorite tank happens to be the Strumtiger and as Steve mentions, "and since that beast isn't entirely dissimilar to your Grizzly", I just had to go out and add one to my stash.
Excellent article with plenty of great photos. This is exactly why I come here to ARMORAMA. Thank you so much for taking the time to share your build with all of us out here on the net. I will be trying some of your techniques on my builds. I especially like your use of figures on your builds. This adds life and scale to your subject vehicle making it all the more interesting.
TOTOALLY INSPIRATIONAL. . . Keep up the excellent work!
-Eddy
APR 27, 2008 - 11:43 AM

Karl,
Awsome job, it is always great to read how you guys pull off those great builds. I am slowly trying to intigrate your techniques to my projects.
Thanks for shareing with the rest of us.
APR 27, 2008 - 10:16 PM
Thanks Andrew and Eddy!
As long as people appreciate them and I can continue to share this great hobby with you all, I'll continue writing these features!
Thanks for the kind comments!
APR 28, 2008 - 08:09 AM
Doog,
Finally had some time to catch up on reading and posts. Love the article and I really liked the detail in it. Thanks!
MAY 14, 2008 - 06:40 AM
Copyright ©2021 by Karl Logan. Images and/or videos also by copyright holder unless otherwise noted. The views and opinions expressed herein are solely the views and opinions of the authors and/or contributors to this Web site and do not necessarily represent the views and/or opinions of Armorama, KitMaker Network, or Silver Star Enterrpises. All rights reserved. Originally published on: 2008-04-17 00:00:00. Unique Reads: 35653

WEB HOSTING BY


Copyright ©2021 Armorama and Kitmaker Network, a subsidiary of Silver Star Enterprises
All Rights Reserved. Please read our Conditions of Use and Privacy Policy.
All Rights Reserved. Please read our Conditions of Use and Privacy Policy.