

1⁄35Bison Bashing
12
Comments
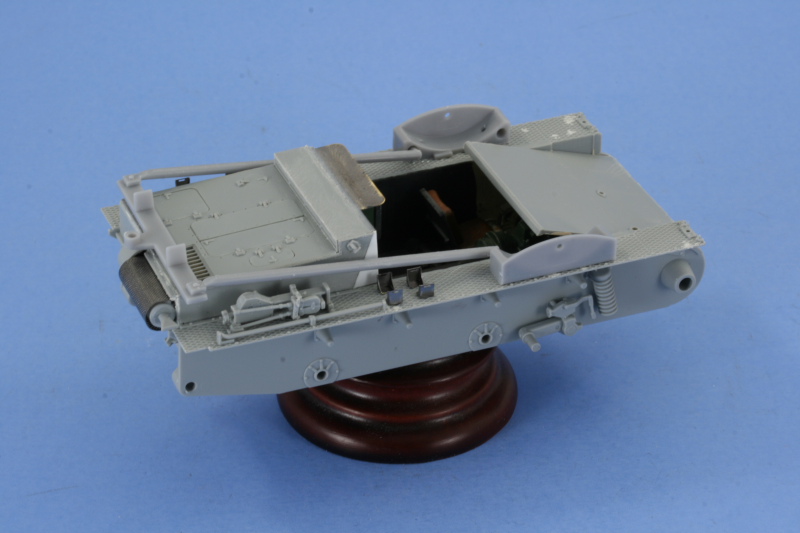
Fenders and Hull Details
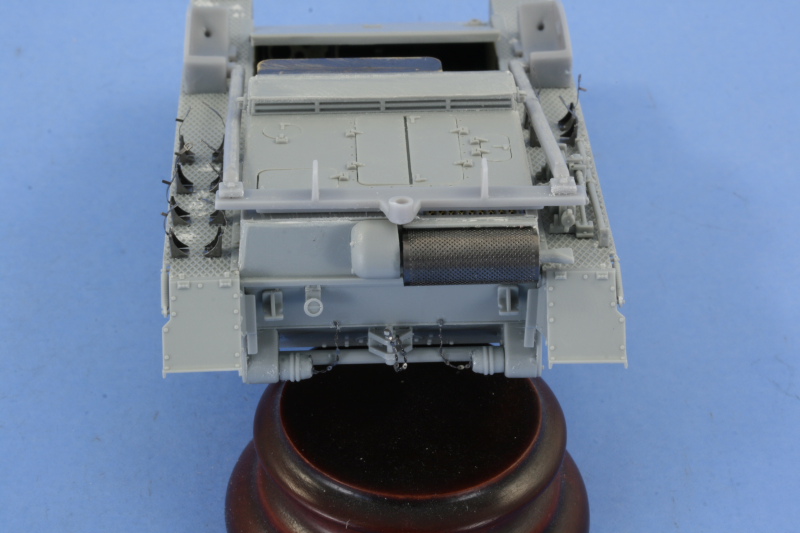
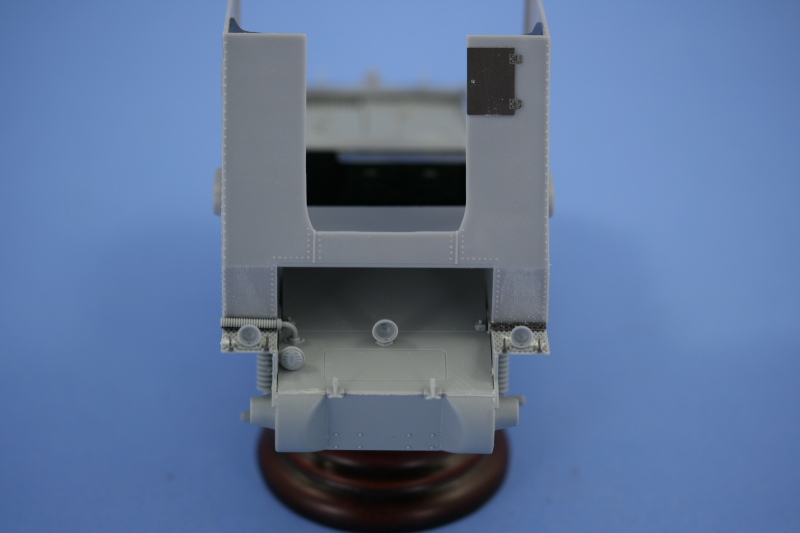
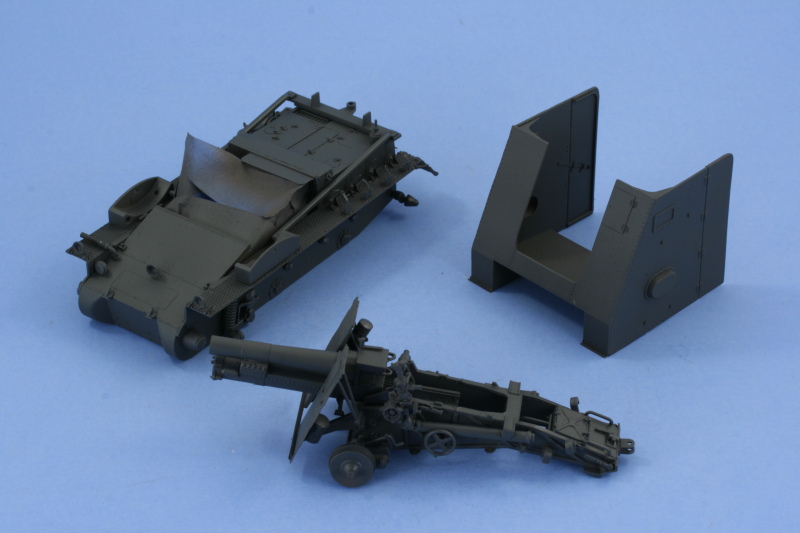
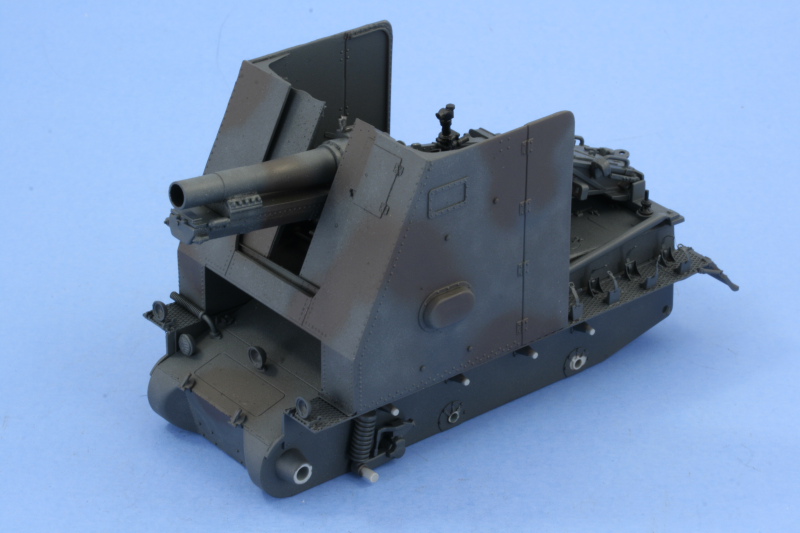
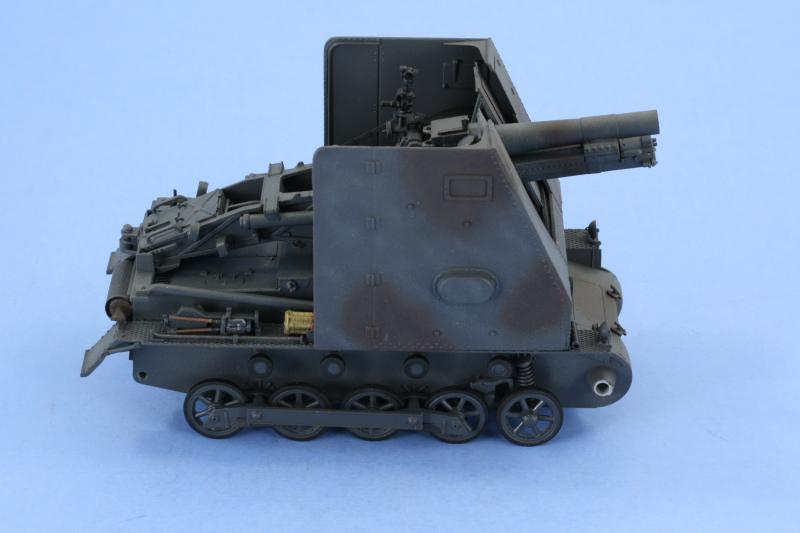
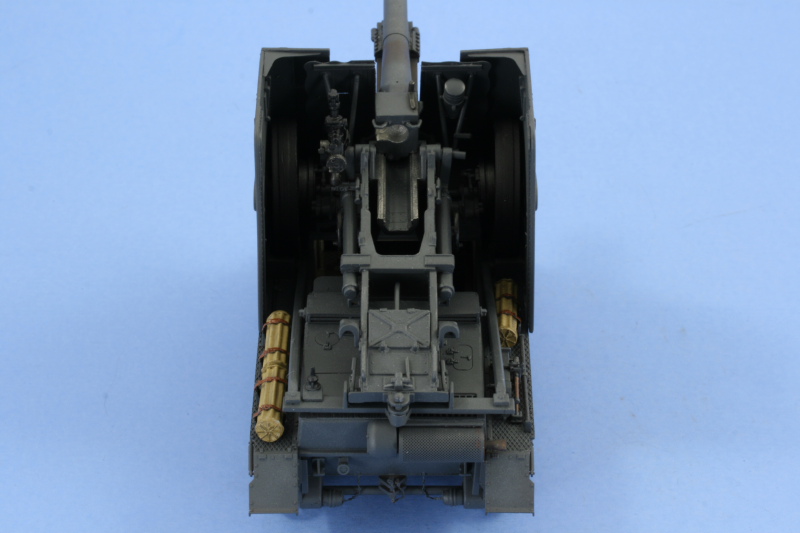
Using the corrected superstructure as a guide, the large curved wheel boxes were installed on both fenders along with the brace arms for the rear trail mount on the engine deck. The fender details were added in the form of the integrated jack and wire cutters, the pry bar, and a set of ready ammunition brackets on the right side. The left side also received brackets for 2 more ready rounds. Test fits with the TMD wicker rounds showed it was possible to go ahead and install the belts, so these were added now to make it easier to paint the rounds off the vehicle and install later. The rear hull plate received some additional details from the Eduard set and I removed the Notek light Id installed earlier and replaced it with the simpler brake light to be consistent with the France 1940 layout. The PE dog chain retainers for the idler caps were given some 3-D characteristics by carefully counter-bending the links using two pairs of tweezers. The front hull also received its details in the form of the 3 headlamps, towing points, and siren. The front fenders were left off as was often done with the Pz Is and the Eduard latching brackets carefully installed with a touch of CA gel. The Alan superstructure had its molded on feet brackets removed and replaced with the Eduard supplied items, necessary for detail purposes but also to allow the brake vent hose to fit properly. The DML hose was modified by cutting it down to size, installing it at a 90-degree angle, and drilling out the now solid end with a pin vise.Initial Painting
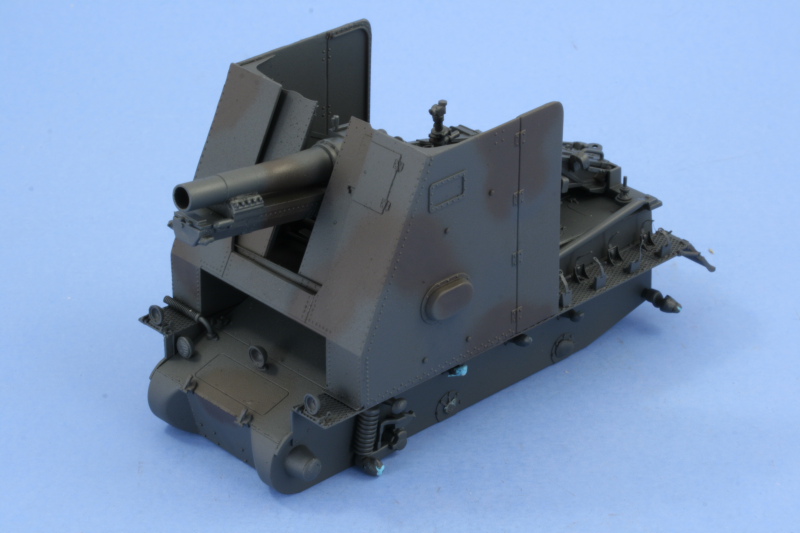
To prep for the painting process, all of the suspension elements were removed from the sprues and cleaned up. Throughout the construction phase, Id kept the vehicle modular by not installing the gun or the superstructure to the hull and the hull interior was protected with strips of painters blue tape. Small balls of blue tack poster putty were used to protect all of the mount points for the suspension to avoid complications and the need to scrape off paint in later stages. All paints mentioned from this point forward are Testors Model Master enamels unless otherwise noted. A primer coat of Italian Dark Brown was applied as the first step to check all the putty work and also to insure no bits of bare plastic were present. Some small corrections were needed and then a base coat of Panzer Schwarzgrau was applied in very thin, multiple passes. As a May-June 1940 vehicle, the 2/3 Panzer Gray and 1/3 Dark Brown scheme is called for and I applied the Dark Brown pattern using Schokoladenbraun at low pressure to minimize over spray. After some minor touch-ups, the Panzer Gray areas received some additional color variation by spraying a mix of 80/20 Panzer Schwarzgrau/Light Gray very sparingly in a somewhat random fashion to finish the major paint work.Details and Tracks
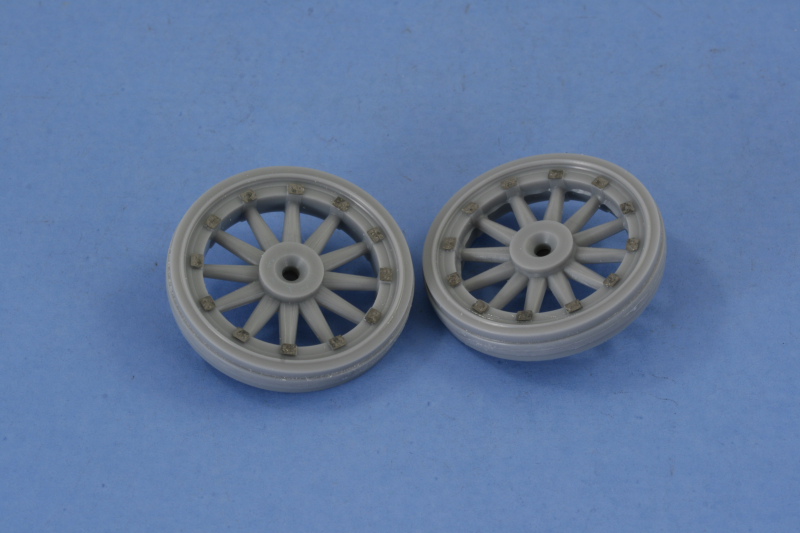
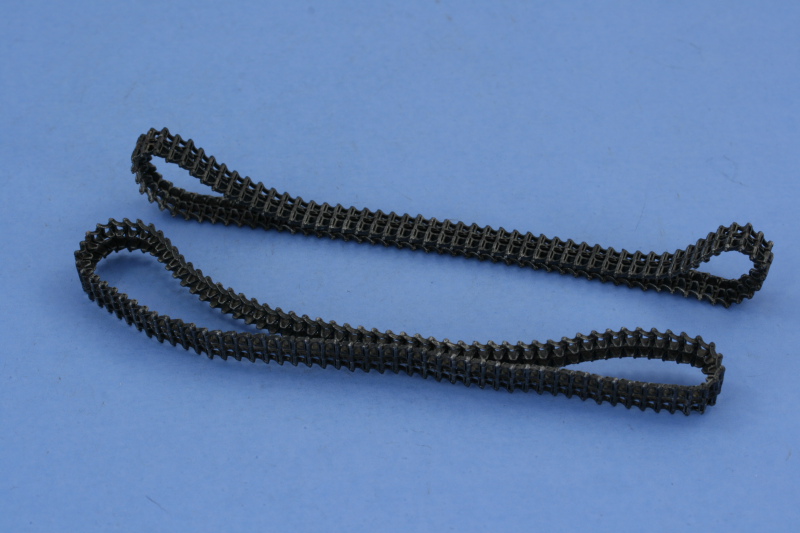
The suspension was detailed and installed, leaving the idlers and sprockets off until it came time to install the tracks. The suspension installation was somewhat fragile and the alignment needed to be just so on both sides. The suspension was allowed to set up overnight on a level surface before the weight of the gun and superstructure were added. The wicker rounds were painted and installed and secured in place with their leather straps on both sides. The pioneer tools on the right side were detailed in place, using a series of small brushes and lots of patience, as was the muffler/exhaust. The gun breech was painted carefully with Steel with additional Steel dry-brushed on the recoil sled rails to simulate its bare metal wear. The Model Kasten tracks were the next hurdle. After a week of working on them while watching TV in the evenings to break up the tedium, I had both runs of 101 links constructed. Each run was base coated with Metalizer Non-buffing Gunmetal, dry-brushed with Steel, and given a light wash of Burnt Umber before being joined into a single track loop for installation. This was essential due to the design of the MK tracks which have one pin molded on each link with the second pin separate. The tracks were installed along with the sprockets and idlers and adjusted to produce a desired amount of sag, then carefully tack glued into place on the return rollers and idlers to keep them secured.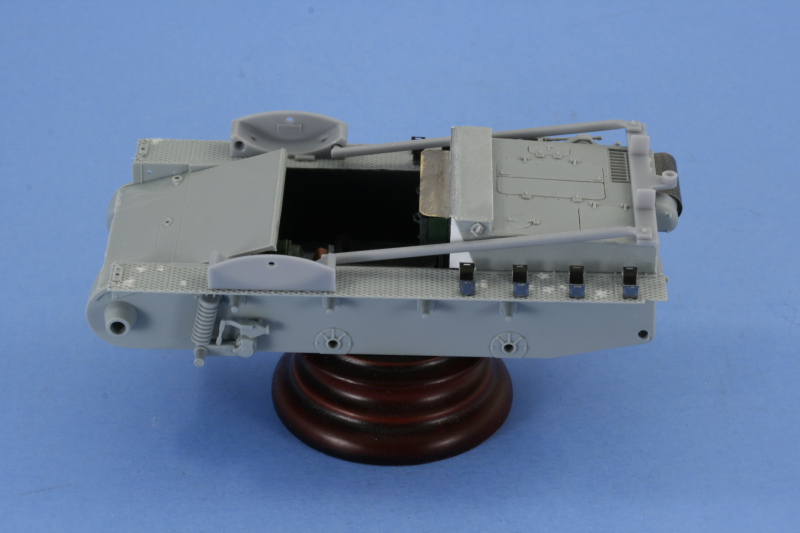


About the Author


FROM: TEXAS, UNITED STATES
Like many, I started out in the hobby as a kid building airplanes to hang from my bedroom cieling. I took a long break from the hobby, returning in 2001 with an interest in armor inspired mostly by online gaming. WW2 armor, 1/35 scale, is my preferred genre with a special taste for the stranger vehi...
Comments


Great job!
I would like to get some subjects by Alan - above all the Pz.II J - but the price is around 40!!!
MAY 04, 2008 - 05:47 AM

Thanks DJ, the radio was a fun item to work on even though you'll need a dental mirror to see it on the finished vehicle, it's there!
Gary, given the fact that DML and Trumpeter have been on an artillery kick lately and the fact that CH has the munitionspanzer version of the Grille out...it may only be a matter of time before a Bison I appears, especially since I spent the time to bash this one together. Same thing happened when I did the Alan Flakpanzer 38(t), so Murphy's Modeling Law could strike again! The Osprey book is a neat one, while its chapter on the Bison I deals with scratch-building one using the Italeri Pzjgr I chassis as the foundation, I had previously kitbashed a Pzjgr I using the Italeri with the DML, so I figured why not try with the Bison? Very useful guide.
Darren,
The Bison I doesn't get a lot of attention due to many factors...not may produced, only used for a relatively short space of time, and ultimately not too successful a concept even though it pushed development for other later vehicles like the Grille. I had a lot of fun learning about and researching the vehicle and was surprised to learn that some were still in service at Kursk in 1943! It's the original "frankenpanzer" though and for that reason has always appealed to me.
James,
40 Euro for an Alan kit! That's pretty steep, IIRC I picked up the Bison I for around $20 USD a couple of years back via Great Models but the kit may be harder to find these days and could explain the price.
MAY 04, 2008 - 05:58 AM
Excellent kitbashing, Bill. You invested a lot of money and time into this Bison and it clearly shows.
Thanks for sharing
MAY 04, 2008 - 01:39 PM
Thanks Jesper, I had accumulated the different items for this project over a long period of time, 2 years or more, so it didn't hurt the wallet too much at any one point. GM sales are wonderful things if you're patient. Appreciate the comments.
MAY 05, 2008 - 02:21 AM

Turned out looking great Bill.
A rather strange looking thing though, appears to be extremely top heavy, and esay to tip over on uneven ground.
MAY 05, 2008 - 12:35 PM
Thanks Dave. The design severely overstressed the chassis...there are pictures in France showing them being transported on trailers to avoid/reduce chances of mechanical breakdowns on road marches!
MAY 05, 2008 - 03:00 PM

Bill , you've done another great one Your extremely talented and I look forward to more of your work Thanks, Bob
MAY 10, 2008 - 10:38 AM

Hello Bill. Im sorry to say Ive missed most of this build, and also the article until now. But what a joy to read it from start to finish as one installment. Love what you´ve done, and its inspiring models like this, when I wish I had more time to attempt similar. For some reason Im being drawn more and more to early way German, and this has to be one of the coolest! Excellent build, and also a very, very useful feature. have the osprey book as well, and between both of these articles, I´m really hoping Dragon or Tristar release this in the near future ... else I´ll be collecting parts!!! Nice one.
MAY 30, 2008 - 10:53 PM
Copyright ©2021 by Bill Plunk. Images and/or videos also by copyright holder unless otherwise noted. The views and opinions expressed herein are solely the views and opinions of the authors and/or contributors to this Web site and do not necessarily represent the views and/or opinions of Armorama, KitMaker Network, or Silver Star Enterrpises. All rights reserved. Originally published on: 2008-05-04 00:00:00. Unique Reads: 23069

WEB HOSTING BY


Copyright ©2021 Armorama and Kitmaker Network, a subsidiary of Silver Star Enterprises
All Rights Reserved. Please read our Conditions of Use and Privacy Policy.
All Rights Reserved. Please read our Conditions of Use and Privacy Policy.