

1⁄35Bison Bashing
12
Comments
Weathering
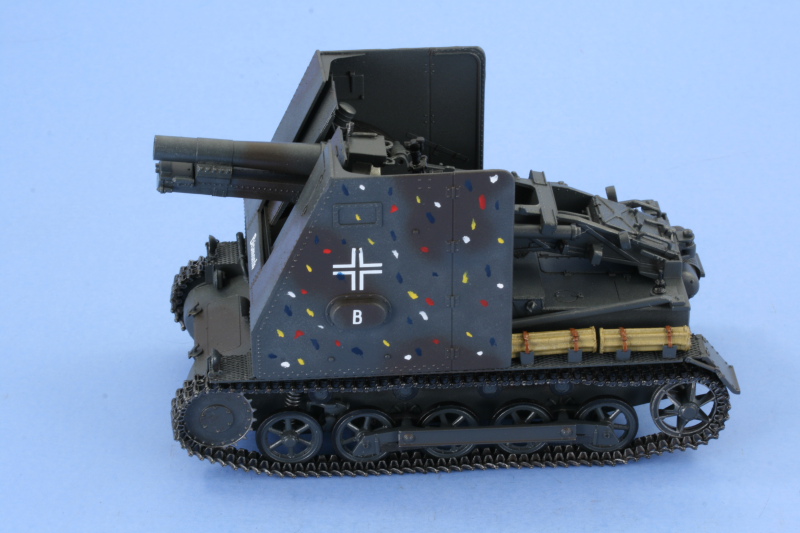
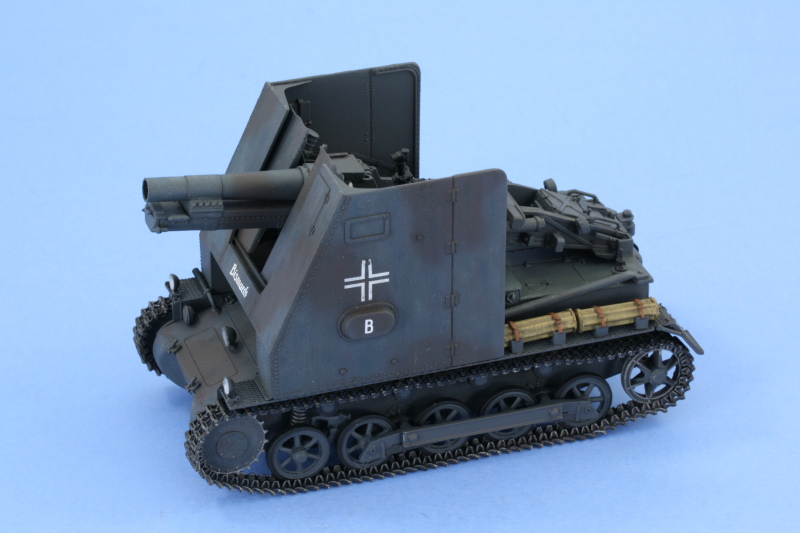
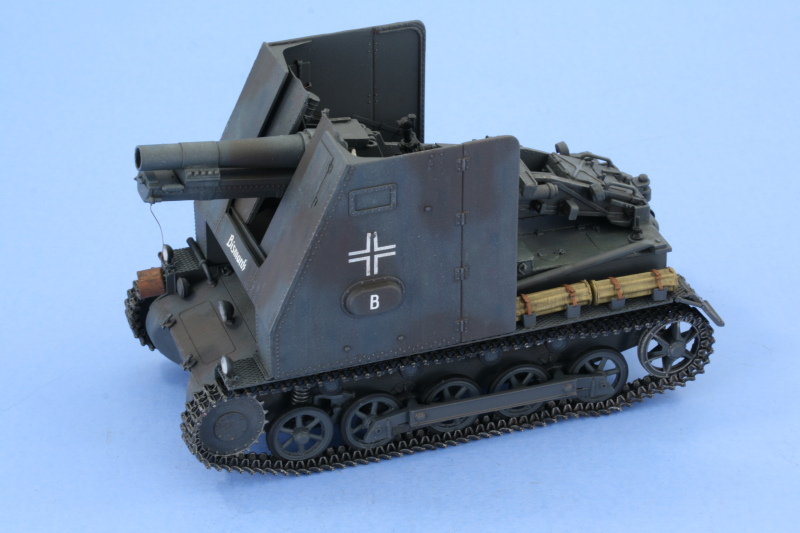
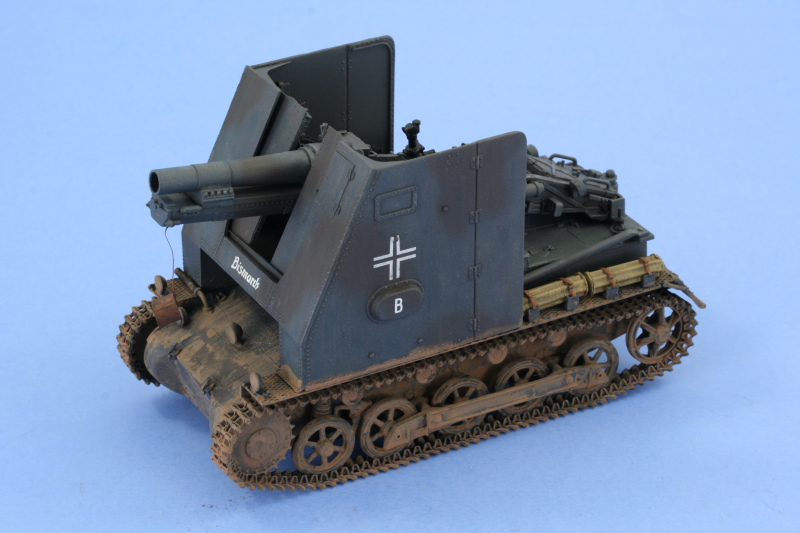
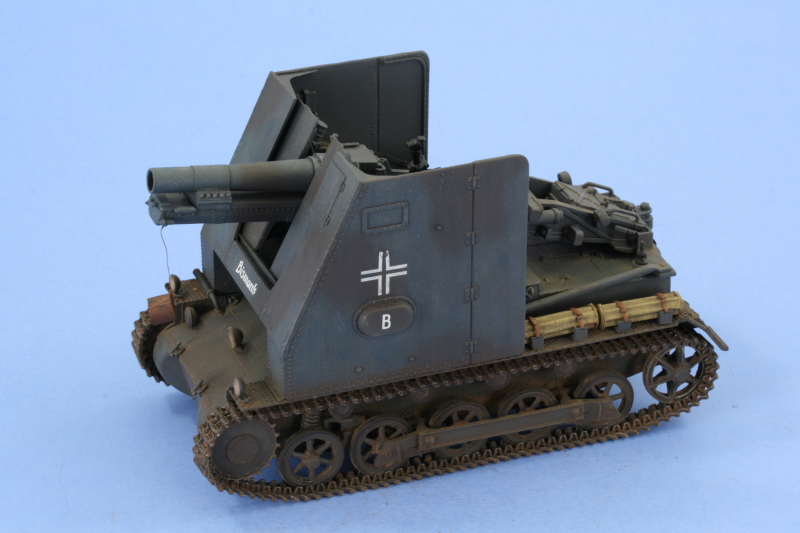
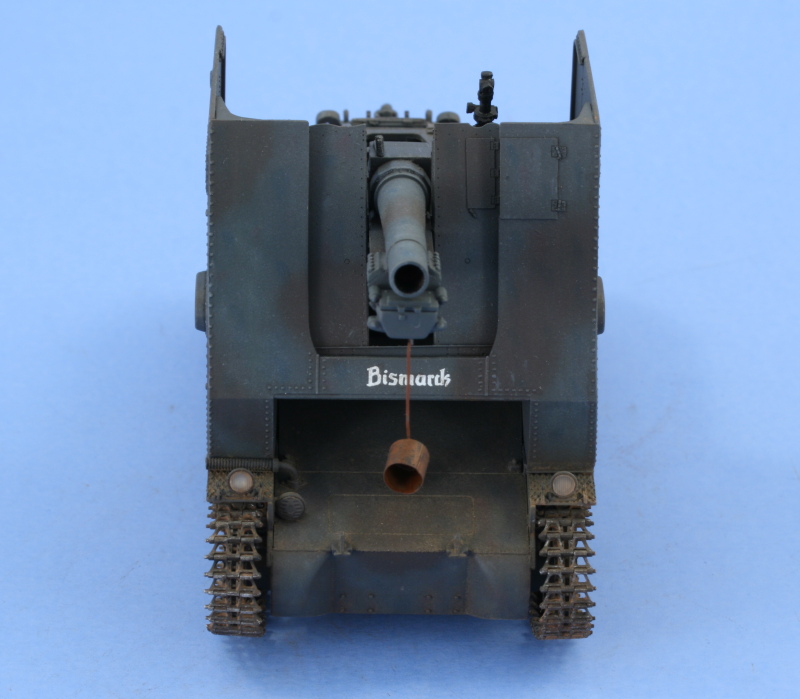
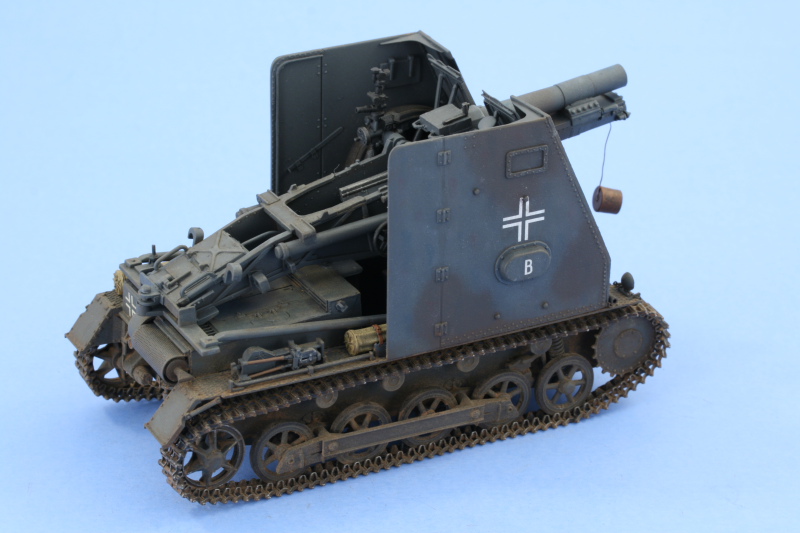
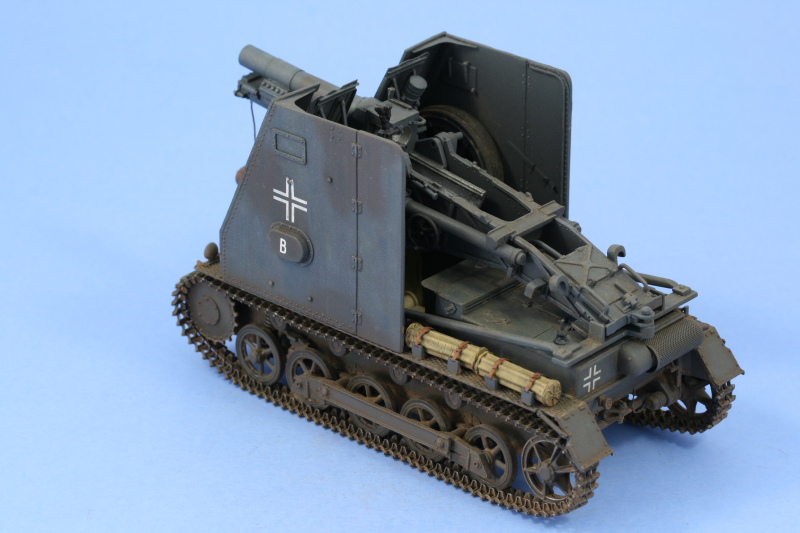
With everything installed, the vehicle was sealed with a light mist coat of Future applied by airbrush as a foundation for the decals and to protect the paint finish from the weathering process. The Bison Decals markings for Bismarck were applied and treated with Walthers Solvaset to insure they snugged down tight to the surface. Once dried, a second mist coat of Future was applied to seal the decals. I started the weathering process by applying a dot filter composed of small dots of Testors regular flat enamels in the small glass jars. I used Sea Blue, Yellow, Red, and White for the dots which were then carefully blended using a thinner dampened 0 round sable brush in a downward motion. This produced a unifying layer to the two-tone camo scheme as well as added very subtle color variation to the overall scheme. To add some additional depth, a pin wash of Burnt Umber was applied to the raised detail and panel lines. After some minor adjustments where the wash had bloomed or been too heavy, the finish was sealed with a coat of Testors Lusterless Flat in the spray can. Now that the finish had a bit of tooth to it, the same 80/20 lightened panzer gray mixture applied earlier was used to dry-brush the raised detail further enhance the depth of the finish. I also installed and painted the leather muzzle cap at this point using the Eduard supplied parts. Weathering for the running gear and lower hull took the form of a mixture of Mig Dark Mud and Europe Dust pigments. These were mixed with ordinary water and applied by brush and allowed to air dry over the course of about an hour. Once dry, the excess was removed using a series of stiff bristled brushes and combinations of wet and dry q-tips as needed. To mute the overall effect of the pigments, some additional Lusterless Flat was sprayed very lightly at a distance of roughly 12. As a final touch some additional Steel was dry-brushed on the track guide horns and contact faces to complete the weathering finish.Conclusion
As with most kit-bashing exercises, this one was a fun challenge to take two kits that had things to contribute and combine it into a single unified vehicle build project. While the Alan parts required more work, it stretched my skills a bit to get them to integrate with the excellently detailed DML parts and I thoroughly enjoyed it from start to finish. References: Nuts and Bolts #19 by Jurgen Wilhelm, Panzer Tracts No. 1-1 by Jentz and Doyle, Osprey's Modelling the German 15cm sIG 33 Bison and Grille by Gary Edmundson.


About the Author


FROM: TEXAS, UNITED STATES
Like many, I started out in the hobby as a kid building airplanes to hang from my bedroom cieling. I took a long break from the hobby, returning in 2001 with an interest in armor inspired mostly by online gaming. WW2 armor, 1/35 scale, is my preferred genre with a special taste for the stranger vehi...
Comments


Great job!
I would like to get some subjects by Alan - above all the Pz.II J - but the price is around 40!!!
MAY 04, 2008 - 05:47 AM

Thanks DJ, the radio was a fun item to work on even though you'll need a dental mirror to see it on the finished vehicle, it's there!
Gary, given the fact that DML and Trumpeter have been on an artillery kick lately and the fact that CH has the munitionspanzer version of the Grille out...it may only be a matter of time before a Bison I appears, especially since I spent the time to bash this one together. Same thing happened when I did the Alan Flakpanzer 38(t), so Murphy's Modeling Law could strike again! The Osprey book is a neat one, while its chapter on the Bison I deals with scratch-building one using the Italeri Pzjgr I chassis as the foundation, I had previously kitbashed a Pzjgr I using the Italeri with the DML, so I figured why not try with the Bison? Very useful guide.
Darren,
The Bison I doesn't get a lot of attention due to many factors...not may produced, only used for a relatively short space of time, and ultimately not too successful a concept even though it pushed development for other later vehicles like the Grille. I had a lot of fun learning about and researching the vehicle and was surprised to learn that some were still in service at Kursk in 1943! It's the original "frankenpanzer" though and for that reason has always appealed to me.
James,
40 Euro for an Alan kit! That's pretty steep, IIRC I picked up the Bison I for around $20 USD a couple of years back via Great Models but the kit may be harder to find these days and could explain the price.
MAY 04, 2008 - 05:58 AM
Excellent kitbashing, Bill. You invested a lot of money and time into this Bison and it clearly shows.
Thanks for sharing
MAY 04, 2008 - 01:39 PM
Thanks Jesper, I had accumulated the different items for this project over a long period of time, 2 years or more, so it didn't hurt the wallet too much at any one point. GM sales are wonderful things if you're patient. Appreciate the comments.
MAY 05, 2008 - 02:21 AM

Turned out looking great Bill.
A rather strange looking thing though, appears to be extremely top heavy, and esay to tip over on uneven ground.
MAY 05, 2008 - 12:35 PM
Thanks Dave. The design severely overstressed the chassis...there are pictures in France showing them being transported on trailers to avoid/reduce chances of mechanical breakdowns on road marches!
MAY 05, 2008 - 03:00 PM

Bill , you've done another great one Your extremely talented and I look forward to more of your work Thanks, Bob
MAY 10, 2008 - 10:38 AM

Hello Bill. Im sorry to say Ive missed most of this build, and also the article until now. But what a joy to read it from start to finish as one installment. Love what you´ve done, and its inspiring models like this, when I wish I had more time to attempt similar. For some reason Im being drawn more and more to early way German, and this has to be one of the coolest! Excellent build, and also a very, very useful feature. have the osprey book as well, and between both of these articles, I´m really hoping Dragon or Tristar release this in the near future ... else I´ll be collecting parts!!! Nice one.
MAY 30, 2008 - 10:53 PM
Copyright ©2021 by Bill Plunk. Images and/or videos also by copyright holder unless otherwise noted. The views and opinions expressed herein are solely the views and opinions of the authors and/or contributors to this Web site and do not necessarily represent the views and/or opinions of Armorama, KitMaker Network, or Silver Star Enterrpises. All rights reserved. Originally published on: 2008-05-04 00:00:00. Unique Reads: 23069

WEB HOSTING BY


Copyright ©2021 Armorama and Kitmaker Network, a subsidiary of Silver Star Enterprises
All Rights Reserved. Please read our Conditions of Use and Privacy Policy.
All Rights Reserved. Please read our Conditions of Use and Privacy Policy.