

1⁄35How to Create Accurate Weld Effects
16
Comments
Basic Welding Simulation
Now that we know how to make our weld seams let us put the practice into theory.
In this section we shall make some simple welds.
Example 1: 90° fillet weld (convex)
| This is the simplest type of weld to make. In Pic 1 we can see the rolling out of milliput to very fine diameters the secret is at all times to keep your fingers, milliput and work surfaces wet! In this image the weld is currently about half the final diameter that we require to do our work. | 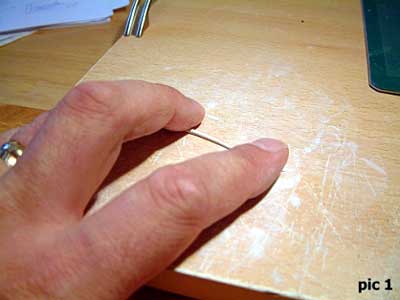 |
|
Pic 2 shows the templates that we will use for our weld examples, basically they
are squares of styrene covered with a grey primer in order to make a good
photographic colour contrast.
To lay the weld we wet with a paintbrush the corner groove that we are to use and then lay the milliput roll into that same space. |
 |
| Now that we have the weld roll in place we must cover the area in water. This will serve to blend the edges of the milliput to the sectional surfaces as well as providing a medium that will prevent the weld tool from sticking to the milliput. Let the milliput harden for a few minutes so that a surface skin forms before applying another small amount of water | 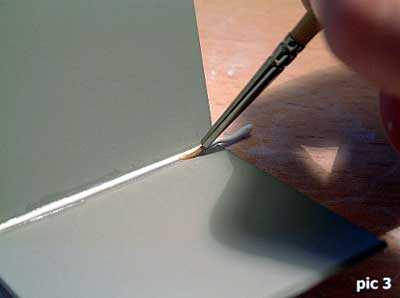 |
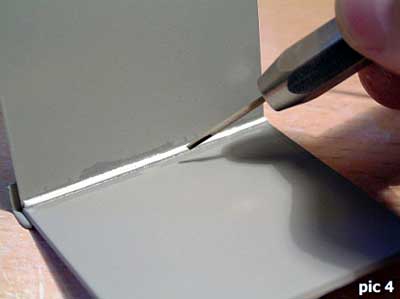
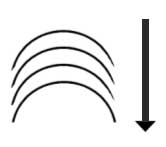
| In Pic 4 we can see the weld tool in a pin-vice before application to the milliput surface. To create a convex weld we use the OPEN end of the groove in the tool, facing the weld, and then sharply jab the tool repeatedly, but not deeply, into the surface of the milliput. What we are trying to achieve is a ridged effect that is semi-circular in shape but that does not penetrate completely the milliput. Always draw the tool down the weld, i.e. as in the direction of the arrow as shown to the left as this will create the correct overlapping nature of the weld. It is VERY important to keep the end of the tool wet when welding otherwise the milliput WILL lift from the surface. |
|
| In Pic 5 we can see the finished weld before a final blending of the edges with water and a paintbrush into the sectional surfaces again (application of the weld tool will always tend to move the milliput around regardless of how careful you are). In this image you can see how certain areas are tidy, others are rough and downright messy, but overall we have an accurate 3-dimensional fillet weld. The look of the finished weld is purely up to how you want you work to look again depending on the time frame and type of vehicle/weld being simulated. |  |
About the Author


Comments

I read this in a book once,but maybe it would work in a different way,In the book it said to slightly push a pin(not heated) in to the pastic,so it forms a bulge around the tiny ark,that traps the paint and makes a rivit,maybe if you scribed very lightly with that pin to make the letters,and painted,you would get the same affect
SEP 04, 2003 - 02:08 PM


Thanks Jim! Your article serves to inspire me to continue with weld seam additions. I've almost given up with the styrene rod method (making it gooey & soft first using thin plastic cement then scribing the weld pattern with a hobby knife). The cement tends to somewhat ruin the surrounding plastic, making the model's surface finish look terrible. The next weld seams on my models will definitely be made of Milliput.... Cheers!
Dennis
SEP 06, 2003 - 01:47 PM

Like learning there are more ways to do a difficult task. That's one thing I can always count on here and that's learning new techniques and even getting ideas on areas I hadn't even considered before.
SEP 06, 2003 - 06:20 PM

This is a good article. Wonderfully illustrated. Quality job. Thank you !
SEP 17, 2003 - 08:51 AM

Excellent Article... Made sure I printed it out for future referance!!
:-)
SEP 17, 2003 - 01:26 PM

Another informative and well written article. Keep em' comin.
Joshua Weingarten
IDF Armour Group
LINK
SEP 18, 2003 - 11:18 AM
Another informative and well written article. Keep em' comin.
Joshua Weingarten
IDF Armour Group
LINK
SEP 18, 2003 - 11:18 AM

This article still remains a classic. I notice some were asking about welded on writing. I've posted picks of the Abrams welded on numbers before which look far better than the DML numbers. There's a clear rubbery substance (I can't remember the name of it as it dried up at least ten years ago) that you can purchase at art supply stores. It can be applied with a syringe (through the needle even) and takes paint very well. I'll see if I can find it next week when I get home, unless someone else knows what it's called.
MAR 02, 2010 - 01:02 PM

Copyright ©2021 by Lee Lloyd. Images and/or videos also by copyright holder unless otherwise noted. The views and opinions expressed herein are solely the views and opinions of the authors and/or contributors to this Web site and do not necessarily represent the views and/or opinions of Armorama, KitMaker Network, or Silver Star Enterrpises. All rights reserved. Originally published on: 2003-08-27 00:00:00. Unique Reads: 82033

WEB HOSTING BY


Copyright ©2021 Armorama and Kitmaker Network, a subsidiary of Silver Star Enterprises
All Rights Reserved. Please read our Conditions of Use and Privacy Policy.
All Rights Reserved. Please read our Conditions of Use and Privacy Policy.