

1⁄35How to Create Accurate Weld Effects
Complex Welding Simulation
In this section we will look at some examples of more complex welding effects. We shall only cover two examples here but the range of effects to be achieved is only dependant upon what the effect is that you are trying to replicate.
Example 1: 90° multiple fillet weld
A multiple fillet weld is a join that has overlapping weld seams that are designed to give a greater strength between the join of sectional surfaces. The effect that we are trying to replicate here can be seen in our examples as described in the section on Basic Welding Techniques. In our case though we will cheat slightly as we do not need to create an entire series of overlapping welds.
|
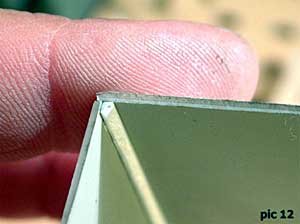
In Pic 12 we have taken our fillet sections and have added a small strip of
triangular styrene directly into the grooved area. This is done to save us time
and effort in having to build the depth up using milliput. Note that in this
example we are creating a big volume weld. In most multiple weld scenarios you
will probably only need overlapping rolls of milliput with no depth filler to
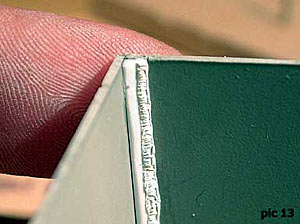
create the desired effect As before the same procedures apply with respect to layering of water on the surfaces to be worked. In Pic 13 we can see the first layer of weld has been applied along with the surface effects being finished. Blending of the weld to the sections is not done at this stage. |
|
| In Pic 14 we can see the application of a second weld seam. All that needs to be
done now is to blend the edges together using water and paintbrush again. Try
not to blend in too much the division between the welds where they touch so that
you keep a fine line of demarcation. This photo again does not show the
volumetric shape that is obtained by this method due to the angle at which the
template has been held up to the camera but the general nature of the finished
product can be visualised by again considering the shape of the depth area in
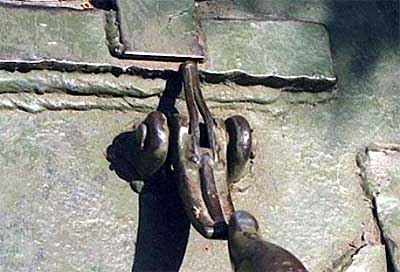
Pic 13. Another fine example of what we are trying to replicate can again be seen in the image below (again taken from an SU100). This example shows a nice overlapping but messy effect. |

|
About the Author


Comments


All Rights Reserved. Please read our Conditions of Use and Privacy Policy.