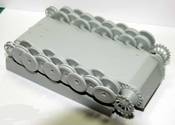
1⁄35Building Dragon's Tiger I (#6252)
First Impressions
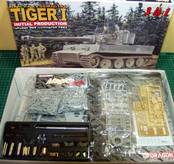
As almost everybody else, I have been anticipating the arrival of this kit from Dragon for some time. Reading about what might be included, what is definitely not included, and what modellers want and didn't want included. I don't think anybody can be disappointed with this kit now that it's finally here!This kit is, to put it quite simply, stunning. It remains to be seen if there are any accuracy problems, these usually surfacing after the kit has been around for a few weeks, but if like me, you model for the fun of it - it just doesn't get any better than this!
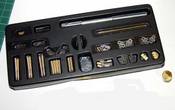
Upon opening the box, one quickly realises that Dragon couldn't have fit much more into it, even if they had wanted to. A neat black plastic tray holds most of the extra goodies, which includes aluminium barrel, brass smoke dischargers, with brass separate brackets for them AND metal wiring. A pre-formed brass bucket, three different types of 88mm brass ammunition, including spent shells, and metal towing shackles. It doesn? end there though. Delve further into the box and you'll find two sheets of photo etched extras, including ends for the ammo and inserts for the jerry cans, two vinyl figures, one holding a movie camera (which is included), two sets of tools, with and without clasps, and a former for making the individual tracks.
The instruction booklet for this model doesn't look thick enough. Not until you look inside and see the beautifully clear but complex drawings of Minoru Igarashi. More like this please! Take the time to study this instruction set before you start, it will pay dividends during the construction.
Construction
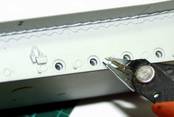
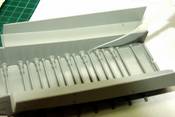
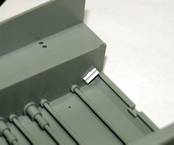
I pulled all the individually bagged sprues out of the box, and examined each one minutely before beginning the construction. There was something on every sprue to amaze me. On the hull itself, the support bracket for the sponsons has the correct scalloped edges on both sides! But to illustrate the trouble Dragon has gone to with this kit, look closely and you will see that they have included welding beads on the scalloped edge.My first task was to prepare the torsion bars and wheel axles, and an absolute minimum of clean up is required here, just a quick swipe with some fine wet and dry. The axles themselves have a lovely casting seam, don't confuse this with a moulding seam - it's supposed to be there! The lugs (which hold the axles at a pre-set height) have to be removed at this stage, but you can leave them if you don't want the suspension to work with the torsion bar system. I have plans to set this Tiger in a diorama so I did remove them.
When fitting the torsion bars, one end of them has to be fitted through the hull and cemented to the axle itself. Liquid poly glue is not ideal for this as its low viscosity will probably draw it into the hull/axle joint by capillary action and seize it up. I used a dab of super glue gel in the recess on the axle that the torsion bar fits into. When assembled I used really low viscosity super glue to cement the blind end of the torsion bar to the inside of the hull. You may be tempted not to cement this end, but it's vital to maintain the springiness of the torsion bar.
Next, the wheels. As with any Tiger, the clean up of these can become monotonous, (48 in total) but it's worth it in the end. Dragons system of using injection gates outside of the part mean that there is always those annoying gates to remove, but when one realises that they prevent marking the surface detail of the part, they become less so. I always find, no matter who the manufacturer, that wheels benefit from sanding the edge, as they always have that ever so slight concavity.
Anybody who has built the Dragon 251 kits will be familiar with Dragons weak alignment regarding the running gear on their kits. I am glad to say that seem to have overcome this with the Tiger kit, as all wheels align perfectly well. The rear idlers are also fitted at this point, and can be left loose to allow one to produce the correct sag later when fitting the tracks. Unfortunately they will not stay on until cemented in place. To overcome this I cemented small pieces of stock channel to the rear of the idlers themselves so that they could still rotate freely, yet remain in place.


