1⁄35Pz.Kpfw I Ausf .F (VK18.01) Build
7
Comments
Back to front
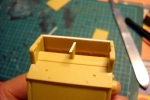
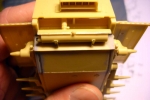
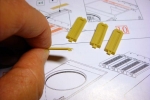
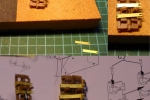
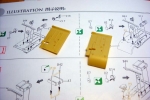
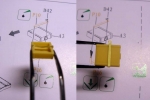
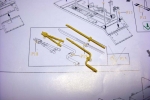
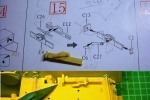
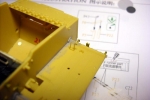
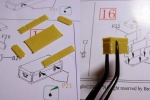
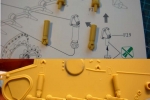
Moving on to the rear hull, I added a stiffener to A9 (it also gives you more gluing surface) and a shim to the centre support piece. It could have been molded with a stiffener, it is a touch too thin for my liking. Dry fit and trim as necessary. I added the muffler and exhaust pipe assembly after fitting the upper rear plate, a little wriggling and it all popped in place. Don't forget the PE support frames. The instructions have one of the bends wrong: before you bend, check the orientation of the angles and the mistake becomes apparent. The louvre / hatch assemblies can be added after everything else roof-wise is sorted out. The lifting rings are small so take care with them. The grilles are very, very, very delicate and soft. And quite possibly wrong. With the limited references the web has to offer, it would seem that the grilles should be a deep latticework structure, not a mesh. I painted the visible areas dark yellow and then ran a heavy wash in the long seams at the bottom to simulate an air vent. I actually didn't add the grilles until much later, no need to tempt fate here, and attached them by running primer around the frames rather than glue. Build up the spare track frame and add it later. The spare tracks are easy enough, providing you don't launch the track pins. I found fingers work better than pliers here. The purist will want to drill holes through the centre guide bars. The PE frame is a bit big so I bent it in at the bottom a little. Add the top bars and wing nuts. The wing nuts look a bit over scale but add interest. I painted the assembly separately and added it at the end of the build. You can add the smoke candle rack at any time. As I mentioned earlier, the roof can be popped on and off as needed or wanted, so don't glue that in place yet unless you're 600% sure the interior is done. The fit is perfect so there's no need for glue to be honest. There will be a couple of seams at the front, but they sort of look like they belong. If you do decide to keep it loose, the engine deck hatches can be tacked in place at the hinges. The roof will slide nicely underneath them once they've set. Staying with the outer hull, I chose to add the fenders without the tools in place. You are given an option of front fenders, and I went with the flapless option. The fit is good with the exception of slight gaps on the rear fenders at the support / hull join. A little water-soluble putty took care of that. I left the rear flaps off until the tracks were in place to make life easier. For some reason I added the jack block prematurely, I should have left it off to make painting easier. The PE for the block is also a little oversized and has a wing nut to be added. I added the grab rails; make sure you get these glued in place securely. One kept breaking off. Sigh. The tools have PE handles for the clasps, or rather, half of the tools do. It would be wiser to add them after you paint the tools. You'll need a spot of filler or mud for the tool locating holes on the undersides of the fenders. When assembling the jack, do not glue the adjustable leg until you've figured out how it sits on the fender (see pics). If you do glue it in place and it doesn't sit properly, shave the locating guide off the fender for a quick fix. Add the PE clamp legs now, and then the top bar and wing nut when you've gotten painting and weathering done. Add the curious looking clamps (P13) at any point you wish. The boxes go together well enough although the fit of the tongue / groove join wasn't very precise on one of them and needed a spot of filler. I found it easier to attach the sides together first, then add the top and bottom pieces. Add the PE clasps if you wish. These things are the size of a pin head. I got them in place using a toothpick as an aid. Cut a chisel point in a toothpick, wet the end with your tongue to pick up the piece, apply a dot of super glue on the box and pray for the best. The instructions are vague on how the long box attaches on the left fender, and in the end I left if off to show the tools better. I added the shock absorbers, which actually sort of work. A nice touch but there is no mention of how much piston should be showing. I also added the PE to the upper hull, brackets for tow ropes I believe. No tow rope is provided, which is a disappointment considering the wealth of detail in the rest of the kit. The armoured visor is designed so you can position it as you wish. B7 is hollow molded, so if you leave it in the fully open position, add a strip of styrene to the bottom.Comments
Very nice build and build-review! You have done a great job on the Tiny Tiger and taken advantage of what looks to be wealth of detail.
The pointers will be helpful to those who tackle this beast - like ME!
Thanks for posting this - very inspirational! Now all I have to do is set aside perhaps 3 - 4 months for to do this one in (what takes others a week is my fiddling for a month or more - "speed, you know, kills!")
Bob
MAR 04, 2014 - 05:34 AM
Thanks Dan and Bob. I was surprised at how long this took to build and above all, paint all that great, detailed stuff you get. Even if I had an airbrush to use, I figure I wouldn't have saved that much time, maybe 5 hours? So yes, set aside plenty of time when you do get around to building it.
Kimmo
MAR 04, 2014 - 06:34 AM
Copyright ©2021 by Kimmo Happonen. Images and/or videos also by copyright holder unless otherwise noted. The views and opinions expressed herein are solely the views and opinions of the authors and/or contributors to this Web site and do not necessarily represent the views and/or opinions of Armorama, KitMaker Network, or Silver Star Enterrpises. All rights reserved. Originally published on: 2014-03-04 13:22:26. Unique Reads: 14889


