

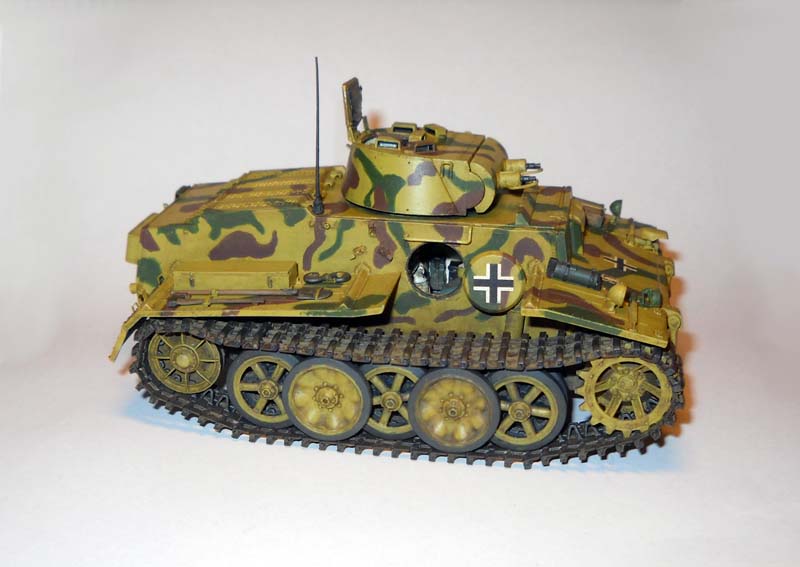
1⁄35Pz.Kpfw I Ausf .F (VK18.01) Build
7
Comments
Lights, action
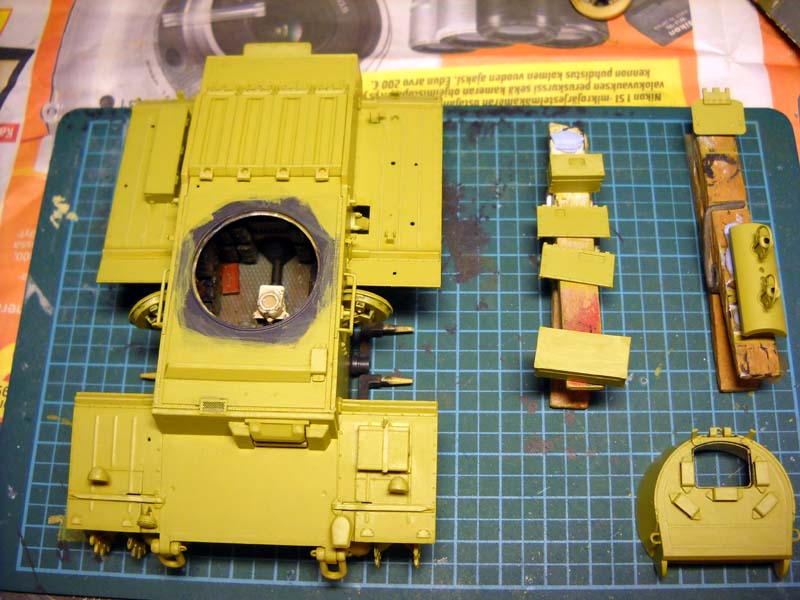
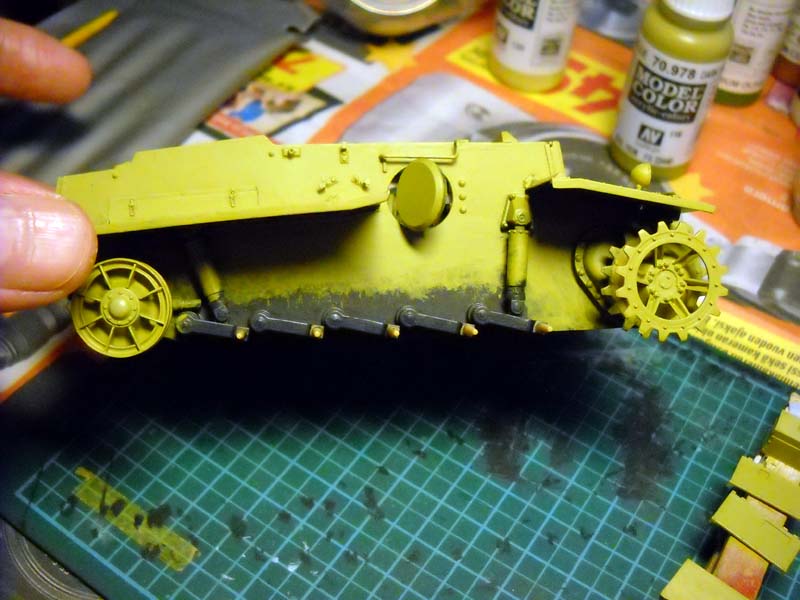
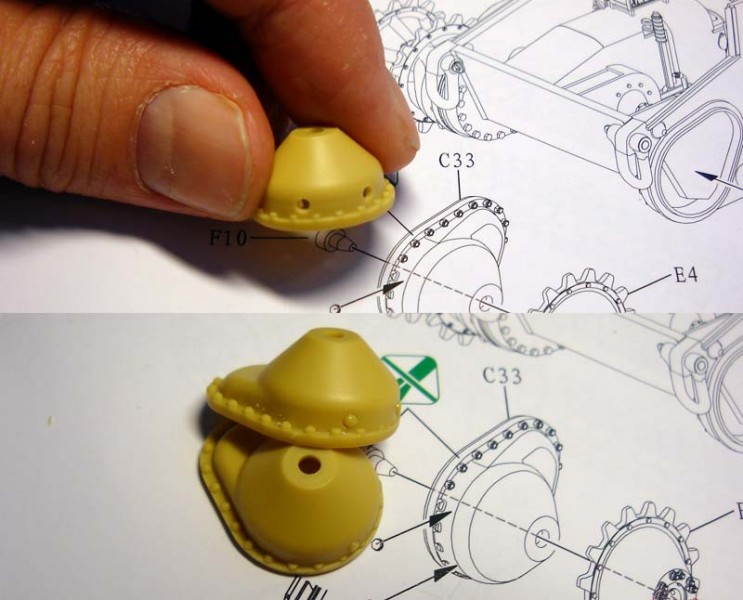
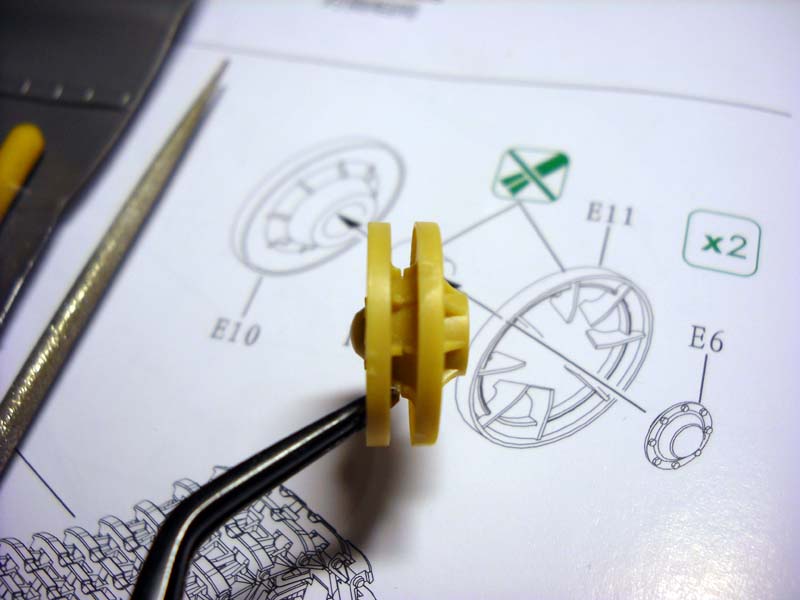
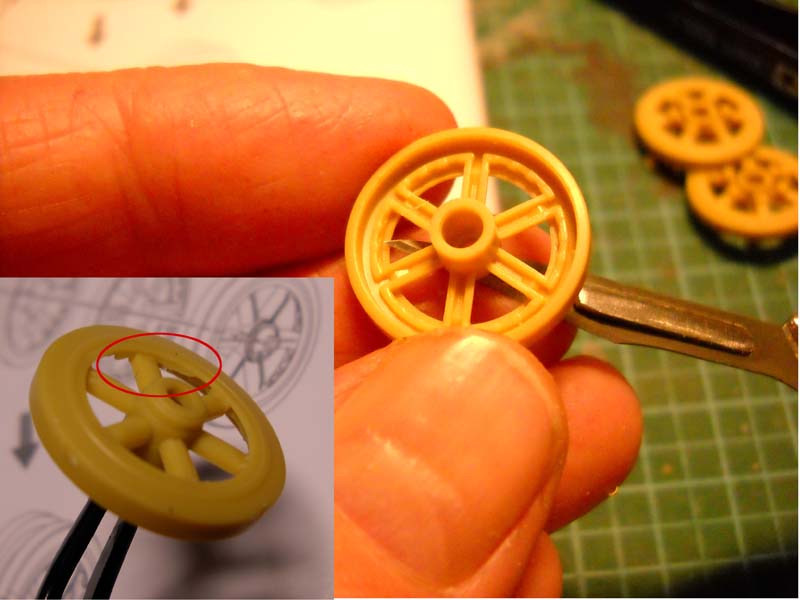
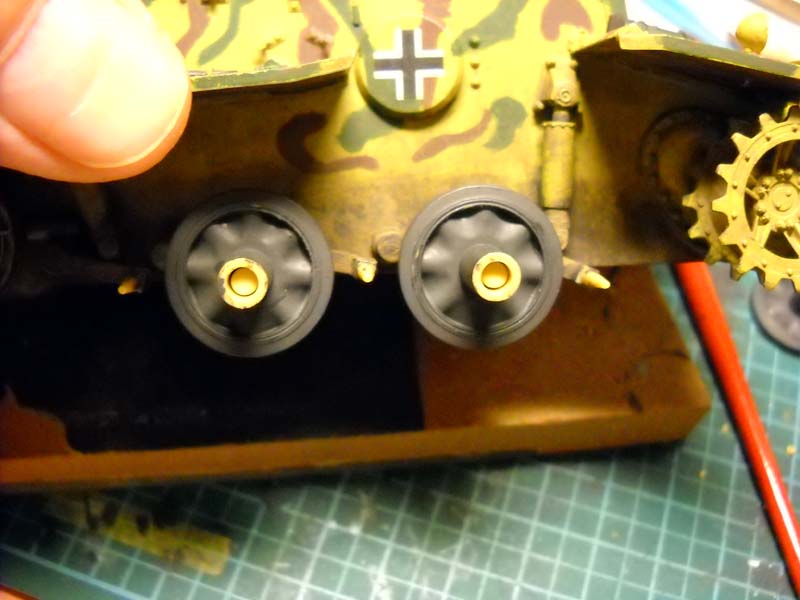
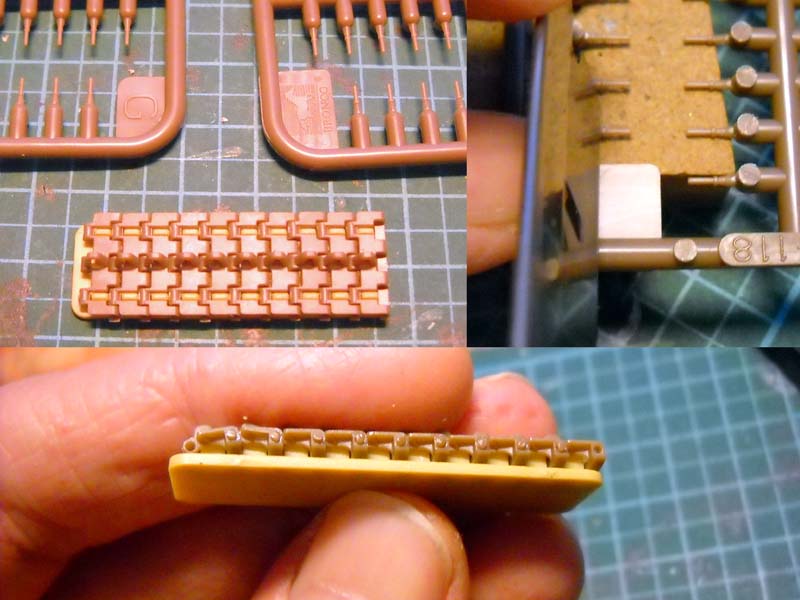
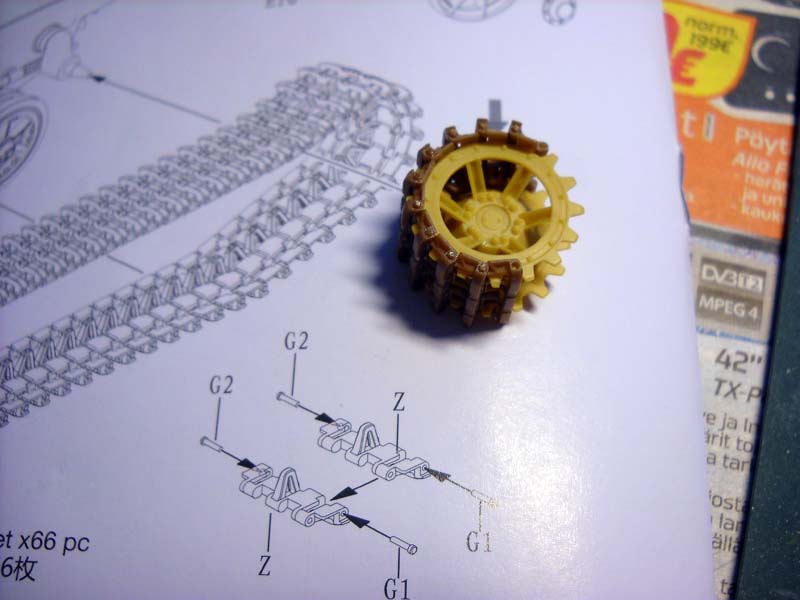
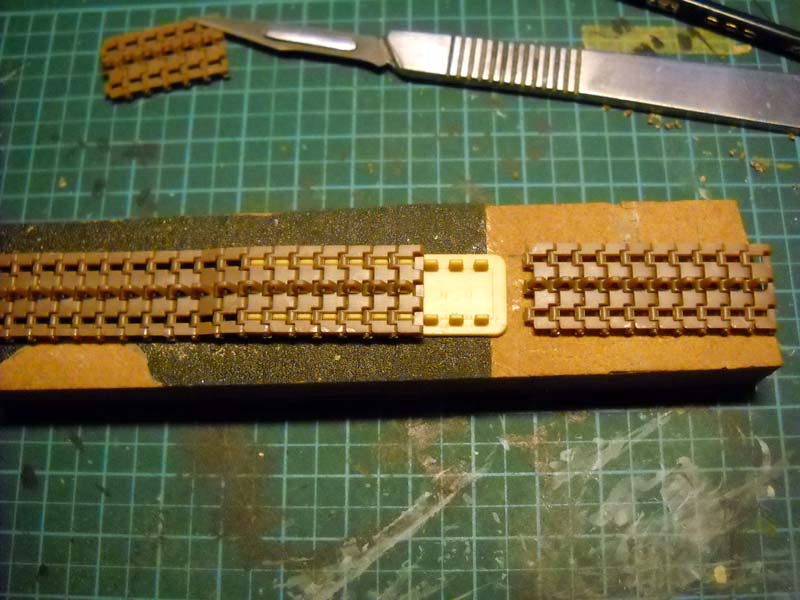
In keeping with the joy of photo etch, the rear lights have PE mounting frames, no plastic options provided. These will test your patience and resolve as both need to have mounting bolts added. First, you'll need to shave the bolts off the sprue; fortunately you get a couple of extras. Slice them off and then the fun starts. Providing you got them off without losing them, you now need to add them to the mounting frames. This must have been my great karma debt call-in moment. Both sets went off without a hitch or flying parts. If you really want to be a masochist, the instructions suggest you bend a flattened out S into the mounting plates. I sort of managed this with tweezers. On reflection, you can probably do this with the aid of a bending tool. If all this sounds too daunting, source mounts from the spares box, or cobble something out of thin styrene, at least this way you can glue with a bit more confidence and not have to mess with super glue. I added these at the end of the build to avoid knocking them off while painting and weathering. The headlights and Notek can be added now. You have an option of blackout covers or clear lenses for the headlights. The light bodies are slide-molded, a good idea that went astray due to a misaligned mold. I did some shaving and sanding to try and get the frame to look even. I'm not sure if this was just a problem with this example or is a design flaw. The other slide-molded parts (machine guns) have this problem too. Having something resembling a tank, I added a base coat of dark grey on the lower half and around the turret opening. These vehicles were produced early in the war and some were sent to training units. For my build, I hypothesized that this was a tank that went to a training unit, hence the heavy wear on the interior, and was then sent to the front necessitating a repaint. The top got a coat of dark yellow. I mixed a 2:1 ratio of Vallejo's Dark Yellow and Light Grey primer. The grey took the green edge off the dark yellow and lightened it a bit. I followed up with regular Vallejo Dark Yellow with a touch of buff and tried to get a blend on the lower third of the hull sides. I figured the unit that repainted the vehicle wouldn't have removed the road wheels and painted what they could reasonably get at or see. You'll need to add drain plugs to the covers; again, shave off bolts from sprue. Do not try to shave off a thin slice. Drill an appropriate sized hole (1.5 mm is just oversized) for each plug and push the plugs through from the back side and glue so that just a hint of cylinder is showing under the bolt head. Before you mount the drive covers you'll need to do up the sprockets, which are a bit fiddly. There are only two teeny attachment points (see pics) so take your time, brush glue into the seams and let set. I pressed both the sprockets down to ensure that they were aligned and seated. Set them side by side and rotate into each other to check they are even. Paint them now if you wish and then glue the mounting pins and attach to the hull. I did the idlers at this point too. No major issues apart from a minor gap between the strengthening rib halves. The road wheels are a bit of a pain. The spoked sets have some minor flash to remove so have a good look before you glue the front and rear halves together and paint now if you wish. The inner rims have detail, which is nice, but have a seam that is noticeable. Add some muck or heavy washes in there and they should disappear. The method for attaching the wheels is somewhat problematic. The swing arms are rather flexible, and the mounting points are, well, points. Why Bronco chose to do it this way, I haven't a clue. I can't see any advantage in it and it doesn't help when it comes to trying to get the pins glued to enable the wheels to rotate freely (in a fine example of hindsight, a tiny ball of blu tack might be the answer here). I wish all manufacturers would just copy Tamiya's poly cap method. I anticipated problems here so I did all my painting and weathering before gluing in place. The solid wheels have an alignment stub on the outer half that does more harm than good as it is way too small to let you find the notch by feel. I cut them off and just eyeballed the alignment. The spoked pairs were eyeballed as well, no alignment help there either. Another issue is that when the wheels are in place, the fit is rather tight meaning the wheels touch each other slightly. I noticed that the spoked pairs don't really sandwich together nicely, so you may want to lightly sand the mating faces to alleviate this problem. Just make sure that the track guide teeth will fit in the gap if you do so. The tracks are fully workable and went together better than expected. Minor clean up for attachment points and you're off to the races. Bronco provides an assembly jig which really speeds things up. Simply place the requisite number of links in the jig and add the pins. I found an assembly line approach worked well here. Clean up one sprue of links at a time, do a run on the jig and set aside to dry, repeat. When you have enough links for a side, simply attach the short runs to each other. I used 65 links per side, one less than the instructions call for, you can judge for yourself if the sag looks right or not in the photos. Going with 64 links makes attaching the track difficult with the road wheels in place, so I leave it to the individual to best judge how to proceed here. Remove the pins from their sprues with a single edged razor. Again, it's much easier to trim a small nub off rather than try to slice flush. Place a finger on two pins, slice and move the pins aside, repeat five times. Clean the ends up. I found picking up the pin with a finger tip and then pinching it worked better than tweezers. Make sure the holes are aligned, pop the pin into place and touch a small amount of glue on the outside edge. Press the pin with tweezers or a toothpick to make sure it is seated properly. Brush a little more glue on to seal it well and set aside to dry. I figure it took me about 3 hours to do both runs and only had one pin go flying. The pins are actually handed but the difference is so slight, you can decide whether to worry about that or not. These tracks will hold up well to handling if you glued the pins properly. One thing to note with these types of track is that when painting and weathering, you will need to flex the tracks to make sure they don't get stuck together if you paint the tracks off the vehicle. You do get a few spare links and pins, but try to keep losses to a minimum.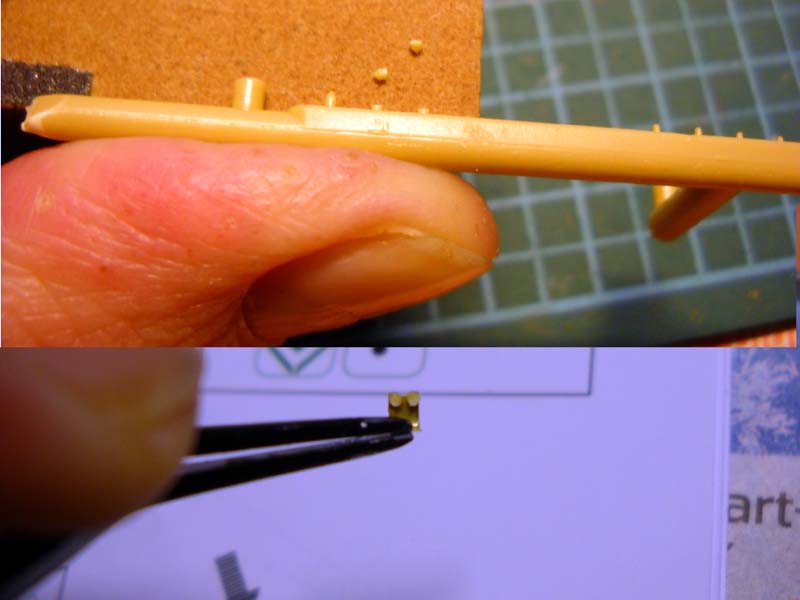


About the Author


FROM: UUSIMAA, FINLAND
I got my first kit when I was about 7 or 8 and was immediately hooked. Magazines such as Fine Scale Modeler helped to push me to go beyond what kits had to offer before photo etch and resin were commonplace. I took a break of about 8 years and now I'm back at it making up for lost time. When I'm not...
Comments


Very nice build and build-review! You have done a great job on the Tiny Tiger and taken advantage of what looks to be wealth of detail.
The pointers will be helpful to those who tackle this beast - like ME!
Thanks for posting this - very inspirational! Now all I have to do is set aside perhaps 3 - 4 months for to do this one in (what takes others a week is my fiddling for a month or more - "speed, you know, kills!")
Bob
MAR 04, 2014 - 05:34 AM

Thanks Dan and Bob. I was surprised at how long this took to build and above all, paint all that great, detailed stuff you get. Even if I had an airbrush to use, I figure I wouldn't have saved that much time, maybe 5 hours? So yes, set aside plenty of time when you do get around to building it.
Kimmo
MAR 04, 2014 - 06:34 AM

Copyright ©2021 by Kimmo Happonen. Images and/or videos also by copyright holder unless otherwise noted. The views and opinions expressed herein are solely the views and opinions of the authors and/or contributors to this Web site and do not necessarily represent the views and/or opinions of Armorama, KitMaker Network, or Silver Star Enterrpises. All rights reserved. Originally published on: 2014-03-04 13:22:26. Unique Reads: 14889

WEB HOSTING BY


Copyright ©2021 Armorama and Kitmaker Network, a subsidiary of Silver Star Enterprises
All Rights Reserved. Please read our Conditions of Use and Privacy Policy.
All Rights Reserved. Please read our Conditions of Use and Privacy Policy.