

1⁄35Building a base for a 1/16 scale figure
9
Comments
Recycling
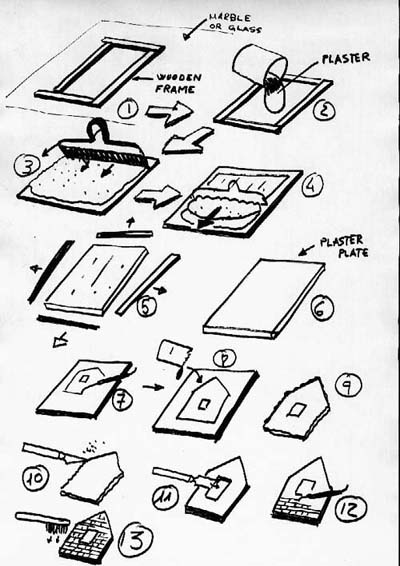
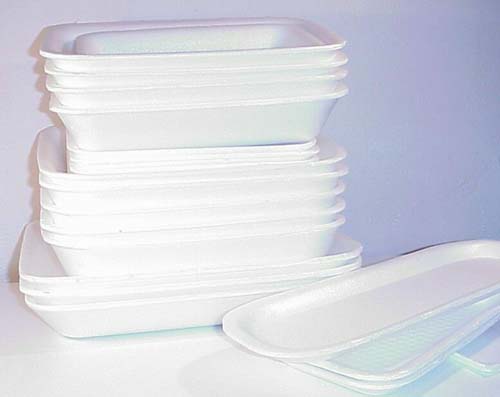
I remember a short article in Doc`s Dios a few years ago that had no text but the hand drawn sketches were enough to show exactly how to cast and scribe buildings. It was from a guy called Carlos Elias or Blockhaus as many more would know him better as, today. I have since cast and scribed flat walls, but have felt this had its limits, as it gave a 2-D wall. I wanted to cast a wall that had more of a 3-D effect from the start. Now I just needed the mould.The polystyrene foam trays that vegetables and meat come in from the supermarket are an extremely useful medium. They can be used for building up height in a dio, scribed with a ball point-pen and used as they are, for walls, or in this case, be used to make moulds.
Making the mould
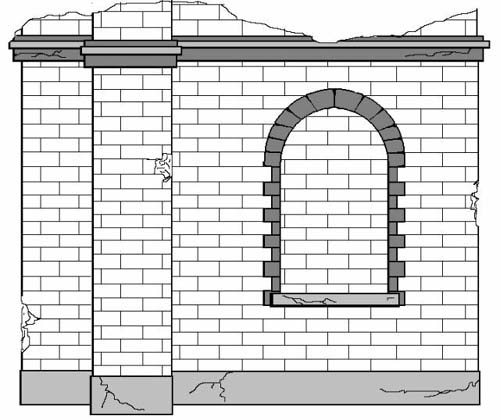
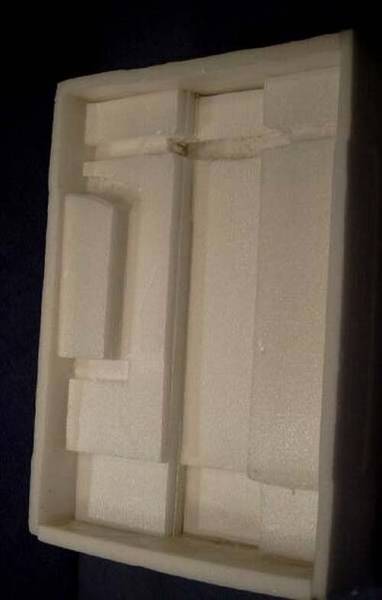
I measured the picture frame base that I was going to use for width and breadth, the figure I had built for height, and with a little imagination thrown in, I made a rough sketch of how the wall was going to be.As this was pretty experimental, I didnt take any great care with measurements or getting everything lined up 100%. I first made a box shape. The base was the outer dimensions of the wall, and the four sides were the cut to get the total wall thickness I wanted. I used a cheap medium-temperature hot-glue-gun for fixing the styrene shapes together. This hardens almost immediately and no time is wasted. White glue takes too long to dry and hold, and other glues will only melt the polystyrene foam.
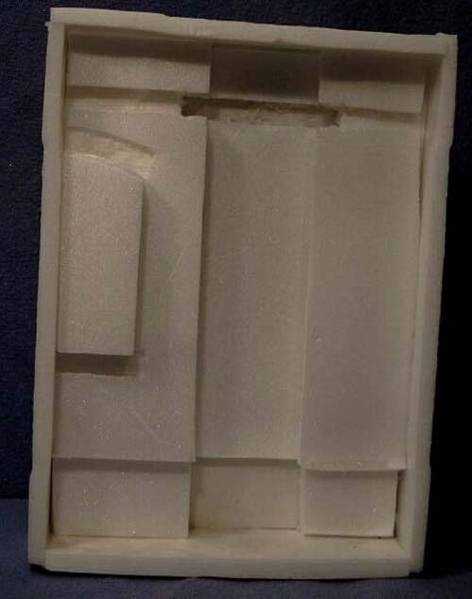
The pillar was the deepest part, so polystyrene foam was placed at each side of where this was to be. More foam was built up in the shape of the window space. The upper ledge of the wall was cut out again afterwards, as it would have taken extra thought to measure it all up from the start. Some foam was also removed nearer the bottom to give a thicker foundation base, and also, above and below the window.
Any awkward shapes that result from short cuts or roughness at this stage can be cut or sanded away, later. As this was planned as a ruin, any bumps on the mould that left holes in finished casting could be damaged to hide.
About the Author


Comments

Frank,
A very well done base and very helpful article. Thanks for sharing your tehnique with us.
JUN 06, 2005 - 02:47 AM

Thanks Danny for doing the presentation. Cheers.
Thanks to you too, Alguhan. Hopefully somebody finds it useful.
JUN 06, 2005 - 10:41 AM

PB - nice article! Nice to see large scale dioramas addressed
Thanks Danny - nice job (as always)
JUN 06, 2005 - 12:37 PM
Thanks Scott. Its cool to have something published on the site. Hopefully I´ll have something again shortly. Cheers.
JUN 06, 2005 - 07:44 PM

now i know what to do wif my styrofoam and polystyrene...thanx a lot dude....
JUN 06, 2005 - 10:36 PM


Nice - but I cannot help wonder why 5 of the 11 photos are of the figure when the article is about the base ??
SEP 07, 2008 - 10:50 PM
Hi Jan. Firstly this was posted more than 3 years ago ... its not new.
There are several in-progress shots of the base and how it was made, and there are only so many angles you can show the same piece of wall from.
The title of the piece is called "Building a base for a 1/16 scale figure" so I thought .... silly me .... that a few pics including the figure would be suitable for this article.
SEP 07, 2008 - 11:28 PM
Yeah, well somebody brought it up again
I agree that 1-2 pictures of the fully painted figure (which is nice too) would be fine - but why the unpainted pictures etc....
N/M - just a thought
SEP 07, 2008 - 11:57 PM
Copyright ©2021 by Frank Glackin. Images and/or videos also by copyright holder unless otherwise noted. The views and opinions expressed herein are solely the views and opinions of the authors and/or contributors to this Web site and do not necessarily represent the views and/or opinions of Armorama, KitMaker Network, or Silver Star Enterrpises. All rights reserved. Originally published on: 2005-06-04 00:00:00. Unique Reads: 19855

WEB HOSTING BY


Copyright ©2021 Armorama and Kitmaker Network, a subsidiary of Silver Star Enterprises
All Rights Reserved. Please read our Conditions of Use and Privacy Policy.
All Rights Reserved. Please read our Conditions of Use and Privacy Policy.