

1⁄35Building a base for a 1/16 scale figure
9
Comments
The base
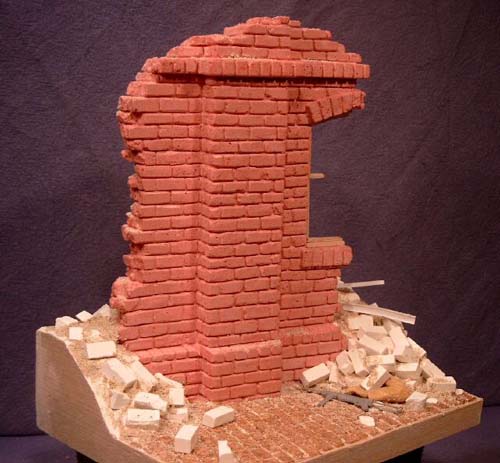
How I build a base, has remained the same since I first started. Again Doc`s Dios influence is apparent. I have noticed recently that Ronny Roadkill Noben´s site has two of these excellent articles available as PDF files. His site is worth checking out at : Roadkill's Modeling CornerFirstly, using balsa sheet, I built up a frame to give some height and show a cross-section of all the rubble that would come from an exploded building. I glued some cork to the glass, to build up the middle area of the photo frame. I then glued the scribed wall to this, in the position I wanted. To fill up the space between the wall and frame, and also to offer more strength, I used polystyrene foam cut to the right shape.
I wedged this in and when the right height was achieved, I made my ground cover.
The area at the front was to be cobbled, so I used cork, cut to a suitable size to simulate a bricked surface. Each brick was super-glued in place. I thinned spackle with white glue and ran this over the bricks to fill out the gaps between them. Then with some tissue I wiped away anything on top of each brick to let the cork show through. Then the rubble was laid in place. White glue was generously brushed over the polystyrene and it seeped into the space between wall, foam and balsa frame. To this was added fine sand, pre-moulded bricks and rubble. I also pushed in some pieces of I shaped plastic rod to resemble fallen metal. I let the rubble fold around each side, to frame the area where the figure would be later placed.
To continue the theme of the last man standing, I used one of the extra, unused arms from the Tamiya Römmel figure and an extra machine gun left over from another 1/16 Dragon figure. Finally, some balsa was used to make a damaged window frame.


About the Author


Comments

Frank,
A very well done base and very helpful article. Thanks for sharing your tehnique with us.
JUN 06, 2005 - 02:47 AM

Thanks Danny for doing the presentation. Cheers.
Thanks to you too, Alguhan. Hopefully somebody finds it useful.
JUN 06, 2005 - 10:41 AM

PB - nice article! Nice to see large scale dioramas addressed
Thanks Danny - nice job (as always)
JUN 06, 2005 - 12:37 PM
Thanks Scott. Its cool to have something published on the site. Hopefully I´ll have something again shortly. Cheers.
JUN 06, 2005 - 07:44 PM

now i know what to do wif my styrofoam and polystyrene...thanx a lot dude....
JUN 06, 2005 - 10:36 PM


Nice - but I cannot help wonder why 5 of the 11 photos are of the figure when the article is about the base ??
SEP 07, 2008 - 10:50 PM
Hi Jan. Firstly this was posted more than 3 years ago ... its not new.
There are several in-progress shots of the base and how it was made, and there are only so many angles you can show the same piece of wall from.
The title of the piece is called "Building a base for a 1/16 scale figure" so I thought .... silly me .... that a few pics including the figure would be suitable for this article.
SEP 07, 2008 - 11:28 PM
Yeah, well somebody brought it up again
I agree that 1-2 pictures of the fully painted figure (which is nice too) would be fine - but why the unpainted pictures etc....
N/M - just a thought
SEP 07, 2008 - 11:57 PM
Copyright ©2021 by Frank Glackin. Images and/or videos also by copyright holder unless otherwise noted. The views and opinions expressed herein are solely the views and opinions of the authors and/or contributors to this Web site and do not necessarily represent the views and/or opinions of Armorama, KitMaker Network, or Silver Star Enterrpises. All rights reserved. Originally published on: 2005-06-04 00:00:00. Unique Reads: 19855

WEB HOSTING BY


Copyright ©2021 Armorama and Kitmaker Network, a subsidiary of Silver Star Enterprises
All Rights Reserved. Please read our Conditions of Use and Privacy Policy.
All Rights Reserved. Please read our Conditions of Use and Privacy Policy.