

1⁄35Building a base for a 1/16 scale figure
9
Comments
Painting and weathering
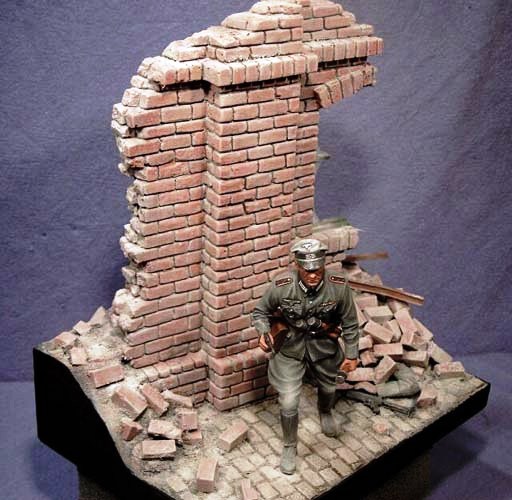
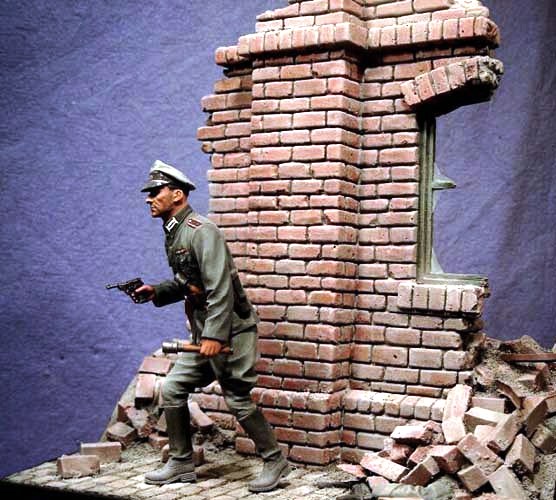
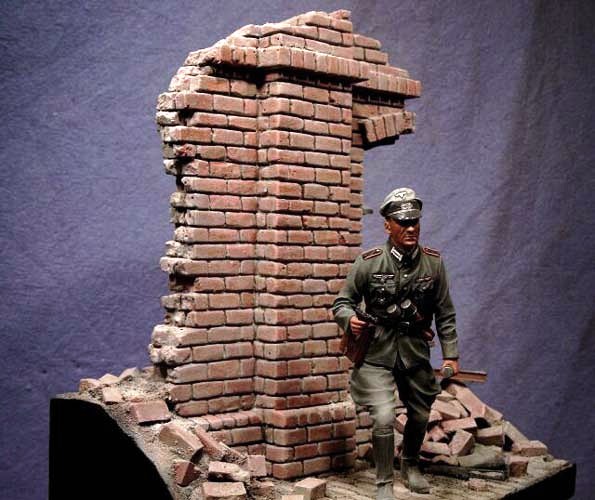
The whole base was now primed with black using the airbrush. Then, block colours for wall, rubble and cobblestones were sprayed as a base for brush painting. All brush painting was done with Humbrol enamels.I choose 3 base colours for the bricks .. brick-red, wine, and leather. To each of these I added, 3 mixers . flesh, sand and light grey. Now I had 9 colours, and painted bricks at random with each of the 9 colours, not forgetting to pick out the bricks in the rubble also. Then with a wide brush, I lightly, and randomly, dry-brushed the whole wall and rubble using some of the lighter mixes. This toned down all the bright colours and tied the wall together. When dry I also sprayed some filters in a vertical motion.
The cobble stones were painted in the same manner, using different greys as my base colours and adding flesh and sand as mixes, doubling up the amount of colours used. The same lighter colours were used for dry brushing, and the same filters as used for the walls, were used afterwards.
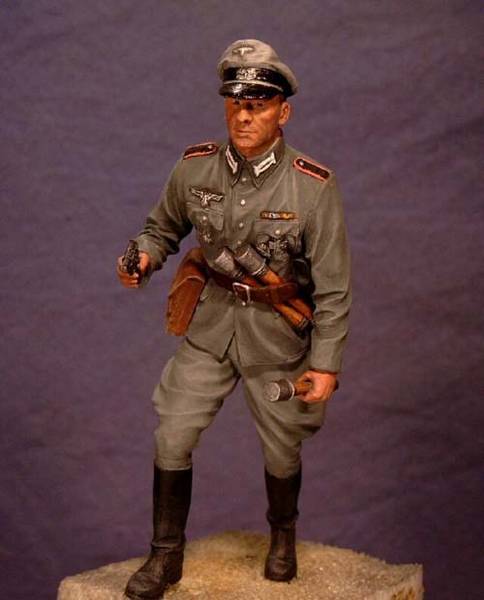
Then I painted the window frame in a green colour, and carefully dry-brushed the edges with a faded version of the green, using Humbrol sand to lighten it. The plastic I beams were painted German camouflage red brown, a nice base colour for rust. This was finished off with orange and brown pastels. Finally I painted the protruding arm.
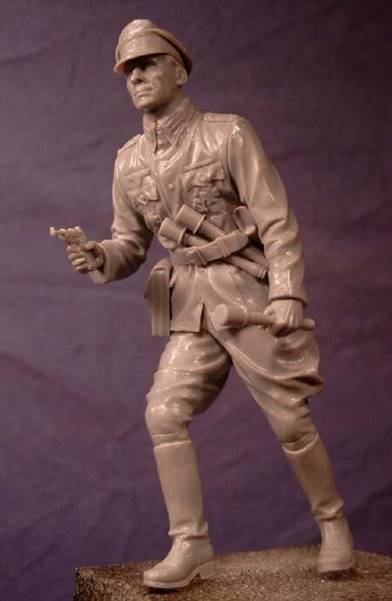
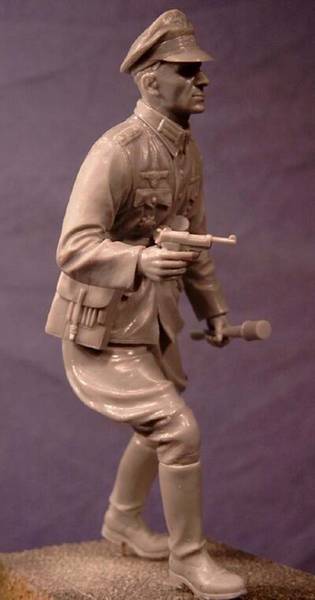
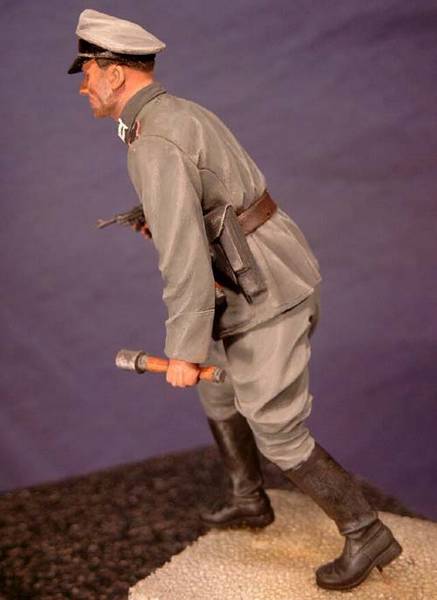
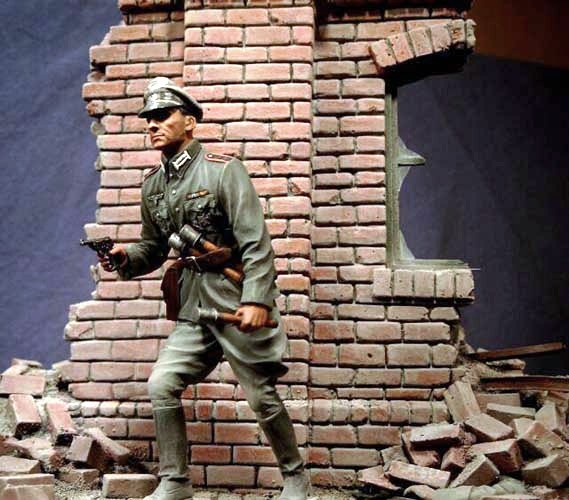
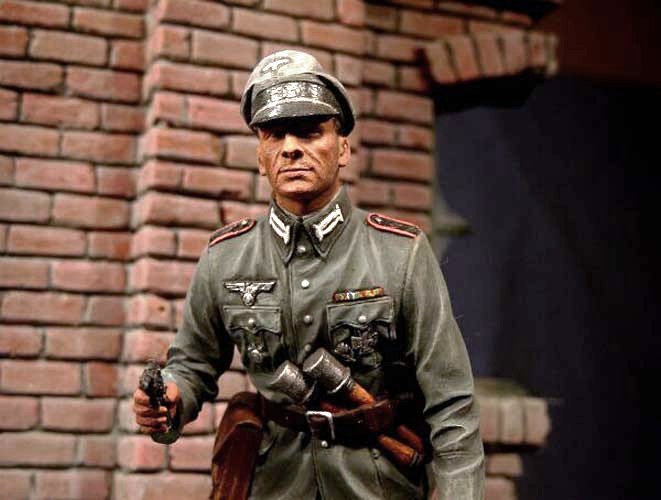
The figure is Dragons Hauptmann Grossdeutschland Divison, kit # 1627. It built up easily enough with some extra care taken, to hide any joints. The details are not as fine as those in Tamiya kits, so I sanded off the insignia on the arms and the epaulets. The figure was completely assembled, as everything could be got at, to paint later.
The figure was primed with Tamiya acrylics using the airbrush, and brush painted with Humbrols and oils.
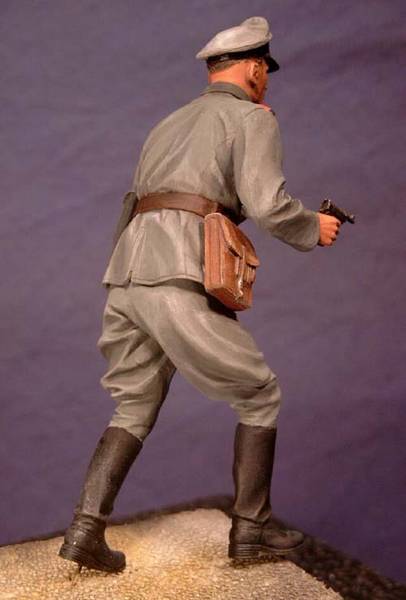
The whole base and the lower legs of the figure received a light spray of Tamiya buff and light grey mixed, heavily thinned with isopropynol, to simulate dust. Then the last detail was added to the base; some shreds of thin clear plastic sheet to simulate broken glass in the window frame and some smaller bits scattered among the rubble. The figure was fixed to the base, using wire glued inside his foot and into the cork cobblestones.
To finish it all off, some sanded down pastels were brushed on the lower legs of the figure, over the rubble and on the glass shards left in the window frame.
This was a very enjoyable project that started out as an experiment in casting a 3-D item, and hopefully the experience gained can be used again to provide a more adventurous scene. It is also hoped that this article may help or inspire you to try something like this. The results are very rewarding and offer endless possibilities. All the best!
Frank
Pictures of the finished scene

About the Author


Comments

Frank,
A very well done base and very helpful article. Thanks for sharing your tehnique with us.
JUN 06, 2005 - 02:47 AM

Thanks Danny for doing the presentation. Cheers.
Thanks to you too, Alguhan. Hopefully somebody finds it useful.
JUN 06, 2005 - 10:41 AM

PB - nice article! Nice to see large scale dioramas addressed
Thanks Danny - nice job (as always)
JUN 06, 2005 - 12:37 PM
Thanks Scott. Its cool to have something published on the site. Hopefully I´ll have something again shortly. Cheers.
JUN 06, 2005 - 07:44 PM

now i know what to do wif my styrofoam and polystyrene...thanx a lot dude....
JUN 06, 2005 - 10:36 PM

Nice - but I cannot help wonder why 5 of the 11 photos are of the figure when the article is about the base ??
SEP 07, 2008 - 10:50 PM
Hi Jan. Firstly this was posted more than 3 years ago ... its not new.
There are several in-progress shots of the base and how it was made, and there are only so many angles you can show the same piece of wall from.
The title of the piece is called "Building a base for a 1/16 scale figure" so I thought .... silly me .... that a few pics including the figure would be suitable for this article.
SEP 07, 2008 - 11:28 PM
Yeah, well somebody brought it up again
I agree that 1-2 pictures of the fully painted figure (which is nice too) would be fine - but why the unpainted pictures etc....
N/M - just a thought
SEP 07, 2008 - 11:57 PM
Copyright ©2021 by Frank Glackin. Images and/or videos also by copyright holder unless otherwise noted. The views and opinions expressed herein are solely the views and opinions of the authors and/or contributors to this Web site and do not necessarily represent the views and/or opinions of Armorama, KitMaker Network, or Silver Star Enterrpises. All rights reserved. Originally published on: 2005-06-04 00:00:00. Unique Reads: 19855

WEB HOSTING BY


Copyright ©2021 Armorama and Kitmaker Network, a subsidiary of Silver Star Enterprises
All Rights Reserved. Please read our Conditions of Use and Privacy Policy.
All Rights Reserved. Please read our Conditions of Use and Privacy Policy.