

1⁄35Building the Panzer 1
7
Comments
step 5
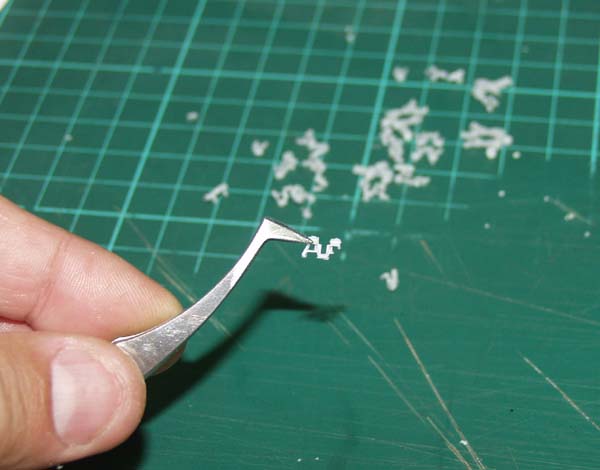
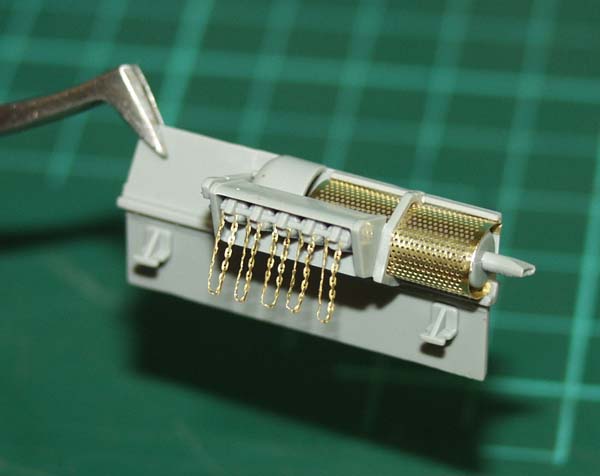
Now I am usually a big fan of individual link tracks. I think all kits should be supplied with them. Yes they do usually take a long time to assemble, but against this is the wonderful appearance that can be achieved. These are no different. Their final appearance is, I think, great. However, it is a Panzer 1. The links are tiny, delicate and therefore prone to damage whilst removing them from the sprue.... and there seems to be an awful lot of them! I damaged an awful lot of them too! I eventually removed them from the sprue by using a pyrogravure, and therefore melting through the sprue rather than putting any pressure whatsoever on it. Still they broke. They are some of the finest moulding Ive ever seen. If you are building one of these, you dont get many spare, so please be careful. I actually did not have enough to finish both lengths, and so there are some half links cunningly placed on the right-hand track! Once removed from the sprue and cleaned up they go together like a dream, just push them together in a short length, run some cement in between and get them around the wheels.... not forgetting to add the proper amount of sag of course! With individual links I like to place them on the vehicle before painting, as I feel its easy to paint them with an airbrush, and very difficult to place them otherwise. If I had to use a brush however, it might be easier to build them, paint them, bend them and fit them! Study the instructions carefully when you come to fit them to the vehicle to ensure they are the correct way round!steps 6&7
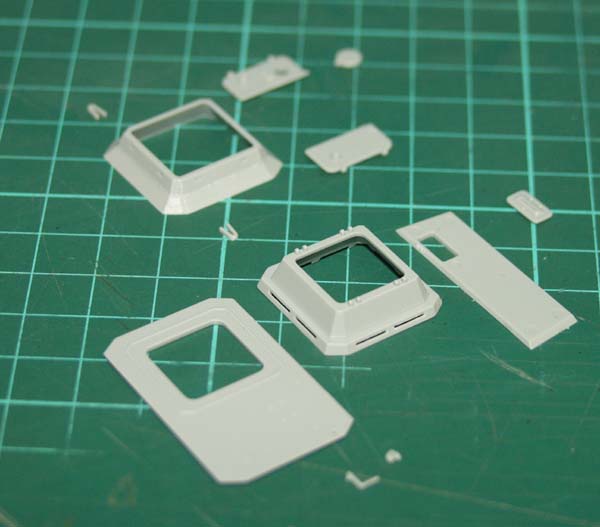
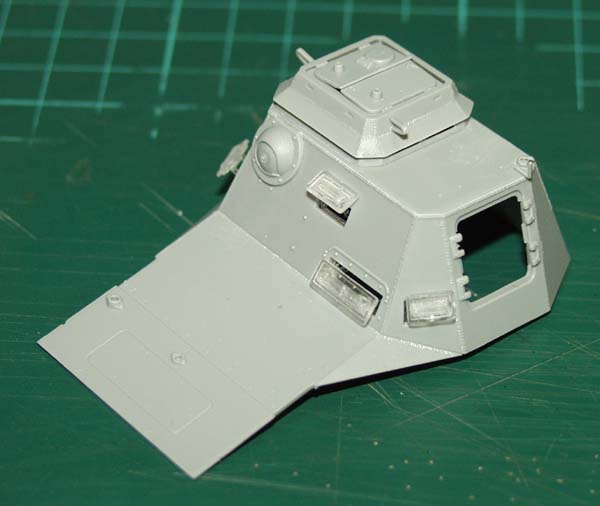
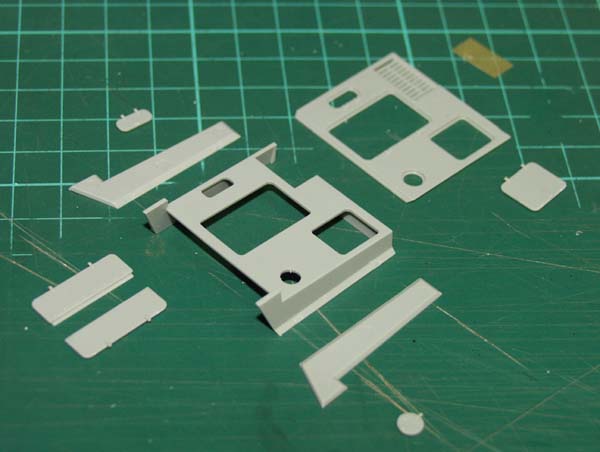
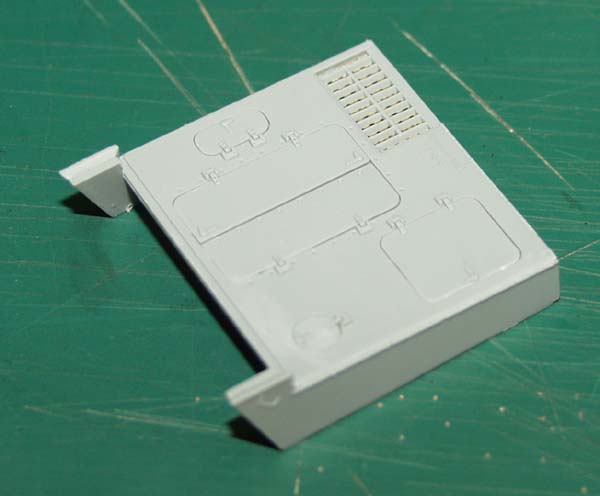
These stages deal with construction of the superstructure. I was slightly nervous about these parts, as having built a similar variant from a different manufacturer and having awful problems getting it to go together, I thought I might have had the same experience here. I need not have worried. It goes together like a dream! It constructed in a very unusual way, sort of like a double skin, with the armour-plating going over a skeleton that forms the basic structure. The option of having both hatches is there, with internal detail on all doors. It is here that you get to use sprue W that contains the mechanisms for the working, transparent vision blocks! Some people have said that these are difficult to work with since being transparent it can be hard to see where mould lines are etc. I have to say, I love them. I cant really see the need for transparent ones in this kit as the effect cannot really be seen on this kit, but the kind of plastic used is ideal for this sort of tiny working detail. The normal grey styrene just would not work; it would be too soft. It can extremely fiddly to assemble these, the best way I found to do it was e.g. to cement W19 to W16 first, then W23 to W19, meanwhile fitting W21 to the superstructure wall. The completed assembly of W23, 19 & 16 can then be fitted through the opening. Seemed to work well!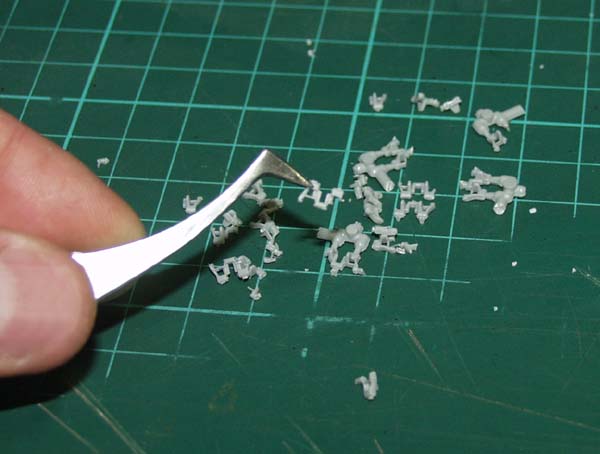


About the Author


Comments

Thanks for sharing and Thank you Vinnie!
It's a most enjoyable reading and you make it look very simple (after all)! Even with the mentioned difficulties it turned out excellent - and I must congratulate you on the color effect that you produced - it looks great!
Looking forward to see the other variants - specially the desert one
Keep up the good work
Skipper
SEP 21, 2005 - 03:25 AM
Vinnie i do love reading your build articles,always well written and your pictures are spot on.
i like the way your Panzerbefehlswagen 1 turned out.
colour is nice and the weathering well you can write a book on your weathering vinnie,top notch.
keep them coming as i love to see your work,
may sound a bit sad but your the man that sort of gave me a kick up the arse and am starting to produce better models.and i was going to pack it all in at the begining of this year
nice one mate
cheers karl
SEP 21, 2005 - 04:05 AM

Nice article Vinnie,
Keep writing them, so I can learn to improve mine.
Nice build, just happen to have the kit, and may get around to building it someday, so the article will surely help.
SEP 21, 2005 - 04:41 AM
Thanks Vinnie for a nice article. I plan to try out that chipping technique, I really liked the results and seems easier than some of the others I've read. Very nice end product, I can see one of those in my future.
Steve
SEP 21, 2005 - 05:59 AM

very nice article and I esp loved the way you described your painting method.. I may try out your technique in the future..
SEP 21, 2005 - 11:22 AM

Excellent.!!!
From the artical and pictures...
It is as if it took you 2 days to build, one day on the model and one day on those damn-individual links....
I too, plan on using your tech for chipped paint...
Keep it up!
SEP 25, 2005 - 05:48 AM

Vinnie you an amazing modeler, i read all of your articles and use many of your tecneques, (i'm playing on using your chipped paint one). Panzer 1 looks great, planning on buying one myself.
OCT 13, 2005 - 06:36 AM
Copyright ©2021 by Vinnie Branigan. Images and/or videos also by copyright holder unless otherwise noted. The views and opinions expressed herein are solely the views and opinions of the authors and/or contributors to this Web site and do not necessarily represent the views and/or opinions of Armorama, KitMaker Network, or Silver Star Enterrpises. All rights reserved. Originally published on: 2005-09-21 00:00:00. Unique Reads: 26849

WEB HOSTING BY


Copyright ©2021 Armorama and Kitmaker Network, a subsidiary of Silver Star Enterprises
All Rights Reserved. Please read our Conditions of Use and Privacy Policy.
All Rights Reserved. Please read our Conditions of Use and Privacy Policy.