

1⁄35Building the Panzer 1
7
Comments
painting
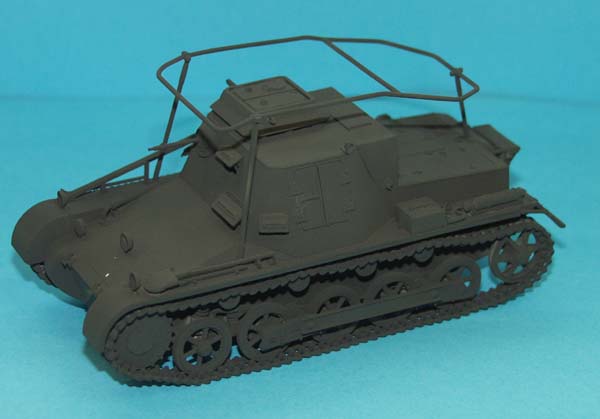
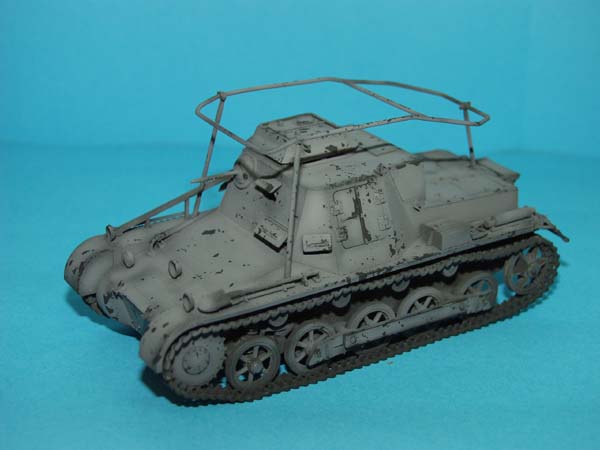
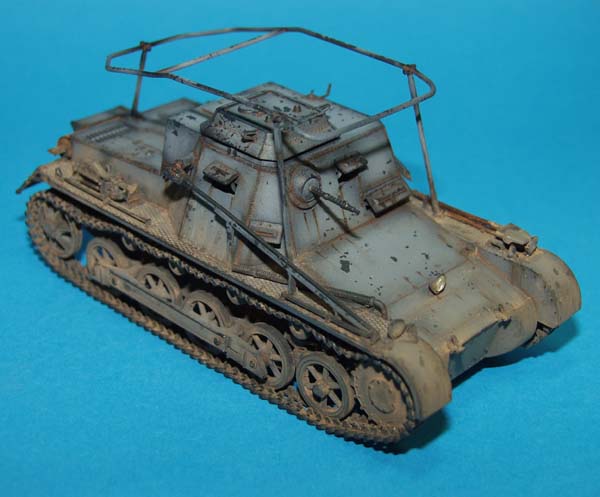
Included in the instructions are 3 painting and marking options, one for each of the three different versions. The decal sheet of course, as is usual with Dragon these days supplies almost everything you could need to depict almost any vehicle. Loads of Divisional markings to depict almost anything you care to, so references for specific vehicles are the order of the day here. I chose to depict the generic Panzer grey version with no divisional markings although there are tactical markings on the vehicle. I began by completely spraying the vehicle in Tamiya XF-69 Nato Black. I use this as a pre-shade and also to achieve the next step, some minor chipping of the paintwork. This is an often over-worked technique. On a personal level I like to use it mainly when depicting vehicles in Panzer grey, but I try not to over do it. After allowing the Nato Black to dry for just a few minutes a small piece of fairly coarse scotchbrite was used to apply the chips. Basically it was dipped into a small pool of art masking fluid, dabbed on paper to ensure that not too much was loaded, and then dabbed around the vehicle, trying to apply it in areas were most wear or knocking of the paintwork would have occurred. Art masking fluid is probably the same stuff as Maskol. I.e. a pva based compound, which dries to a rubbery texture. Only it comes in bigger bottle and is a lot cheaper. Any decent art supply shop should have it. Careful you dont over apply it as it dries almost invisibly, only showing as a slight shiny area!panzer grey
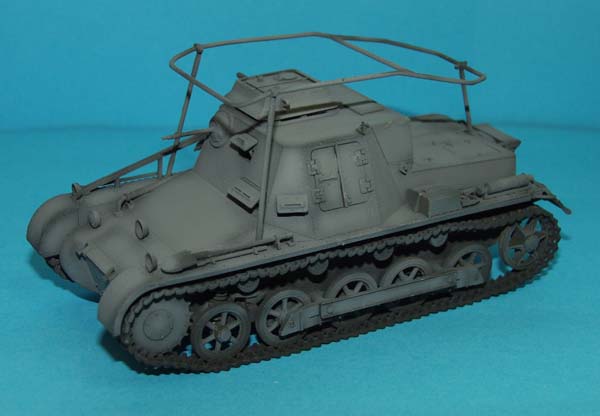
In truth, there were so many different shades of grey around, and on top of that you have the effects of weathering and wear, that which particular shade of grey you choose to depict your model in is open to some interpretation. Added to this is the fact that the base colour you use will invariably change the appearance considerably too. With this in mind I decided to use Tamiya XF-53 Neutral Grey, thinned down 50:50 with Tamiyas own thinner. I began by spraying a very light coat all over the vehicle from around 10cm at 20 psi. I then came in to about a centimetre and began to spray the centre of panels and around the details, to try and achieve the effect I wanted. When finished I set it aside for a few moments to dry.chipping
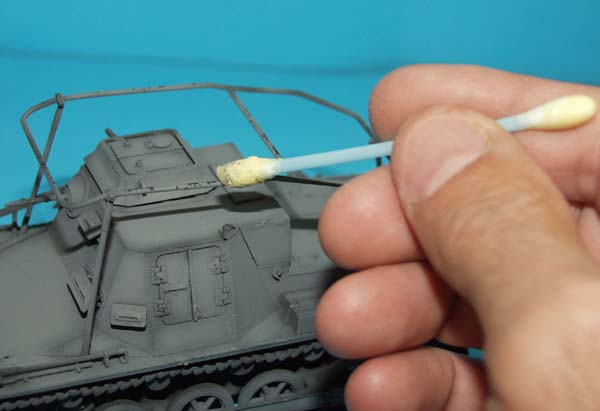
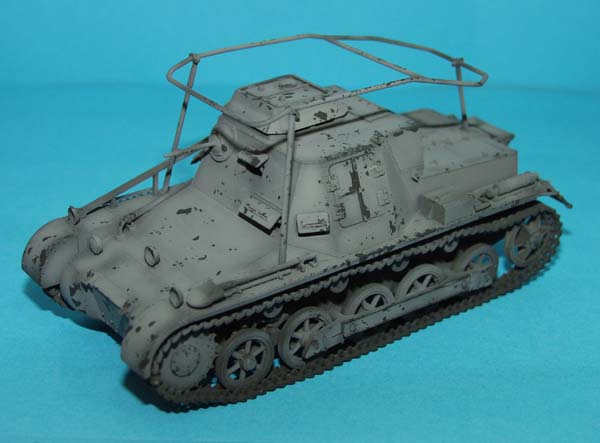
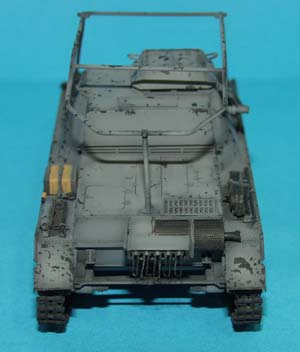
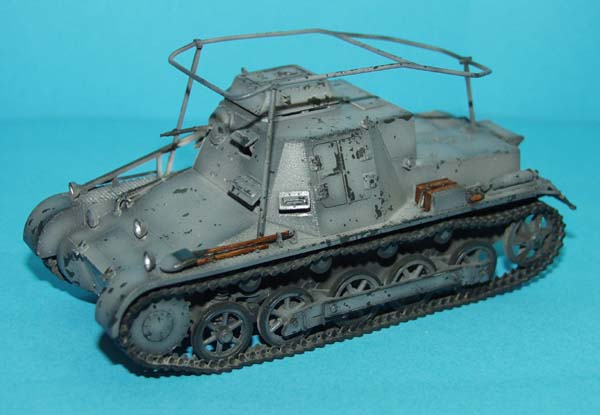
To get the masking fluid off the vehicle and reveal the chips, I used cotton buds dipped in the fluid and allowed to dry. I believe you can use a pencil eraser too, although I have not as yet tried this myself. I have a feeling an eraser would leave a deposit? Lightly rub the cotton buds over the surface of your model and you will find the masking fluid comes off quite easily, although you have to be very careful none is missed. If you do not like the effect another light misting with the Neutral Grey can tone it down somewhat. When I was sure all the masking fluid had been removed I began to paint in the details by brush using Vallejo acrylics. This included the various tools, machine gun, road wheels, tracks and exhaust. I used Vallejo 862 Black Grey to repaint all these details, with further colours being added as appropriate. The tool handles were painted in Vallejo 860 Medium Fleshtone, before having a small amount of Burnt Umber oil paint rubbed along their length. Dipping a small brush in white spirit and taking some oil off if necessary can lighten the effect of this. The jack block was done in the same way. The exhaust was painted in a fairly orangey mixture of Tamiya acrylics to which a very small amount of talcum powder had been added. Afterwards I ground up a small amount of black chalk pastel, mixed this with a little white spirit, and applied it over the orange. This takes moments to dry, and then the excess can be brushed off revealing as much or as little of the orange colour as you want.


About the Author


Comments

Thanks for sharing and Thank you Vinnie!
It's a most enjoyable reading and you make it look very simple (after all)! Even with the mentioned difficulties it turned out excellent - and I must congratulate you on the color effect that you produced - it looks great!
Looking forward to see the other variants - specially the desert one
Keep up the good work
Skipper
SEP 21, 2005 - 03:25 AM
Vinnie i do love reading your build articles,always well written and your pictures are spot on.
i like the way your Panzerbefehlswagen 1 turned out.
colour is nice and the weathering well you can write a book on your weathering vinnie,top notch.
keep them coming as i love to see your work,
may sound a bit sad but your the man that sort of gave me a kick up the arse and am starting to produce better models.and i was going to pack it all in at the begining of this year
nice one mate
cheers karl
SEP 21, 2005 - 04:05 AM

Nice article Vinnie,
Keep writing them, so I can learn to improve mine.
Nice build, just happen to have the kit, and may get around to building it someday, so the article will surely help.
SEP 21, 2005 - 04:41 AM
Thanks Vinnie for a nice article. I plan to try out that chipping technique, I really liked the results and seems easier than some of the others I've read. Very nice end product, I can see one of those in my future.
Steve
SEP 21, 2005 - 05:59 AM

very nice article and I esp loved the way you described your painting method.. I may try out your technique in the future..
SEP 21, 2005 - 11:22 AM

Excellent.!!!
From the artical and pictures...
It is as if it took you 2 days to build, one day on the model and one day on those damn-individual links....
I too, plan on using your tech for chipped paint...
Keep it up!
SEP 25, 2005 - 05:48 AM

Vinnie you an amazing modeler, i read all of your articles and use many of your tecneques, (i'm playing on using your chipped paint one). Panzer 1 looks great, planning on buying one myself.
OCT 13, 2005 - 06:36 AM
Copyright ©2021 by Vinnie Branigan. Images and/or videos also by copyright holder unless otherwise noted. The views and opinions expressed herein are solely the views and opinions of the authors and/or contributors to this Web site and do not necessarily represent the views and/or opinions of Armorama, KitMaker Network, or Silver Star Enterrpises. All rights reserved. Originally published on: 2005-09-21 00:00:00. Unique Reads: 26849

WEB HOSTING BY


Copyright ©2021 Armorama and Kitmaker Network, a subsidiary of Silver Star Enterprises
All Rights Reserved. Please read our Conditions of Use and Privacy Policy.
All Rights Reserved. Please read our Conditions of Use and Privacy Policy.