1⁄35
Texturing AFV Surfaces
 |
Texturing Armour |
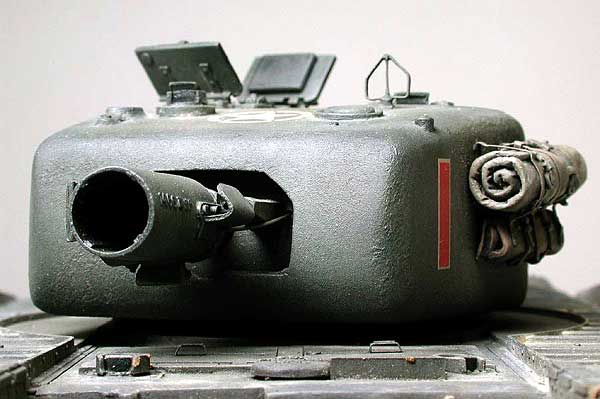
In military modelling nowadays, much attention is paid
in painting and weathering a kit. It is my opinion that these effects and
the effect of realism can be doubled by taking care on the base, the
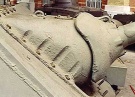
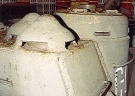
surface of the kit. Even the surface of soft armoured AFV's is slightly
textured and sometimes uneven and not smooth like the surface of the
respective kit will make us believe. The same is valid for weld seams.
To represent this texture I am using Italeri liquid glue and old brushes. I
am wetting the relevant area of the kit with the glue and after a few
seconds I start brushing around and texturing the surface. I am stroking
symmetrical and asymmetrical until I get the desired result. It is important
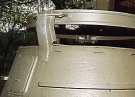
to be aware of the consistence of the plastic. Some are more resistant than
others and keeping that in mind one should calculate the amount of glue
added onto it. I always do some tests on the inside or bottom of the lower
hull before I start off. Please do not loose your nerves when the plastic is
changing it's colour and the kit will get shiny, it is normal! It is
important that this effect is not overdone, or surface details are damaged
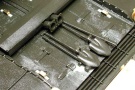
by the glue. It is recommended to always check out pictures, or if possible
refer to the real vehicle and examine it personally to get a feeling how the
texture looks like. For beginners a medium or heavy Russian tank from WWII
is recommended, as the surface of these tanks was always textured quite
heavy. Nevertheless, if a surface got to heavy, it can be corrected by
sanding with fine sandpaper.
For several reasons I sometimes get a hold of already painted AFVs. If they
are painted with acrylics to go ahead with the glue and brush technique as
the paint dissolves and mingles with the glue. This technique is not
recommended for enamel or acrylic-enamel as the paint does not mingle with
the glue. Copyright ©2002 - Text by Werner Kampfhofer (tankbuster).
Photos by Hannelore Zajic, Wolfram Bradac, Robert J. Sladek, and Tankbuster. All Rights Reserved. |
 |
About the Author
About Werner Kampfhofer (tankbuster)
Copyright ©2021 by Werner Kampfhofer. Images and/or videos also by copyright holder unless otherwise noted. The views and opinions expressed herein are solely the views and opinions of the authors and/or contributors to this Web site and do not necessarily represent the views and/or opinions of Armorama, KitMaker Network, or Silver Star Enterrpises. All rights reserved.