135
Make Tracks!

Part 1 : Picking Up The Pieces

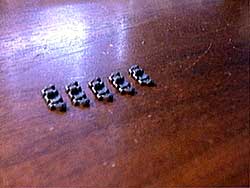
I build my tracks by making small sub sections of 5 to 10 track links, which I then join together. I build these sections by first laying out the pieces I am going to use (figure 1.1).

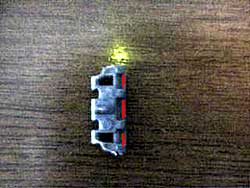
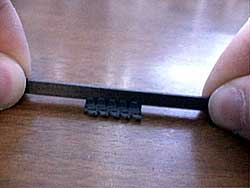
I put a dab of glue in each of the grooves in the track (the red lines show where I apply the glue), and then add another track link into the one I just applied glue to. I find that instead of sliding the new link in, pushing it down from the top works better. I then repeat this until I have a section of 5 links (figures 1.2, 1.3, 1.4).

Now to make the track totally flat I put my file (any flat stick or ruler would do) across all the links and press down on it (figure 1.5).


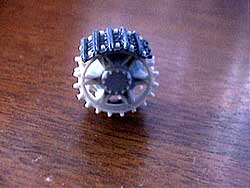
Part 2 : Track over Drive Wheel

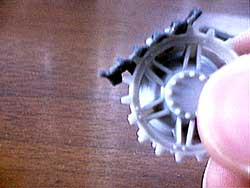
Now I let the section sit for about1 min to let the glue dry a little. Once I’m happy it’s dry a bit and will not fall apart I place it on the tank's drive sprocket (figure 2.1).

Then I bend it around the sprocket and let it dry for about 1 hour (figure 2.2).

Continue by clicking the forward arrow below.

Copyright ©2002 - Text and Photos by Bob Lester (Sohcahtoa) All Rights Reserved.

Project Photos


figure 1.1


figure 1.2


figure 1.3


figure 1.4


figure 1.5


figure 2.1


figure 2.2


About the Author

About Bob (Sohcahtoa)
FROM: ONTARIO, CANADA


Comments

Found this article very handy....thanks. Will be working on making individual tracks for dragons elefant soon so will be using this as a guide thanks
FEB 19, 2003 - 02:13 PM
Thanks for the article Armorama! This will definately be helpful for my next project which happens to have individual tracks included in the kit
FEB 20, 2003 - 03:19 AM
I have finaly come to use more or less that method (I always adapt to my liking) ! And I must say I'm very pleased with it, even at the first try !
MAR 17, 2003 - 11:59 PM
This is a very good article with lots of details and throughout the building process detailed explanations, photos etc. I think it would be beneficial to all of us to see more articles like this on the site. Just a suggestion. Until I'll get enough experience to share and post my building process and techniques, I'll learn from articles like this and ask tons of questions. Indeed, this site is great!! Kind regards, Sebastian
MAR 26, 2003 - 02:22 PM
Great article Mr. Bob!!! I have an MLRS on which I will begin working on in a while, and I think your excellent article is going to help me with the one part of the kit that I think may be troublesome (other than fitting the pods in, which I've heard gripes about). The techniques you presented should help me, as well as my fellow modellers in conquering this sometimes daunting task.
MAR 26, 2003 - 03:04 PM
I see this was first posted almost a year ago. Glad someone found it and pulled it forward. Who knows what other gems remain hidden in the archives. Has anyone done a step by step on those metal Fruiji (whatever) track links. I'ld like to do a comparison
MAR 26, 2003 - 07:03 PM
looks straight forward enough I've always put kits off with the indi links as i've been unsure how to build/paint them oly thing I'm worried bout is the oil wash with the thinning agent be too strong as I've heard some horror stories bour the wash dissoving the glue and trashing the tracks, I've used humbrol rust and black acyrlics with some success for track washes but would prefer to use enamels any tips? but good nice easy to follow article thats why I love this site!
JUN 24, 2003 - 10:27 PM
a very clear, concise article thanks bob! I know it will be refered to bymeslef many times as i embark upon my first track kit for my armour for the latest campaign. thanks again! (++) (++)
JUN 27, 2003 - 08:33 AM
Great article. I think I will try that on my Stug III in progress. Tanks a lot, Steve
JUN 27, 2003 - 02:41 PM
JAN 26, 2013 - 03:18 AM