

1⁄35Panzer IV D
11
Comments

Stages 2 to 7
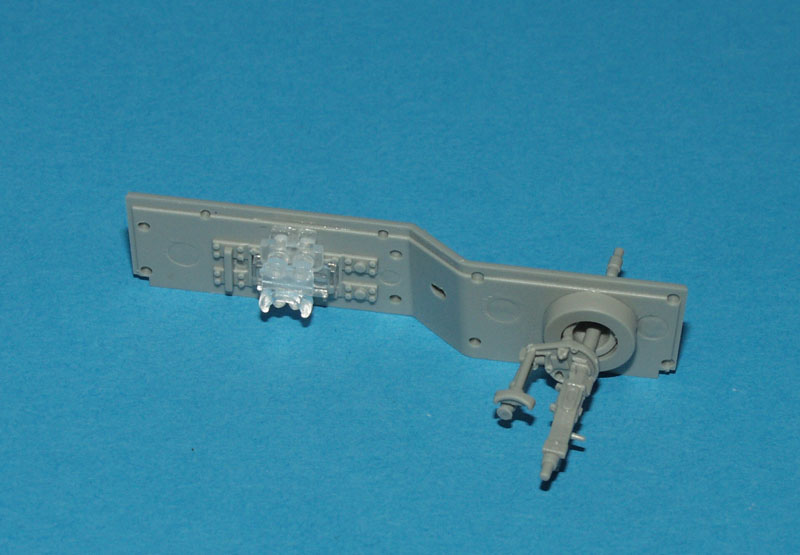
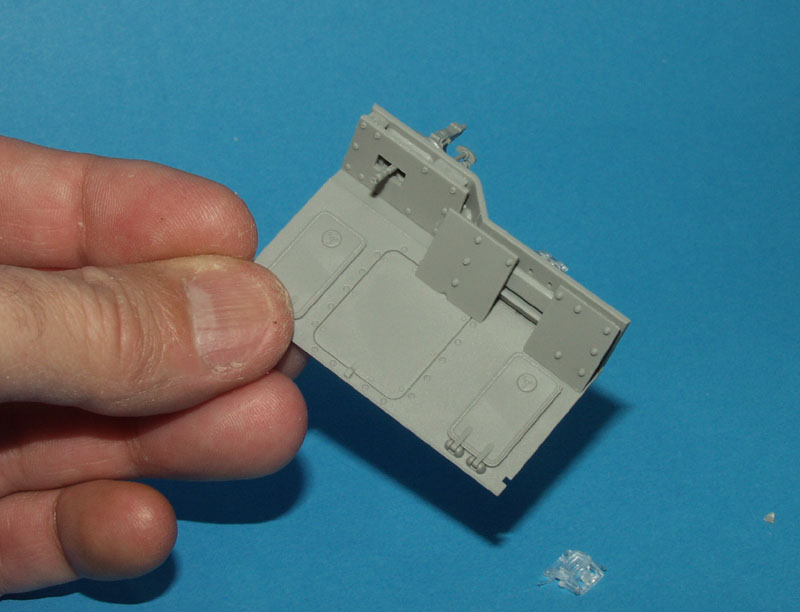
At the beginning of this stage you must commit yourself to which version you wish to build, since this is a Dragon 3 in 1 kit. The 3 versions possible are the production version, with added armour, and the tropical version. The tropical version, which I had decided to build, used the hull with the added armour, there being two types of hull supplied in the kit. Both hulls come with the option of having the fuel filler caps open or closed, and if you decide to display them open there is an insert you put on the inside of the hull to represent the neck of the fuel tank. Next is the front plate, and the towing pintles. Again, I replaced the etched chains with real chain from the spares box and small jump rings made from wire formed around a drill bit. The suspension shock absorbers are fitted at this stage, as is the ring inside the hull on which the turret is located later. The drive housings must be constructed now, and again we are presented with a choice. The choice is whether or not to display the whole thing in pieces, since Dragon provide all the gears for inside the housing, should you choose to display the Panzer IV in a maintenance setting. I could just imagine slapping on loads of neat black oil paint to represent all the grease that the housing would be full of! Maybe next time, since this one was going to built in full working order. The armoured covers for the drive housings include some of the smallest pieces I have ever seen made from styrene, the conical headed bolts, take care you dont lose any! In stage 5 as with all the Panzer IV kits from Dragon that Ive built, the armoured covers for the suspension that fit along either side of the hull bottom, just dont seem to want to fit properly. Theyre fine until I come to cement them, and then I always have to tape them in place, as you can see from the photograph. Stage 5 gave me a bit of a problem, in that the rear plate along the bottom of the hull when fitted left large gaps between the supporting fillets and the idler adjustment housing. No matter how I tried I couldnt seem to get rid of these gaps and ended up filling them with some strips of styrene. I decided to let these harden overnight before continuing with the build. The next morning, I decided to pull the whole thing apart and find out where I had gone wrong. I carefully removed the plate, cleaned up all the joins and started again. This time it fit. I still dont know where I had gone wrong the first time, but I suspect that it has to do with the not so positive fit between D71 and the hull. So take care! In stages 6 & 7 you must construct the hull front plate holding the drivers visor, and co drivers machine gun, and the rear hull plate including the engine intakes. The drivers visor is made completely from transparent styrene, and can be posed in one of two positions, although it cant actually be seen on the completed model unless of course youre leaving the front hatches open. The same can be said of the superb Mg34 for the front hull plate. The detail is amazing, so if you are going to leave the front hatches open, this area will look superb.


About the Author


Comments

Excellent Vinnie. This will be handy when building the kit. The finish and weathering look great. Another nice model for your collection.
What chain did you use, (Links per inch) and where did you get it? I agree that etched chain does not look the part .. I´d rather go with some slightly out of scale chain instead!
APR 29, 2006 - 05:08 AM

Amazing work as allways Vinnie
Thanks for the tips and hints , it will be great help as im building a DML Panzer IV as we speak
Ian
APR 29, 2006 - 05:09 PM

Thanks for the Review. Looks great & you make it seem so easy. So, Like I could do it in a weekend right? :-) :-) :-)
APR 29, 2006 - 06:48 PM

Brilliant Vinnie,
another first class build,the weathering is top notch.
I think the D.A.K tanks with the yellow over grey are one of the most difficult to get right,and you got it spot on
Is this going in a dio? with a zundapp :-) :-) ???
Must do one of these IV's soon, what one?,B,C,D, Vorpanzer...aaahhhh can't choose :-) :-) but when I do I will follow your review
Cheers mate
Andy
APR 30, 2006 - 12:07 AM

LOved the article Vinnie!! Especially since I am in the throes of building the Tristar version. So many parts, so many opportunities to goof. Glad to see I'm not the only one having a few difficulties. What I found amazing is that areas I have struggled with are the same ones you had problems with even though they are different brands....hhmmmm. My biggest complaint on the Tristar is that in several areas it is not clear how parts are suppossed to go togehr and that has caused me the most problems. LIke that chain, I use the stuff for anchor chain on my 350 scale ships, I'll have to see if what I have can be used to substitute or go fid some finer chain soeplace
APR 30, 2006 - 12:49 AM

Vinnie i can say only one thing, "damn good job " sir.
And also a perfect review.
043
APR 30, 2006 - 12:57 AM
Steve, I get some strange looks when going in cheap girly accessory shops looking for earings with very fine chain,and tell the nosey assistants "They not for me,they for my model tank!!" :-) :-) :-)
APR 30, 2006 - 01:35 AM

[quote]Here''s a full build of the DML Panzer IV Ausf.D, finished in tropical scheme!
Vinnie
Please forgive my lack of knowledge....
But which modification , would be needed , in order to represent the " Up - gunned " Panzer IV Ausf.D , as shown at the Bovington museum ?
Cheers...
Mike
APR 30, 2006 - 09:05 PM

Hi Vinnie, great job as usual
If I can say something... I don't like the desert yellow tone. In my opinion it should be pale and lighter cause the sun, and the wear and tear of dust and sand....
But it's only my personal opinion!!!
ciao
tom
MAY 04, 2006 - 01:02 PM

Vinnie
Another superb project. Got some really good tips from the article as well. I don't know where you get the time to do the project AND the article!!
MAY 12, 2006 - 12:46 AM
Copyright ©2021 by Vinnie Branigan. Images and/or videos also by copyright holder unless otherwise noted. The views and opinions expressed herein are solely the views and opinions of the authors and/or contributors to this Web site and do not necessarily represent the views and/or opinions of Armorama, KitMaker Network, or Silver Star Enterrpises. All rights reserved. Originally published on: 2006-04-29 00:00:00. Unique Reads: 24081

WEB HOSTING BY


Copyright ©2021 Armorama and Kitmaker Network, a subsidiary of Silver Star Enterprises
All Rights Reserved. Please read our Conditions of Use and Privacy Policy.
All Rights Reserved. Please read our Conditions of Use and Privacy Policy.