

1⁄35Panzer IV D
11
Comments
stages 8 to 10
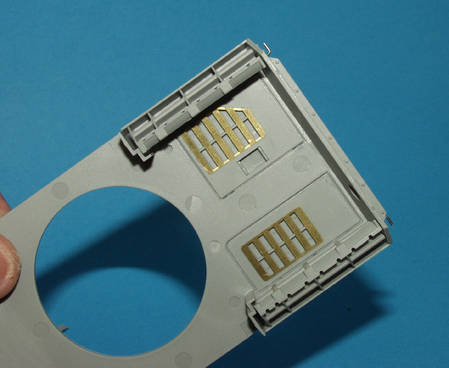
At the beginning of this stage you must fit the grills under the engine access hatches, and the instructions do get a little confusing here, but it wouldnt be a 3 in 12 kit if they didnt! Since you will have already chosen which version youre making, all you have to do is find the correct version on the instruction sheet. You cant actually see much of all this once the model is complete, but at least you know its there! Besides, you might come up with a way of displaying the completed kit so that you can see all this lovely detail, such as the huge fans under the right-hand hatch. You really have to pay close attention to the instructions here, since there are things to remove depending on which version youre building. In stage 10 you have to fit the fenders to the hull superstructure, and before you do, decide on whether to use the tools with the moulded clamps or the photo-etched clamps. I wanted to use the photo-etched clamps, so used the fenders without all the locating holes pre-drilled. In addition I wanted to use the front mudguards from an Eduard set so that I could display them folded up and bent a bit. This necessitated making working hinges from the Eduard set and some wire. The springs that hold the mudguards in position come as moulded ones in the Dragon kit, but for a more realistic appearance I made my own from fine copper wire wound around a drill bit and cut to length. A small rivet at either end from lead foil finished them off.stage 11 and 12
These two stages concern only the various tools and pieces of equipment on the fenders. As mentioned earlier I had decided to go with the photo-etched clamps for all the tools, and as I was to find, this presented certain problems! Most things are fine, and build exactly as the instructions depict. The clamps for the jack are extremely difficult to fit. Just dont seem long enough; I ended up using a small piece of brass strip cut to size. Note that on the instructions MA25 should actually read MA43, and MA43 on the instructions are actually the S towing shackles, which are not numbered on the PE fret but are next to MA45! Then I attempted to make the folding step for the left fender. This was to result in a disaster! I found it very frustrating trying to get the thing straight and eventually it just fell apart where the fold lines in the brass were. Luckily I had another set of photo-etch from a Panzer IV and so could have another attempt. This does mean however, Ill eventually have to build one without a step! Then the biggest problem, trying to get everything lined up correctly on the fenders according to the plan supplied by Dragon. The problems seem to have started with fitting the trough for the antennae. Dragon dont seem to have allowed for the thickness of the extra armour on the front side of the upper hull, and this in turn means that the rearmost bracket isnt long enough. No problem, since I had planned to remove the moulded on brackets, whish are way too thick and replace them with ones from an Eduard set anyhow. As far as I could tell, the trough is in exactly the same place as it would have been had I used the moulded on brackets. It proved impossible then to use the shovel in the position shown on the instructions. There simply wasnt enough room for it and the spare track links on the fenders beneath it. In the end I had to dump the shovel completely. The wires supplied by Dragon for holding the spare road wheels were a problem too. I couldnt get them to sit properly with road wheels in them. Eventually I went looking for further references, and found out that many Ausf.Ds had field made brackets for Jerry cans where Dragon would have you put the spare road wheels, so with a little brass strip I made one for the left fender and attached it to the upper hull. It was only afterwards that I saw Dragon had included this option anyway in stage 20! It seemed unreasonable to have no spare road wheels though, so I manufactured a bracket that seemed to be welded onto the hull rear plate, which again, I had seen a picture of.


About the Author


Comments

Excellent Vinnie. This will be handy when building the kit. The finish and weathering look great. Another nice model for your collection.
What chain did you use, (Links per inch) and where did you get it? I agree that etched chain does not look the part .. I´d rather go with some slightly out of scale chain instead!
APR 29, 2006 - 05:08 AM

Amazing work as allways Vinnie
Thanks for the tips and hints , it will be great help as im building a DML Panzer IV as we speak
Ian
APR 29, 2006 - 05:09 PM

Thanks for the Review. Looks great & you make it seem so easy. So, Like I could do it in a weekend right? :-) :-) :-)
APR 29, 2006 - 06:48 PM

Brilliant Vinnie,
another first class build,the weathering is top notch.
I think the D.A.K tanks with the yellow over grey are one of the most difficult to get right,and you got it spot on
Is this going in a dio? with a zundapp :-) :-) ???
Must do one of these IV's soon, what one?,B,C,D, Vorpanzer...aaahhhh can't choose :-) :-) but when I do I will follow your review
Cheers mate
Andy
APR 30, 2006 - 12:07 AM

LOved the article Vinnie!! Especially since I am in the throes of building the Tristar version. So many parts, so many opportunities to goof. Glad to see I'm not the only one having a few difficulties. What I found amazing is that areas I have struggled with are the same ones you had problems with even though they are different brands....hhmmmm. My biggest complaint on the Tristar is that in several areas it is not clear how parts are suppossed to go togehr and that has caused me the most problems. LIke that chain, I use the stuff for anchor chain on my 350 scale ships, I'll have to see if what I have can be used to substitute or go fid some finer chain soeplace
APR 30, 2006 - 12:49 AM

Vinnie i can say only one thing, "damn good job " sir.
And also a perfect review.
043
APR 30, 2006 - 12:57 AM
Steve, I get some strange looks when going in cheap girly accessory shops looking for earings with very fine chain,and tell the nosey assistants "They not for me,they for my model tank!!" :-) :-) :-)
APR 30, 2006 - 01:35 AM

[quote]Here''s a full build of the DML Panzer IV Ausf.D, finished in tropical scheme!
Vinnie
Please forgive my lack of knowledge....
But which modification , would be needed , in order to represent the " Up - gunned " Panzer IV Ausf.D , as shown at the Bovington museum ?
Cheers...
Mike
APR 30, 2006 - 09:05 PM

Hi Vinnie, great job as usual
If I can say something... I don't like the desert yellow tone. In my opinion it should be pale and lighter cause the sun, and the wear and tear of dust and sand....
But it's only my personal opinion!!!
ciao
tom
MAY 04, 2006 - 01:02 PM

Vinnie
Another superb project. Got some really good tips from the article as well. I don't know where you get the time to do the project AND the article!!
MAY 12, 2006 - 12:46 AM
Copyright ©2021 by Vinnie Branigan. Images and/or videos also by copyright holder unless otherwise noted. The views and opinions expressed herein are solely the views and opinions of the authors and/or contributors to this Web site and do not necessarily represent the views and/or opinions of Armorama, KitMaker Network, or Silver Star Enterrpises. All rights reserved. Originally published on: 2006-04-29 00:00:00. Unique Reads: 24081

WEB HOSTING BY


Copyright ©2021 Armorama and Kitmaker Network, a subsidiary of Silver Star Enterprises
All Rights Reserved. Please read our Conditions of Use and Privacy Policy.
All Rights Reserved. Please read our Conditions of Use and Privacy Policy.