Texas, United States
Joined: July 16, 2005
KitMaker: 264 posts
Armorama: 263 posts
Posted: Saturday, November 17, 2007 - 08:50 AM UTC
New Brunswick, Canada
Joined: July 29, 2007
KitMaker: 93 posts
Armorama: 92 posts
Posted: Saturday, November 17, 2007 - 09:46 AM UTC
The Filter turned out fantastic! Very realistic look of the complex shades in a military vehicle. I think I'll check out those filter sets from MIG, was going to already but now I'm certain.
Virginia, United States
Joined: July 17, 2006
KitMaker: 1,558 posts
Armorama: 1,159 posts
Posted: Saturday, November 17, 2007 - 02:33 PM UTC
Wow! The new camera settings definitely worked, and your filters look great! You're building quite the good-looking Abrams! I particularly like the way the side skirts came out--they look worn and weathered in the right proportions.

Joined: January 12, 2007
KitMaker: 3 posts
Armorama: 2 posts
Posted: Saturday, November 17, 2007 - 07:21 PM UTC
to yufkey 70
nice clean build . very nice . i got 1 as well to build as i work away on a iron ore mine , thought i could build it in my free time but got scared too big (boo cu ) . not enough time so building gundam kits . Our army are using abrams now and are using ASLAVS / Strykers in Afghanistan . does anyone make a aftermarket PE or otherwise addon for the anti-RPg bar work seen on strykers in Afghanistan ? keep up the good work .
Removed by original poster on 11/18/07 - 20:42:42 (GMT).
New Brunswick, Canada
Joined: July 29, 2007
KitMaker: 93 posts
Armorama: 92 posts
Posted: Sunday, November 18, 2007 - 06:18 AM UTC
@ Punchy
Being from another country I don't consider myself the authority on US Army vehicles but ASLAVs aren't used by the US Army, in fact AS stands for Australia. There is a Photo-Etch Slat armour set from Eduard for the Stryker, it is very big and quite expensive. If you were intimidated by the Dragon Abrams kits I wouldn't even bother with the Slat Armour set, It's about as difficult as it comes.
California, United States
Joined: February 24, 2006
KitMaker: 205 posts
Armorama: 200 posts
Posted: Sunday, November 18, 2007 - 01:04 PM UTC
What color or colors did you use on the Vision blocks and sights? They look great, how did you get them to look so real?
Don

The deadliest weapon in the world is a Marine and his rifle.
Gen. John "Black Jack" Pershing, U.S. Army
Commander of American Forces in World War I
Texas, United States
Joined: July 16, 2005
KitMaker: 264 posts
Armorama: 263 posts
Posted: Sunday, November 18, 2007 - 07:38 PM UTC
Manitoba, Canada
Joined: August 13, 2006
KitMaker: 1,021 posts
Armorama: 805 posts
Posted: Thursday, November 22, 2007 - 03:34 PM UTC
I like your idea for the vision blocks. I just added mine using a similar technique only I used sequins. Probably the same stuff actually. She looks great Yufkey! What is written on the right side of the turret? Can't quite make it out.
It seemed she viewed guys on the same level as potatoes.
-Kyon
North Carolina, United States
Joined: June 06, 2006
KitMaker: 4,691 posts
Armorama: 3,509 posts
Posted: Friday, November 23, 2007 - 02:53 AM UTC
Great work,I really followed your build and I hope I can put to use your instructions when I start my own kit which has been sitting for awhile.
Thanks
England - South East, United Kingdom
Joined: July 30, 2007
KitMaker: 658 posts
Armorama: 599 posts
Posted: Friday, November 23, 2007 - 04:21 AM UTC
hi yufkey
ive been following your abrams since day 1 and would just like to say how good i think it looks.my question to you is when you applied the mig filters did you brush them over a gloss finish and then matt varnish or straight on to the top coat of sand yellow ?
all the best
neil

-============================================================-
"THE MAN THAT MAKES NO MISTAKES USUALLY MAKES VERY LITTLE ELSE"
-============================================================-
Texas, United States
Joined: July 16, 2005
KitMaker: 264 posts
Armorama: 263 posts
Posted: Sunday, November 25, 2007 - 09:04 PM UTC
I did both just to see the results. First I used Tamiya Clear from the Spray Can. I didnt like how the model looked after that, but this is something that needs to be done. After that I applied the Decals and went back over it with some Dullcoat. I left some parts unsealed. The results of the filters are about the same on a plane surface. It gets a little tricky when comes to applying it to the grip surface. Also I used a plane paint brush to apply the filters. One last thing the filters will stain the paint area you apply it to.
Thanks for all of the great feedback I should have some new pictures soon.

Texas, United States
Joined: July 16, 2005
KitMaker: 264 posts
Armorama: 263 posts
Posted: Saturday, December 08, 2007 - 09:42 PM UTC
Virginia, United States
Joined: July 17, 2006
KitMaker: 1,558 posts
Armorama: 1,159 posts
Posted: Sunday, December 09, 2007 - 02:41 PM UTC
Wow, it's looking really good, Yufkey! Congrats! Can't wait to see it finished.
Texas, United States
Joined: July 16, 2005
KitMaker: 264 posts
Armorama: 263 posts
Posted: Wednesday, December 12, 2007 - 09:04 AM UTC
Thanks Lucas for all of the positive feedback. Right now I have been very busy at work, so I haven't work on my Abrams much lately. What I have done is played around with the stowage, trying to figure out the best way to place it. More pictures to come soon
Manitoba, Canada
Joined: August 13, 2006
KitMaker: 1,021 posts
Armorama: 805 posts
Posted: Wednesday, December 12, 2007 - 08:04 PM UTC
It seemed she viewed guys on the same level as potatoes.
-Kyon
Texas, United States
Joined: July 16, 2005
KitMaker: 264 posts
Armorama: 263 posts
Posted: Sunday, December 16, 2007 - 03:00 AM UTC
Manitoba, Canada
Joined: August 13, 2006
KitMaker: 1,021 posts
Armorama: 805 posts
Posted: Sunday, December 16, 2007 - 02:44 PM UTC
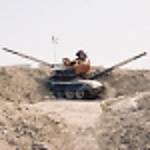
The only thing I would change would be the camo covered ALICE packs. The colours don't quite look right. The sand colour should be a little lighter and the weird green colour should have some of that same sand colour mixed in so it doesn't stand out so much. Here's a couple of pictures that helped me with my build.


Other than that it looks great. Keep going, your getting closer to that finish line.

-Matt
It seemed she viewed guys on the same level as potatoes.
-Kyon
Texas, United States
Joined: July 16, 2005
KitMaker: 264 posts
Armorama: 263 posts
Posted: Friday, January 25, 2008 - 10:14 AM UTC
Good day to all,
its been a while since I posted some new pictures of my build I should have some new ones by the end of this weekend
England - South West, United Kingdom
Joined: October 28, 2006
KitMaker: 203 posts
Armorama: 195 posts
Posted: Friday, January 25, 2008 - 10:24 AM UTC
All looks good to me .
Look forward to seeing more.
Connecticut, United States
Joined: December 15, 2006
KitMaker: 1,165 posts
Armorama: 1,105 posts
Posted: Thursday, January 31, 2008 - 02:07 PM UTC
Nicely done Matt. Thanks for sharing. It was very well done.
On da bench
Dragon Tiger I Early
Takom T-55A
Three Takom Mark IV's
Texas, United States
Joined: July 16, 2005
KitMaker: 264 posts
Armorama: 263 posts
Posted: Saturday, February 16, 2008 - 11:08 PM UTC
Baden-Württemberg, Germany
Joined: October 14, 2007
KitMaker: 314 posts
Armorama: 226 posts
Posted: Sunday, February 17, 2008 - 02:00 AM UTC
looks great!
the M1A2 SEP from dragon will be my next model to buy. i hope,there are not problems during the build.i love what you made from the kid
England - South West, United Kingdom
Joined: October 28, 2006
KitMaker: 203 posts
Armorama: 195 posts
Posted: Sunday, February 17, 2008 - 02:10 AM UTC
Yep , thats a winner . The only part i do not like is the hub cap things on the wheels , in that scale I think they should be painted black , as the clear parts seem a bit gimmicky to me , otherwise its a fantastic model.
Virginia, United States
Joined: July 17, 2006
KitMaker: 1,558 posts
Armorama: 1,159 posts
Posted: Sunday, February 17, 2008 - 07:35 AM UTC
Wow, very nice work, Yufkey! I agree with John about the hub caps--you may want to paint them black on the inside. I think the paint chipping came out fine, but you may want to cover it up with some dust to blend it in a bit--it seems a bit too stark right now.
I noticed that one of the rear light lenses (on the left of th tank in the pictures) is missing--you may have forgotten it.


 Can't wait to see more. She's a beauty!


