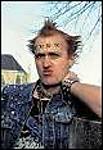
Right then, just to prove I am actually doing something on this project. Here is a WIP on the latest "grunt" -
Obviously just the flesh tones at this point but I was thinking of doing a step by step of this figure to let you know how I paint them. If anyone cares
All Vallejo acrylics for this bit.
First the eyes are painted directly on the primer. A thin line of off white to form the eye shape then an eyeball shape with a dark blue/grey colour. A very small white highlight gives the eye a "glint".
1. Base flesh tone is a 60/40 mix of 955 Flat Flesh and 929 Light Brown.
2. Highlights are base mix blended up to pure 955. Add some 815 Basic Skintone to the mix and blend up to pure 815 on the very final highlight.
3. Shadows are base mix with a VERY small amount of 814 Burnt Cadmium Red and finally a touch of 872 Chocolate Brown for the lining out.
4. Eyebrows painted in 872 Chocolate Brown.
For a more in depth guide (and where I learnt it) Painting a face step by step by Jaume Ortiz http://www.planetfigure.com/forums/showthread.php?t=12338 - The daddy !
If your highlights and/or shadows are a little harsh - try using a VERY thin (I mean dirty water thin) glaze/wash of the original base mix. This will tie everything together and soften out those harsh edges.
Stay tuned - Uniform coming next !!
Constructive Feedback
For in-progress or completed build photos. Give and get contructive feedback!
Hosted by Darren Baker, Dave O'Meara
USMC M48 with a few figures !
andyevans
England - East Midlands, United Kingdom
Joined: October 04, 2008
KitMaker: 369 posts
Armorama: 249 posts
Joined: October 04, 2008
KitMaker: 369 posts
Armorama: 249 posts
Posted: Tuesday, March 24, 2009 - 05:57 AM UTC
newfish
England - West Midlands, United Kingdom
Joined: June 23, 2008
KitMaker: 2,329 posts
Armorama: 2,110 posts
Joined: June 23, 2008
KitMaker: 2,329 posts
Armorama: 2,110 posts
Posted: Tuesday, March 24, 2009 - 08:32 PM UTC
Andy superb work on the skin mate,
Hopefully they'll be done for cosford ?
Outerarm
England - South East, United Kingdom
Joined: September 20, 2007
KitMaker: 240 posts
Armorama: 233 posts
Joined: September 20, 2007
KitMaker: 240 posts
Armorama: 233 posts
Posted: Tuesday, March 24, 2009 - 09:54 PM UTC
Excellent work on the face -- very realistic!
Cheers,
Ian
Cheers,
Ian
andyevans
England - East Midlands, United Kingdom
Joined: October 04, 2008
KitMaker: 369 posts
Armorama: 249 posts
Joined: October 04, 2008
KitMaker: 369 posts
Armorama: 249 posts
Posted: Tuesday, March 24, 2009 - 11:37 PM UTC
Sorry about the blurry photos - must really get a decent camera.
Fatigue trousers painted now (arms will be the same colour but I don't fit them until the body armour is painted).
All Humbrol enamels this time. The only reason is that the colour is quite a good match for worn uniform and I painted all the others this way !
Base coat is 86 Light Olive.
Highlighting is done with the base colour and 72 Khaki.
Shadows are 116 US green, then a little 33 Black added for the final outlining.
Hope you don't mind me going off on a figure tangent here but the figures are a major part of this project and I know that when I started painting Vietnam figures there was very little information around on how to paint the uniforms, so if this helps anyone I feel like I've given something back for all those hours I trawled through the web.
Or, you can always send me money
newfish
England - West Midlands, United Kingdom
Joined: June 23, 2008
KitMaker: 2,329 posts
Armorama: 2,110 posts
Joined: June 23, 2008
KitMaker: 2,329 posts
Armorama: 2,110 posts
Posted: Wednesday, March 25, 2009 - 12:15 AM UTC
Or buy you a .
Superb work matey I am going to try your method on my Bravo 6 figure
Do you have this one?
G.I reference
Superb work matey I am going to try your method on my Bravo 6 figure
Do you have this one?
G.I reference
Posted: Wednesday, March 25, 2009 - 12:46 AM UTC
Great Figures! Like the work you’ve done on the M48. Might get me started again on the one that’s been sitting on my shelf with a base coat of green for the last 7 or 8 years...
Cheers
Cheers
andyevans
England - East Midlands, United Kingdom
Joined: October 04, 2008
KitMaker: 369 posts
Armorama: 249 posts
Joined: October 04, 2008
KitMaker: 369 posts
Armorama: 249 posts
Posted: Wednesday, March 25, 2009 - 02:21 AM UTC
Quoted Text
Might get me started again on the one that’s been sitting on my shelf with a base coat of green for the last 7 or 8 years...
Ha. That is exactly how long this one has been sat on my shelf without ANY paint !
andyevans
England - East Midlands, United Kingdom
Joined: October 04, 2008
KitMaker: 369 posts
Armorama: 249 posts
Joined: October 04, 2008
KitMaker: 369 posts
Armorama: 249 posts
Posted: Wednesday, March 25, 2009 - 03:50 AM UTC
As you've probably gathered, doing a bit of painting today when I should be busy doing something else....
Anyway, OD scarf and boots finished, back on the Vallejo acrylics now:-
Scarf & canvas part of boots base colour is 924 Russian Uniform WW2.
Highlight base mix with 881 Yellow Green. Shadow base mix with 893 US Dark Green.
Leather part of boots base colour is 862 Black Grey, shaded with 950 Black.
As I mentioned before, uniforms and boots will be weathered as part of the vehicle weathering process therefore creating a "complete" picture.
That is it for now, thanks for all the good feedback.
Andy
newfish
England - West Midlands, United Kingdom
Joined: June 23, 2008
KitMaker: 2,329 posts
Armorama: 2,110 posts
Joined: June 23, 2008
KitMaker: 2,329 posts
Armorama: 2,110 posts
Posted: Wednesday, March 25, 2009 - 04:02 AM UTC
Andy superb work . Btw how do you paint rifles?
andyevans
England - East Midlands, United Kingdom
Joined: October 04, 2008
KitMaker: 369 posts
Armorama: 249 posts
Joined: October 04, 2008
KitMaker: 369 posts
Armorama: 249 posts
Posted: Thursday, March 26, 2009 - 05:29 AM UTC
Update for today :
Body armour painted, base colour 887 Brown Violet. Highlight base & 886 Green Grey, Shadow base & 889 US Olive Drab.
Ammo bandolier and webbing belt base colour 988 Khaki. Highlight base & 986 Deck Tan, Shadow base & 889 US Olive Drab.
The eagle-eyed amongst you will notice that the figure has no waterbottles. The reason for this is that I have a load of them painted ready to attach to the figures but because of the close proximity of the figures to each other on the tank, I don't want them to interfere with figure placement.
That's it for now.
Andy
andyevans
England - East Midlands, United Kingdom
Joined: October 04, 2008
KitMaker: 369 posts
Armorama: 249 posts
Joined: October 04, 2008
KitMaker: 369 posts
Armorama: 249 posts
Posted: Thursday, March 26, 2009 - 05:32 AM UTC
Just noticed, I've got my first stripe - oo-rah !
motorbreath23
Wisconsin, United States
Joined: December 29, 2008
KitMaker: 159 posts
Armorama: 138 posts
Joined: December 29, 2008
KitMaker: 159 posts
Armorama: 138 posts
Posted: Thursday, March 26, 2009 - 05:55 AM UTC
ooh rah Andy, your figures are fantastic!
newfish
England - West Midlands, United Kingdom
Joined: June 23, 2008
KitMaker: 2,329 posts
Armorama: 2,110 posts
Joined: June 23, 2008
KitMaker: 2,329 posts
Armorama: 2,110 posts
Posted: Thursday, March 26, 2009 - 06:20 AM UTC
Superb work Andy . Your method is brilliant!
newfish
England - West Midlands, United Kingdom
Joined: June 23, 2008
KitMaker: 2,329 posts
Armorama: 2,110 posts
Joined: June 23, 2008
KitMaker: 2,329 posts
Armorama: 2,110 posts
Posted: Friday, March 27, 2009 - 04:15 AM UTC
Hi Andy, here is a few shots of my M48 in progress i still need the legened set and some AFV club tracks for it though.
More images can be seen here
lM48 W.I.P
More images can be seen here
lM48 W.I.P
KESTRELSUPER
England - West Midlands, United Kingdom
Joined: February 16, 2009
KitMaker: 86 posts
Armorama: 81 posts
Joined: February 16, 2009
KitMaker: 86 posts
Armorama: 81 posts
Posted: Friday, March 27, 2009 - 09:42 AM UTC
james..thats looking good mate..question is ...is it going to be ready for cosford?..Nahh just jokin...looks real good dude..!! how much you got left to do on it??
chefchris
North Carolina, United States
Joined: February 06, 2006
KitMaker: 1,544 posts
Armorama: 1,464 posts
Joined: February 06, 2006
KitMaker: 1,544 posts
Armorama: 1,464 posts
Posted: Friday, March 27, 2009 - 10:19 AM UTC
[quote]Hi Andy, here is a few shots of my M48 in progress i still need the legened set and some AFV club tracks for it though.
James the AFV Club tracks are really for the Italeri M47 - you can use them on the Tamiya M48, but they are considerably narrower than the kit tracks so adjustments will have to made to the Drive sprockets and wheels.
Chris
James the AFV Club tracks are really for the Italeri M47 - you can use them on the Tamiya M48, but they are considerably narrower than the kit tracks so adjustments will have to made to the Drive sprockets and wheels.
Chris
newfish
England - West Midlands, United Kingdom
Joined: June 23, 2008
KitMaker: 2,329 posts
Armorama: 2,110 posts
Joined: June 23, 2008
KitMaker: 2,329 posts
Armorama: 2,110 posts
Posted: Friday, March 27, 2009 - 10:41 AM UTC
Hi Andy im affraid it wont as I need to get some bits for it from cosford lol but ill bring it with me. Just got to glue the drivers periscopes and then the addtional extras then paint !
newfish
England - West Midlands, United Kingdom
Joined: June 23, 2008
KitMaker: 2,329 posts
Armorama: 2,110 posts
Joined: June 23, 2008
KitMaker: 2,329 posts
Armorama: 2,110 posts
Posted: Sunday, March 29, 2009 - 11:53 PM UTC
Andy any progress?
cosfords is less than a week away
cannylad
England - North East, United Kingdom
Joined: March 26, 2009
KitMaker: 13 posts
Armorama: 4 posts
Joined: March 26, 2009
KitMaker: 13 posts
Armorama: 4 posts
Posted: Monday, March 30, 2009 - 08:22 AM UTC
Hi
Just a quick line to compliment you on the figure, outstanding, hoping i can reach this standard someday
cheers
Brian
Just a quick line to compliment you on the figure, outstanding, hoping i can reach this standard someday
cheers
Brian
andyevans
England - East Midlands, United Kingdom
Joined: October 04, 2008
KitMaker: 369 posts
Armorama: 249 posts
Joined: October 04, 2008
KitMaker: 369 posts
Armorama: 249 posts
Posted: Tuesday, March 31, 2009 - 03:31 AM UTC
Thanks everyone for all the great comments, might even get this finished some day !!
Anyway, put all the figures in position on the vehicle just to check for any interferences and to reassure myself that it will still work !!! Pictures are below.
Also please note that I am now exactly half way through painting the figures It will never end. Also the sandbags on the front glacis are temporary, the final ones will be moulded properly behind a retaining bar across the headlamp assemblies.
Once again, appreciate all your comments - If you think I should change anything, speak now !
Andy
ViperAtl
Georgia, United States
Joined: August 22, 2005
KitMaker: 331 posts
Armorama: 191 posts
Joined: August 22, 2005
KitMaker: 331 posts
Armorama: 191 posts
Posted: Tuesday, March 31, 2009 - 03:44 AM UTC
Great job on painting the figures. I'll be back for more WIP updates.
newfish
England - West Midlands, United Kingdom
Joined: June 23, 2008
KitMaker: 2,329 posts
Armorama: 2,110 posts
Joined: June 23, 2008
KitMaker: 2,329 posts
Armorama: 2,110 posts
Posted: Tuesday, March 31, 2009 - 04:25 AM UTC
Andy great work!. Btw what are the tank crew are they hobby fan?
andyevans
England - East Midlands, United Kingdom
Joined: October 04, 2008
KitMaker: 369 posts
Armorama: 249 posts
Joined: October 04, 2008
KitMaker: 369 posts
Armorama: 249 posts
Posted: Tuesday, March 31, 2009 - 04:32 AM UTC
James,
All Hobby Fan cut up and modified to some extent, heads are mostly Hornet.
Andy
All Hobby Fan cut up and modified to some extent, heads are mostly Hornet.
Andy
keenan
Indiana, United States
Joined: October 16, 2002
KitMaker: 5,272 posts
Armorama: 2,844 posts
Joined: October 16, 2002
KitMaker: 5,272 posts
Armorama: 2,844 posts
Posted: Tuesday, March 31, 2009 - 06:39 AM UTC
I really like this. Great job.
Shaun
Shaun
marsiascout
Noord-Brabant, Netherlands
Joined: March 24, 2008
KitMaker: 1,247 posts
Armorama: 913 posts
Joined: March 24, 2008
KitMaker: 1,247 posts
Armorama: 913 posts
Posted: Tuesday, March 31, 2009 - 07:09 AM UTC
Super work! Those figures are great and really fit onto your vehicle.
lars
lars