

Hi Guys,
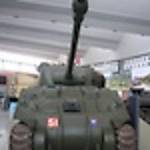
This little Tamyia PkII was 1 of my first builds after more than 25 years away from modeling. I built it in July 2008 while I was home for 5 weeks with a broken leg and built some armor to kill time. In February of this year I got back into modeling when I re-injured the leg and since reading and learning what you guys have to say here i think it was time to overhaul this little guy.
http://s836.photobucket.com/albums/zz283/ltb073/?action=view¤t=PkII1.jpg
Straight OOB build and glued together no sanding, filing or filler. Then I threw on some enamel paint.
http://s836.photobucket.com/albums/zz283/ltb073/?action=view¤t=PkII2.jpg
The brown is a sorry attempt at weathering.
Campaigns
Where Armorama group builds can be discussed, organized, and updates posted.
Where Armorama group builds can be discussed, organized, and updates posted.
Hosted by Darren Baker, Richard S.
Tank Overhaul Campaign

ltb073

Joined: March 08, 2010
KitMaker: 3,662 posts
Armorama: 3,078 posts
Posted: Saturday, May 01, 2010 - 06:32 AM UTC

ltb073
Joined: March 08, 2010
KitMaker: 3,662 posts
Armorama: 3,078 posts
Posted: Saturday, May 01, 2010 - 06:35 AM UTC
The links are to a pictures that I put on photobucket.
Can anyone tell me how to put them up on the tread. Thanks.
Can anyone tell me how to put them up on the tread. Thanks.
Dangeroo

#023

Joined: March 13, 2009
KitMaker: 2,058 posts
Armorama: 1,656 posts

Posted: Saturday, May 01, 2010 - 06:45 AM UTC
Hi Sal
Use the IMG code under "share this image" next to the picture, copy it and paste it into the thread and off you go:

Looks pretty good for a first after 25 years!
Cheers!
Stefan
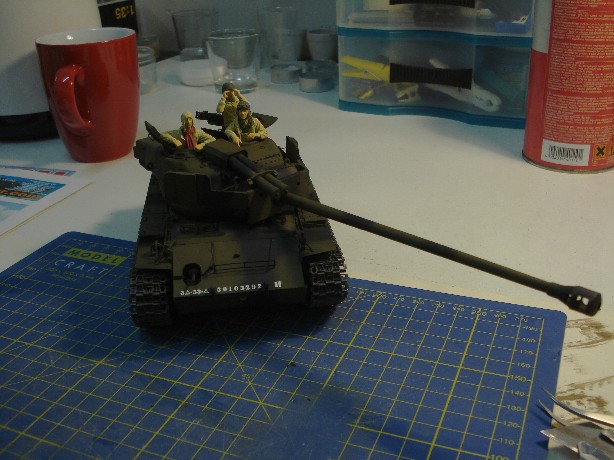
PS: My Super Pershing is getting color at the moment, OD is on, next will be the black camo.
Use the IMG code under "share this image" next to the picture, copy it and paste it into the thread and off you go:
Looks pretty good for a first after 25 years!
Cheers!
Stefan
PS: My Super Pershing is getting color at the moment, OD is on, next will be the black camo.
ltb073
Joined: March 08, 2010
KitMaker: 3,662 posts
Armorama: 3,078 posts
Posted: Sunday, May 02, 2010 - 12:56 AM UTC
Hi Stephen,
Thanks I'll try that.l Lets see if it works

Hey look at that it worked. The uniform color reminds me of What Robin Williams was saying in Good Morning Vietnam. That will be changed as well.
Thanks I'll try that.l Lets see if it works

Hey look at that it worked. The uniform color reminds me of What Robin Williams was saying in Good Morning Vietnam. That will be changed as well.
ltb073
Joined: March 08, 2010
KitMaker: 3,662 posts
Armorama: 3,078 posts
Posted: Monday, May 03, 2010 - 02:29 AM UTC
Hi Guys made some progress over the weekend. Stripped off the lame desert camo and its now in early war gray in stead. Removed the storage bin at the rear of the turret. Couldn't find 1 picture with it there so it came off.
 Added a tow cable to the front.
 Now I'll add some more life to it some gear and a rifleman on the rear and some helmets and stuff on the turret.
 Added a tow cable to the front.
 Now I'll add some more life to it some gear and a rifleman on the rear and some helmets and stuff on the turret.
Bigrip74
Joined: February 22, 2008
KitMaker: 5,026 posts
Armorama: 1,604 posts

Posted: Monday, May 03, 2010 - 07:36 AM UTC
Sal, how did you remove the earlier paint? Looks like a method that I would give a try.
Bob
Bob

Loobes

Joined: August 20, 2007
KitMaker: 409 posts
Armorama: 168 posts

Posted: Monday, May 03, 2010 - 08:00 AM UTC
We have some excellent builds coming along now - Stefan yours is looking great, so are yours , Sal and Jan  . Keep it coming
Cheers
Loobes
. Keep it coming Cheers
Loobes

ltb073
Joined: March 08, 2010
KitMaker: 3,662 posts
Armorama: 3,078 posts
Posted: Monday, May 03, 2010 - 08:25 AM UTC
Quoted Text
how did you remove the earlier paint? Looks like a method that I would give a try.
The dark yellow was the plastic no paint, the other stuff i just lightly sanded then sprayed over what was left with spray paint, don't have an airbrush yet.

ltb073
Joined: March 08, 2010
KitMaker: 3,662 posts
Armorama: 3,078 posts
Posted: Wednesday, May 05, 2010 - 02:27 PM UTC
Ok Guys we have completed the overhaul and assigned this little PkII to the 6th Panzer Division in France.


Added some jerry cans, supplies and a rifleman to the rear


Added tow cable to front and some helmets hanging off the turret
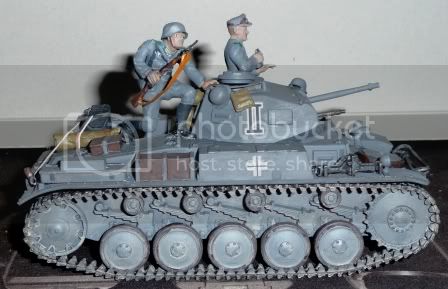
Campaign was a lot of fun might overhaul some others that I built before I started taking the peoples advice on this web site.Any comments or suggestions are welcome as they always help me improve my skills and creativity.
Bigrip74
Joined: February 22, 2008
KitMaker: 5,026 posts
Armorama: 1,604 posts
Posted: Wednesday, May 05, 2010 - 06:22 PM UTC
Sal, you have given me hope for some of my older nasty looking builds. Maybe I can strip them and try again.
Bob
Bob
Dangeroo
#023
Joined: March 13, 2009
KitMaker: 2,058 posts
Armorama: 1,656 posts
Posted: Wednesday, May 19, 2010 - 11:53 PM UTC
Well now! Not a whole lot going on in here...
I have some progress to report on my Super Pershing. It's all painted now, ready for weathering (Which I actually started this morning). Also have the figures ready (entered them into the "Paint thos troops!" campaign. So here goes:


Cheers!
Stefan
I have some progress to report on my Super Pershing. It's all painted now, ready for weathering (Which I actually started this morning). Also have the figures ready (entered them into the "Paint thos troops!" campaign. So here goes:
Cheers!
Stefan
Jasonbee71
#009

Joined: March 03, 2003
KitMaker: 686 posts
Armorama: 258 posts

Posted: Friday, May 28, 2010 - 11:10 PM UTC
Stefan, looking good mate,
as we've only got a few days over a month to go, It's about time I put in an update, well I kind of stopped for a few weeks, lost my motivation for modelling completely and everything got put to one side, But a few kind words got me back in the saddle, I will take and post some pics within the next week or so as I get towards finishing my Panzer IV.
Jason

yeahwiggie

Joined: March 24, 2006
KitMaker: 2,093 posts
Armorama: 1,359 posts

Posted: Saturday, May 29, 2010 - 01:16 AM UTC
Then you're better of than me, Jason.
I hit a serious low too, but no matter what I do, I just don't go back to building again.
I tried it all; building something different than usual, selling of surplus kits and books, going to a modellingshow with live 1:1 vehicles.... but nothing gave me that spark...
Modelling's down, so is reading and roaming the fora...
I don't even care for other people's builds or campaigns that much anymore..
Am I in trouble here???
Dangeroo
#023
Joined: March 13, 2009
KitMaker: 2,058 posts
Armorama: 1,656 posts
Posted: Saturday, May 29, 2010 - 07:04 AM UTC
Thanks Jason!
Well, I'm calling mine done. Definitely an improvement over the original, if I may say so myself...
Here's the pics:
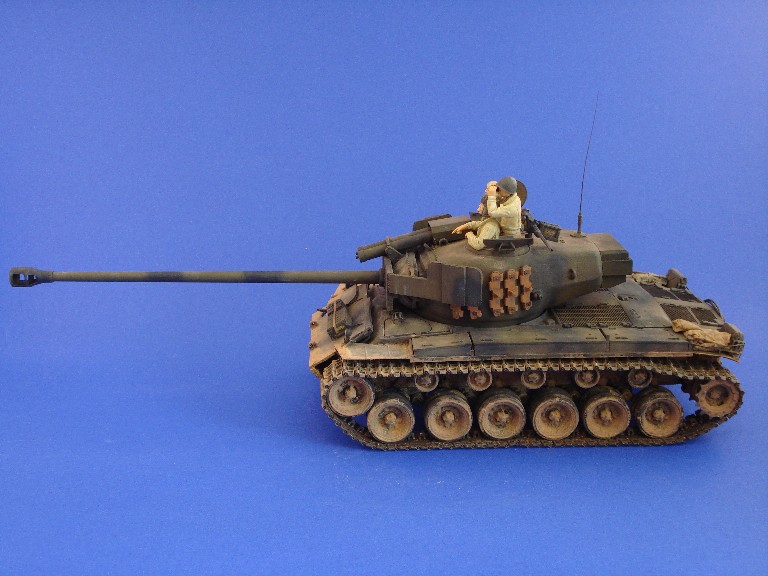


Cheers and thanks for the campaign!
Stefan
Well, I'm calling mine done. Definitely an improvement over the original, if I may say so myself...
Here's the pics:
Cheers and thanks for the campaign!
Stefan

DazzaD

Joined: June 17, 2007
KitMaker: 235 posts
Armorama: 232 posts
Posted: Monday, May 31, 2010 - 01:50 AM UTC
Hi all! Some great looking up grades in the campaign so far. I am joining late but have spent the past few days looking a a very poor looking Panther. I built this one as a kid... and it shows! 
I have been wanting to redo this model but never got around to it. The more I looked at it, the more I thought there was only one thing to do... 'Destroy' it
Where it started...

After a little damage....

My first attempt and my starting point for this build...

I want to try the hair spray and salt method. All new to me but there's only one way to learn, both feet first!
I have been wanting to redo this model but never got around to it. The more I looked at it, the more I thought there was only one thing to do... 'Destroy' it
Where it started...
After a little damage....
My first attempt and my starting point for this build...
I want to try the hair spray and salt method. All new to me but there's only one way to learn, both feet first!
ltb073
Joined: March 08, 2010
KitMaker: 3,662 posts
Armorama: 3,078 posts
Posted: Monday, May 31, 2010 - 07:11 AM UTC
[quoteI want to try the hair spray and salt method. All new to me but there's only one way to learn, both feet first![/quote]
Dazzad,
Your overhaul is looking good. If you go to the Mini Art website
http://www.miniart-models.com/index.htm?/Assembly/page_01.htm
they show how to do the salt method. I have heard several times about the hairspray method but don't know what it is, how to do it or what it does.
Dazzad,
Your overhaul is looking good. If you go to the Mini Art website
http://www.miniart-models.com/index.htm?/Assembly/page_01.htm
they show how to do the salt method. I have heard several times about the hairspray method but don't know what it is, how to do it or what it does.
Loobes
Joined: August 20, 2007
KitMaker: 409 posts
Armorama: 168 posts
Posted: Tuesday, June 01, 2010 - 09:30 PM UTC
Excellent Guys - Stefan, are you sure you didn't go out and buy a new kit?
Sal - terrific building
DazzaD- Very nice so far - keep it coming
Just 1 Month remaining - remember to post in the galleries!
Cheers
Loobes
Sal - terrific building
DazzaD- Very nice so far - keep it coming
Just 1 Month remaining - remember to post in the galleries!
Cheers
Loobes
DazzaD
Joined: June 17, 2007
KitMaker: 235 posts
Armorama: 232 posts
Posted: Tuesday, June 01, 2010 - 11:44 PM UTC
Cheers Sal, I am searching the net each night and have found some pretty cool videos on it. The out come always looks better then any thing I have built... I am keen to see if it is the painting method... or just the builder 
DazzaD
Joined: June 17, 2007
KitMaker: 235 posts
Armorama: 232 posts
Posted: Tuesday, June 01, 2010 - 11:51 PM UTC
hmm, I probably should show the changes... dont have much time left after all!
http://gallery.kitmaker.net/showphoto.php/photo/339188
I sprayed it black with an over spray of rust. Then plenty of hairspray (I hope not too much) and then dusted it down with 4 shades of burnt and rust pigments. Next will be the salting and camo.
http://gallery.kitmaker.net/showphoto.php/photo/339188
I sprayed it black with an over spray of rust. Then plenty of hairspray (I hope not too much) and then dusted it down with 4 shades of burnt and rust pigments. Next will be the salting and camo.
DazzaD
Joined: June 17, 2007
KitMaker: 235 posts
Armorama: 232 posts
Posted: Saturday, June 05, 2010 - 06:42 PM UTC
Time to get a move on...
Hairspray and Salted. I added loads of salt because I wanted this one to be knocked out and rusted in the fields for a while...
Rusted with pigments....

Heavy Salted...

And here is the camo over the top....

I would usually add small details when I spray the camo on but with all the salt you cant. I am not really expecting much as this is my learning experience. I will let it all settle and knock the salt off.
Hairspray and Salted. I added loads of salt because I wanted this one to be knocked out and rusted in the fields for a while...
Rusted with pigments....
Heavy Salted...
And here is the camo over the top....
I would usually add small details when I spray the camo on but with all the salt you cant. I am not really expecting much as this is my learning experience. I will let it all settle and knock the salt off.
DazzaD
Joined: June 17, 2007
KitMaker: 235 posts
Armorama: 232 posts
Posted: Friday, June 11, 2010 - 01:17 AM UTC
Knocked the salt off. It came out ok and I have gained a lot of experence from the build. I am not 100% happy with the finish but I now know how to sort the rust out on my next build

Firefly74
Joined: April 15, 2010
KitMaker: 224 posts
Armorama: 205 posts

Posted: Monday, June 14, 2010 - 09:51 PM UTC
Hi all, last minute enlistment! Nice overhauls being done everyone.
@DazzaD: have being following your Panther with interest,have never tried the hairspray/salt technique so keen to see how it turns out!
I'll be doing a 1:72 scale Airfix Crusader,i built it about 10 years ago when i was last modeling and have been wanting to change it for some time.
Picture below is with the old airfix unit decals removed.(left serial numbers on).
Will drill out the barrel,add some antennae,crew stowage,camo.scheme and new unit markings.
Cheers,
Tim
Loobes
Joined: August 20, 2007
KitMaker: 409 posts
Armorama: 168 posts
Posted: Wednesday, June 16, 2010 - 07:44 PM UTC
Looking good Dazzad - only a few weeks left
Gonna be good firefly
Gonna be good firefly
DazzaD
Joined: June 17, 2007
KitMaker: 235 posts
Armorama: 232 posts
Posted: Friday, June 18, 2010 - 01:11 AM UTC
Well after a few mods and letting the model dry out the colours all changed. It looked much better then it had...


I was almost happy with the outcome but the camo green was WAY too bright. The photos dont show it up very well but with the dark rust background it really stood out.
I thought I would both blend the edges and bull the green with an over spray of rust and black...
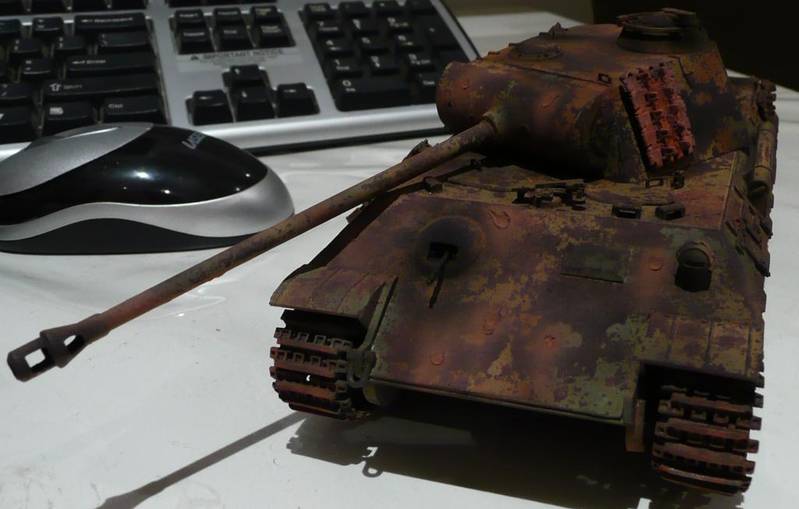

Now I wish I didnt. The over spray dulled the green but it blended the edges too much. Ruined the effect. All knowledge for next time. The next build will have a far better out come. Over all the hair spray/salt method was far easier then I thought and if I was a little lighter on the over spray at the end, it wouldve been far better.
I was almost happy with the outcome but the camo green was WAY too bright. The photos dont show it up very well but with the dark rust background it really stood out.
I thought I would both blend the edges and bull the green with an over spray of rust and black...
Now I wish I didnt. The over spray dulled the green but it blended the edges too much. Ruined the effect. All knowledge for next time. The next build will have a far better out come. Over all the hair spray/salt method was far easier then I thought and if I was a little lighter on the over spray at the end, it wouldve been far better.
Jasonbee71
#009
Joined: March 03, 2003
KitMaker: 686 posts
Armorama: 258 posts
Posted: Monday, June 21, 2010 - 10:40 PM UTC

Hi all,
Well with a week to go, I've finally got round to priming my Panzer IV (will post pics tomorrow sometime) I'm just making sure it's primed all over, then it's hi-lites and base coat, I will endeavor to post pictures as each level of paint is sprayed.
Jason
 |

WEB HOSTING BY


Copyright ©2021 Armorama and Kitmaker Network, a subsidiary of Silver Star Enterprises
All Rights Reserved. Please read our Conditions of Use and Privacy Policy.
All Rights Reserved. Please read our Conditions of Use and Privacy Policy.