Nice work Nick.
I don't know. I like these pieces of artillery sitting on their own as the focus. I have a collection of unbuilt German pieces like this that will (I think) have a nice long spot on the display shelf all sitting beside each other. I think that would be cool.
Campaigns
Where Armorama group builds can be discussed, organized, and updates posted.
Where Armorama group builds can be discussed, organized, and updates posted.
Hosted by Darren Baker, Richard S.
Tank Killers
tominizer

Joined: September 26, 2006
KitMaker: 210 posts
Armorama: 81 posts

Posted: Friday, May 21, 2010 - 07:43 AM UTC
Posted: Friday, May 21, 2010 - 10:28 PM UTC
Tominizer,
If you like them as a centre piece, you could build a base that looks like a concrete floor, with a plain brick back wall and a low chain railing to replicate a typical museum display and then place the gun on it - every once in a while replace it with a different one for variety! (I'm thinking of doing similar for temporarily "basing" tanks at model shows just to jazz up the table.)
Tom

ppawlak1

Joined: March 14, 2006
KitMaker: 1,973 posts
Armorama: 1,843 posts

Posted: Sunday, May 23, 2010 - 08:54 PM UTC
I'm done with the JPK, it's time to move on to the Canadian C2 Mexas in another Campaign 


Cheers
Paul


Cheers
Paul
ltb073

Joined: March 08, 2010
KitMaker: 3,662 posts
Armorama: 3,078 posts

Posted: Monday, May 24, 2010 - 12:21 AM UTC
Paul,
Very nice I like it, weathering not overdone, looks great. Who's kit is that?
Very nice I like it, weathering not overdone, looks great. Who's kit is that?

roman

Joined: July 20, 2004
KitMaker: 99 posts
Armorama: 95 posts

Posted: Monday, May 24, 2010 - 06:45 PM UTC
ISU - 152 Tamiya in progress
base green


base green


ppawlak1

Joined: March 14, 2006
KitMaker: 1,973 posts
Armorama: 1,843 posts

Posted: Monday, May 24, 2010 - 06:54 PM UTC
Quoted Text
Paul,
Very nice I like it, weathering not overdone, looks great. Who's kit is that?
G'day Sal,
thanks for the comments. The kit is the Revell kit with the Perfect Scale resin update, tracks, and barrel

Cheers
Paul
Philippus

Joined: March 13, 2007
KitMaker: 182 posts
Armorama: 84 posts

Posted: Wednesday, May 26, 2010 - 12:33 AM UTC
Nice work everyone,
I'm really late with starting this but here is what I'm doing:

Hope to Have some progress this evvening!
Thanks,
Philip.
I'm really late with starting this but here is what I'm doing:

Hope to Have some progress this evvening!
Thanks,
Philip.

Posted: Thursday, May 27, 2010 - 10:28 PM UTC
Wow, beautiful JagdPanzer, Paul. Really love that finish.
Thanks for sharing
Thanks for sharing


ppawlak1

Joined: March 14, 2006
KitMaker: 1,973 posts
Armorama: 1,843 posts

Posted: Thursday, May 27, 2010 - 10:36 PM UTC
Quoted Text
Wow, beautiful JagdPanzer, Paul. Really love that finish.
Thanks for sharing
Thanks for the kind words Jesper, the lighing makes the JP a little bright but I've learnt a bit more from this build - as you do in this hobby.
I used Abt 502 Oils for the weathering, and Mig pigments suspended in Mig thinner for washes for the lower hull, tracks,and dirt effects.
Cheers
Paul
Posted: Sunday, May 30, 2010 - 03:31 AM UTC
I finally got some work done on my Marder III.. I tend to get hung up in details and trying to get everything perfect.. well last night I just went and put it together and this morning I painted the basecoat. kept to the basics and let it fall where it may.. kinda fun not to worry too much.

I basecoated it with Model Master Dunklegelb 2095, but I thought it was a bit too greenish and dark so I lightened it up with some white tint and added just a bit of Raw sienna to try and tone down the greenness.
the airbrushing didn't go perfect there are a few problems that I'll fix up with the camo and weathering but I think it looks ok. not my best and not my worst. I really am going to try and finish this.
laters
Delbert

Posted: Sunday, May 30, 2010 - 06:54 AM UTC
Delbert,
I'm no expert on Dunkelgelb (although they do exist...) but it looks like a good base to me. Add some camo, weather it up, and it should be as "real" as any of the other formulations for this 70-year old paint.
I really need too post pics of my own work too, as we only have a week to go! (Gulp!)
Tom
tominizer

Joined: September 26, 2006
KitMaker: 210 posts
Armorama: 81 posts

Posted: Monday, May 31, 2010 - 02:57 AM UTC
Tom, that's not a bad idea. I'll think about that one!! only thing is most pieces represented at a museum have been cleaned up somewhat. My WWII models never look that way....... have too much fun weathering the crap out of them and making them look like their put away wet after a hard days work!!
BTW, everyone's stuff is looking GREAT
BTW, everyone's stuff is looking GREAT

Posted: Monday, May 31, 2010 - 10:34 AM UTC
Howdy all.
got some more done today..
applied the camo used humbrol red/brown and Model Masters Panzer olive grun. used the airbrush free hand which is not something I'm very good with, but i'm happy with the results.


Delby
got some more done today..
applied the camo used humbrol red/brown and Model Masters Panzer olive grun. used the airbrush free hand which is not something I'm very good with, but i'm happy with the results.

Delby
Posted: Monday, May 31, 2010 - 11:15 AM UTC
With a week to go, here's where I'm at. I shelved the M36B1 a couple weeks ago (it will get done by August, so keep an eye on the M36B1 build log that Stefan started in the Armor/AFV forum...) and threw together this Revell SU-100 just to get something done by the deadline. Then the in-laws came for a week...
These first two shots show the big gaps where the hull goes together - these were filled with Evergreen, but are a pain.


And here's the beast ready for paint. Note that I restricted the AMS to a few tool clamps and grabs that Revell forgot.


The plan is to paint it with that satin "brush-painted by volunteers" look of public monuments. I was going to make it look neglected, but the web snaps I've seen are all in good condition - I guess the former Soviet Union didn't suffer as much from teenage vandals! I'll add the obligatory white edging, but the display base will not happen in time.
Tom
These first two shots show the big gaps where the hull goes together - these were filled with Evergreen, but are a pain.


And here's the beast ready for paint. Note that I restricted the AMS to a few tool clamps and grabs that Revell forgot.


The plan is to paint it with that satin "brush-painted by volunteers" look of public monuments. I was going to make it look neglected, but the web snaps I've seen are all in good condition - I guess the former Soviet Union didn't suffer as much from teenage vandals! I'll add the obligatory white edging, but the display base will not happen in time.
Tom

jccraemer

Joined: December 24, 2007
KitMaker: 462 posts
Armorama: 262 posts

Posted: Monday, May 31, 2010 - 12:30 PM UTC
Add to pics to the campaign gallery finished dragon gunner

opsguy

Joined: April 18, 2010
KitMaker: 55 posts
Armorama: 54 posts

Posted: Monday, May 31, 2010 - 02:11 PM UTC
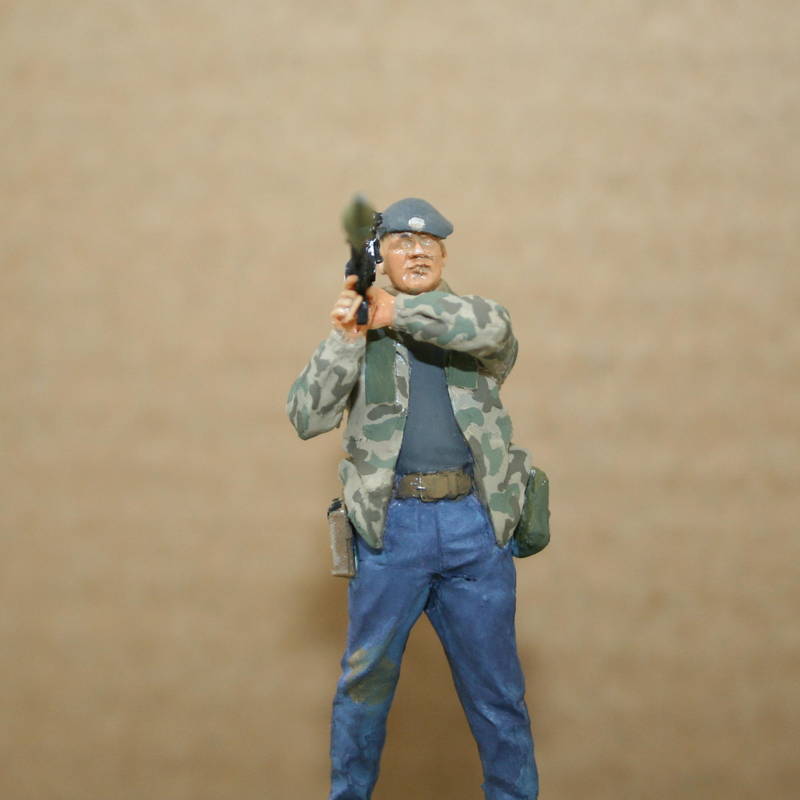
Made some progress on my team...


The gloss on their helmets is future. I need to add the early helmet decals, a couple of touch ups and the team is done. Obviously I am working on the base. My first, and I'm learning a lot!


The gloss on their helmets is future. I need to add the early helmet decals, a couple of touch ups and the team is done. Obviously I am working on the base. My first, and I'm learning a lot!
ltb073

Joined: March 08, 2010
KitMaker: 3,662 posts
Armorama: 3,078 posts

Posted: Monday, May 31, 2010 - 02:38 PM UTC
Rich,
Figures look great mine come out terrible but I still do them hoping to improve. Dio is looking good as well would like to see the finished product.

Figures look great mine come out terrible but I still do them hoping to improve. Dio is looking good as well would like to see the finished product.


warreni

Joined: August 14, 2007
KitMaker: 5,926 posts
Armorama: 712 posts

Posted: Monday, May 31, 2010 - 07:09 PM UTC
"Oooo wait a minute!" I thought, "There is a campaign I haven;t entered yet. I must have 20 or more lits I could do for it, but I only have a few weeks at most left. Oops! Make that days."
Speed build time...
SO here are the results of a few days of intensive building to finish in time..
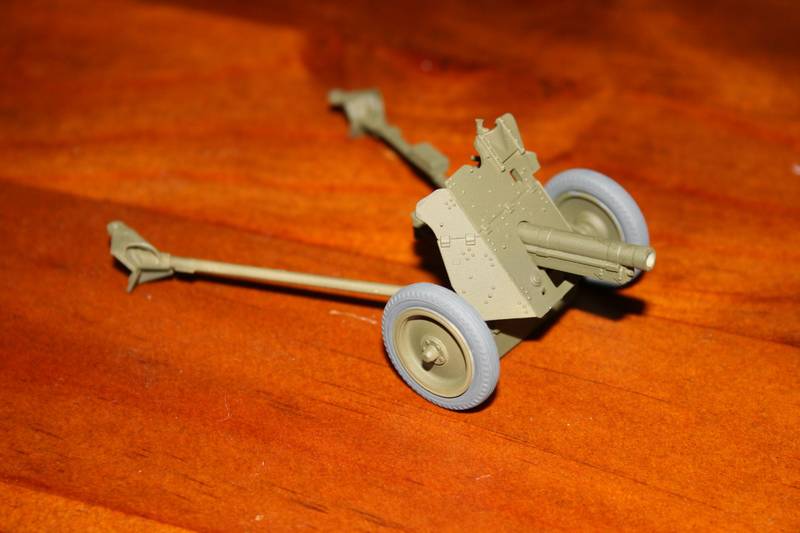
I wandered out to the garage to look in my five big model stash cupboards (7 feet tall, three feet wide and two feet deep) and looked into my mainly-1/35th cupboard. I have one or two shelves with off the wall type kits from eastern european manufacturers in there and my eyes fell on an Alanger 1/35 45mm Anti-Tank Gun. "Perfect" I thought to myself. Then I went to my Tamiya shelves and spotted an old (very old) 6 pounder AT Gun. I had a closer look and it is so simple I thought I would build both of them. That put weathering mostly out as time waits for no man! So it took about 90 minutes to build and about another hour to paint. (I will do some further weathering etc later)
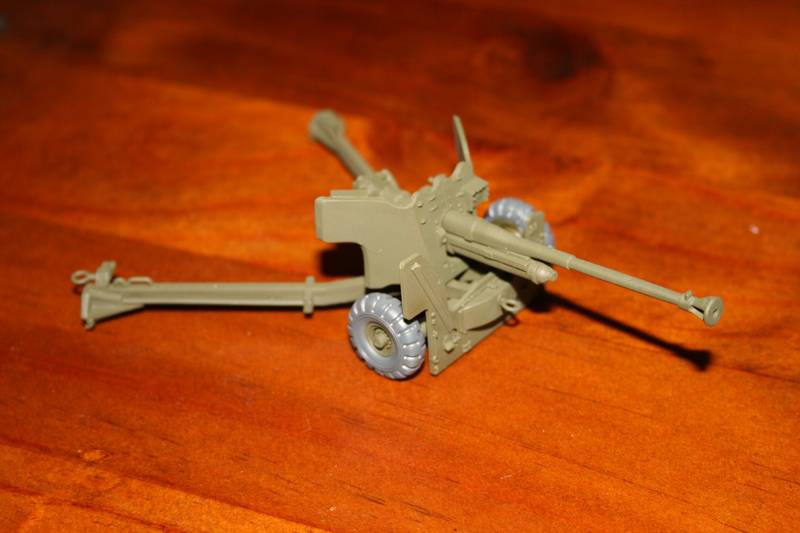
So then I started on the 45mm. Problem was the instructions and parts looked nothing like the picture on the box top. The barrel being way too short for example. Now this kit and another Alanger one, a 76mm Regimental Gun, where bought by me about 5 years ago and never opened until now. Seems the two sprues and instructions had been put in the wrong boxes, because when I opened the 76mm Regimental gun box there was the 45mm AT Gun sprue and its instructions! I think the person I bought them off must have put them back in the wrong boxes before they got to me.
But anyway, here is the 45mm...
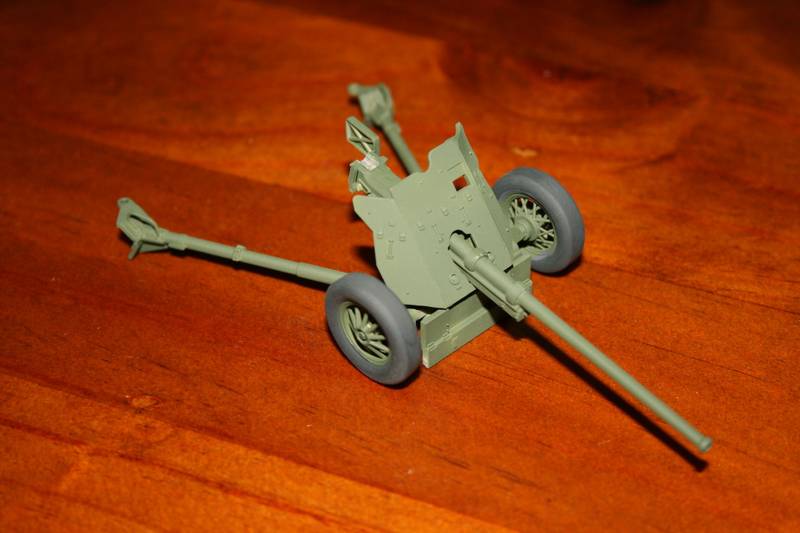
Quite a nice build after removing a bit of flash. And here is the 76mm (yes it isn't an AT Gun..)
So after finishing these three guns in the time it normally takes me to build the cockpit of one of my 1/32 aircraft, I thought I might build something to tow the things with. Now I am not sure but maybe, just maybe the Russians also got Bren Gun Carriers from the Brits along with the other equipment sent to them.. Did you know they were produced from 1934 to 1960..
Anyway, I finished mine as one that toed a 6 pounder AT Gun over the green fields of England while practicing for the D-Day landings. (It's my story and I am sticking to it!)
and
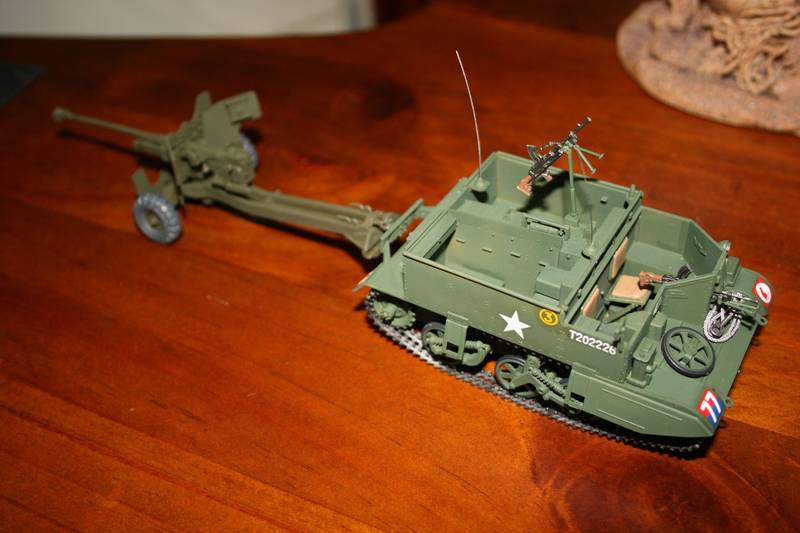
So there you are. Originally it was to be the 6 pounder AT Gun. Then the 45mm got added. Then when I had mostly finished the 76mm thinking it was the 45mm it turned into three guns. And just to top it off the Universal Carrier for something a bit different.
About 2 hours later the Tamiya Gun was finished. It is a bit rough in spots, and I think I got the tyres a little light in colour, but hey this is a speed build!
Speed build time...
SO here are the results of a few days of intensive building to finish in time..
I wandered out to the garage to look in my five big model stash cupboards (7 feet tall, three feet wide and two feet deep) and looked into my mainly-1/35th cupboard. I have one or two shelves with off the wall type kits from eastern european manufacturers in there and my eyes fell on an Alanger 1/35 45mm Anti-Tank Gun. "Perfect" I thought to myself. Then I went to my Tamiya shelves and spotted an old (very old) 6 pounder AT Gun. I had a closer look and it is so simple I thought I would build both of them. That put weathering mostly out as time waits for no man! So it took about 90 minutes to build and about another hour to paint. (I will do some further weathering etc later)

So then I started on the 45mm. Problem was the instructions and parts looked nothing like the picture on the box top. The barrel being way too short for example. Now this kit and another Alanger one, a 76mm Regimental Gun, where bought by me about 5 years ago and never opened until now. Seems the two sprues and instructions had been put in the wrong boxes, because when I opened the 76mm Regimental gun box there was the 45mm AT Gun sprue and its instructions! I think the person I bought them off must have put them back in the wrong boxes before they got to me.
But anyway, here is the 45mm...

Quite a nice build after removing a bit of flash. And here is the 76mm (yes it isn't an AT Gun..)

So after finishing these three guns in the time it normally takes me to build the cockpit of one of my 1/32 aircraft, I thought I might build something to tow the things with. Now I am not sure but maybe, just maybe the Russians also got Bren Gun Carriers from the Brits along with the other equipment sent to them.. Did you know they were produced from 1934 to 1960..
Anyway, I finished mine as one that toed a 6 pounder AT Gun over the green fields of England while practicing for the D-Day landings. (It's my story and I am sticking to it!)

and

So there you are. Originally it was to be the 6 pounder AT Gun. Then the 45mm got added. Then when I had mostly finished the 76mm thinking it was the 45mm it turned into three guns. And just to top it off the Universal Carrier for something a bit different.

About 2 hours later the Tamiya Gun was finished. It is a bit rough in spots, and I think I got the tyres a little light in colour, but hey this is a speed build!

Posted: Tuesday, June 01, 2010 - 05:26 AM UTC
Warren,
Wow! Better slow down before the cops see you... I'm amazed how quickly you got that Bren Carrier done! Are you sure you don't have time to weather them?
Tom
Wow! Better slow down before the cops see you... I'm amazed how quickly you got that Bren Carrier done! Are you sure you don't have time to weather them?
Tom

Philippus

Joined: March 13, 2007
KitMaker: 182 posts
Armorama: 84 posts

Posted: Tuesday, June 01, 2010 - 09:44 PM UTC
Hi guys,
Managed to get my PAK 38 completed and the first coat of German Grey on.


Thanks,
Philip
Managed to get my PAK 38 completed and the first coat of German Grey on.


Thanks,
Philip


Philippus

Joined: March 13, 2007
KitMaker: 182 posts
Armorama: 84 posts

Posted: Wednesday, June 02, 2010 - 10:51 PM UTC
I am now finished my PAK 38.


Could someone point me in the direction of the gallery please.
Thanks,
Philip.


Could someone point me in the direction of the gallery please.
Thanks,
Philip.

ltb073

Joined: March 08, 2010
KitMaker: 3,662 posts
Armorama: 3,078 posts

Posted: Thursday, June 03, 2010 - 12:17 AM UTC
Quoted Text
I am now finished my PAK 38.
Could someone point me in the direction of the gallery please.
Thanks,
Philip.
Philip, nice job are you gonna do the figures too? Hedre is the link to the gallery
http://gallery.kitmaker.net/showgallery.php/cat/25000


Nylonathatep

Joined: September 27, 2007
KitMaker: 58 posts
Armorama: 56 posts

Posted: Thursday, June 03, 2010 - 01:38 AM UTC
Made up and fitted the front track guards and headlights, and gave the tracks a coat of paint. Fitted crew seating and fuel tanks.

Left to do:
Rear tool stowage
Jack mount
Engine access panels
Horn
Paint and markings

Left to do:
Rear tool stowage
Jack mount
Engine access panels
Horn
Paint and markings
Posted: Thursday, June 03, 2010 - 04:23 AM UTC
Philip, well done!
Michael, with all that work to go, are you going to make it in time? If not, what kind of "overtime" would it take? I'm willing to consider extensions with a build this nice!
Tom
Michael, with all that work to go, are you going to make it in time? If not, what kind of "overtime" would it take? I'm willing to consider extensions with a build this nice!
Tom
eoinryan

Joined: April 30, 2010
KitMaker: 232 posts
Armorama: 134 posts

Posted: Thursday, June 03, 2010 - 08:45 AM UTC
Hi folks,
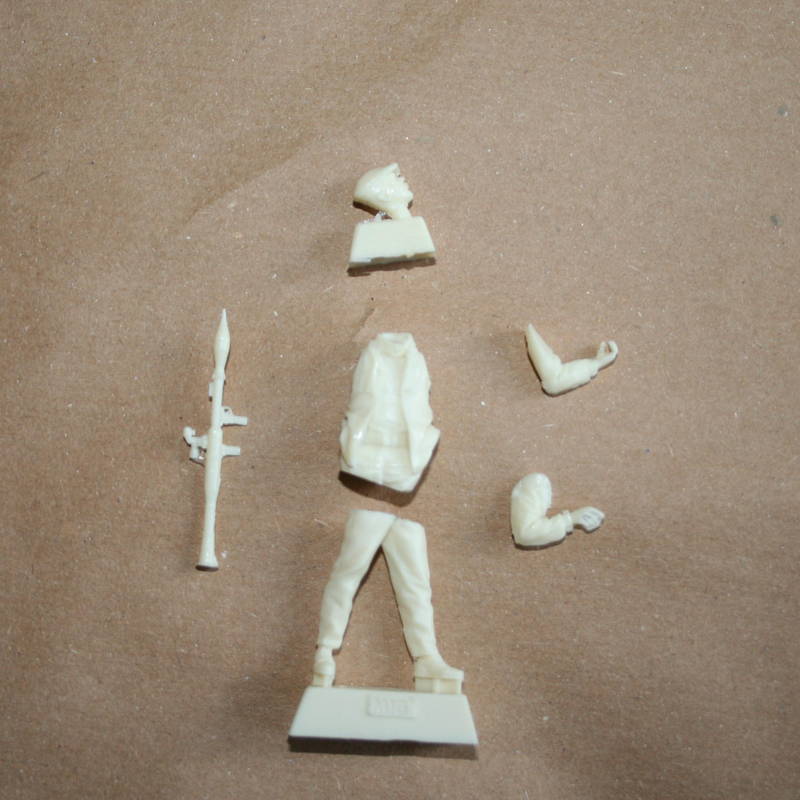
I'm a late entry, here's some progress photos:



Eoin
I'm a late entry, here's some progress photos:


Eoin
 |


