Campaigns
Where Armorama group builds can be discussed, organized, and updates posted.
Tank Killers
HARV
#012
Visit this Community
Wyoming, United States
Joined: November 07, 2003
KitMaker: 3,098 posts
Armorama: 1,236 posts
Posted: Sunday, January 17, 2010 - 07:29 AM UTC
Here is my in-progress photo #1 of the Italeri 1/35 Panzerjager I with 4.7 cm PAK that I am building for this campaign.


I have most of the construction completed. I just need to wash all of the pieces and get a base coat painted on everything. Hopefully I will be able to show another in progress photo soon.

Thanks,

HARV
mecanix
Visit this Community
Kerry, Ireland
Joined: March 03, 2003
KitMaker: 201 posts
Armorama: 189 posts
Posted: Sunday, January 17, 2010 - 12:24 PM UTC
The plan is to take this:

Accurate Armour's kit K31 the 1/35th Humber FV 1611 Pig APC and turn it into this:

The Humber FV 1620 Hornet/Malkara air-transportable A/T vehicle of the Parachute Squadron, Royal Armoured Corps circa 1960.
The idea is to use as much AA as possible making the vehicle first, then the two Malkaras and finally the lift/firing arm.
I first bought this kit with this project in mind when it first came out in 1991 and I remember Derek promising that they had no immeadiate plans to do one of their own. Nearly 20 years later he has still kept his promise!
References and drawings are quite good Mil Mod did plans and an article in the Oct 1997 issue, John Church has a set of 1/76th drawings and Patrick Keenan over at WarWheels has some great photos and a fine article by Clive Elliot.
First the body needs to be fed into a scroll saw, its rather thick resin so its quite happy to take it. Do it wet and with the dust suction on full.


Then you put the body to the chassis. The piece behind the rear wheel arches needs to be trimmed away with the saw as the Hornet is slightly shorter

Next comes the new body work. The roof hatches and front hatches are substantially different from the Pig kit fittings.Hornet's roof hatches are circular not oval as in the kit. Also the two drivers hatches are staggered not level.

So I smothed away all the molded on fittings and made two new plates. One for the roof with new circular bigger hatches and a periscope missile sight and one for the vehicle front with new vision blocks and drivers ports.

Then the new rear bodywork .


Hopefully next are the numerous stowage bins.

Paddy
pzcreations
Visit this Community
Georgia, United States
Joined: May 24, 2006
KitMaker: 2,106 posts
Armorama: 1,116 posts
Posted: Friday, January 22, 2010 - 07:36 AM UTC
heres an update on my jagpanzer.. Im planning a small dio, which I made a large tree for. After hours and hours off applied clay to the armature... once I finished up the sculpt, I checked on what temp to bake it at...guess what..I didnt know I was using a non-hardening clay, which didnt state it on the package soo..now I have to strip it all down and start over.
rtvmodeler
#136
Visit this Community
Distrito Federal, Mexico
Joined: April 06, 2002
KitMaker: 437 posts
Armorama: 391 posts
Posted: Saturday, January 23, 2010 - 05:50 AM UTC
Hello friends!

Great works in this Campaign!!!. Well, aAfter of near 4 months I will back with an Elefant. Now my heatlh is 80% ok!.

Kit: Sd.Kfz.184 ELEFANT W/Zimmerit - Dragon Zimmerit 1/35 / Includes Photoetched parts tow cables, towing hooks and metal gun.


I started the kit. This armor have many pins of the mould, from 2 to 4 for each piece

Suspensions - they can be placed fixed or movable


Soon more pics!
Regards,
Rodolfo
pzcreations
Visit this Community
Georgia, United States
Joined: May 24, 2006
KitMaker: 2,106 posts
Armorama: 1,116 posts
Posted: Saturday, January 23, 2010 - 11:28 AM UTC
Nice one! cant wait to see that Elefant finished.
Heres my completed entry...its goin in a dio ,but the tank is done!


travellerne
Visit this Community
United States
Joined: January 11, 2010
KitMaker: 8 posts
Armorama: 7 posts
Posted: Sunday, January 24, 2010 - 10:18 PM UTC

Quoted Text

heres an update on my jagpanzer.. Im planning a small dio, which I made a large tree for. After hours and hours off applied clay to the armature... once I finished up the sculpt, I checked on what temp to bake it at...guess what..I didnt know I was using a non-hardening clay, which didnt state it on the package soo..now I have to strip it all down and start over.


Ouch! That's too bad. The tree in the picture looks fantastic.

Say, how did you get the wood effect on the Jagpanzer's tools?

Thanks,
Kris
travellerne
Visit this Community
United States
Joined: January 11, 2010
KitMaker: 8 posts
Armorama: 7 posts
Posted: Sunday, January 24, 2010 - 10:20 PM UTC

Quoted Text

Great works in this Campaign!!!. Well, aAfter of near 4 months I will back with an Elefant. Now my heatlh is 80% ok!.

Kit: Sd.Kfz.184 ELEFANT


Here's to your good health, Rodolfo. I also think it will be great to see the finished Elefant!

Kris
RKinsella
Visit this Community
Dublin, Ireland
Joined: September 29, 2007
KitMaker: 603 posts
Armorama: 575 posts
Posted: Monday, January 25, 2010 - 02:29 AM UTC
Mecanix that is some undertaking converting thw pig into the Hornet!!

..infact I'd never heard of this before so thanks for enlighting us, keep up the work my friend I'd love to see this kit finished

MVisser
Visit this Community
Utrecht, Netherlands
Joined: December 14, 2006
KitMaker: 2,679 posts
Armorama: 313 posts
Posted: Monday, January 25, 2010 - 04:41 AM UTC
my Tank Destroyer for this campagne:

the dragon Hornisse OOTB with an RB models barrel


rtvmodeler
#136
Visit this Community
Distrito Federal, Mexico
Joined: April 06, 2002
KitMaker: 437 posts
Armorama: 391 posts
Posted: Thursday, January 28, 2010 - 06:50 PM UTC
Tim, excellent work with your Jagdpanzer, great detail and camo!!!

Regards,
Rodolfo
rtvmodeler
#136
Visit this Community
Distrito Federal, Mexico
Joined: April 06, 2002
KitMaker: 437 posts
Armorama: 391 posts
Posted: Thursday, January 28, 2010 - 06:56 PM UTC
Great work in progress, theinterior detail looks excellent!

Regards,
Rodolfo
rtvmodeler
#136
Visit this Community
Distrito Federal, Mexico
Joined: April 06, 2002
KitMaker: 437 posts
Armorama: 391 posts
Posted: Thursday, January 28, 2010 - 06:57 PM UTC

Quoted Text


Quoted Text

Great works in this Campaign!!!. Well, aAfter of near 4 months I will back with an Elefant. Now my heatlh is 80% ok!.
Kit: Sd.Kfz.184 ELEFANT

Here's to your good health, Rodolfo. I also think it will be great to see the finished Elefant!
Kris


Thanks for your kind comments friend. Here more pics.

I had problems to fix the rear part. they did not fix correctly, I proceeded to cut in order to reduce much plastic


Regards,
Rodolfo
rtvmodeler
#136
Visit this Community
Distrito Federal, Mexico
Joined: April 06, 2002
KitMaker: 437 posts
Armorama: 391 posts
Posted: Friday, January 29, 2010 - 06:56 AM UTC
Here more pics.

I made a little modification in the bar with the PE. The rest is ok!.


Regards,
Rodolfo
mecanix
Visit this Community
Kerry, Ireland
Joined: March 03, 2003
KitMaker: 201 posts
Armorama: 189 posts
Posted: Saturday, January 30, 2010 - 10:42 AM UTC
This is the Hornet with it's stowage boxes/bins:

Two large side lockers, a pair of battery boxes and a strange shaped box for the right front wing containing the remote firing gear.


The supplied and extra lights need protective grills. The smoke dischargers were copied from an Accurate Armour 432 APC kit


Now fitted with stowage, the vehicle is 95% complete except for exausts,number/bridge plates and small delicate fittings such as wipers. They will be left till the immeadiate pre-paint stage.

Next job is the two Malkara missiles.
Tim, superb paint job!

Paddy
RKinsella
Visit this Community
Dublin, Ireland
Joined: September 29, 2007
KitMaker: 603 posts
Armorama: 575 posts
Posted: Sunday, January 31, 2010 - 11:36 AM UTC
Fantastic Mecanix, some amount of detail, think you should be bringing this to the Cork gig, the work you have done is unbelievable! Well done man!!

Longlance
Visit this Community
Galway, Ireland
Joined: June 02, 2009
KitMaker: 89 posts
Armorama: 87 posts
Posted: Sunday, January 31, 2010 - 11:57 AM UTC
[quote][/Fantastic Mecanix, some amount of detail, think you should be bringing this to the Cork gig, the work you have done is unbelievable! Well done man!! ]


i must say mecanix, you've done some beuitful work so far,

is there a shw comming up in cork ?
mecanix
Visit this Community
Kerry, Ireland
Joined: March 03, 2003
KitMaker: 201 posts
Armorama: 189 posts
Posted: Monday, February 01, 2010 - 10:32 AM UTC
The Malkara missile, which apparently means "shield" in the Aboriginal dialect, was developed in 1951 in Australia and was 6.5 feet long, weighted 300Ibs and had a range of 4000yds. It was adapted for a British ATGW requirement and fitted with a 56Ib HESH warhead.

Building the missile was rather straightforward, luckily. I had expected a few problems along the way .
The mainmissile tube body is 3/16" K&S aluminium tubing and the main body, through which it slots is 6mm sq Evergreen box section. The tape you can see marks the limit of sanding the block into the contour to fit the tube. The tail fins are Aeroclub airfoil strip(much used by WW1airplane builders) fitted on to a collar of 7/32" K&S tube slid over the end.
The fins are carved originally from the tail wing of an Airfix ME 109, great airfoil section! and copied in resin. One set has the cut out for the tracking light fitting
The warheadwas the one point that I expected problems, I could, I hope make one and copy another but getting the shape exactly right worried me. Then I had a happy modelling idea and after going through almost every ball-pen in the stationary store I found one that fits in every respect. it even has the smal nose indentation which in the real one has a large hex-nut. Lucky indeed.


Again they are only 95% finished, the fittings that hang the missle from the launch arm I will add when that frame is finished, that should ensure a more snug fit.
Yes Shane ,IPMS Ireland are having the first Irish Nationals at the Montenotte Hotel,Cork. on the 24/25th April . See you there?

Paddy
pzcreations
Visit this Community
Georgia, United States
Joined: May 24, 2006
KitMaker: 2,106 posts
Armorama: 1,116 posts
Posted: Tuesday, February 02, 2010 - 02:22 AM UTC
Whoa thats some super work there mechanix.


Quoted Text

Ouch! That's too bad. The tree in the picture looks fantastic.

Say, how did you get the wood effect on the Jagpanzer's tools?

Thanks,
Kris


hey Kris, nice JPanther youve got goin. I do the same thing with the cooling fans..just spray em with red oxide primer and maybe paint the fans silver..at least if a judges peaks in with a flash light he'll see it. as for the tools I paint the wood parts with a flesh color, usually dark flesh from Vallejo. Then I'll give them a thin wash of Gamesworkshop "Flesh Wash" ,which is now Citadel I think.. Thats then followed with a wash of black oil paint, Winsor & Newton Ivory Black is what I used, a little thicker than a normal wash though. hope that helps
rtvmodeler
#136
Visit this Community
Distrito Federal, Mexico
Joined: April 06, 2002
KitMaker: 437 posts
Armorama: 391 posts
Posted: Tuesday, February 02, 2010 - 09:54 AM UTC
Thanks for your kind comments friends! Here more pics with a general view about my work with Photoetched. (The instructions mention only the 10% of the assemble of PE 's).


Regards,
Rodolfo
SGTJKJ
#041
Visit this Community
Kobenhavn, Denmark
Joined: July 20, 2006
KitMaker: 10,069 posts
Armorama: 4,677 posts
Posted: Wednesday, February 03, 2010 - 10:37 PM UTC
Impressive stuff, Mecanix. It looks great! Looking forward to see it finished - quite a unique project.

Tim, excellent jagdpanzer. Thumbs up!
travellerne
Visit this Community
United States
Joined: January 11, 2010
KitMaker: 8 posts
Armorama: 7 posts
Posted: Thursday, February 04, 2010 - 07:28 PM UTC
Hi Tim,


Quoted Text

as for the tools I paint the wood parts with a flesh color, usually dark flesh from Vallejo. Then I'll give them a thin wash of Gamesworkshop "Flesh Wash" ,which is now Citadel I think.. Thats then followed with a wash of black oil paint, Winsor & Newton Ivory Black is what I used, a little thicker than a normal wash though. hope that helps


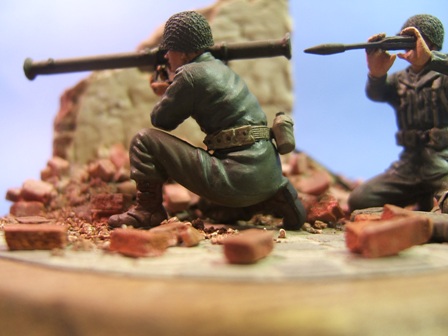
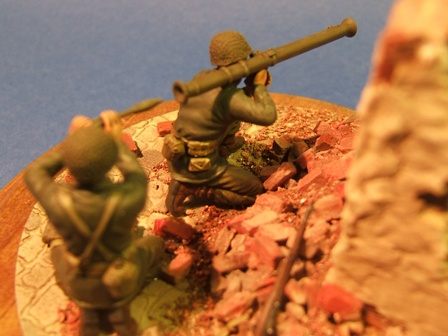
Thanks for the tip! I'll have to try it.

Hi mecanix,

The Hornet is certainly a unique project. Can't wait to see it.

Kris
MSGsummit
Visit this Community
Tennessee, United States
Joined: November 16, 2002
KitMaker: 751 posts
Armorama: 545 posts
Posted: Saturday, February 06, 2010 - 03:57 PM UTC
Hey all,
well....here it is.....my completed entry. Not much to it. But that is what I like about it the most. Nothing complicated, just relaxing. Also my first completed project for 2010. As always, all comments and critiques are welcome. Enjoy!


Longlance
Visit this Community
Galway, Ireland
Joined: June 02, 2009
KitMaker: 89 posts
Armorama: 87 posts
Posted: Tuesday, February 09, 2010 - 04:00 AM UTC
HI all,

i've finaly got around to getting cracking on my entery for the campaign, its small dio concisting of three figers and a knocked out T34

this project which i began a couple of weeks ago and is still on going, is one of my enteries for this year IMMS shop in Collin's barracks DUBLIN, Any of the Irish or indeed any modeler thinking of attending ?

the scene depicts a two tankers of a heavy Panzer battalion maybe 501. The pair, the tanks gunner and loader inspect their handy work on a badly mashed up tank, as they give themsevels a slap on the back for a job well done, a infantry anti-tank man appears who contests the kill as his own....hence the title 'we hit him frist'


ill have wip photos up this evening


shane
MSGsummit
Visit this Community
Tennessee, United States
Joined: November 16, 2002
KitMaker: 751 posts
Armorama: 545 posts
Posted: Tuesday, February 09, 2010 - 05:13 AM UTC
Sounds cool Shane...........looking forward to the pics!