Campaigns
Where Armorama group builds can be discussed, organized, and updates posted.
Where Armorama group builds can be discussed, organized, and updates posted.
Hosted by Darren Baker, Richard S.
Tank Killers
Removed by original poster on 02/09/10 - 18:19:16 (GMT).
Longlance

Joined: June 02, 2009
KitMaker: 89 posts
Armorama: 87 posts

Posted: Tuesday, February 09, 2010 - 06:29 AM UTC
right here you go,
the T 34 is from DRAGON and was given plenty of battle damage, just imagine driving into a company of tiger's with their supporting greniders, and then you hjave the look im going for
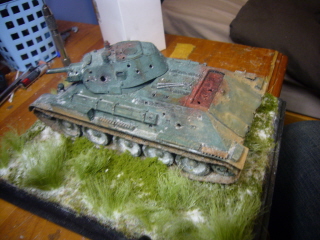
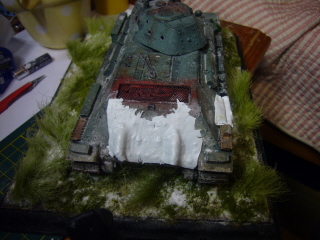
The tank crew came from this well known kit
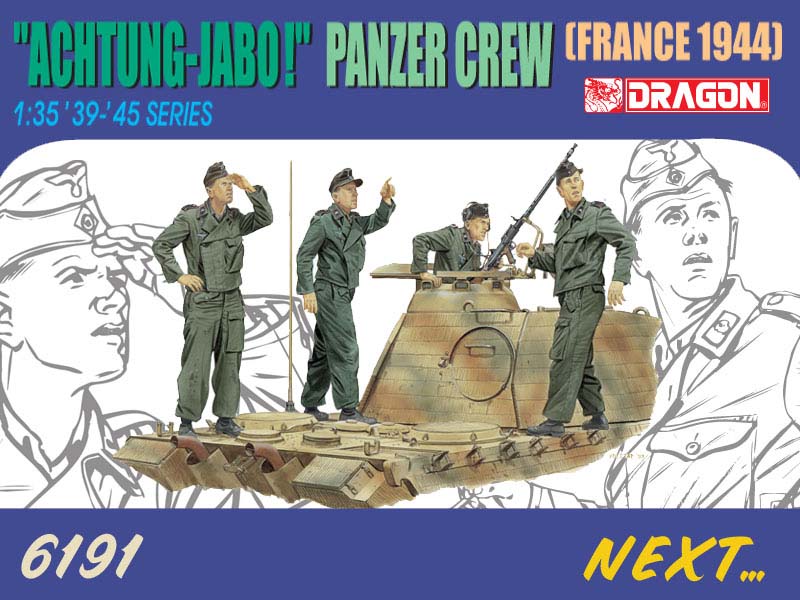
the T 34 is from DRAGON and was given plenty of battle damage, just imagine driving into a company of tiger's with their supporting greniders, and then you hjave the look im going for


The tank crew came from this well known kit

Posted: Tuesday, February 09, 2010 - 08:06 AM UTC
 Nice T-34 Shane!.
 Here the model ready for starting the paint!!!

Soon more pics!
Regards,
Rodolfo
Longlance

Joined: June 02, 2009
KitMaker: 89 posts
Armorama: 87 posts

Posted: Tuesday, February 09, 2010 - 11:30 AM UTC
thanks mate, your ferd is great, you did a great job
heres some more wip photos
the tank crew were finished using AV paints and oils
The loader:
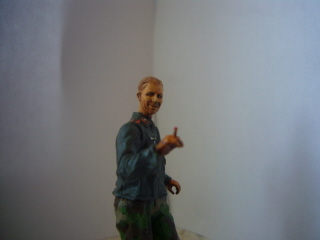
heres some more wip photos
the tank crew were finished using AV paints and oils
The loader:

pzcreations

Joined: May 24, 2006
KitMaker: 2,106 posts
Armorama: 1,116 posts

Posted: Tuesday, February 09, 2010 - 11:35 AM UTC
The elefant looks great. wondering how you plan on dealing with the tracks that are too long? I tried once with those tracks ,but messed it up and had to replace them.
Posted: Tuesday, February 09, 2010 - 08:46 PM UTC
Nice Elefant, Rodolfo. Some really nice details. Looking forward to see it painted.

Nylonathatep

Joined: September 27, 2007
KitMaker: 58 posts
Armorama: 56 posts

Posted: Thursday, February 11, 2010 - 03:34 PM UTC
Posted: Friday, February 12, 2010 - 02:56 PM UTC
 Thanks for your kind comments friends!. Regarding the tracks, I hope not to have problems. here more pics!
Regards,
Rodolfo
Posted: Friday, February 12, 2010 - 03:02 PM UTC
 Hello friends:
 Here are more pics. For the initial camuflage I mixed XF-64 + X-26 + XF-7. I made some light and heavy strips. I will add the khaki color
Regards,
Rodolfo
Erwinfoxjj

Joined: January 02, 2010
KitMaker: 45 posts
Armorama: 44 posts

Posted: Saturday, February 13, 2010 - 07:05 AM UTC
I got my Tank Killer in the gallery, a German Anti-Tank Rifle
Posted: Sunday, February 14, 2010 - 06:49 AM UTC
 Hello friends!
Here are more pics. I added the khaki color.
Regards,
Rodolfo
Longlance

Joined: June 02, 2009
KitMaker: 89 posts
Armorama: 87 posts

Posted: Monday, February 15, 2010 - 08:33 PM UTC
great work mate, your elefant is top nouch
shane
shane
Posted: Wednesday, February 17, 2010 - 06:40 PM UTC
 Thanks friend. Here are more pics!.
Marks and Cross were applied with airbrush. Irregular numbers hand-painted (as the crews in the original armors).
I cut 2 links of the tracks in order to adjust. First step on the tracks were painted with black of Vallejo and dry brush with flat aluminium of Tamiya. Now I will start the small details and weathering.
Regards,
Rodolfo
travellerne

Joined: January 11, 2010
KitMaker: 8 posts
Armorama: 7 posts

Posted: Thursday, February 18, 2010 - 12:12 AM UTC
I finally worked my way free of other projects and got back on the Jagdpanther. Here is a picture of the assembled body, primered, with vision blocks masked and the weld lines inked for some pre-shading. It's ready for a base coat of Tamiya XF-60 dark yellow (hopefully in a day or two).


MVisser

Joined: December 14, 2006
KitMaker: 2,679 posts
Armorama: 313 posts

Posted: Friday, February 19, 2010 - 03:32 AM UTC
Hi all, here an update on my hornisse
Paintjob


Weathering turret


Paintjob


Weathering turret


ppawlak1

Joined: March 14, 2006
KitMaker: 1,973 posts
Armorama: 1,843 posts

Posted: Saturday, February 20, 2010 - 02:51 PM UTC
Well the T-72A project is finally finished, and I can move onto the JagdPanzer Kanone.
This will be fun, I need to assemble the lower hull and then assemble the resin tracks first.
Cheers
Paul
This will be fun, I need to assemble the lower hull and then assemble the resin tracks first.
Cheers
Paul
Posted: Sunday, February 21, 2010 - 11:52 AM UTC
Here is in-progress photo #2 of the 1/35 Italeri Panzerjager I with 4.7 cm PAK that I am building for this campaign.

I have the base coat applied and the majority of the detail painting completed. I hope to get the interior painted and detailed this coming week. I also hope to get the gun detailed this coming week as well.
So if all goes well I should have another in-progress photo to show soon.
Thanks,
HARV

I have the base coat applied and the majority of the detail painting completed. I hope to get the interior painted and detailed this coming week. I also hope to get the gun detailed this coming week as well.
So if all goes well I should have another in-progress photo to show soon.
Thanks,
HARV

Posted: Sunday, February 21, 2010 - 06:50 PM UTC
 Here are more pics!
I applied a general wash with Matt Brown Yellow mixed with Thinner enamel both of Humbrol, in order to " kills" the brightness.
For the earth, I applied with brush PVC PIMEX acetate glue the fine powder of marble.
Regards!
Rodolfo
WARLORD

Joined: April 23, 2003
KitMaker: 1,923 posts
Armorama: 868 posts

Posted: Monday, February 22, 2010 - 06:36 AM UTC
Interior of AFV Club's Achilles Mk. IIc


Posted: Tuesday, February 23, 2010 - 12:12 AM UTC
Great paintjob, Martin. I especially like the subtle chipping in the gun compartment. It looks great.
Rodolfo, very nice progress on your Elelfant. The "blending in" of the camouflage looks good.
Looking forward to see more
Rodolfo, very nice progress on your Elelfant. The "blending in" of the camouflage looks good.
Looking forward to see more

Posted: Thursday, February 25, 2010 - 06:25 PM UTC
 Thanks for your kind comment Jesper. Here is the model finished!.
Weathering:
1).- Thinner Enamel of Humbrol over all the model
2).- Oils mixed with Thinner enamel of Humbrol
3).- Marble dust in sides, front, rear and under of the armor
4).- Airbrushed with Flath-Earth of Tamiya
-------------------------------------------------------------------------
VERSION: 3./ Shwere Panzerjäger-Abteilung 653 during the fighting in the Galicia Region of the Soviet Union in April 1944
-------------------------------------------------------------------------


More pics in the Gallery of the Campaign at: http://gallery.kitmaker.net/showgallery.php?cat=25000
Regards!
Rodolfo
MVisser

Joined: December 14, 2006
KitMaker: 2,679 posts
Armorama: 313 posts

Posted: Sunday, February 28, 2010 - 08:43 AM UTC
Next up: weathering.
Before filters/washes/chips

AFTER


Martin
Before filters/washes/chips

AFTER


Martin
Posted: Sunday, February 28, 2010 - 12:52 PM UTC
Here is in-progress photo #3 of the 1/35 Italeri Panzerjager I with 4.7 cm PAK that I am building for this campaign.

I still have some work to do obviously. Hopefully I should have another in-progress photo to show soon.
Thanks,
HARV

I still have some work to do obviously. Hopefully I should have another in-progress photo to show soon.
Thanks,
HARV


Tigerbait

Joined: September 28, 2005
KitMaker: 347 posts
Armorama: 141 posts

Posted: Sunday, February 28, 2010 - 01:43 PM UTC
Fini !! I'll post to the gallery as well


Nylonathatep

Joined: September 27, 2007
KitMaker: 58 posts
Armorama: 56 posts

Posted: Tuesday, March 02, 2010 - 10:06 PM UTC
 |


